
There’s something magical about a crochet top that feels like autumn wrapped around your shoulders. This Mocha Autumn Rose Crochet Top is exactly that kind of project. It combines a cozy solid bodice with dramatic bell sleeves, delicate lace details, and a stunning diagonal cascade of dimensional roses in warm sunset tones.
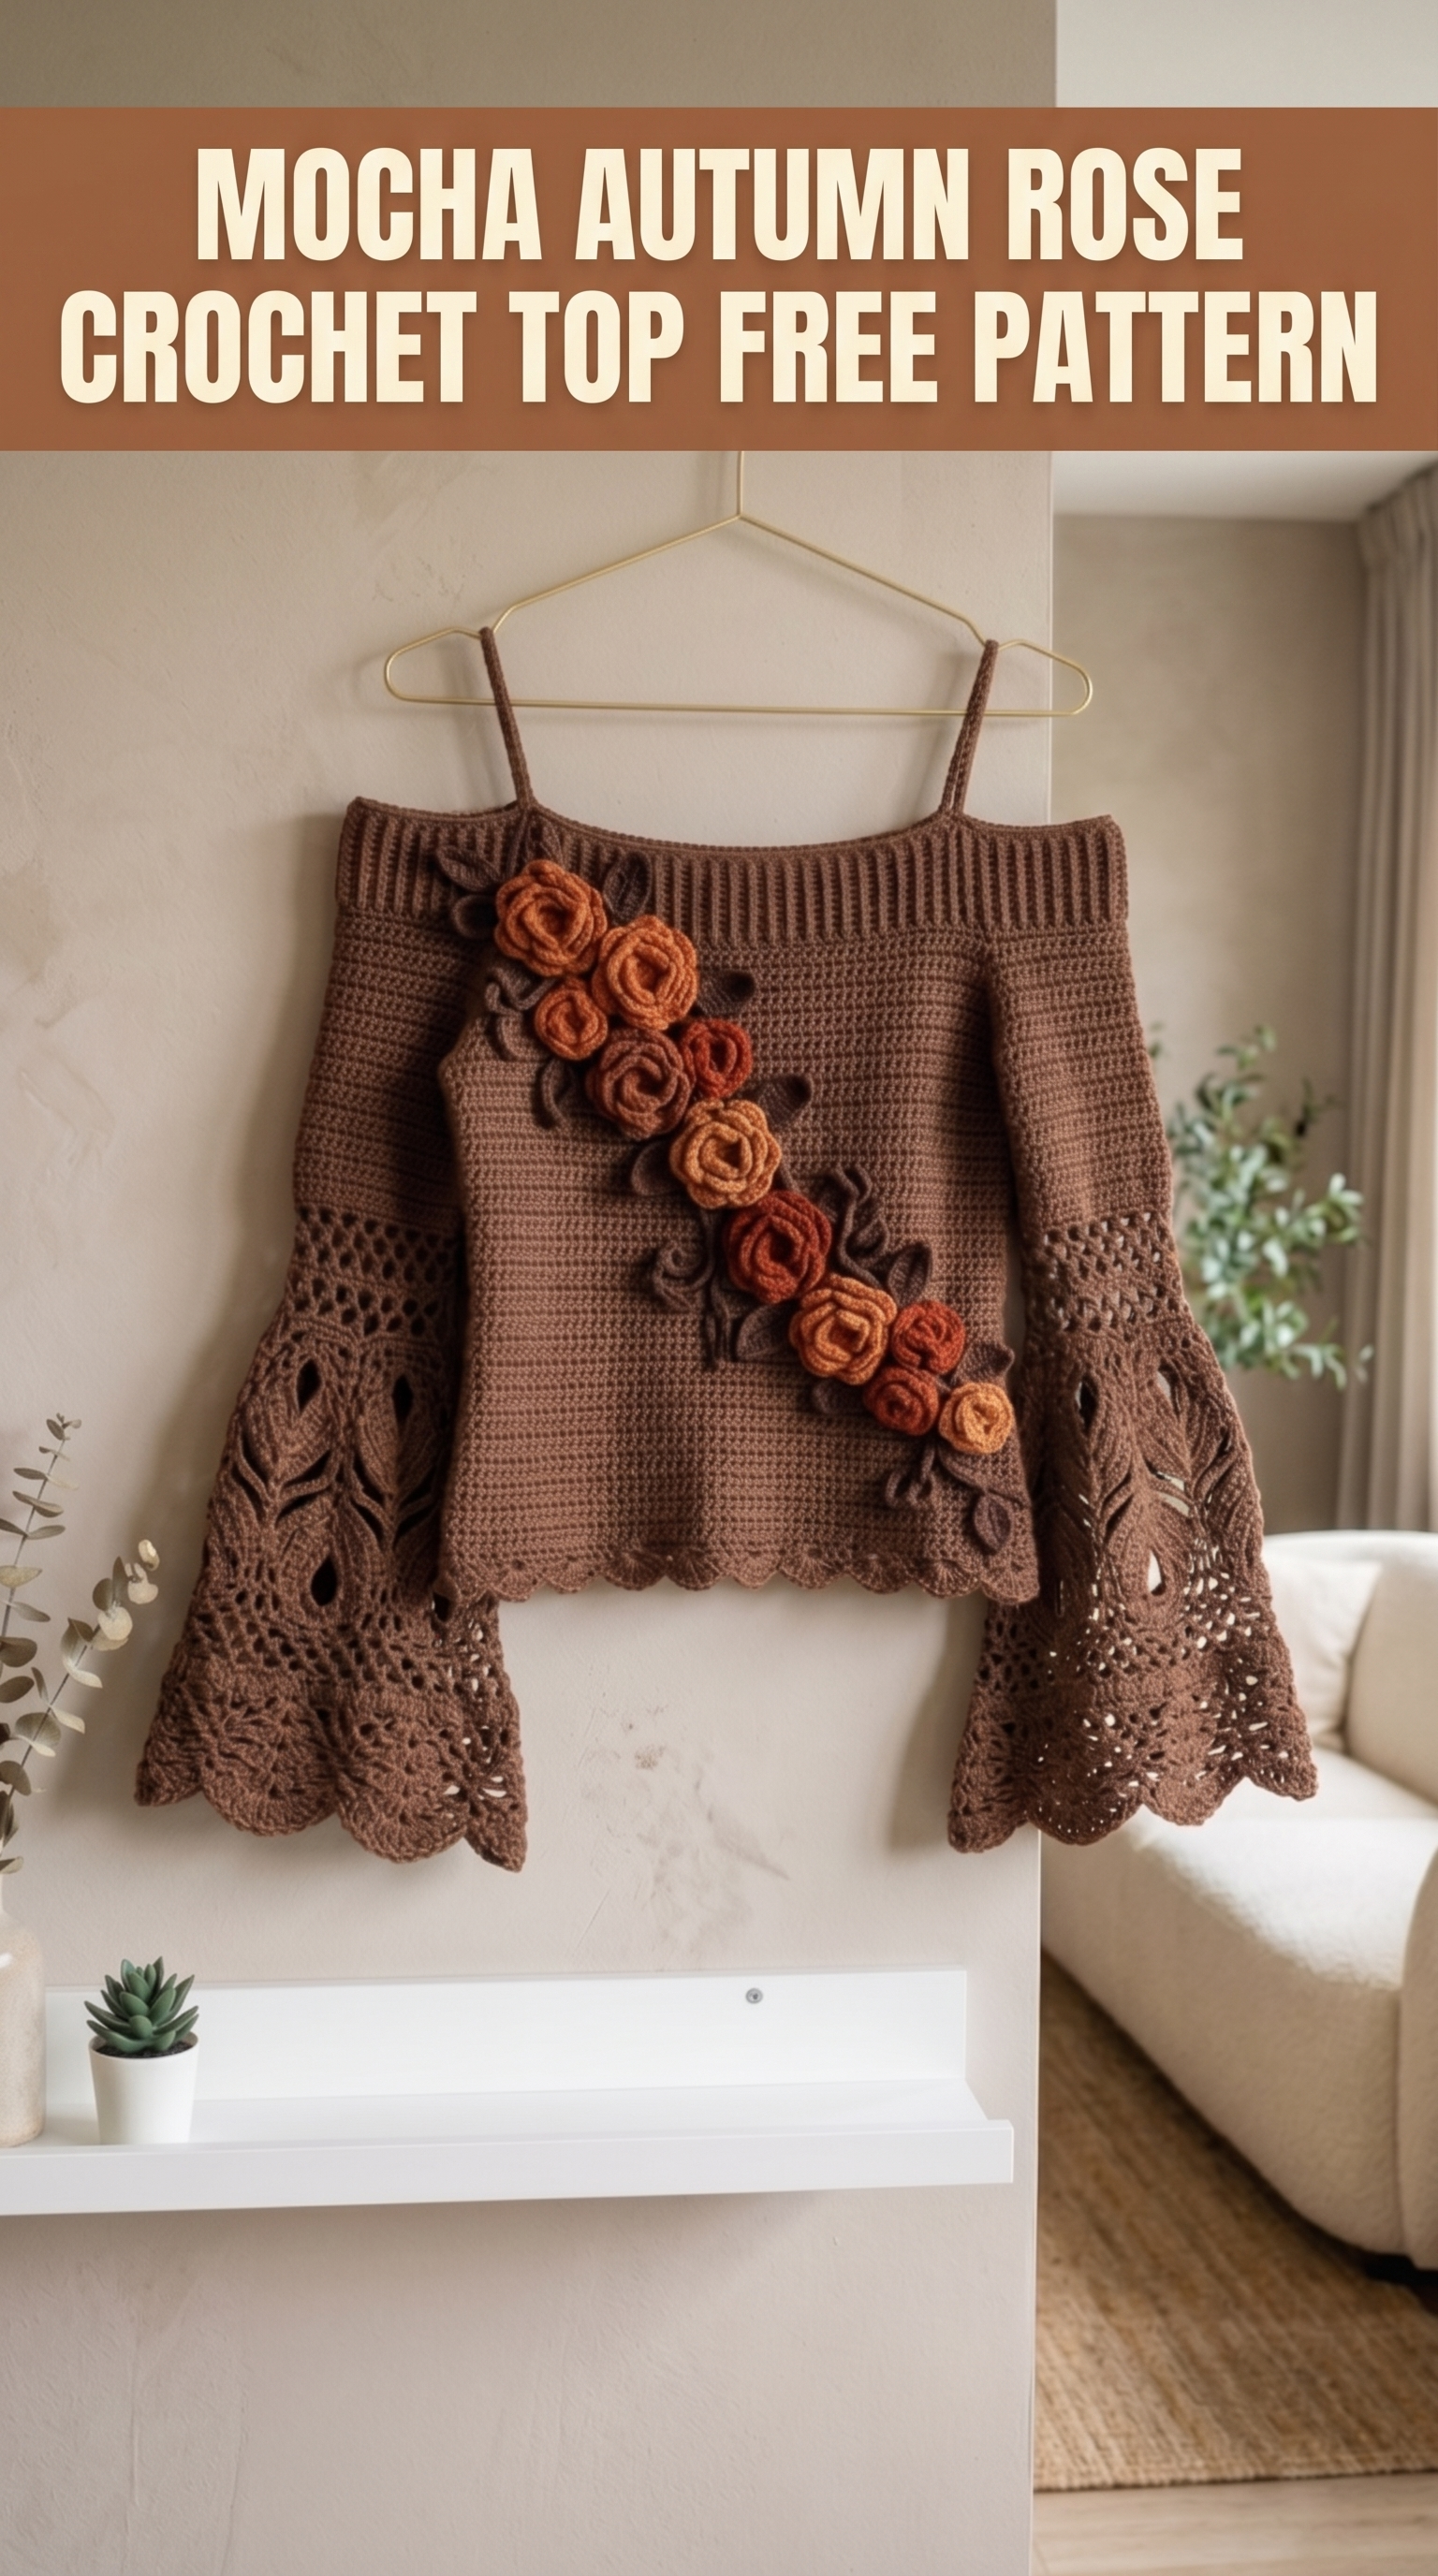
I designed this piece for intermediate crocheters who want a wearable statement garment without overwhelming construction. If you can work basic stitches and follow a simple pattern repeat, you can absolutely make this top. The roses look impressive but are easier than you think. Promise.
Let me walk you through everything you need to recreate this crochet top pattern from start to finish.
Why This Crochet Top Pattern Works
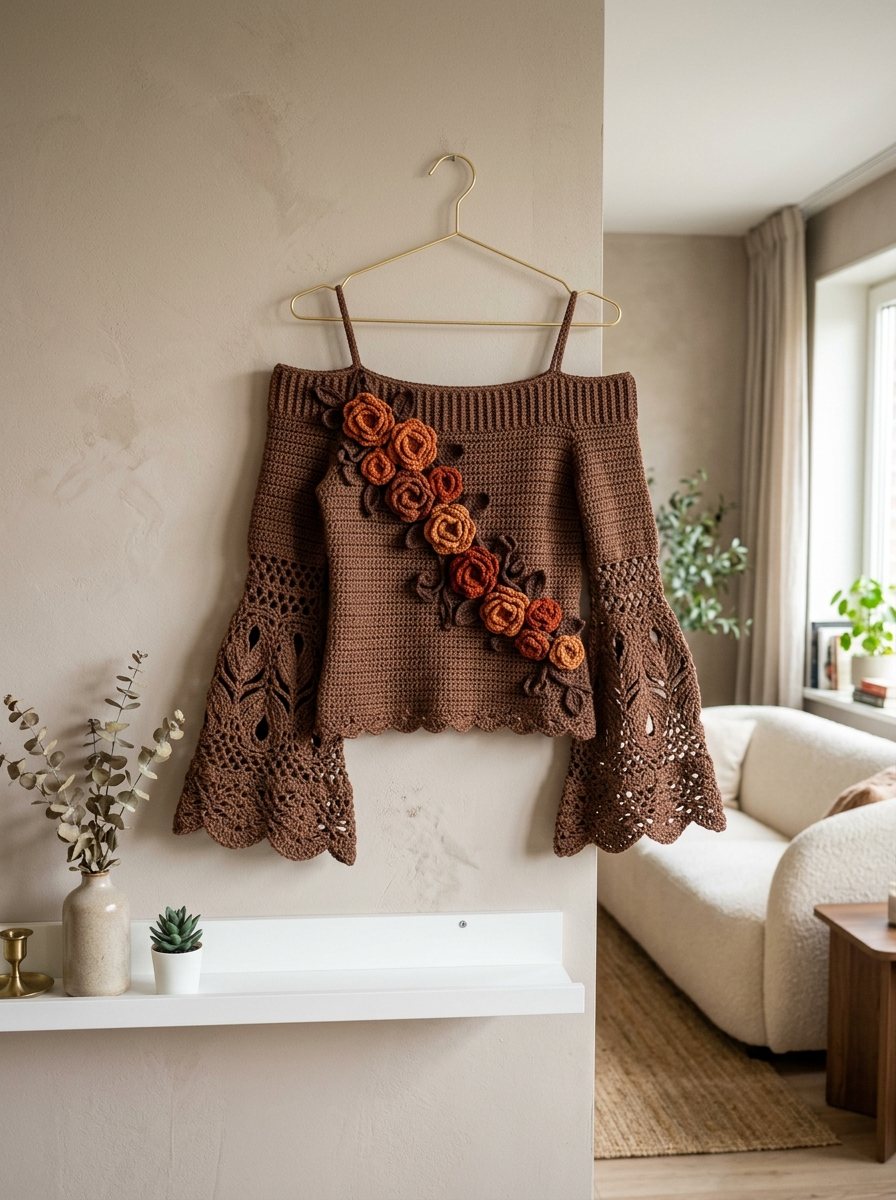
This design balances structure with romance. The ribbed neckline gives clean lines and slight stretch. The solid bodice works up quickly in rows of single crochet. The bell sleeves flare dramatically with openwork lace panels and leaf cutout motifs. And those dimensional roses in burnt orange, rust, and golden amber create a focal point that draws the eye diagonally across the front.
The scalloped hem adds vintage femininity without fussiness.
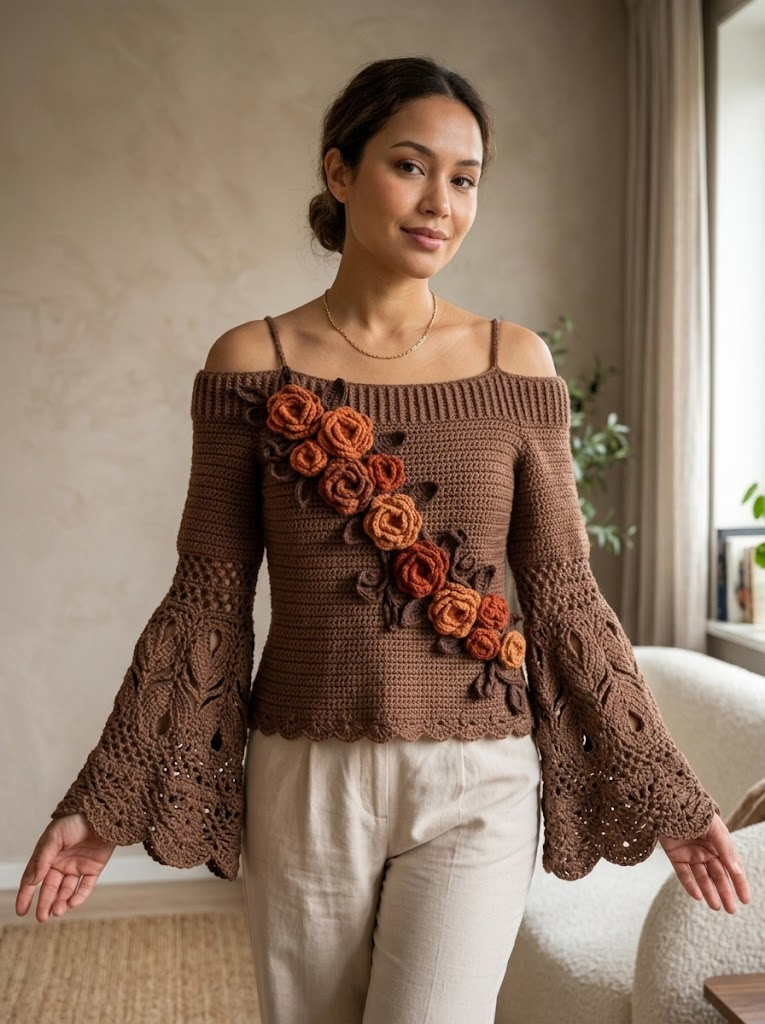
This is a cropped top length, hitting right at the natural waist. The fit is relaxed through the body with that gorgeous sleeve drama doing all the talking.
Skill Level
Intermediate. You should be comfortable with:
If you are an adventurous beginner, this crochet tutorial breaks everything into manageable sections. Take it one piece at a time.
Finished Measurements
This pattern is written for size Medium with notes for adjusting.
Gauge and stitch multiples allow you to adjust width easily.
Materials Needed
Yarn:
I recommend a cotton blend or bamboo blend yarn for drape and breathability. Pure acrylic works but may feel warmer. Avoid anything too stiff.
Hook:
Notions:
Gauge
16 stitches and 18 rows = 4 inches in single crochet with 5.0mm hook.
Always swatch. Gauge matters for fit. If your swatch is too small, go up a hook size. Too large, go down.
Abbreviations and Stitch Definitions
Let me define every stitch before we start. Read through this section even if you are experienced. It helps when you hit unfamiliar terms mid-pattern.
Pattern Notes
Step by Step Crochet Pattern Instructions
Back Panel
With MC and 5.0mm hook:
Row 1: Ch 77. Sc in 2nd ch from hook and in each ch across. Turn. (76 sts)
Rows 2–54: Ch 1, sc in each st across. Turn. (76 sts)
This creates a rectangle approximately 19 inches wide and 12 inches tall.
Shape armholes:
Row 55: Ch 1, sl st in first 5 sts, ch 1, sc in next 66 sts, leave remaining 5 sts unworked. Turn. (66 sts)
Row 56: Ch 1, sc2tog over first 2 sts, sc to last 2 sts, sc2tog. Turn. (64 sts)
Rows 57–60: Repeat Row 56. (56 sts after Row 60)
Rows 61–72: Ch 1, sc in each st across. Turn. (56 sts)
Fasten off. Weave in ends.
Front Panel
Work exactly as Back Panel through Row 72.
Do not fasten off yet.
Neckline shaping (optional): For a slightly scooped front neckline, on Row 70 work 20 sc, skip center 16 sts, work remaining 20 sc. Work each shoulder side separately for 2 more rows, decreasing 1 st at neck edge each row. Fasten off both sides.
If you prefer a straight neckline matching the back, skip the shaping.
Ribbed Neckband
The ribbed texture comes from working in back loop only.
With MC and 5.0mm hook:
Row 1: Ch 9. Sc in 2nd ch from hook and each ch across. Turn. (8 sts)
Rows 2–120: Ch 1, sc BLO in each st across. Turn. (8 sts)
This creates a stretchy band approximately 26 inches long. Adjust length to match your top edge measurement plus ease.
Fasten off, leaving long tail for seaming.
Bell Sleeves (Make 2)
The sleeves combine solid sections with lace panels and decorative leaf cutouts.
Solid Upper Sleeve:
With MC and 5.0mm hook:
Row 1: Ch 41. Sc in 2nd ch from hook and each ch across. Turn. (40 sts)
Rows 2–20: Ch 1, sc in each st across. Turn. (40 sts)
Begin increases for bell shape:
Row 21: Ch 1, 2 sc in first st, sc to last st, 2 sc in last st. Turn. (42 sts)
Rows 22–24: Ch 1, sc in each st across. Turn. (42 sts)
Row 25: Repeat Row 21. (44 sts)
Continue alternating 1 increase row with 3 plain rows until you have 60 sts (approximately Row 45).
Lace Panel Section:
This creates the openwork effect visible in the lower sleeve.
Row 46: Ch 3 (counts as dc), sk 1 st, *dc in next st, ch 1, sk 1 st* across to last 2 sts, dc in last 2 sts. Turn.
Row 47: Ch 3, dc in each dc and ch-1 sp across. Turn. (60 sts)
Row 48: Ch 4 (counts as dc + ch 1), sk 1 st, *dc in next st, ch 1, sk 1 st* across. Turn.
Row 49: Repeat Row 47.
Rows 50–55: Alternate Rows 48 and 47 for continued mesh effect.
Leaf Cutout Motif Panel:
For the decorative leaf shapes, work the following pattern:
Row 56: Ch 1, sc in first 8 sts, ch 5, sk 5 sts (creates opening), sc in next 10 sts, ch 5, sk 5 sts, sc in next 10 sts, ch 5, sk 5 sts, sc in last 8 sts. Turn.
Row 57: Ch 1, sc in each sc and 5 sc in each ch-5 sp across. Turn. (60 sts)
Rows 58–62: Work sc across, maintaining stitch count.
For the raised leaf detail inside each cutout, you will crochet leaf motifs separately and sew them centered over the openings later.
Scalloped Cuff Edging:
Final Row: *Sc in next st, sk 1 st, 5 dc in next st (shell made), sk 1 st* across. End with sc in last st. Fasten off.
Leaf Motifs (Make 12 total: 6 for sleeves, 6 for rose arrangement)
With LC and 4.5mm hook:
Ch 10. Sl st in 2nd ch from hook, sc in next ch, hdc in next ch, dc in next 3 ch, hdc in next ch, sc in next ch, sl st in last ch.
Ch 1, working down opposite side of foundation chain: sl st, sc, hdc, dc, dc, dc, hdc, sc, sl st.
Fasten off, leaving tail for attaching.
This creates a small pointed leaf approximately 2 inches long.
Dimensional Roses (Make 7 to 9 total)
Make a variety: 3 in CA (burnt orange), 3 in CB (rust), 2 to 3 in CC (golden amber).
Rose Pattern:
With contrast color and 4.5mm hook:
Ch 40.
Row 1: Dc in 4th ch from hook, *2 dc in next ch* across. Turn. (approximately 74 dc)
Row 2: Ch 3, *2 dc in next st* across.
Fasten off, leaving 12-inch tail.
Starting from the beginning of the strip, roll tightly to form rose center, then continue rolling more loosely for outer petals. Use yarn tail to stitch through base layers, securing the spiral. Do not cut tail until rose is attached to top.
The rolled technique creates dimensional, realistic roses without complicated petal shaping.
Straps (Make 2)
With MC and 5.0mm hook:
Ch 60. Sc in 2nd ch from hook and each ch across. (59 sts)
Fasten off.
Adjust chain length for desired strap length. These should reach from front neckband, over shoulder, to back neckband with enough ease to not dig in.
Assembly
This is where your pieces become a garment. Take your time here.
1. Block all pieces before seaming. Wet block or steam lightly. Let dry completely.
2. Seam side edges of front and back panels using mattress stitch or whip stitch. Leave top 5 inches open on each side for armholes.
3. Attach ribbed neckband to top edge of front and back, stretching slightly to fit. The ribbing should sit along the upper edge like a structured band.
4. Seam sleeves along long edge to form tubes.
5. Attach sleeves to armhole openings, easing fullness at shoulder. Pin before sewing.
6. Attach straps to inside of neckband at front and back, spacing approximately 4 inches from center.
7. Add scalloped edging to bottom hem: Join MC at side seam, work shell pattern around entire hem, sl st to join. Fasten off.
8. Attach leaves inside sleeve cutouts using yarn needle. Tack at center vein.
9. Arrange roses and leaves diagonally from left shoulder toward right hip. Pin in place. Try on if possible to check placement. Sew each rose securely through base. Tuck leaves behind and between roses.
Finishing Tips
Customization Ideas
You Made It
Honestly, this Mocha Autumn Rose Crochet Top is one of those projects that looks far more complicated than it actually is. Each section is manageable on its own. The drama comes from combining them.
Thank you so much for choosing this pattern. I hope the finished top makes you feel as beautiful as it looks hanging in that golden autumn light.
When you finish, I would absolutely love to see your version. Tag me on Instagram or share in our Facebook community so I can cheer you on. Seeing your makes genuinely brightens my day.
Happy crocheting, friend. You have got this.