
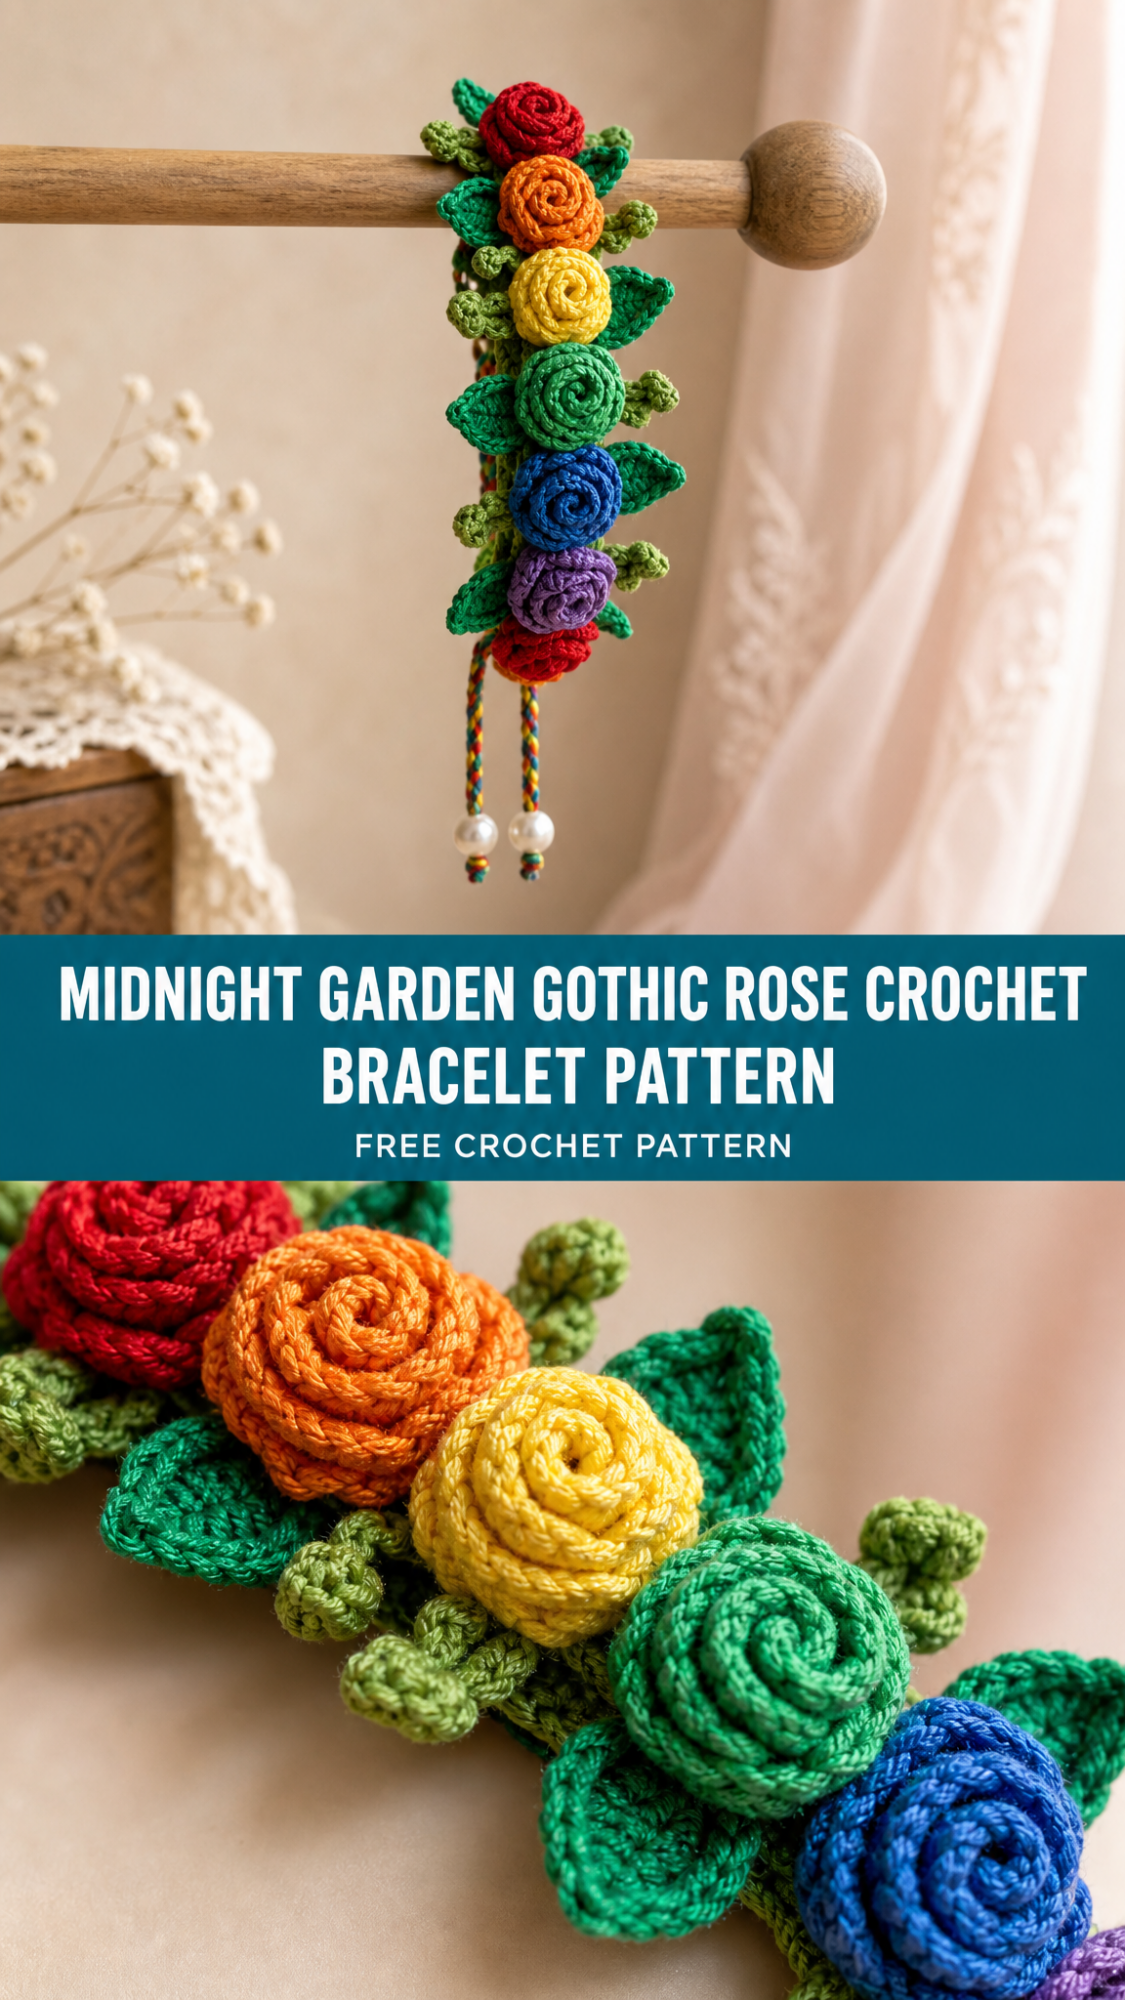
Looking for a gorgeous handmade gift that works up in an afternoon? This rainbow rose crochet bracelet makes a perfect present for anyone who loves bold, wearable art. The pattern uses basic single crochet and chain stitches to create stunning rolled roses and simple leaves, all joined along a central stem with adjustable braided ties. Whether you’re making one for yourself, a best friend, or a Pride celebration, this eye-catching accessory is easier than it looks. It’s also a fantastic stash-buster for those small amounts of colorful cotton thread you’ve been saving.
About This Crochet Rose Bracelet Pattern
This statement bracelet features seven rolled roses in rainbow colors, each nestled between two-toned green leaves along a crocheted stem. The adjustable closure uses braided thread ties finished with pearl beads, making it fit most wrist sizes comfortably.
What I love about this design is how impressive it looks despite being built from the simplest techniques. Each rose is just a long strip of single crochet that you roll up and stitch in place. The leaves are tiny ovals worked in rounds. Once you’ve made all your components, you attach them to a chain foundation, and suddenly you have this lush, garden-inspired piece of jewelry.
Skill Level: Intermediate beginner. If you can single crochet confidently and work in rounds, you can absolutely make this bracelet.
Finished Measurements: Approximately 6.5 inches (16.5 cm) long (bracelet portion), adjustable to fit 6 to 8 inch wrists with the braided ties.
Materials Needed
Thread:
– Red (approximately 5 yards)
– Orange (approximately 5 yards)
– Yellow (approximately 5 yards)
– Green/teal (approximately 5 yards)
– Blue (approximately 5 yards)
– Purple (approximately 5 yards)
– Dark red or burgundy (approximately 5 yards)
– Kelly green (approximately 15 yards for larger leaves and stem)
– Light green or lime (approximately 10 yards for smaller leaves)
Popular thread brands that work beautifully include Aunt Lydia’s Classic 10, DMC Petra Size 5, or Lizbeth Size 10.
Hook:
Notions:
Abbreviations and Stitch Definitions
Before we dive in, let me explain every stitch you’ll need:
ch = chain. Wrap yarn over hook, pull through loop on hook. This creates the foundation for most crochet work.
sl st = slip stitch. Insert hook into stitch, yarn over, pull through both the stitch and the loop on your hook in one motion. Used for joining and moving across stitches invisibly.
sc = single crochet. Insert hook into stitch, yarn over and pull up a loop (2 loops on hook), yarn over and pull through both loops. This is the shortest basic stitch.
inc = increase. Work 2 single crochet stitches into the same stitch. This adds one stitch to your count.
2sc-tog = single crochet two together (decrease). Insert hook into first stitch, pull up a loop, insert hook into next stitch, pull up a loop (3 loops on hook), yarn over and pull through all 3 loops. This removes one stitch from your count.
Pattern Notes
Read through these tips before starting. They’ll save you frustration later.
Tension matters here. Because you’re working with fine thread, keep your stitches firm but not so tight that you can’t insert your hook. Loose stitches will make floppy roses that won’t hold their shape.
The roses are identical in construction. You’ll make seven of them, one in each rainbow color plus an extra red or burgundy. Once you’ve made one, the rest go quickly.
Leaves come in two sizes. The pattern includes both larger leaves (kelly green) and smaller accent leaves (light green). This creates visual depth and interest.
Assembly is where the magic happens. Take your time arranging the roses and leaves before stitching them down permanently. Play with the layout until you love it.
How to Crochet the Rolled Roses (Make 7)
Each rose starts as a simple ruffled strip that you roll into a spiral. Make one rose in each color: red, orange, yellow, green, blue, purple, and dark red.
Foundation Row:
Ch 26.
Row 1:
Sc in 2nd ch from hook. *Ch 1, skip 1 ch, sc in next ch.* Repeat from * to end. (13 sc, 12 ch-1 spaces)
Row 2:
Ch 1, turn. Work 3 sc in each ch-1 space across. (36 sc)
Fasten off, leaving a 12-inch tail for sewing.
Rolling the Rose:
Starting at one end of the strip, begin rolling tightly. The ruffled edge (Row 2) will naturally fan outward, creating petals. Use the long tail and your tapestry needle to stitch through the base of the roll every few turns, securing it as you go. When you reach the end, stitch through the base several times to lock everything in place. Don’t cut the remaining tail yet.
Tip for beginners: The first rose might feel awkward. That’s completely normal. By your third rose, you’ll have the rhythm down. If your rose looks too loose, unroll it and try again with tighter initial tension.
How to Crochet the Large Leaves (Make 14)
These kelly green leaves frame each rose beautifully. You’ll need two leaves per rose.
Work in continuous rounds. Use a stitch marker to track the beginning of each round if needed.
Round 1:
Using kelly green, ch 2. Work 6 sc in the 2nd ch from hook. Do not join. (6 sc)
Round 2:
Inc in each st around. (12 sc)
Round 3:
*Sc in next st, inc in next st.* Repeat around. (18 sc)
Round 4:
Sc in each st around. (18 sc)
Round 5:
*Sc in next st, 2sc-tog.* Repeat around. (12 sc)
Round 6:
*2sc-tog.* Repeat around. (6 sc)
Round 7:
*2sc-tog.* Repeat around. (3 sc)
Fasten off, leaving a 6-inch tail. Flatten the leaf with your fingers. The natural point from the decreases creates the leaf tip.
How to Crochet the Small Accent Leaves (Make 14)
These light green leaves add dimension and a two-toned garden effect.
Round 1:
Using light green, ch 2. Work 6 sc in the 2nd ch from hook. (6 sc)
Round 2:
Inc in each st around. (12 sc)
Round 3:
Sc in each st around. (12 sc)
Round 4:
*2sc-tog.* Repeat around. (6 sc)
Round 5:
*2sc-tog.* Repeat around. (3 sc)
Fasten off, leaving a 6-inch tail. These leaves will be noticeably smaller than the kelly green ones, which is exactly what we want.
How to Crochet the Stem
The stem creates the backbone of the bracelet. All components attach to this piece.
Foundation:
Using kelly green, ch 75.
Row 1:
Sc in 2nd ch from hook and in each ch across. (74 sc)
Fasten off, leaving a 6-inch tail at each end for attaching ties.
The stem should measure approximately 6.5 inches. If your tension differs, adjust the foundation chain to achieve this length.
Making the Braided Ties
The closure system uses four braided cords, two on each end. Each cord gets a pearl bead finish.
For each tie:
Cut six 18-inch strands of thread, using a mix of your rainbow colors. Gather all six strands and fold in half, creating a loop. Attach this loop to one end of the stem with a lark’s head knot. Divide the 12 strands into 3 groups of 4 strands each. Braid tightly for approximately 4 inches.
Tie an overhand knot to secure. Thread a pearl bead onto the braid above the knot. Tie another small knot above the bead to hold it in place. Trim excess thread to about half an inch below the final knot.
Repeat to create four braided ties total, two at each end of the stem.
Assembly Instructions
This is where your bracelet comes to life. Take your time with this step.
Step 1: Lay out your components.
Arrange the stem on a flat surface. Place your seven roses along the stem, evenly spaced, in rainbow order (red, orange, yellow, green, blue, purple, dark red). Position two large leaves and two small leaves around each rose.
Step 2: Attach the roses.
Using the tail from each rose, stitch through the stem and back through the rose base several times. Pull firmly to secure. Weave in the end through the rose base.
Step 3: Attach the leaves.
Position each large leaf so it peeks out from behind a rose. Stitch through the leaf base and into the stem. For the small leaves, tuck them between the large leaves and roses, stitching through the stem. Vary the angles slightly for a natural garden look.
Step 4: Final adjustments.
Once everything is attached, gently shape the roses and leaves with your fingers. If desired, apply a light coat of fabric stiffener to help the bracelet hold its shape. Let dry completely before wearing.
Wearing and Care Tips
To put on the bracelet, wrap it around your wrist with the roses facing up. Gather two ties from one end with two ties from the opposite end and tie them together in a bow or double knot.
Care instructions: Hand wash gently in cool water with mild soap if needed. Reshape while damp and allow to air dry flat. Avoid machine washing, which can distort the roses.
Customization Ideas
This crochet bracelet pattern adapts beautifully to different styles:
Monochromatic elegance: Make all roses in shades of one color, perhaps pink ombré or deep burgundy.
Wedding accessory: Use white and ivory thread with pearl embellishments for bridal party gifts.
Autumn vibes: Choose rust, gold, burgundy, and brown for a fall-inspired version.
Larger statement: Extend the stem and add more roses for a choker necklace or headband.
Troubleshooting Common Issues
Roses won’t hold their shape: Your stitches may be too loose. Try going down one hook size, or apply fabric stiffener after assembly.
Leaves curl too much: This is normal for worked-in-the-round pieces. Blocking with steam or stiffener helps flatten them.
Bracelet is too long or short: Adjust your foundation chain for the stem. Add or subtract roses as needed.
Braids unraveling: Make sure your knots are tight and secure. A tiny dot of clear nail polish on the knots can help.
Thank you so much for choosing this Midnight Garden Gothic Rose Crochet Bracelet pattern. I hope you love making it as much as I loved designing it. If you create one, I’d absolutely love to see it. Tag me on Instagram or share a photo in my Facebook group.
If this pattern brightened your day, consider pinning it to your favorite Pinterest board so you can find it easily later. And please drop a comment below if you make this bracelet. I read every single one, and hearing about your finished projects truly makes my day.