
Last spring, I found myself standing in front of my closet for the hundredth time, frustrated that nothing felt me anymore. Everything was either too casual or too stiff. I wanted something romantic but wearable. Something that felt like wearing artwork but could still pair with my favorite jeans. So I sat down with a cup of tea, a sketchpad, and a wild idea.
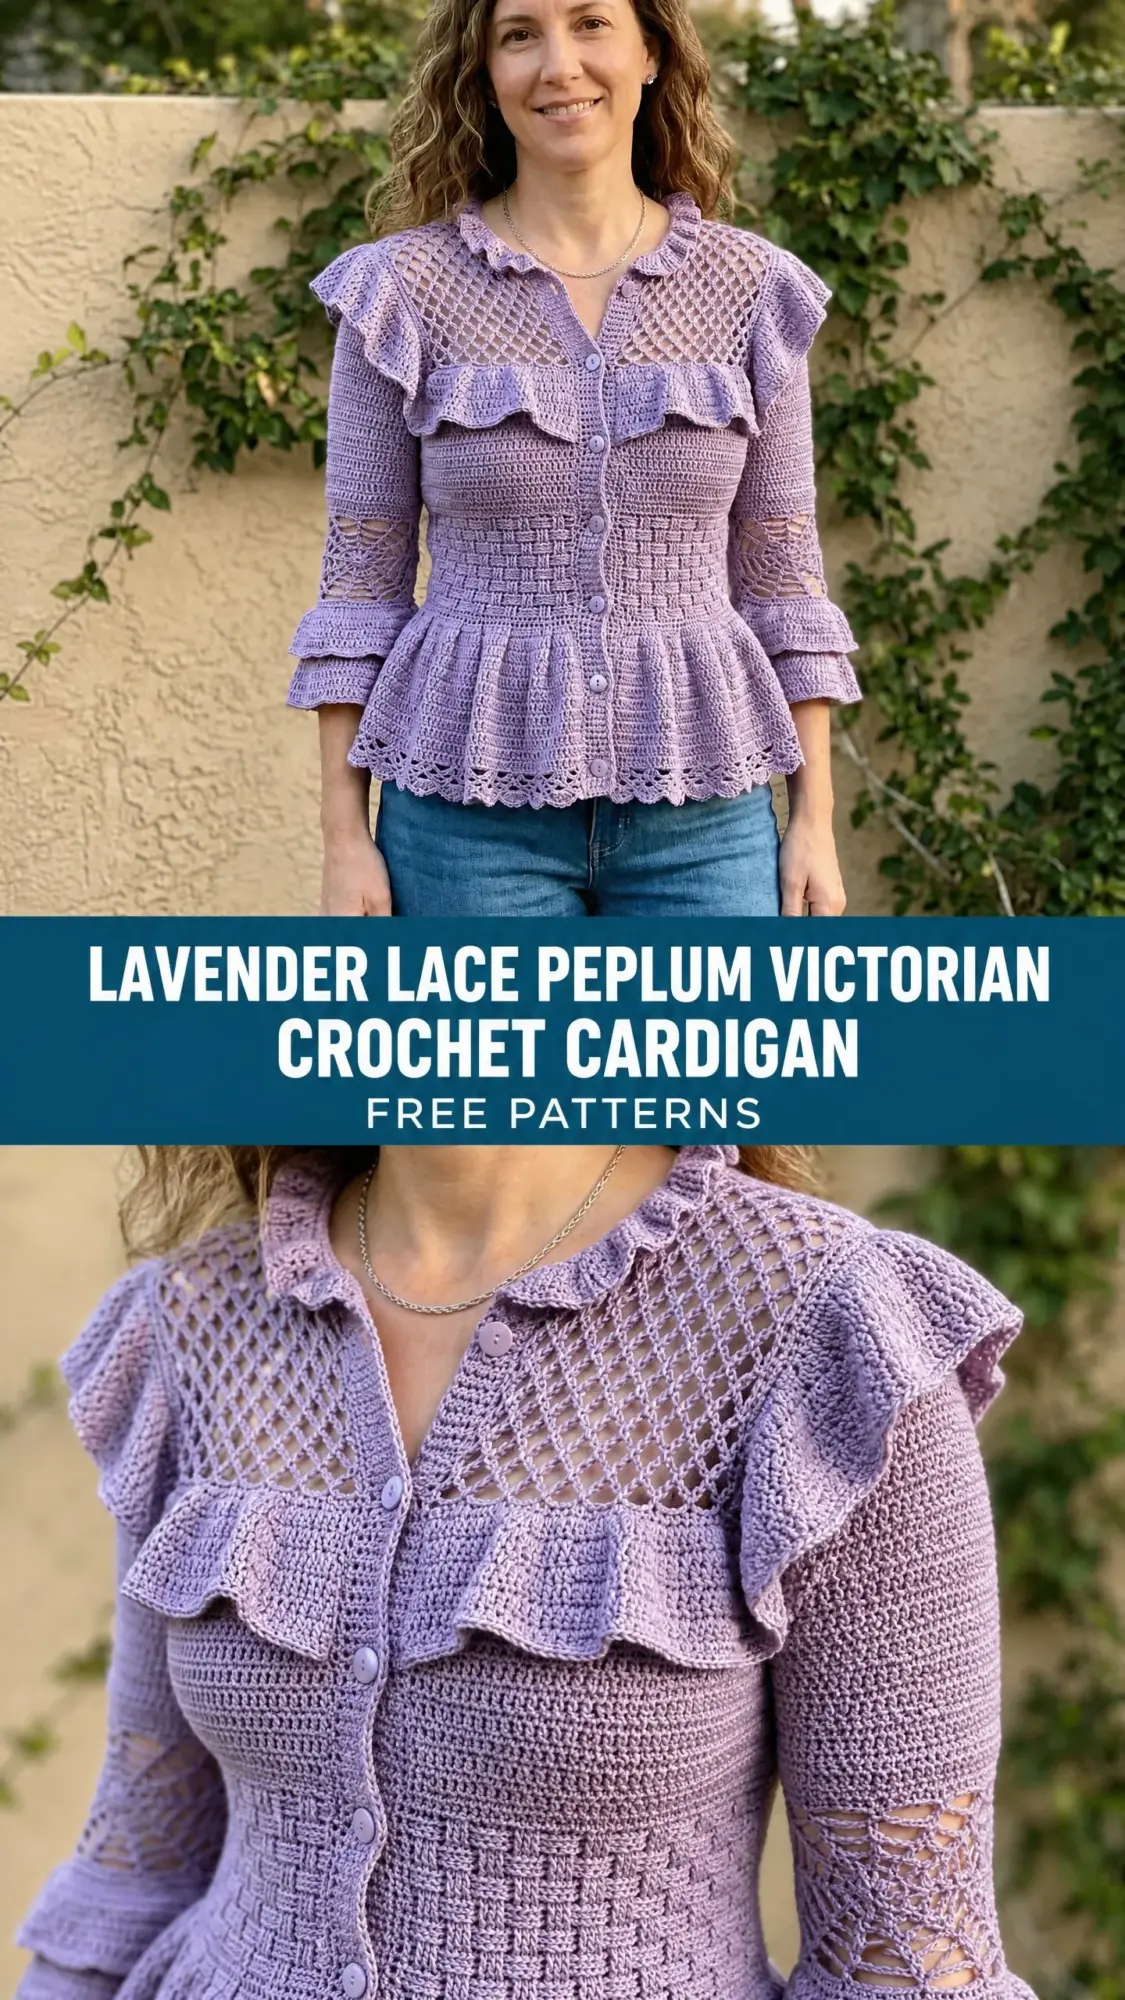
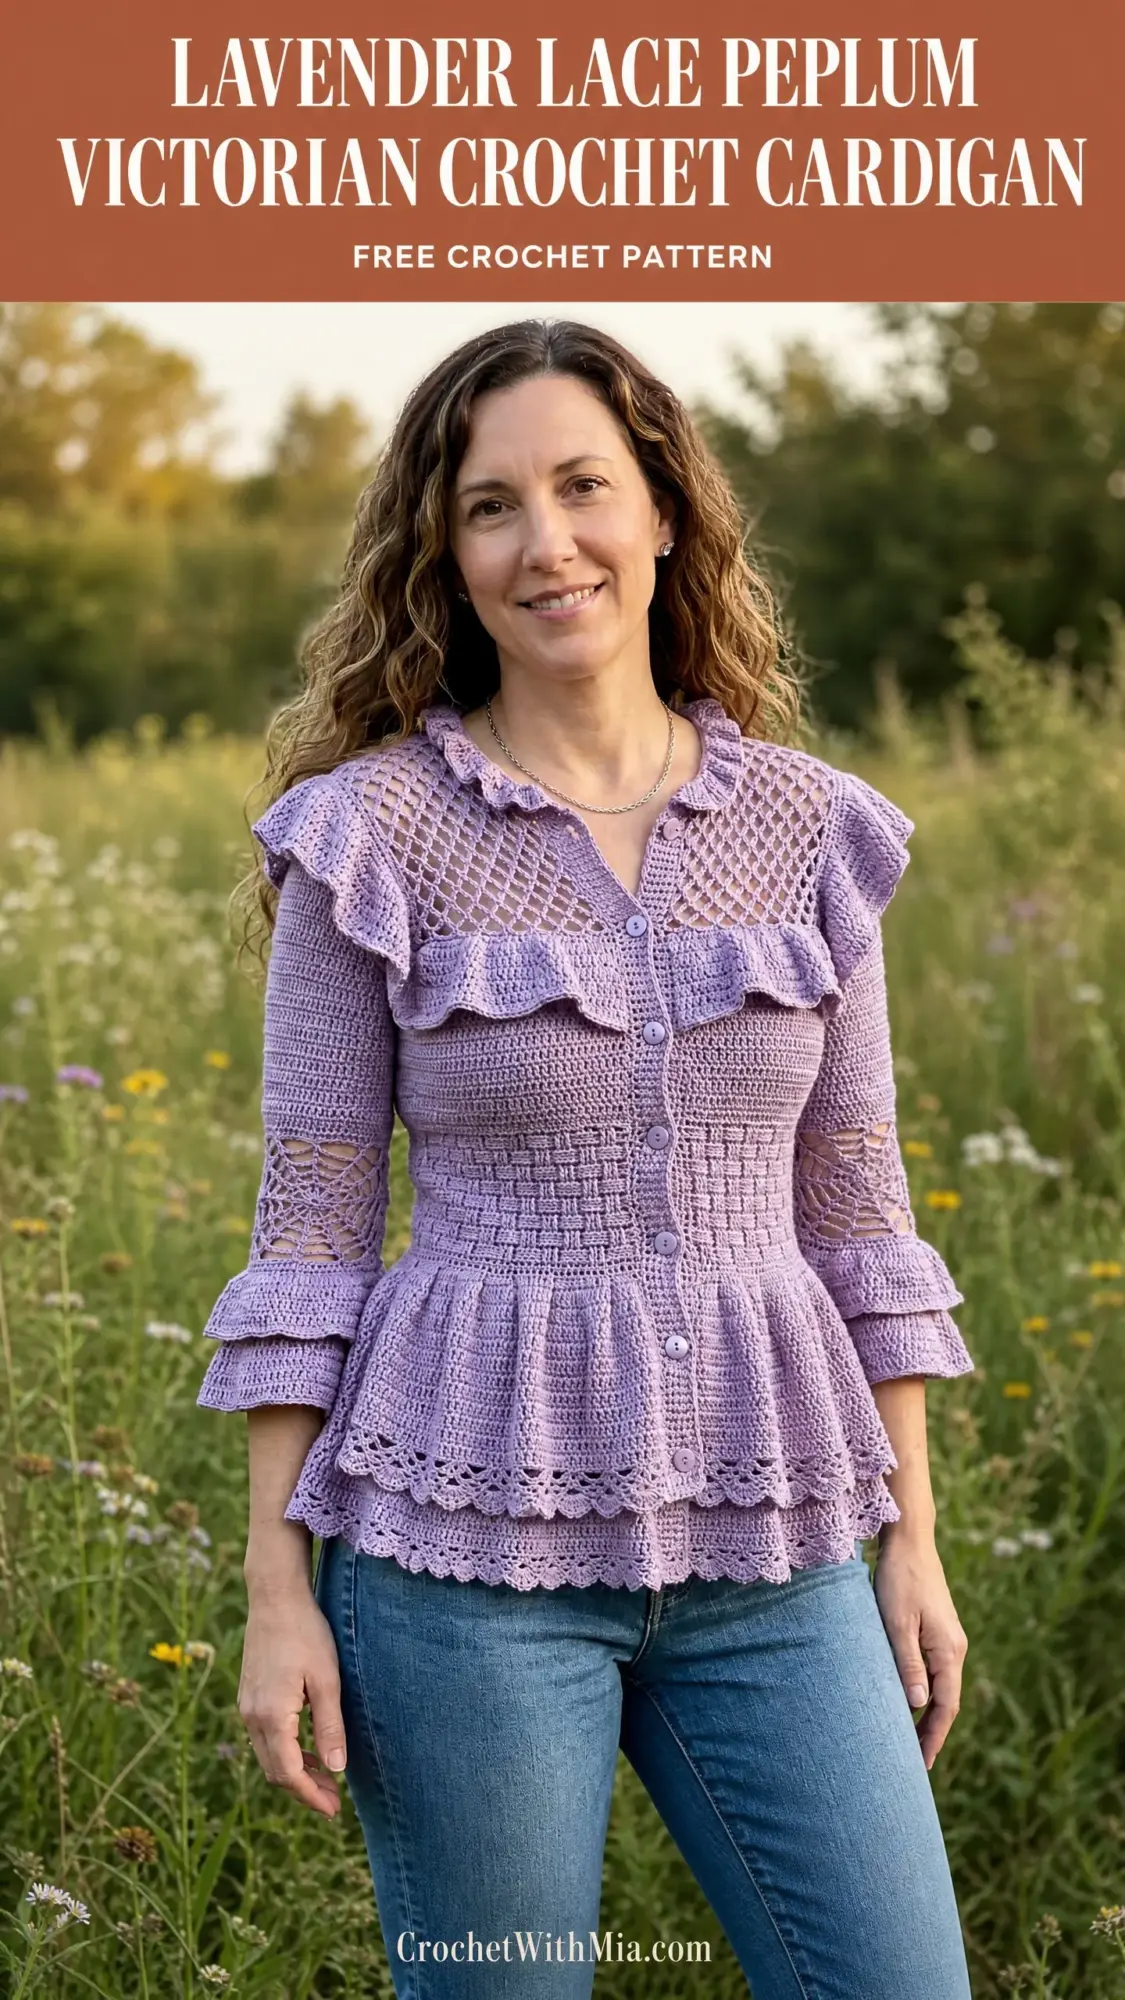
What came out of that afternoon was this cardigan. A fitted, button-front piece that borrows from Victorian silhouettes but feels completely modern. The open diamond lattice yoke, the dense basket-weave bodice, those dreamy double-tiered ruffles. I spent weeks tweaking every detail until it felt exactly right.
This pattern is my love letter to statement pieces that actually get worn. If you have been looking for a project that challenges your skills and rewards you with something truly stunning, pull up a chair. We are making something beautiful together.
Pattern Overview and Skill Level
This Lavender Lace Peplum Victorian Crochet Cardigan combines multiple stitch textures into one cohesive, fitted garment. The construction moves from top to bottom, starting with the yoke panels, seaming at the shoulders, then working the body downward in one piece. Sleeves are picked up at the armhole and worked in the round. All ruffle elements get added after blocking the main pieces.
The skill level sits at advanced intermediate to advanced. You should feel comfortable with:
If you have completed two or three fitted garments before, you will find this pattern manageable when followed section by section. Take your time. This is not a weekend project, but every hour shows in the finished piece.
Time estimate: Approximately 60 to 80 hours for an experienced crocheter. Allow additional time for blocking, seaming, and button attachment.
Finished Measurements
This crochet pattern is written for a finished bust of 36 inches (91 cm):
Size customization tips are provided at the end of the pattern instructions.
Materials You Will Need
Yarn
DK weight / light weight (CYCA 3), smooth mercerized cotton or cotton-blend for stitch definition and drape. You will need approximately 1,400 yards / 1,280 meters total.
Suggested yarns:
1. Paintbox Yarns Simply DK (100% cotton, 137 yd / 125 m per 50 g skein) in shade "Dusty Lilac." Approximately 11 skeins needed. This yarn offers excellent stitch definition and washes beautifully.
2. Lion Brand 24/7 Cotton DK (100% mercerized cotton, 186 yd / 170 m per 100 g skein) in "Lavender." Approximately 8 skeins needed. Slightly heavier hand but drapes elegantly and is widely available.
3. Scheepjes Catona 50g (100% mercerized cotton, 125 yd / 114 m per 50 g ball) in "Lilac Mist." Approximately 12 balls needed. The tighter twist gives exceptional lace clarity.
Substitution note: Choose a smooth DK-weight yarn with minimal halo or texture so that the diamond lattice and basket-weave stitches remain crisp and legible. Avoid fuzzy fibers that obscure stitch definition.
Hooks
Notions
Gauge (Please Do Not Skip This)
With E-4 (3.5 mm) hook and DK-weight cotton:
In basket-weave stitch pattern:
20 stitches and 20 rows = 4 in / 10 cm (blocked)
In diamond lattice stitch pattern:
18 stitches and 14 rows = 4 in / 10 cm (blocked)
Gauge is mandatory for this garment. A difference of even half a stitch per inch across the full bust will result in a fit discrepancy of more than an inch. Swatch both stitch patterns, block your swatch as you intend to block the finished piece, and adjust hook size as needed before beginning.
Abbreviations and Stitch Definitions
Let me walk you through every abbreviation you will encounter. I am defining each one fully so you never have to guess.
Special Stitches and Techniques
This cardigan uses several special stitch patterns. I am explaining each one thoroughly so you understand exactly what you are creating.
Diamond Lattice Stitch (worked over a multiple of 4 stitches plus 2)
This stitch creates the open diamond mesh visible across the upper yoke. Each diamond forms by crossing double crochets over chain spaces in alternating rows.
Foundation: Work a base of dc separated by ch-2 spaces.
Row A (RS): Ch 4 (counts as dc, ch 1), sk 1 st, dc in next st, (ch 2, sk 2 sts, dc in next st, ch 1, sk 1 st, dc in next st) across, turn.
Row B (WS): Ch 4, dc in ch-1 sp, (ch 2, dc in next ch-1 sp or dc, ch 2, dc in next ch-1 sp) across, ending dc in t-ch sp, turn.
Row C (RS): Ch 3 (counts as dc), dc in ch-2 sp, (ch 2, sk next dc, dc in ch-2 sp, dc in next dc, dc in ch-2 sp) across, ending dc in t-ch sp, turn.
Row D (WS): Ch 4 (counts as dc, ch 1), sk 1 dc, dc in next dc, (ch 2, sk 1 dc, dc in next dc, ch 1, sk 1 dc, dc in next dc) across, turn.
Repeat Rows A through D for pattern.
Basket-Weave Stitch (worked over a multiple of 8 stitches)
This stitch creates the dense woven texture visible on the fitted bodice and much of the sleeve body. It forms using raised front and back post doubles worked in groups.
Set-up row: Work one row of dc across foundation.
Row 1 (RS): Ch 2 (does not count as st), (FPdc around next 4 sts, BPdc around next 4 sts) across, dc in turning ch, turn.
Row 2 (WS): Ch 2, (BPdc around next 4 FPdc, FPdc around next 4 BPdc) across, dc in turning ch, turn.
Rows 3 and 4: Repeat Rows 1 and 2.
Row 5: Ch 2, (BPdc around next 4 sts, FPdc around next 4 sts) across, dc in turning ch, turn.
Row 6: Ch 2, (FPdc around next 4 BPdc, BPdc around next 4 FPdc) across, dc in turning ch, turn.
Rows 7 and 8: Repeat Rows 5 and 6.
Repeat Rows 1 through 8 for pattern. The raised columns alternate direction every 4 rows, creating the woven basket effect.
Ruffle Stitch
Used for the collar, chest ruffle, sleeve cuff ruffles, and peplum edge trim.
Row/Rnd 1: Join yarn to edge. Work 3 dc in each stitch or ch-sp across or around, sl st to join if working in the round.
Row/Rnd 2: Ch 3 (counts as dc), 2 dc in same st, 3 dc in each dc across or around, sl st to join if in the round. (This doubles the stitch count and causes the ruffle to wave and curl.)
For a double-layer ruffle (as on the sleeves and peplum), work a second ruffle attached to the row below the first ruffle, using the unused loops or a picked-up row of slip stitches worked into the back loops of the base row.
Lace Spider Panel (worked over 8 stitches)
This small openwork motif creates the spider-web-like circular lace windows visible on the sides of the sleeves.
Row 1: Sc in first st, ch 3, sk 2 sts, sc in next st, ch 3, sk 2 sts, sc in next st, ch 3, sk 2 sts, sc in last st. (3 ch-3 spaces)
Row 2: Ch 1, sc in first sc, 3 sc in ch-3 sp, ch 5, sl st to join into center of same ch-3 sp creating a ring, 3 sc in same sp, sc in next sc, 3 sc in next ch-3 sp, sc in last sc.
Row 3: Ch 1, sc in each st across, working 5 sc into each ch-5 ring. (8 sc)
Repeat these 3 rows for placement as directed in the sleeve section.
Scallop Edging (for the peplum lower hem)
Ch 1, sl st in first st, (sk 2 sts, 5 dc in next st, sk 2 sts, sl st in next st) across. Fasten off.
Shell Stitch
5 dc in a single stitch or chain space = 1 shell.
Important Pattern Notes Before You Begin
1. The cardigan is constructed top-down for the yoke, then worked downward through the body. Sleeves are worked separately from picked-up stitches at the armhole and worked downward in the round.
2. The center-front opening is maintained throughout by working left and right fronts as separate panels and never joining them across the front.
3. Button loops are worked into the right front band during the finishing process using a simple chain-loop method. The band is single crochet throughout.
4. All ruffle elements are added after the main garment body and sleeves are complete and blocked. Blocking first ensures the ruffles attach to a stable, dimensionally accurate base.
5. Right side is always the public-facing side. When instructed to work RS facing, have the RS facing you.
6. Turning chain conventions: ch 3 counts as dc throughout unless noted otherwise. Ch 2 at beginning of basket-weave rows does NOT count as a stitch.
7. Stitch counts given at the end of each row reflect working stitches only and do not include turning chains unless the turning chain is explicitly counting as a stitch in that section.
8. The diamond lattice section (yoke) is worked flat in rows. The body below the yoke is worked flat and seamed at the underarms. Sleeves are worked in the round from the armhole downward.
Step-by-Step Instructions
Back Yoke
Foundation chain: Ch 94.
Row 1 (WS): Dc in 4th ch from hook and in each ch across. Turn. (92 dc)
Row 2 (RS): Begin Diamond Lattice pattern. Ch 4 (counts as dc, ch 1), sk 1 st, dc in next st, (ch 2, sk 2 sts, dc in next st, ch 1, sk 1 st, dc in next st) across to last 2 sts, ch 2, sk 1 st, dc in last st. Turn. (46 dc, 22 ch-2 sps, 23 ch-1 sps)
Note on diamond lattice stitch count tracking: For the yoke sections, stitch counts will be given as total chain-and-stitch (network) counts. The working stitch equivalent is 92 stitches throughout the yoke.
Rows 3 through 14: Continue in Diamond Lattice pattern (Rows B through D then repeat). Work through 12 rows total of diamond lattice, ending on a WS row.
Checkpoint: After Row 14, the back yoke should measure approximately 3.5 in / 9 cm in height from the foundation chain. The piece should be 18.5 in / 47 cm wide (blocked).
Armhole Shaping
Row 15 (RS): Sl st across first 10 sts, ch 3, continue in diamond lattice pattern across until 10 sts remain, do not work those 10 sts. Turn. (72 working sts)
Row 16 (WS): Ch 3, dc2tog, continue in pattern to last 3 sts, dc2tog, dc. Turn. (70 sts)
Row 17: Ch 3, dc2tog, continue in pattern to last 3 sts, dc2tog, dc. Turn. (68 sts)
Row 18: Ch 3, dc2tog, continue in pattern to last 3 sts, dc2tog, dc. Turn. (66 sts)
Row 19: Ch 3, dc2tog, continue in pattern to last 3 sts, dc2tog, dc. Turn. (64 sts)
Rows 20 through 22: Work even in diamond lattice pattern. (64 sts)
Checkpoint: The armhole opening on each side should measure approximately 2 in / 5 cm deep. The back yoke from shoulder edge (top of foundation) to current row should be approximately 5.5 in / 14 cm.
Shoulder Shaping and Neck
Row 23 (RS): Work 20 sts in pattern, dc2tog, turn, leaving remaining sts unworked. (21 sts, right shoulder)
Row 24 (WS): Ch 3, dc2tog, work in pattern to end. Turn. (20 sts)
Row 25: Work in pattern to last 3 sts, dc2tog, dc. Turn. (19 sts)
Row 26: Fasten off. This is the right back shoulder.
Re-attach yarn to Row 23 stitch count remaining (64 sts total minus the 21 worked for right shoulder = 43 sts remaining). Sk center 22 sts for back neck, re-attach yarn to next st.
Row 23L (RS): Ch 3, dc2tog, work in pattern across remaining 20 sts. Turn. (21 sts, left shoulder)
Row 24L: Work in pattern to last 3 sts, dc2tog, dc. Turn. (20 sts)
Row 25L: Ch 3, dc2tog, work in pattern to end. Turn. (19 sts)
Row 26L: Fasten off.
Right Front Yoke
Foundation chain: Ch 48.
Row 1 (WS): Dc in 4th ch from hook and in each ch across. Turn. (46 dc)
Rows 2 through 14: Work Diamond Lattice pattern same as back yoke, maintaining 46-stitch equivalent. Turn at end of each row. (46 sts)
Checkpoint: Right front yoke should match back yoke height exactly, approximately 3.5 in / 9 cm.
Armhole Shaping (armhole side = right edge when RS faces you)
Row 15 (RS): Sl st across 10 sts, ch 3, work in pattern to end. Turn. (36 sts)
Row 16: Work in pattern to last 3 sts, dc2tog, dc. Turn. (35 sts)
Row 17: Ch 3, dc2tog, work in pattern to end. Turn. (34 sts)
Row 18: Work in pattern to last 3 sts, dc2tog, dc. Turn. (33 sts)
Row 19: Ch 3, dc2tog, work in pattern to end. Turn. (32 sts)
Rows 20 through 22: Work even. (32 sts)
Neckline Shaping (begins at Row 23 at center front edge)
Row 23 (RS): Work in pattern across first 19 sts, dc2tog at neck edge. Turn. (20 sts)
Row 24: Sl st across 1 st (neck decrease), ch 3, work in pattern to armhole edge, dc2tog, dc. Turn. (18 sts)
Row 25: Ch 3, dc2tog, work in pattern to neck edge, dc2tog. Turn. (16 sts)
Row 26: Work even across shoulder. (16 sts)
Shoulder seaming: Seam right front shoulder to right back shoulder using a slip stitch seam through both layers with RS facing together. Back shoulder has 19 sts; front shoulder has 16 sts. Ease the extra 3 sts by working 2 front sts together 3 times evenly during the seam. After seaming, the join is secure and smooth. Fasten off.
Left Front Yoke
Work to mirror the right front yoke exactly, reversing armhole and neckline shaping sides.
Foundation chain: Ch 48.
Row 1 (WS): Dc in 4th ch from hook and in each ch across. Turn. (46 dc)
Rows 2 through 14: Diamond Lattice pattern. (46 sts)
Armhole Shaping (armhole side = left edge when RS faces you)
Row 15 (RS): Work in pattern to last 10 sts, do not work last 10 sts. Turn. (36 sts)
Row 16: Ch 3, dc2tog, work in pattern to end. Turn. (35 sts)
Row 17: Work in pattern to last 3 sts, dc2tog, dc. Turn. (34 sts)
Row 18: Ch 3, dc2tog, work in pattern to end. Turn. (33 sts)
Row 19: Work in pattern to last 3 sts, dc2tog, dc. Turn. (32 sts)
Rows 20 through 22: Work even. (32 sts)
Neckline Shaping
Row 23 (RS): Dc2tog at left neck edge, work across 19 sts in pattern, dc at end. Turn. (20 sts)
Row 24: Work in pattern to last 2 sts, dc2tog at neck edge, ch 1, turn. (18 sts)
Row 25: Dc2tog at neck, work in pattern to armhole edge, dc2tog, dc. Turn. (16 sts)
Row 26: Work even. (16 sts)
Seam left front shoulder to left back shoulder using sl st seam RS together, easing 3 extra back sts as on the right side. Fasten off.
Joining the Body and Working Downward
With RS facing and the two front panels and back now seamed at both shoulders, you will work the body downward from the lower edges of all three yoke panels.
Join yarn at the lower right front edge (center-front side). The lower edges of the three panels together form a continuous working edge of 46 (right front) plus 92 (back) plus 46 (left front) = 184 stitches total. The armhole gaps are left open at this stage.
Body Set-up Row (RS): Ch 3, work 1 dc into each dc along the lower edge of the right front yoke (46 dc), then work across the lower edge of the back yoke (92 dc), then across the lower edge of the left front yoke (46 dc). Turn. (184 dc)
Basket-weave body begins here. The basket-weave stitch requires a multiple of 8. Confirm: 184 divided by 8 = 23 repeats exactly. Correct.
Body Row 1 (WS): Ch 2 (does not count as st), (FPdc around next 4 sts, BPdc around next 4 sts) across, ending FPdc around last 4 sts. Turn. (184 sts)
Body Row 2 (RS): Ch 2, (BPdc around next 4 FPdc, FPdc around next 4 BPdc) across. Turn. (184 sts)
Body Row 3 (WS): Ch 2, (FPdc around next 4 BPdc, BPdc around next 4 FPdc) across. Turn. (184 sts)
Body Row 4 (RS): Repeat Row 2. (184 sts)
Body Row 5 (WS): Ch 2, (BPdc around next 4 sts, FPdc around next 4 sts) across. Turn. (Reversal row, switches basket direction.) (184 sts)
Body Row 6 (RS): Ch 2, (FPdc around next 4 BPdc, BPdc around next 4 FPdc) across. Turn. (184 sts)
Body Row 7 (WS): Repeat Row 5. (184 sts)
Body Row 8 (RS): Repeat Row 6. (184 sts)
Repeat Body Rows 1 through 8 for the full basket-weave sequence.
Continue basket-weave pattern for a total of 24 rows of basket-weave (3 complete 8-row repeats). Do not increase or decrease during this section.
Checkpoint: After 24 rows of basket-weave, the body (below the yoke) should measure approximately 5 in / 12.5 cm. Total garment height from shoulder should be approximately 8.5 in / 21.5 cm.
Waist Shaping: Decrease Section (worked over 8 rows)
Dec Row 1 (RS): Ch 2, work in established basket-weave pattern for 44 sts, dc2tog, work 92 sts in pattern, dc2tog, work to end. Turn. (182 sts)
Dec Row 2 (WS): Work even in pattern. (182 sts)
Dec Row 3 (RS): Ch 2, work 43 sts in pattern, dc2tog, work 90 sts in pattern, dc2tog, work to end. Turn. (180 sts)
Dec Row 4 (WS): Work even in pattern. (180 sts)
Dec Row 5 (RS): Ch 2, work 42 sts in pattern, dc2tog, work 88 sts in pattern, dc2tog, work to end. Turn. (178 sts)
Dec Row 6 (WS): Work even. (178 sts)
Dec Row 7 (RS): Ch 2, work 41 sts in pattern, dc2tog, work 86 sts in pattern, dc2tog, work to end. Turn. (176 sts)
Dec Row 8 (WS): Work even. (176 sts)
Checkpoint: The waist section should now measure approximately 9 in / 23 cm below the shoulder. The body width at this point should be approximately 35 in / 89 cm (176 sts at 20 sts per 4 in = approximately 35.2 in). This represents the intended waist suppression.
Waist Shaping: Increase Section (worked over 8 rows, for hips)
Inc Row 1 (RS): Ch 2, work 41 sts in pattern, 2 dc in next st, work 86 sts in pattern, 2 dc in next st, work to end. Turn. (178 sts)
Inc Row 2 (WS): Work even. (178 sts)
Inc Row 3 (RS): Ch 2, work 42 sts in pattern, 2 dc in next st, work 88 sts in pattern, 2 dc in next st, work to end. Turn. (180 sts)
Inc Row 4 (WS): Work even. (180 sts)
Inc Row 5 (RS): Ch 2, work 43 sts in pattern, 2 dc in next st, work 90 sts in pattern, 2 dc in next st, work to end. Turn. (182 sts)
Inc Row 6 (WS): Work even. (182 sts)
Inc Row 7 (RS): Ch 2, work 44 sts in pattern, 2 dc in next st, work 92 sts in pattern, 2 dc in next st, work to end. Turn. (184 sts)
Inc Row 8 (WS): Work even. (184 sts)
Continue working even in basket-weave for 8 more rows. (184 sts)
Checkpoint: The body should now measure approximately 14 in / 35.5 cm from shoulder to current edge. Total width should be approximately 36.5 in / 93 cm. You are now ready to work the peplum attachment row, but the peplum itself will be added after blocking. Place a locking stitch marker along this edge every 10 stitches and fasten off.
Sleeves (Make 2)
The sleeves are worked in joined rounds from the armhole edge downward. With RS facing, join yarn at the base of the armhole opening on one side.
Armhole edge pickup: The armhole opening consists of the 10 slip-stitched sts at the underarm plus the shaped armhole edge rows. Count the available stitches and post stitches along the armhole opening. Pick up and work 64 sc evenly around the full armhole opening, placing a marker at the underarm center. Join with sl st. Do not turn; work in rounds. (64 sc)
Sleeve Rnd 1: Ch 2 (does not count as st), FPdc around next 4 sts, BPdc around next 4 sts, continue in basket-weave pattern around, joining last st with sl st to first FPdc. (64 sts)
Note: 64 divided by 8 = 8 repeats. Correct for basket-weave pattern.
Sleeve Rnds 2 through 4: Continue basket-weave in established pattern, sl st join each round. (64 sts)
Sleeve Rnd 5: Begin basket-weave reversal (shift raised column direction). Continue for 4 rounds in new direction. (64 sts each round)
Work sleeve basket-weave for a total of 16 rounds.
Checkpoint: After 16 rounds, sleeve should measure approximately 3.5 in / 9 cm from underarm.
Sleeve Decreases (worked every 4 rounds, 4 times total)
Dec Rnd 1: Ch 2, dc2tog (1 stitch decreased at beginning of round), work in pattern around to last 2 sts, dc2tog. Join. (62 sts)
Work 3 rounds even. (62 sts)
Dec Rnd 2: Ch 2, dc2tog, work in pattern around to last 2 sts, dc2tog. Join. (60 sts)
Work 3 rounds even. (60 sts)
Dec Rnd 3: Ch 2, dc2tog, work in pattern around to last 2 sts, dc2tog. Join. (58 sts)
Work 3 rounds even. (58 sts)
Dec Rnd 4: Ch 2, dc2tog, work in pattern around to last 2 sts, dc2tog. Join. (56 sts)
Work 3 rounds even. (56 sts)
Checkpoint: After all sleeve decreases, the sleeve should measure approximately 9 in / 23 cm from the underarm. The sleeve circumference at this point should be approximately 11.2 in / 28.5 cm (56 sts divided by 5 sts per inch = 11.2 in).
Lace Spider Panel Section
Work 8 rounds total, alternating between the Lace Spider Panel (worked over an 8-stitch section on each side of the sleeve) and basket-weave for the remaining stitches.
Lace panel placement round: Mark the center 8 sts on each side of the sleeve (2 lace panels per sleeve, directly opposite each other). Work basket-weave across all non-panel stitches (40 sts) and work Lace Spider Panel over the marked 8 sts on each side. This places 2 panels of 8 sts each into the sleeve sides.
Work the Lace Spider Panel Rows 1, 2, and 3 (each spanning one round) over those 8 sts while continuing basket-weave on the remaining 40 sts. Work the lace panel twice (6 lace-affected rounds total) to create two stacked spider