
I call this one the Coastal Dress, and it has quite the story behind it. The original sketch lived in a tattered notebook I kept during a summer trip to the Mediterranean years ago. I watched women strolling along seaside promenades in these effortlessly chic crocheted pieces, and I knew I had to create something that captured that breezy elegance.
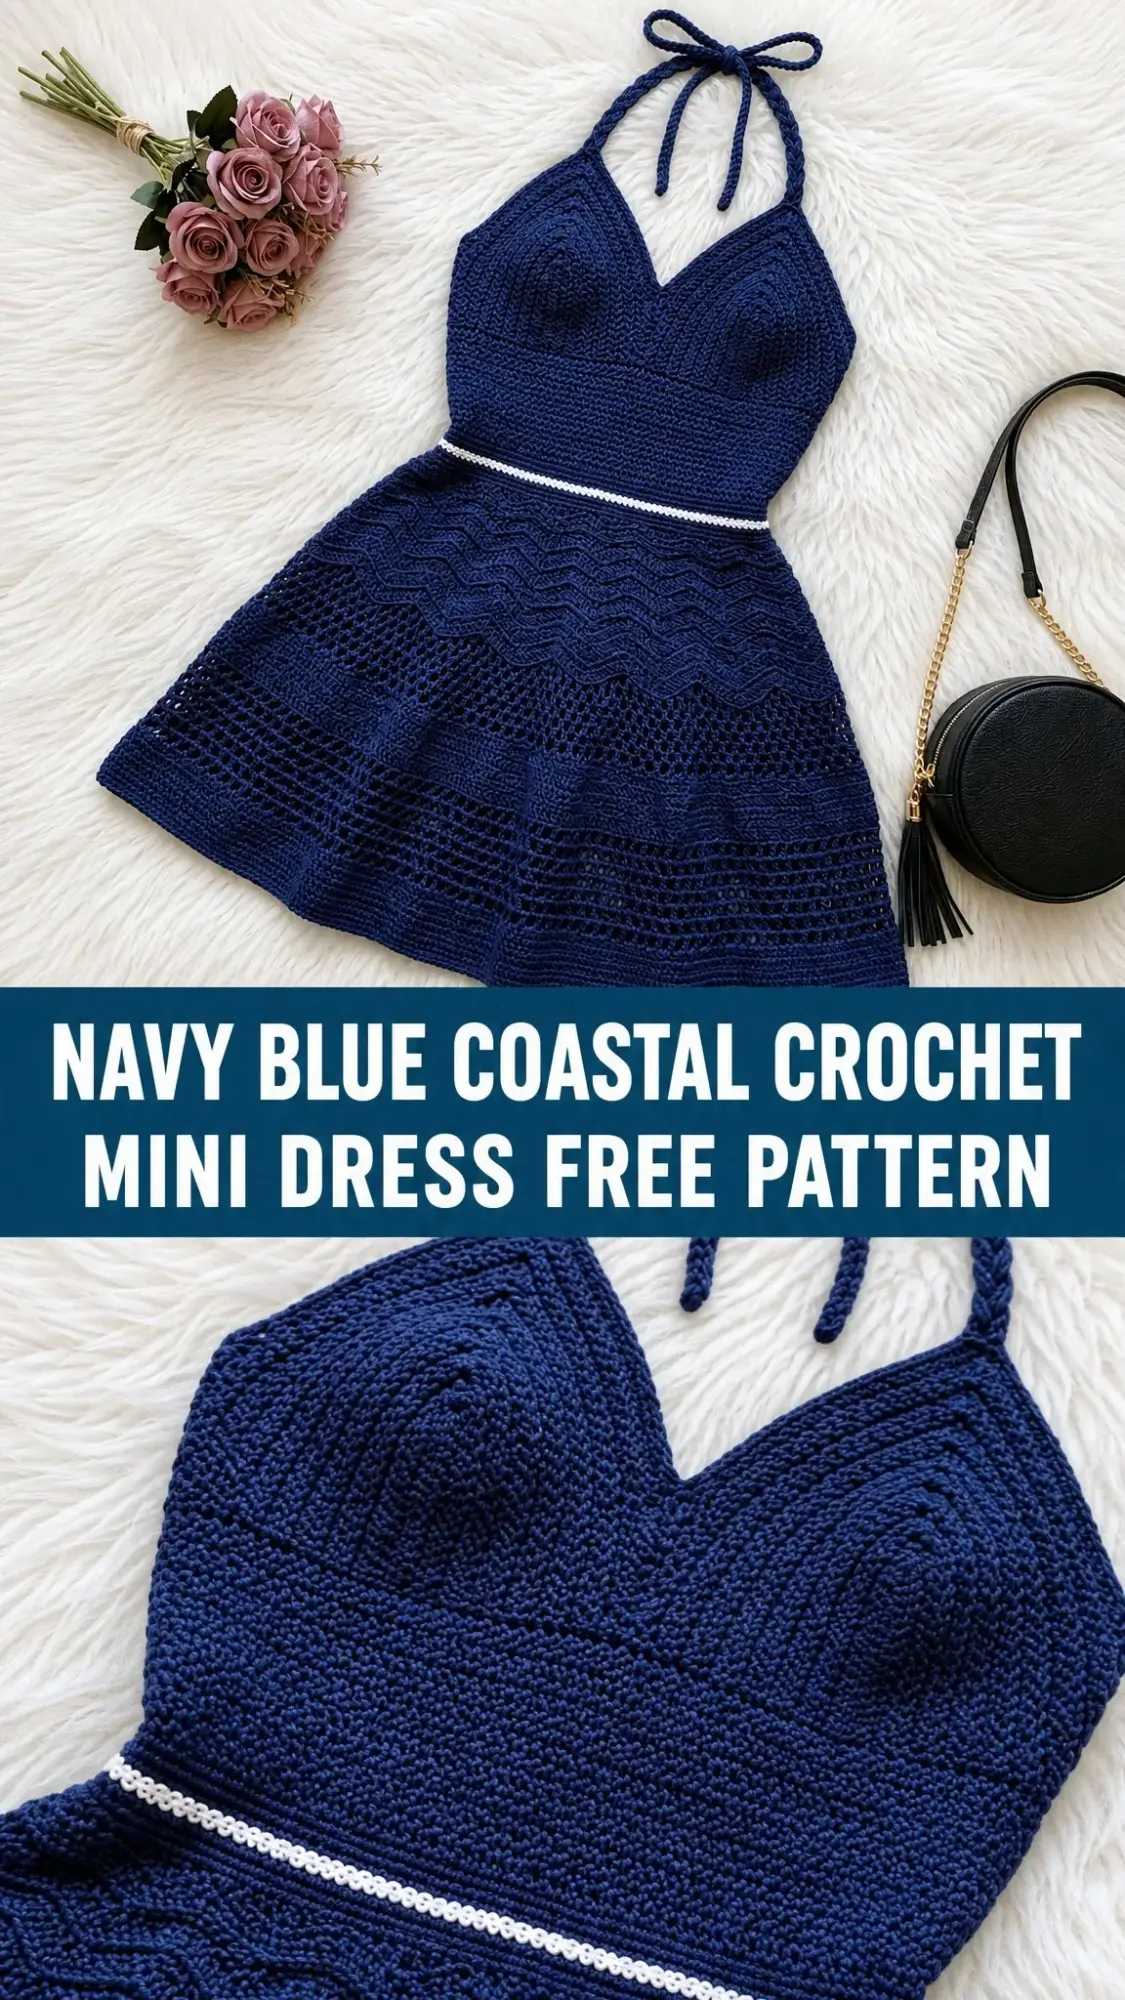
The notebook got tucked away for ages. Then last spring, I found it while cleaning out my craft room, and the sketch practically jumped off the page. Navy blue with a delicate white accent at the waist. A halter neckline that ties in a pretty bow. A skirt that swirls when you walk. I finally brought her to life, and honestly? She turned out even better than I imagined.
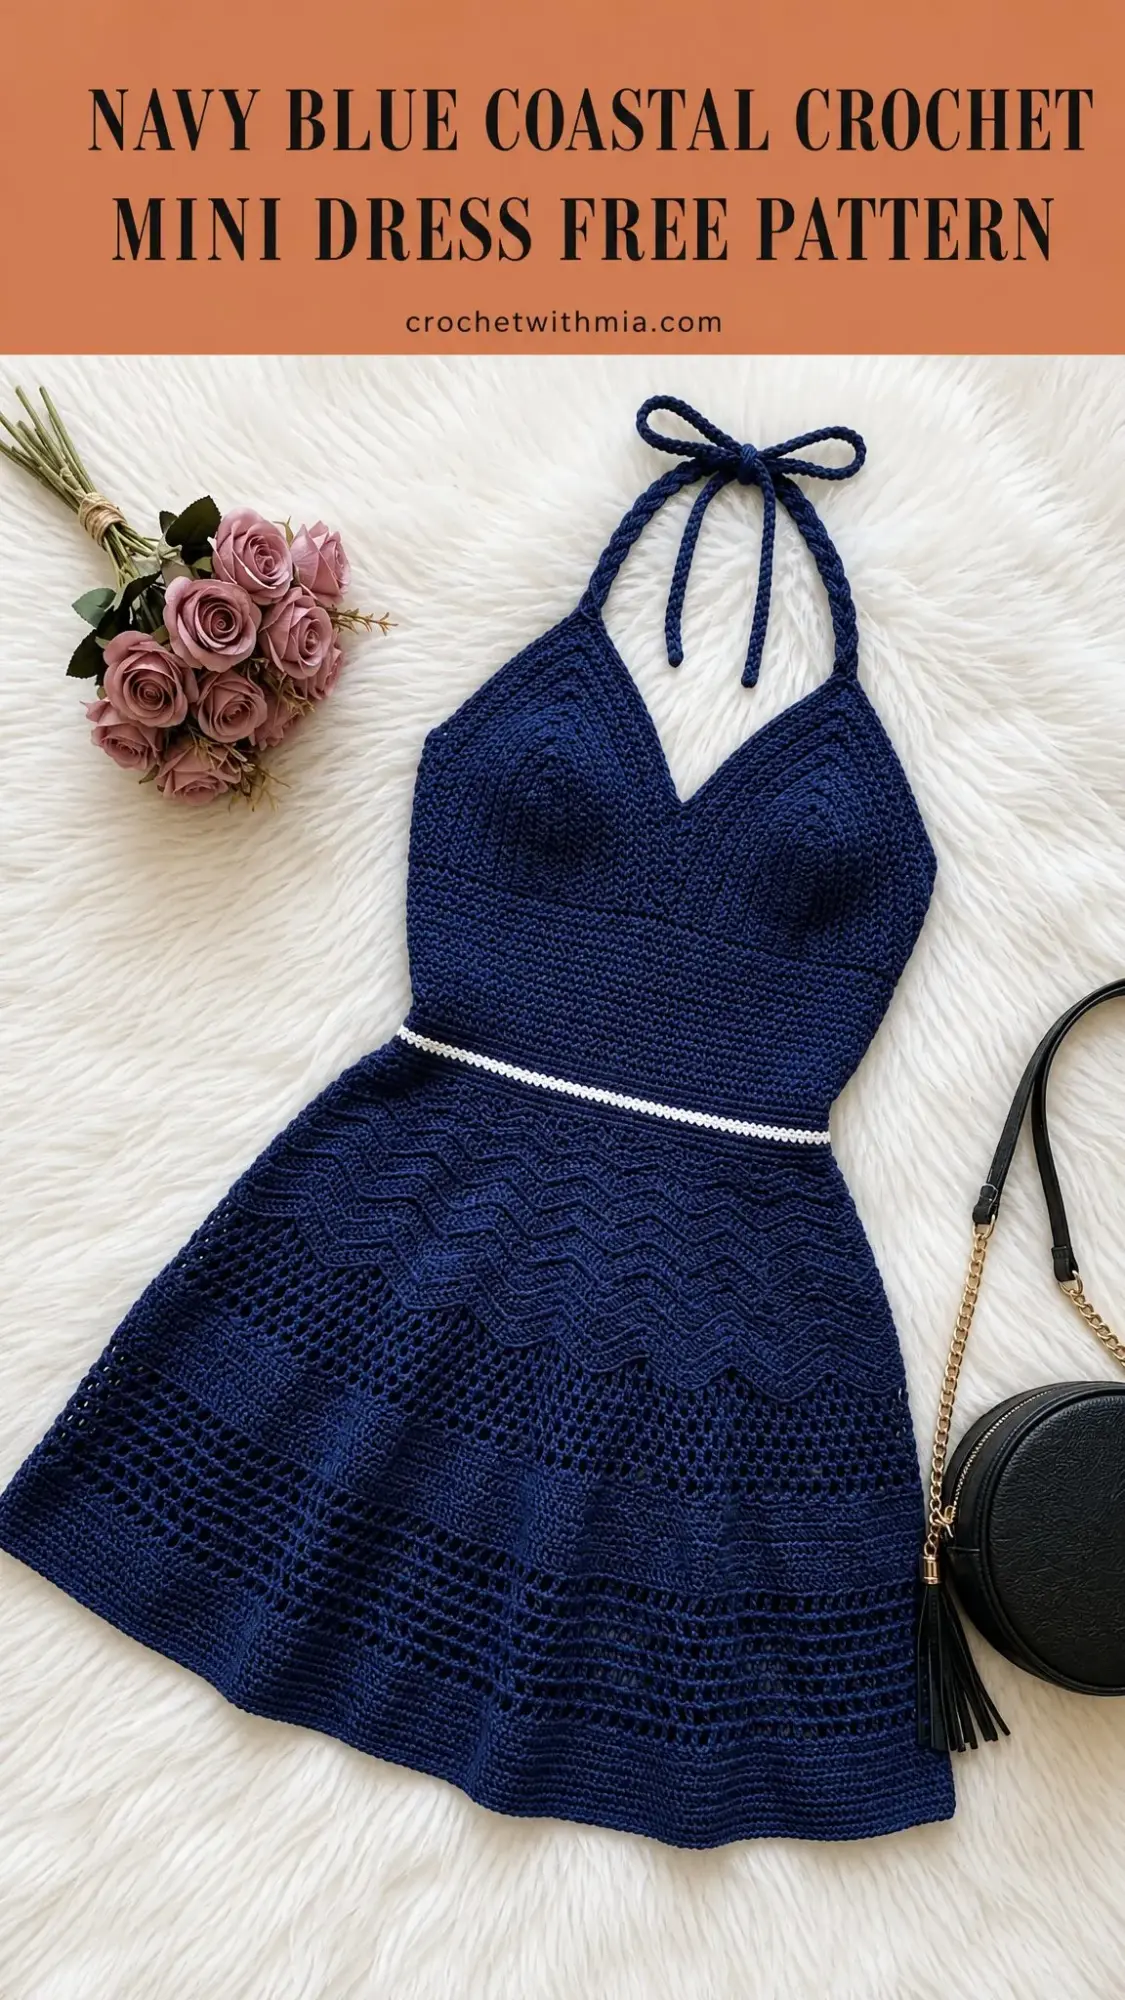
This navy blue crochet mini dress combines fitted bodice shaping, textured chevron bands, open honeycomb mesh, and a structured grid lace hem. It is an intermediate to advanced project that will challenge you and reward you with a stunning handmade garment you will treasure for years.
About This Crochet Dress Pattern
The Coastal Dress is a halter style mini dress worked in smooth cotton yarn. The construction breaks down into manageable sections: two shaped bust cups, a fitted bodice band, and a flared A-line skirt worked in the round from the waist down.
What makes this design special is the combination of textures on the skirt. You start with dense single crochet (sc) rows for structure, transition into a gorgeous chevron stitch band that creates wave-like ridges, then open up into airy honeycomb mesh, and finish with a grid lace border at the hem. The white slip stitch belt at the waist adds that crisp nautical accent that ties everything together.
The dress has open V-necklines at both front and back. The halter ties are braided cords that provide adjustable fit at the shoulders. There is no zipper or closure, so the finished piece slips on easily.
Skill level: Intermediate to Advanced. You should be comfortable working in rows and rounds, reading stitch counts carefully, executing decreases and increases for shaping, and maintaining gauge across multiple stitch textures. If you have made fitted garments before, you are ready for this.
Time estimate: Approximately 40 to 60 hours for an experienced crocheter working at a moderate pace. This is a labor of love, but every hour shows in the finished piece.
Finished Measurements
These measurements are for a size Small. Customization notes appear at the end of the pattern for adjusting to other sizes.
Materials You Will Need
Yarn:
Suggested Yarn Options:
1. Paintbox Yarns Cotton DK (100% cotton, 137 yds / 125 m per 50 g skein) in "Sailor Blue." This yarn has excellent stitch definition, ideal for showing the chevron and mesh textures clearly.
2. Lion Brand 24/7 Cotton DK (100% mercerized cotton, 186 yds / 170 m per 100 g skein) in "Navy." A widely available, smooth option with good drape for the flared skirt.
3. Drops Safran (70% cotton / 30% linen, 175 yds / 160 m per 50 g skein) in "Dark Navy." The linen content adds subtle body to the bodice and a lightly textured surface.
Substitution Note: Use any DK weight (weight category 3) smooth cotton or cotton-blend yarn that achieves the stated gauge. Avoid yarns with significant elasticity, such as cotton-acrylic blends with more than 20% acrylic. They will not hold the structured shaping of the bodice cups or the drape of the skirt correctly.
Hooks:
Additional Materials:
Gauge
Getting gauge right is critical for this fitted garment. Even a half-stitch difference per inch will affect the bust and waist fit significantly.
With E-4 / 3.5 mm hook and DK cotton yarn in single crochet:
20 stitches and 22 rows = 4 in / 10 cm (square swatch, blocked)
With F-5 / 3.75 mm hook in chevron pattern (one full chevron repeat = 12 stitches):
12 stitches and 8 rows = approximately 3 in wide x 2.5 in tall (7.5 cm x 6.5 cm)
Swatch, block your swatch, and re-measure before beginning. I cannot stress this enough for garments.
Abbreviations and Stitch Definitions
Let me walk you through each abbreviation you will encounter. If you are newer to reading patterns, bookmark this section.
Pattern notation:
Special Stitches and Techniques
Chevron Stitch (worked flat, over a multiple of 12 sts + 3)
This creates a zigzag ridge texture. Each repeat has a peak (2 increases) and a valley (sc2tog twice).
Row setup: ch 3 (counts as dc), dc in same st (peak start), [dc in next 4 sts, sc2tog, sc2tog, dc in next 4 sts, 2 dc in next st, 2 dc in next st] across, ending last rep with 2 dc in last st.
On subsequent rows, maintain peaks above peaks and valleys above valleys. The texture builds as you stack the rows.
Honeycomb Mesh Stitch (worked in rounds, over a multiple of 4 sts)
Rnd A: [sc in next st, ch 2, sk 1 st, dc in next st, ch 2, sk 1 st] around, sl st to first sc to join.
Rnd B: [sc in dc, ch 2, dc in sc, ch 2] around.
These two rounds alternate to create an open, airy mesh with beautiful drape.
Grid Lace Stitch (worked in rounds, over a multiple of 4 sts)
Rnd A: [sc in next st, ch 3, sk 3 sts] around, sl st to join.
Rnd B: sc in each ch-3 sp (3 sc per sp) and 1 sc in each sc around, sl st to join.
These two rounds alternate for a structured grid lace look at the hem border.
Braided Cord (for halter ties)
Cut 6 strands of yarn, each 60 in / 152 cm long. Hold 2 strands together as one unit (3 units total). Tie all 3 units together at one end with a knot. Braid to desired length. Tie off at other end. Trim ends evenly to 0.5 in / 1.3 cm.
Slip Stitch Belt Row
Working with white yarn from RS along the designated waist joining row, insert hook through both loops of each stitch and sl st across. This creates a flat, raised horizontal line mimicking a narrow belt.
Pattern Notes Before You Begin
Take a moment to read these notes. They will save you confusion later.
1. The dress is worked in three main sections: the RIGHT CUP, LEFT CUP (both worked flat, then joined), the BODICE BAND (worked flat), and the SKIRT (worked in the round from the waist downward). The halter ties are made separately and attached.
2. The bodice cups are worked flat from the bottom edge upward using short rows for shaping, then the two cups are joined at the center front.
3. The dress has an open V at both front and back. There is no zipper or closure. The halter tie provides the primary adjustment for fit at the top.
4. The white accent belt is a single sl st row worked along the top of the skirt waist join, not a separate sewn piece.
5. When working flat sections, turn at the end of each row unless otherwise stated.
6. Place stitch markers at each end of a round or row when transitioning between sections to keep track of your working position.
7. Optional: The bodice lining can be cut from a stretch knit fabric and hand-sewn on the WS of the cups before attaching the halter for added modesty.
Step by Step Crochet Pattern Instructions
Section 1: Right Bust Cup
The cups are worked flat in sc from the bottom edge up. Short rows create the three-dimensional cup shape. Each cup is approximately 5 in / 12.5 cm wide and 5.5 in / 14 cm tall at center.
Foundation chain for Right Cup:
With E-4 hook and navy yarn, ch 27.
Row 1 (RS): sc in 2nd ch from hook and in each ch across. Turn. (26 sc)
Row 2: ch 1, sc in each st across. Turn. (26 sc)
Row 3: ch 1, inc in first st, sc to last st, inc in last st. Turn. (28 sc)
Row 4: ch 1, sc across. Turn. (28 sc)
Row 5: ch 1, inc in first st, sc to last st, inc in last st. Turn. (30 sc)
Row 6: ch 1, sc across. Turn. (30 sc)
Row 7 (short row begin, shaping the cup curve):
ch 1, sc in first 20 sts only. Turn. Leave remaining 10 sts unworked. (20 sc worked)
Row 8: ch 1, sc in first 14 sts. Turn. Leave remaining 6 sts unworked. (14 sc worked)
Row 9: ch 1, sc across all 14 sts, then continue across the held 6 sts from Row 7, then continue across the remaining 10 sts held from Row 6. Turn. (30 sc total)
Do not panic if the short rows feel strange at first. You are essentially creating a dart that shapes the cup around the bust. Just follow the stitch counts.
Row 10: ch 1, sc across. Turn. (30 sc)
Row 11: ch 1, sc2tog, sc to last 2 sts, sc2tog. Turn. (28 sc)
Row 12: ch 1, sc across. Turn. (28 sc)
Row 13: ch 1, sc2tog, sc to last 2 sts, sc2tog. Turn. (26 sc)
Row 14: ch 1, sc across. Turn. (26 sc)
Row 15: ch 1, sc2tog, sc to last 2 sts, sc2tog. Turn. (24 sc)
Row 16: ch 1, sc across. Turn. (24 sc)
Row 17: ch 1, sc2tog, sc across to last 2 sts, sc2tog. Turn. (22 sc)
Row 18: ch 1, sc across. Turn. (22 sc)
Do not fasten off. Place a stitch marker in the last stitch. Set Right Cup aside.
Section 2: Left Bust Cup
With E-4 hook and navy yarn, ch 27.
Row 1 (RS): sc in 2nd ch from hook and in each ch across. Turn. (26 sc)
Row 2: ch 1, sc across. Turn. (26 sc)
Row 3: ch 1, inc in first st, sc to last st, inc in last st. Turn. (28 sc)
Row 4: ch 1, sc across. Turn. (28 sc)
Row 5: ch 1, inc in first st, sc to last st, inc in last st. Turn. (30 sc)
Row 6: ch 1, sc across. Turn. (30 sc)
Row 7 (short rows for Left Cup):
ch 1, sc in first 20 sts. Turn. Leave remaining 10 sts unworked. (20 sc)
Row 8: ch 1, sc in first 14 sts. Turn. (14 sc)
Row 9: ch 1, sc across all 14, then across remaining 6 from Row 7, then across remaining 10 from Row 6. Turn. (30 sc)
Row 10: ch 1, sc across. Turn. (30 sc)
Row 11: ch 1, sc2tog, sc to last 2 sts, sc2tog. Turn. (28 sc)
Row 12: ch 1, sc across. Turn. (28 sc)
Row 13: ch 1, sc2tog, sc to last 2 sts, sc2tog. Turn. (26 sc)
Row 14: ch 1, sc across. Turn. (26 sc)
Row 15: ch 1, sc2tog, sc to last 2 sts, sc2tog. Turn. (24 sc)
Row 16: ch 1, sc across. Turn. (24 sc)
Row 17: ch 1, sc2tog, sc across to last 2 sts, sc2tog. Turn. (22 sc)
Row 18: ch 1, sc across. Turn. (22 sc)
Do not fasten off.
Joining the Two Cups at Center Front
Hold Right Cup and Left Cup with RS facing upward, top edges (Row 18 edges) aligned.
Working with the yarn still attached to the Left Cup, ch 1, then sc across the 22 sts of Left Cup, then sc across the 22 sts of Right Cup (picking up from the live loop of Right Cup marked earlier). Turn. (44 sc, this is the center front joining row, forming the V-neck base)
Row 19 (now working across full joined width):
ch 1, sc across all 44 sts. Turn. (44 sc)
Checkpoint: After joining the two cups and completing Row 19, the joined bodice front panel should measure approximately 9 in / 23 cm wide and 4.5 in / 11.5 cm tall at the outer cup edges. The center dips lower to form the V.
Section 3: Bodice Band (Underband and Side Body)
The bodice band is a rectangle that wraps from center front, around each side of the torso, and meets at center back. It creates the fitted midriff. It is worked flat and then seamed at center back.
The underband begins at Row 1 below the cup foundation chains. Working along the bottom edge (foundation chain edge) of both cups:
With E-4 hook and navy, join yarn to the bottom-left corner of the Left Cup foundation chain edge (from RS).
Row 1: ch 1, sc evenly along the entire bottom foundation edge of Left Cup (26 sc) and Right Cup (26 sc). Turn. (52 sc)
Row 2: ch 1, sc across. Turn. (52 sc)
Row 3: ch 1, sc2tog, sc to last 2 sts, sc2tog. Turn. (50 sc)
Row 4: ch 1, sc across. Turn. (50 sc)
Row 5: ch 1, sc2tog, sc to last 2 sts, sc2tog. Turn. (48 sc)
Row 6: ch 1, sc across. Turn. (48 sc)
Row 7: ch 1, sc2tog, sc to last 2 sts, sc2tog. Turn. (46 sc)
Row 8: ch 1, sc across. Turn. (46 sc)
Row 9: ch 1, sc2tog, sc to last 2 sts, sc2tog. Turn. (44 sc)
Row 10: ch 1, sc across. Turn. (44 sc)
Row 11: ch 1, sc2tog, sc to last 2 sts, sc2tog. Turn. (42 sc)
Row 12: ch 1, sc across. Turn. (42 sc)
Row 13: ch 1, sc2tog, sc to last 2 sts, sc2tog. Turn. (40 sc)
Row 14: ch 1, sc across. Turn. (40 sc)
This is the waist row. The 40-stitch row corresponds to the narrowest point. Do not fasten off.
Checkpoint: After Row 14 of the Bodice Band, the piece from the top of the cups to the bottom of the band should measure approximately 7 in / 18 cm. The waist edge (40 sts across) should measure approximately 8 in / 20 cm.
Section 3B: Bodice Back Panel
The back has an open V similar to the front. The back panel is worked as two triangular sections without bust shaping.
With E-4 hook and navy, ch 27.
Row 1: sc in 2nd ch from hook, sc across. Turn. (26 sc)
Rows 2 through 6: ch 1, sc across. Turn. (26 sc each row)
Row 7: ch 1, sc2tog, sc to last 2 sts, sc2tog. Turn. (24 sc)
Row 8: ch 1, sc across. Turn. (24 sc)
Row 9: ch 1, sc2tog, sc to last 2 sts, sc2tog. Turn. (22 sc)
Row 10: ch 1, sc across. Turn. (22 sc)
Row 11: ch 1, sc2tog, sc to last 2 sts, sc2tog. Turn. (20 sc)
Row 12: ch 1, sc across. Turn. (20 sc)
Row 13: ch 1, sc2tog, sc to last 2 sts, sc2tog. Turn. (18 sc)
Row 14: ch 1, sc across. Turn. (18 sc)
Fasten off. This is the Right Back Panel. Make a second identical piece for the Left Back Panel.
Join the two back panels at their narrowest top inner edges (Row 14 edges) with a single sc join, RS facing:
sc across 18 sts of Left Back Panel, then 18 sts of Right Back Panel. (36 sc on joined back top row)
Back Underband (worked along foundation chains of back panels):
Join navy at bottom-left corner of Left Back Panel foundation chain.
Row 1: sc across 26 foundation sts of Left Back Panel, then 26 foundation sts of Right Back Panel. Turn. (52 sc)
Rows 2 through 14: Work same decrease pattern as front Bodice Band Rows 2 through 14. (ending at 40 sc at waist)
Fasten off.
Assembling the Bodice
With tapestry needle and navy yarn, seam the left side of the front Bodice Band to the left side of the Back Underband using a whipstitch or mattress stitch on WS. Repeat for right side.
The bodice is now a continuous tube at the waist with an open V front and open V back.
Checkpoint: After assembling the bodice tube, the circumference at the widest row should be approximately 27 in / 68.5 cm. The waist circumference at Row 14 should be approximately 20 in / 50.5 cm, stretching to fit a 26 in waist. The dress is designed to be worn with slight compression at the waist for that defined look.
Section 4: Waist Belt Accent
Complete Section 5, Rnd 1 first, then return here.
With white DK yarn and E-4 hook, join yarn at any point along the first round of the skirt join.
Working from RS along the first round of the skirt join, sl st in each st around. (130 sl sts)
Fasten off white yarn. Weave in ends. This creates the thin white belt line visible at the waist.
Section 5: Skirt
The skirt is worked in the round from the waist down. It has four texture zones: Zone A (dense sc rounds), Zone B (chevron texture band), Zone C (honeycomb mesh), and Zone D (grid lace hem border).
Setting Up the Skirt Foundation:
With E-4 hook and navy yarn, join yarn at any point along the bottom waist edge of the assembled bodice tube. Working in sc, pick up and sc evenly around the entire waist circumference: approximately 65 sc across the front waist row and 65 sc across the back waist row, joined with a sl st to first sc to form a round.
Rnd 1: sc in each st around. Sl st to first sc. (130 sc)
This is the round along which the white belt accent is worked (see Section 4).
Zone A: Initial Flare Rounds
Rnd 2: ch 1, [sc in next 12 sts, inc in next st] 10 times. Sl st to first sc. (140 sc)
Rnd 3: ch 1, sc in each st around. Sl st. (140 sc)
Rnd 4: ch 1, [sc in next 13 sts, inc in next st] 10 times. Sl st. (150 sc)
Rnd 5: ch 1, sc in each st around. Sl st. (150 sc)
Rnd 6: ch 1, [sc in next 14 sts, inc in next st] 10 times. Sl st. (160 sc)
Rnd 7: ch 1, sc in each st around. Sl st. (160 sc)
Rnd 8: ch 1, [sc in next 15 sts, inc in next st] 10 times. Sl st. (170 sc)
Rnd 9: ch 1, sc in each st around. Sl st. (170 sc)
Rnd 10: ch 1, [sc in next 16 sts, inc in next st] 10 times. Sl st. (180 sc)
Rnd 11: ch 1, sc in each st around. Sl st. (180 sc)
Checkpoint: After Rnd 11, the skirt should measure approximately 2.5 in / 6.5 cm below the waist. The circumference should be approximately 36 in / 91.5 cm.
Zone B: Chevron Texture Band
Switch to F-5 / 3.75 mm hook.
Rnd 12 (Chevron Setup):
ch 3 (counts as first dc), dc in same st (peak), [dc in next 4 sts, sc2tog twice (valley), dc in next 4 sts, 2 dc in next st, 2 dc in next st (peak)] 14 times, dc in next 4 sts, sc2tog twice, dc in next 4 sts, 2 dc in last st. Sl st to top of ch-3. (180 sts)
Rnd 13: ch 3, dc in same st, [dc in next 4 sts, sc2tog twice, dc in next 4 sts, 2 dc in next st, 2 dc in next st] 14 times, dc in next 4 sts, sc2tog twice, dc in next 4 sts, 2 dc in last st. Sl st to top of ch-3. (180 sts)
Rnd 14: Repeat Rnd 13. (180 sts)
Rnd 15 (Increase within chevron):
ch 3, dc in same st, [dc in next 4 sts, sc2tog twice, dc in next 4 sts, 2 dc in next st, 2 dc in next st, dc in joining st between peaks] rep across 15 chevron peaks. (195 sts)
Rnd 16: ch 3, dc in same st, [dc in next 5 sts, sc2tog twice, dc in next 5 sts, 2 dc in next st, 2 dc in next st] 12 times, dc in next 5 sts, sc2tog twice, dc in next 5 sts, 2 dc in last st. Sl st to top of ch-3. (195 sts)
Rnd 17: Repeat Rnd 16. (195 sts)
Rnd 18: Repeat Rnd 16. (195 sts)
Checkpoint: After Rnd 18, the skirt should measure approximately 6 in / 15 cm below the waist. You should see 3 to 4 rows of clear chevron zigzag ridges.
Switch back to E-4 / 3.5 mm hook.
Zone C: Honeycomb Mesh
Rnd 19 (transition inc rnd): ch 1, sc in each st around, working 1 extra inc evenly placed. (196 sc)
Rnd 20 (Mesh Rnd A): ch 1, [sc in next st, ch 2, sk 1 st, dc in next st, ch 2, sk 1 st] 49 times. Sl st to first sc. (49 sc, 49 dc, 98 ch-2 sps)
Rnd 21 (Mesh Rnd B): ch 1, [sc in dc, ch 2, dc in sc, ch 2] 49 times. Sl st to first sc.
Rnds 22 through 27: Alternate Rnd 20 and Rnd 21 patterns.
Rnd 28 (closing mesh): ch 1, sc in each sc, 2 sc in each ch-2 sp, sc in each dc around. Sl st. (294 sc)
Checkpoint: After Rnd 28, the skirt should measure approximately 9 in / 23 cm below the waist. The circumference should be approximately 58.8 in / 149 cm.
Zone D: Grid Lace Hem Border
Rnd 29 (adjustment rnd): ch 1, sc around, working 2 inc evenly spaced. Sl st. (296 sc)
Rnd 30 (Grid Lace Rnd A): ch 1, [sc in next st, ch 3, sk next 3 sts] 74 times. Sl st to first sc.
Rnd 31 (Grid Lace Rnd B): ch 1, sc in first sc, 3 sc in first ch-3 sp, [sc in next sc, 3 sc in next ch-3 sp] 73 times. Sl st. (296 sc)
Rnds 32 through 36: Continue alternating Rnd 30 and Rnd 31 patterns.
Rnd 37 (Hem finishing rnd): ch 1, sc in first sc, 3 sc in each ch-3 sp, sc in each sc around. Sl st. (296 sc)
Rnd 38: ch 1, sl st in each st around. Sl st to join. Fasten off. (296 sl sts)
Final Checkpoint: The skirt measures approximately 14 in / 35.5 cm below the waist. The hem circumference is approximately 59 in / 150 cm.
Section 6: Halter Ties (Make 2)
For each tie, cut 6 strands of navy yarn, each 60 in / 152 cm long.
Hold 2 strands together as one unit (you will have 3 units total). Tie all 3 units together at one end with a secure knot.
Braid the three units together to approximately 18 in / 45.5 cm length.
Tie off at the other end with another knot. Trim ends evenly to 0.5 in / 1.3 cm.
Attach one tie to the top outer corner of each cup using your tapestry needle. Secure firmly with several passes of matching yarn, then weave in ends.
Finishing Your Navy Blue Crochet Dress
Weave in all remaining ends with your tapestry needle. Take your time here. On a garment this special, secure weaving matters.
Blocking: Wet block the entire dress by soaking in cool water for 15 minutes. Gently squeeze out excess water (do not wring). Lay flat on blocking mats or clean towels, shaping the skirt to the correct width and smoothing the bodice. Allow to dry completely before wearing.
Optional lining: For added modesty in the bodice, cut two cup shapes from a coordinating stretch knit fabric (such as jersey or power mesh). Hand stitch to the wrong side of each cup using a whipstitch along the edges.
Optional boning: For extra structure at the underband, slip a 6 in piece of firm boning or interfacing into a fabric channel hand sewn on the wrong side of the band.
A Few Tips From My Experience
Work the short rows slowly the first time. They feel awkward, but once you see the cup take shape, it clicks.
Count your stitches religiously on the chevron section. The peaks and valleys must align round after round, or the texture will look