
Lace crochet with skulls and roses sounds intimidating. I get it. You see a three-piece gothic set with intricate motifs and bat-wing sleeves, and your brain immediately says "nope, too advanced." But here’s the truth: if you can work a double crochet and follow a chart, you can absolutely make this stunning set.
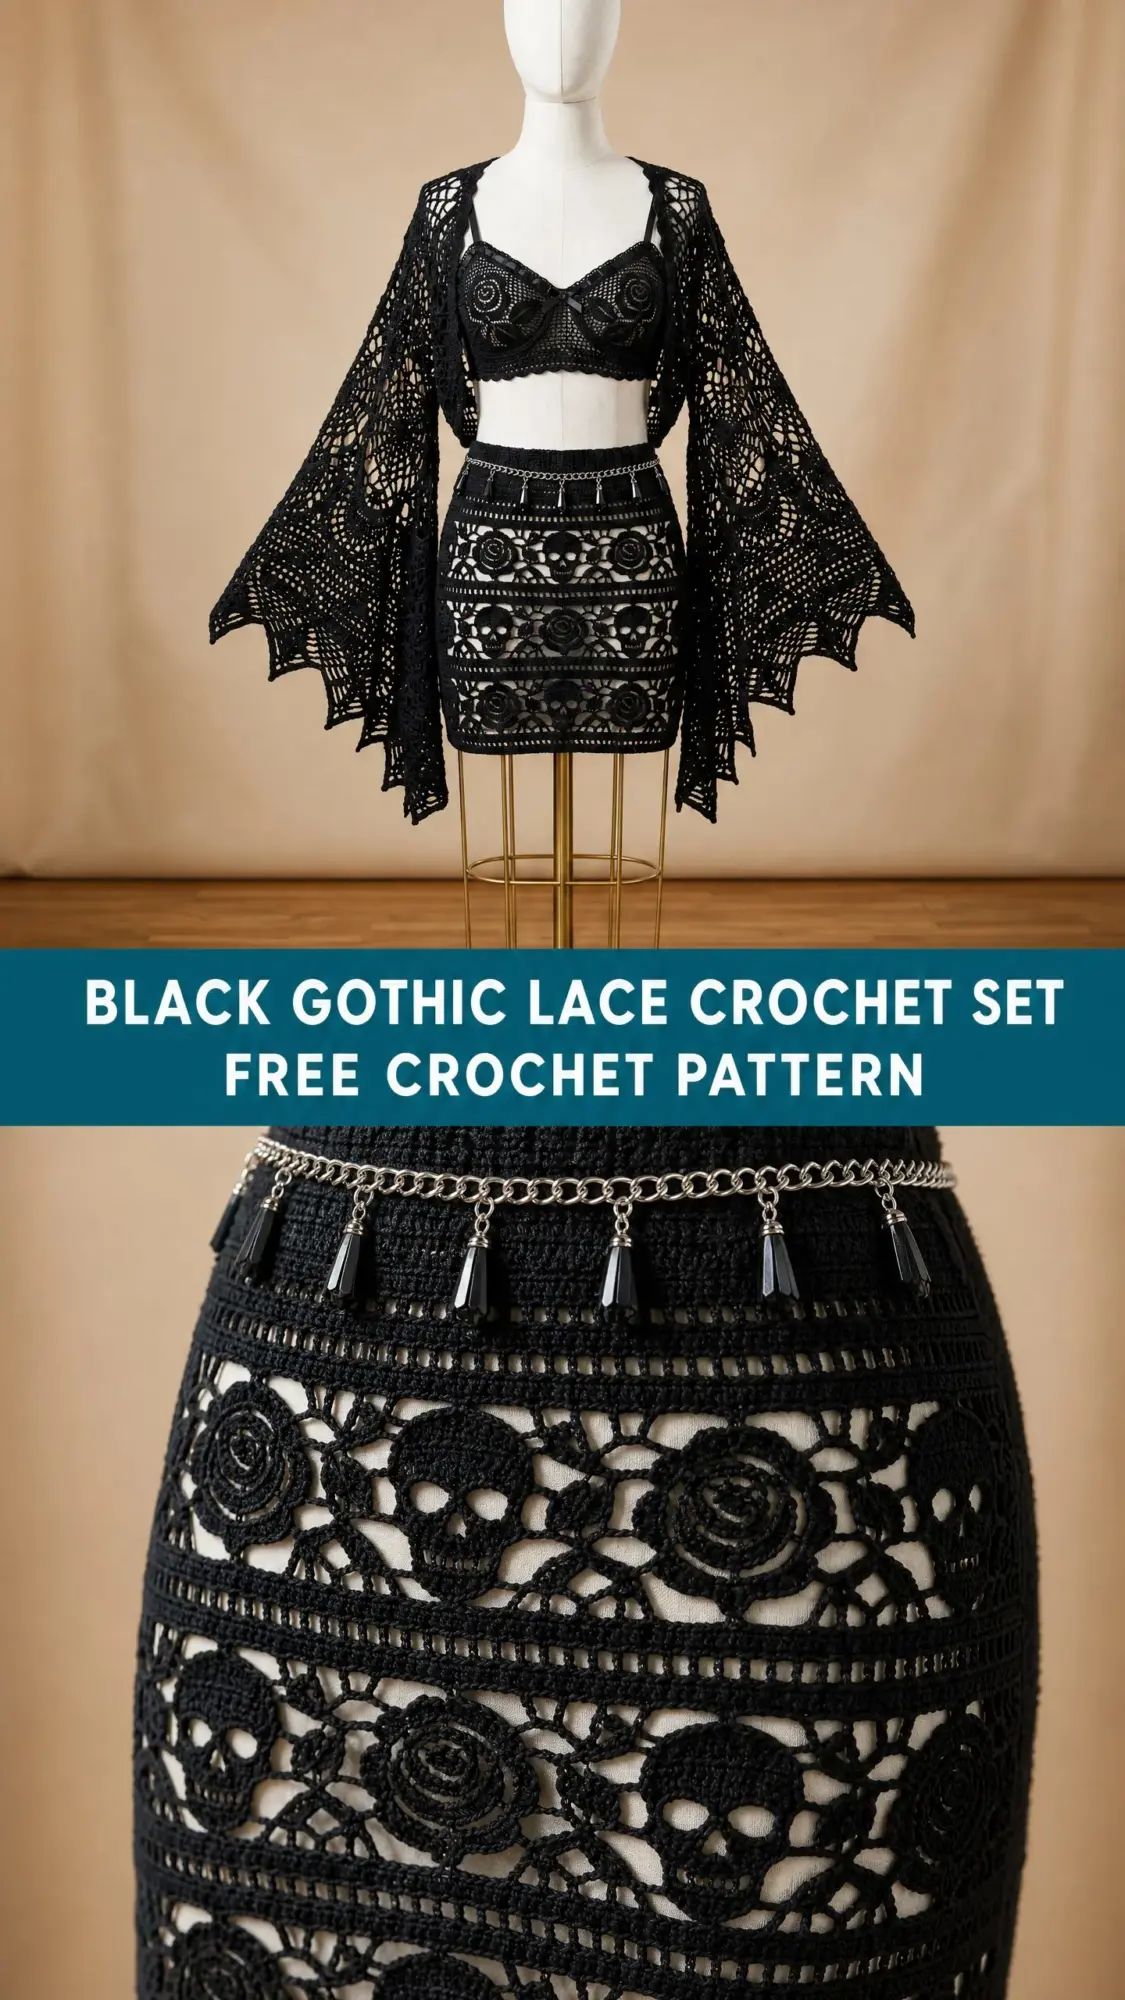
This pattern breaks down into manageable pieces. The bralette uses basic increasing in the round. The skirt is worked as a simple tube with decorative bands. The kimono is flat panels seamed together. None of these techniques are scary on their own. Put them together, and you get something that looks like it belongs in a high-end boutique.
Whether you’re an adventurous intermediate crafter ready to level up or an experienced lacemaker looking for your next showstopper project, this pattern meets you where you are. I’ll walk you through every stitch, every motif, and every joining technique. Let’s demystify this gorgeous gothic set together.
About This Black Gothic Lace Crochet Set Pattern
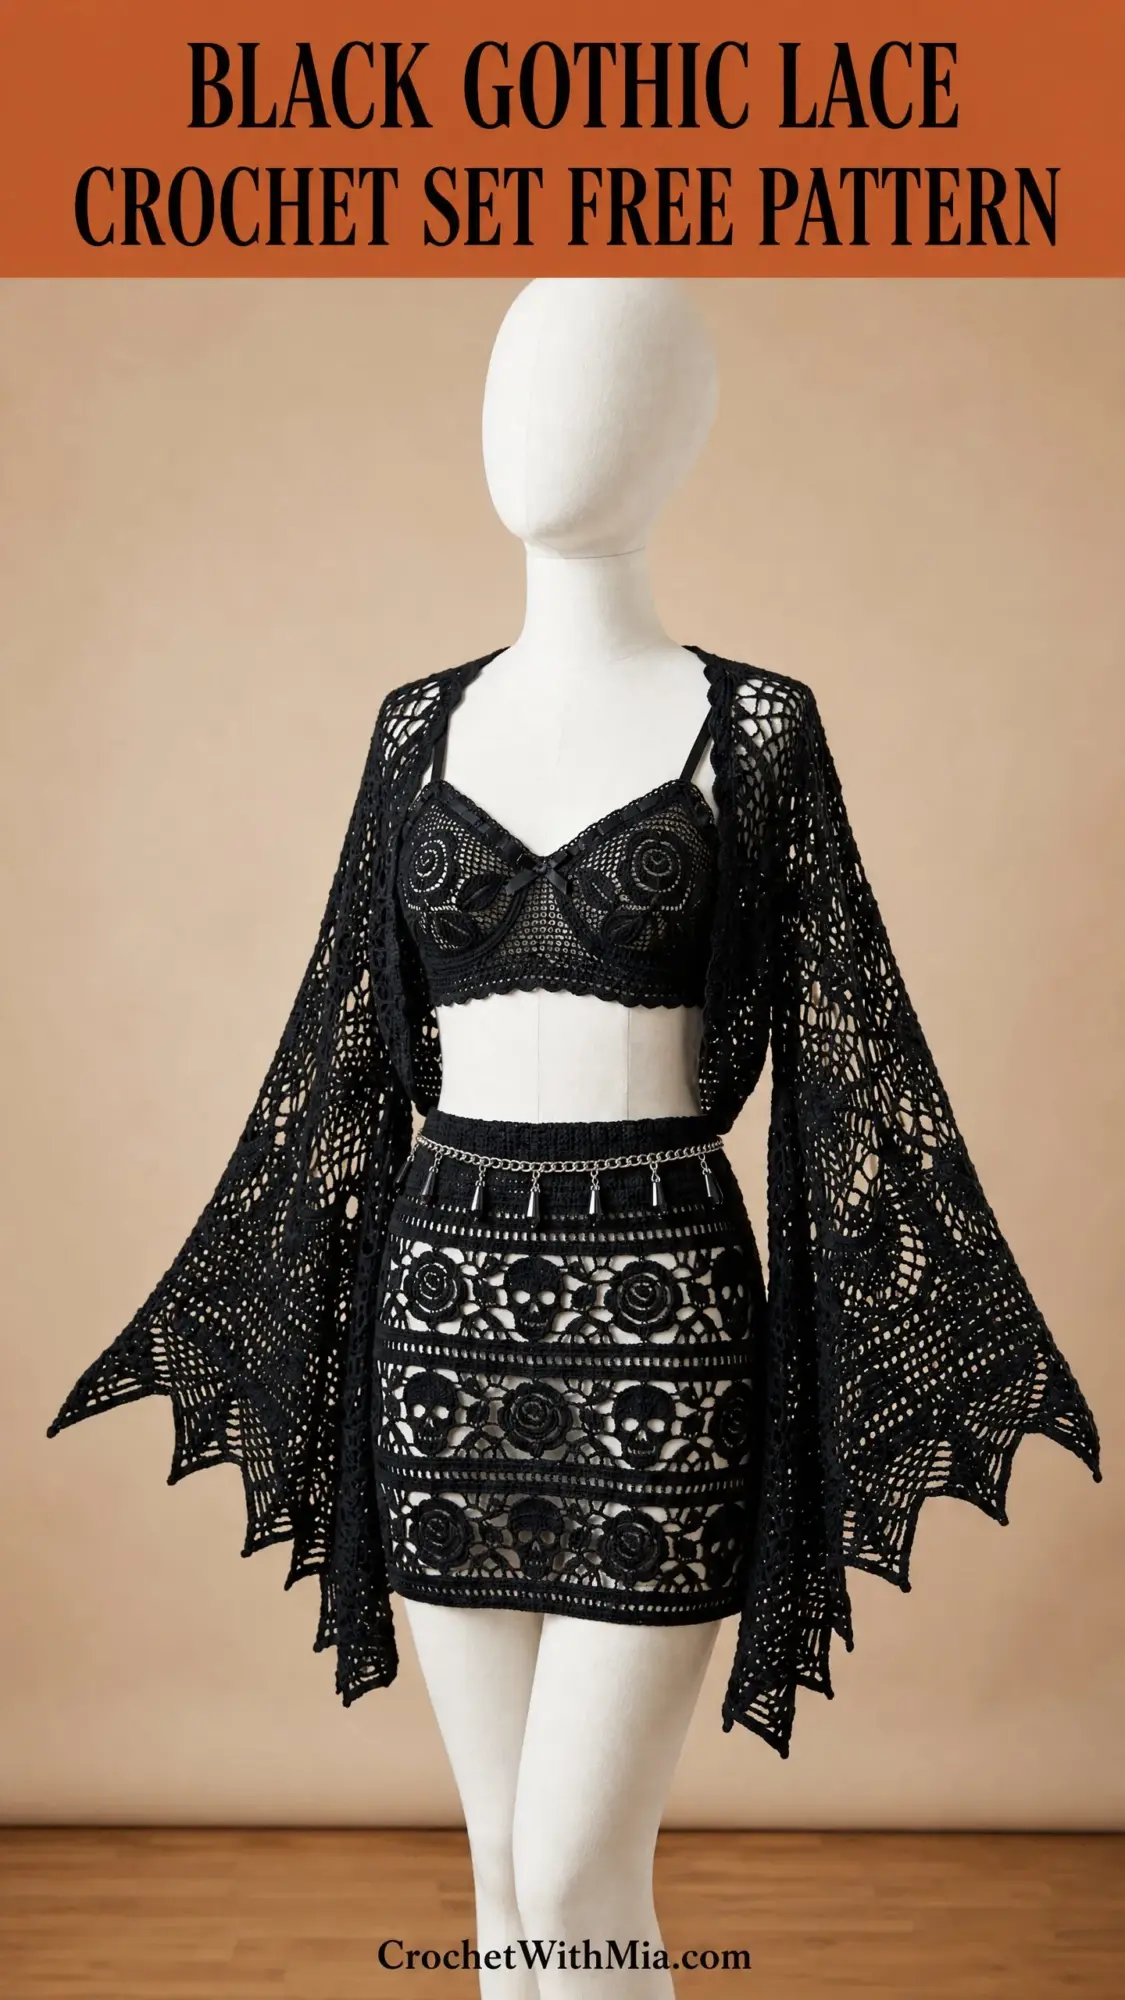
This three-piece set includes a structured bralette top, a fitted mini skirt with skull and rose motif bands, and an open-front kimono cardigan with dramatically flared bat-wing sleeves. All pieces are worked in black cotton crochet thread, creating an intricate openwork fabric that evokes Victorian mourning lace.
The bralette features crocheted rose appliques at the cups and accommodates underwire for support. The skirt uses tapestry-style rows that alternate skulls and roses against an openwork mesh background. The kimono showcases large geometric lace medallions with sleeves that taper into pointed bat-wing extensions at the cuffs. A silver chain with drop pendants accents the skirt waistband for extra drama.
Skill Level: Advanced. You’ll need proficiency in reading lace charts, working three-dimensional motifs like roses and skulls, constructing large flat lace medallions, and applying shaped edgings. Don’t let that scare you though. Take it one section at a time.
Time Estimate:
Finished Measurements
All measurements are given for size Small (Medium, Large). Adjust your yarn quantity and gauge swatch accordingly.
Bralette:
Mini Skirt:
Bat-Wing Kimono Cardigan:
Materials Needed for This Crochet Pattern
Yarn:
Fine lace-weight or size 10 crochet cotton thread in black
Total yardage needed: approximately 4,200 yd / 3,840 m for the full set
Yarn Suggestions:
Option 1: Aunt Lydia’s Classic Crochet Thread Size 10, Black (100% mercerized cotton, 350 yd / 320 m per ball). This is the most widely available option and produces the tight stitch definition necessary for skull and rose motifs. You will need approximately 12 balls for the full set.
Option 2: Lizbeth Crochet Thread Size 10 by Handy Hands, Jet Black (100% Egyptian cotton, 122 yd / 112 m per ball). Higher sheen and slightly smoother hand. Produces excellent stitch definition. You will need approximately 35 balls for the full set.
Option 3: DMC Petra Crochet Cotton Size 3, Black (100% combed cotton, 306 yd / 280 m per ball). Slightly thicker than size 10 thread, this option produces a denser, more structured fabric appropriate for the skirt and bralette. If using DMC Petra Size 3, adjust to a US Steel Hook Size 2 / 2.20 mm and re-swatch for gauge. You will need approximately 14 balls for the full set.
Important: Avoid fuzzy or textured threads. The skull and rose motifs require crisp stitch definition. Do not substitute with acrylic fingering weight yarn. The drape and sheen of mercerized cotton are integral to the final appearance.
Hooks:
Adjust hook size to match gauge.
Notions:
Gauge
Using US Steel Hook Size 7 / 1.65 mm and size 10 crochet cotton:
Using US Steel Hook Size 5 / 1.90 mm and size 10 crochet cotton:
Gauge is critical for fit. Work a gauge swatch of at least 6 in x 6 in / 15 cm x 15 cm and block before beginning. Do not skip this step.
Abbreviations and Stitch Definitions
beg = beginning
bl = back loop only (working into only the back loop of a stitch instead of both loops)
BPdc = back post double crochet (working around the post of a stitch from back to front)
ch = chain (a foundation stitch created by pulling yarn through a loop)
ch-sp = chain space (the gap created by chain stitches in previous rows)
dc = double crochet (yarn over, insert hook, pull up loop, yarn over and pull through 2 loops twice)
dc2tog = double crochet two together (a decrease that joins 2 stitches into 1)
dtr = double treble crochet (yarn over 3 times before inserting hook)
FPdc = front post double crochet (working around the post of a stitch from front to back)
hdc = half double crochet (yarn over, insert hook, pull up loop, yarn over and pull through all 3 loops)
inc = increase (work 2 stitches in same stitch)
MR = magic ring (an adjustable starting ring for working in the round)
rep = repeat
rnd = round
RS = right side
sc = single crochet (insert hook, pull up loop, yarn over and pull through both loops)
sk = skip
sl st = slip stitch (insert hook, pull loop through stitch and loop on hook in one motion)
sp = space
st(s) = stitch(es)
tr = treble crochet (yarn over twice before inserting hook)
WS = wrong side
yo = yarn over
Special Stitches for This Gothic Lace Crochet Set
Picot: Chain 3, slip stitch in 3rd chain from hook. This creates a small decorative bump.
Shell: Work 5 double crochet in same stitch or space. This creates a fan-shaped shell.
V-Stitch (V-st): Work (dc, ch 2, dc) all in same stitch or space. This creates a V shape with a chain space in the center.
Popcorn (pc): Work 5 dc in same stitch. Remove hook from loop. Insert hook in first dc of the 5-dc group from front to back. Reinsert hook in dropped loop. Pull dropped loop through to close popcorn. Chain 1 to lock if needed to secure. This creates a raised, textured bump.
Bobble (bob): Yarn over, insert hook in stitch, yarn over and pull up loop, yarn over and draw through 2 loops (2 loops remain on hook). Repeat this sequence 4 more times in the same stitch (6 loops on hook). Yarn over and draw through all 6 loops. Chain 1 to close.
Rose Petal Stitch: In designated ring or chain space: (sc, hdc, 3 dc, hdc, sc) all in same space. This forms one rounded petal.
BatWing Point Edging:
Row 1 of edging: Join yarn at corner. Ch 4 (counts as tr). Work tr in next st. Ch 3. Tr in same st. [Sk 2 sts. (Tr, ch 3, tr) in next st.] Repeat to end. Turn.
Row 2 of edging: Sl st to ch-3 sp. Ch 4. (2 tr, ch 3, 3 tr) in same sp. [Sk next sp. (3 tr, ch 3, 3 tr) in next sp.] Repeat to end. Turn.
Row 3 of edging: Sl st to ch-3 sp. Ch 1. Sc in same sp. Ch 5. [Sc in next ch-3 sp. Ch 5.] Repeat to end. Turn.
Row 4 of edging: In each ch-5 sp: (sc, hdc, dc, tr, dtr, tr, dc, hdc, sc). This produces a deep pointed spike for each repeat. Fasten off.
Pattern Notes Before You Begin
1. All pieces are designed for US size Small. Instructions for Medium and Large are given in parentheses where stitch counts differ: Small (Medium, Large).
2. The bralette is worked flat in two cup sections, then joined at center front, with a band worked in the round.
3. The skirt is worked in the round from the waist down. A chain foundation is joined to form a tube. Waistband elastic is inserted at the end.
4. The kimono cardigan is worked flat, constructed in large lace panels that are seamed. The two front panels, back panel, and sleeves are worked separately and joined. The bat-wing edging is applied last.
5. Check your gauge after every 6 inches of work and adjust tension if necessary. Lace work can loosen significantly after blocking.
6. Block each piece aggressively to open the lace. Pin to measurements and mist with water or steam.
7. When working the skull motif rows, carry tension carefully. Each open space (sk 1 st, ch 1) must be consistent in size or the skull shape will distort.
8. The chain belt with charms is purely decorative and not crocheted. Source a pre-made chain and attach charms as desired.
9. The bra underwire casing is sewn by hand after blocking using the long yarn tails left at cup base.
10. Turning chain counts:
Rose Motif Instructions (Three-Dimensional Applique)
Make 3 roses for bralette (one per cup center plus one small accent) and 6 roses for skirt band.
Rnd 1: MR. Ch 1. Work 10 sc in ring. Join with sl st to first sc. Pull ring closed. (10 sc)
Rnd 2: Ch 1. [Sc in next st, ch 2] 10 times. Join with sl st to first sc. (10 sc, 10 ch-2 sps)
Rnd 3 (first petal layer): In each ch-2 sp: work (sc, hdc, 3 dc, hdc, sc). Join with sl st. (10 petals made)
Rnd 4: Working behind Rnd 3 petals, sl st to back loop of sc in Rnd 2. Ch 1. [Sc in back loop of Rnd 2 sc, ch 3] 10 times. Join. (10 ch-3 sps)
Rnd 5 (second petal layer): In each ch-3 sp: work (sc, hdc, 5 dc, hdc, sc). Join. (10 larger petals)
Rnd 6: Working behind Rnd 5 petals, sl st to back loop of Rnd 4 sc. Ch 1. [Sc in back loop, ch 4] 10 times. Join. (10 ch-4 sps)
Rnd 7 (third petal layer, outermost): In each ch-4 sp: work (sc, hdc, dc, 3 tr, dc, hdc, sc). Join. (10 large petals)
Fasten off, leaving a 12-inch tail for sewing. The finished rose measures approximately 1.75 in / 4.5 cm in diameter with three tiers of petals creating a rounded, dimensional flower.
Skull Motif Chart (Row-by-Row Description)
Each skull repeat is 18 stitches. For clarity, O = open (ch-1 sp with sk 1 st), X = solid dc.
Skull Row 1 (base jaw): O X X O X X X X X X O X X O O O O O
Skull Row 2 (teeth): X O X X O O X X O O X X O X O O O O
Skull Row 3 (jaw close): O X X X X X X X X X X X X X X X O O
Skull Row 4 (neck thin): O O X X X X X X X X X X X X O O O O
Skull Row 5 (chin): O O O X X X X X X X X X O O O O O O
Skull Row 6 (lower cranium): O O X X X X X X X X X X X X O O O O
Skull Row 7 (eye row 1): O X X X X O O X X O O X X X X X O O
Skull Row 8 (eye row 2): O X X X O O O O X O O O O X X X O O
Skull Row 9 (eye row 3): O X X X O O O O X O O O O X X X O O
Skull Row 10 (brow): O X X X X O O X X O O X X X X X O O
Skull Row 11 (upper cranium 1): O O X X X X X X X X X X X X O O O O
Skull Row 12 (upper cranium 2): O O O X X X X X X X X X O O O O O O
Skull Row 13 (crown taper): O O O O X X X X X X O O O O O O O O
Skull Row 14 (crown peak): O O O O O X X X X O O O O O O O O O
This chart produces a readable skull silhouette when worked in single black thread against the open mesh background. Each O space reads as negative (light) space and each X reads as positive (filled) space in the finished fabric.
Bralette Instructions
Bralette Left Cup
Foundation: Ch 4. Join with sl st to form ring (or use MR).
Rnd 1 (RS): Ch 3 (counts as dc). Work 11 dc in ring. Join with sl st to top of ch-3. (12 dc)
Rnd 2: Ch 3. Dc in same st. 2 dc in each st around. Join. (24 dc)
Rnd 3: Ch 3. Dc in same st. [Dc in next st. 2 dc in next st.] 11 times. Dc in last st. Join. (36 dc)
Rnd 4: Ch 3. Dc in same st. [Dc in next 2 sts. 2 dc in next st.] 11 times. Dc in last 2 sts. Join. (48 dc)
Rnd 5: Ch 3. [V-st in next st. Sk 1 st. Dc in next st.] 15 times. V-st in next st. Sk 1 st. Join with sl st to top of ch-3. (16 V-sts, 16 dc)
From Rnd 5 onward, the cup transitions from solid dc increasing to an openwork mesh structure.
Rnd 6: Sl st to ch-2 sp of first V-st. Ch 3. Dc in same sp. Ch 1. [2 dc in next V-st ch-2 sp. Ch 1.] 15 times. Join. (32 dc, 16 ch-1 sps)
Rnd 7: Ch 3. Dc in next dc. Ch 1. Sk ch-1 sp. [Dc in next 2 dc. Ch 1. Sk ch-1 sp.] 15 times. Join. (32 dc, 16 ch-1 sps)
Rnd 8: Rep Rnd 7. (32 dc, 16 ch-1 sps)
Now begin shaping the top cup edge. The cup is worked flat in rows to create the sweetheart cup shape.
Row 9 (RS): Ch 3. Turn. Dc in next 23 sts and sps (treating each ch-1 sp as 1 st). Leave rem 24 sts unworked. (24 dc)
Row 10 (WS): Ch 3. Turn. Dc across. (24 dc)
Row 11: Ch 3. Turn. Dc2tog over first 2 sts. Dc across to last 3 sts. Dc2tog. Dc in last st. (22 dc)
Row 12: Ch 3. Turn. Dc2tog. Dc to last 3 sts. Dc2tog. Dc. (20 dc)
Row 13: Ch 3. Turn. Dc2tog. Dc to last 3 sts. Dc2tog. Dc. (18 dc)
Row 14: Ch 3. Turn. Dc across. (18 dc)
Row 15: Ch 3. Turn. V-st in 3rd st. [Sk 2 sts. V-st in next st.] 4 times. Sk 2 sts. Dc in last st. (6 V-sts, 2 dc)
Row 16: Ch 3. Turn. [2 dc in V-st sp. Ch 1.] 6 times. Dc in top of ch-3. (13 dc, 6 ch-1 sps)
Row 17 (top cup edge): Ch 1. Turn. Sc across all sts and sps. (18 sc)
Fasten off. Left cup complete. Set aside.
Bralette Right Cup
Work exactly as Left Cup through Row 17. Fasten off. Set aside.
Joining Cups and Working Center Front
With RS facing, hold both cups so that the Row 17 edges (top of cups) will eventually be the top edge of the bralette, and the original ring centers are the cup centers. Place cups side by side with a gap of 8 (9, 10) stitches between them at center front.
Foundation Row (joining): With new yarn, ch 97 (103, 109).
Row 1 of band base: Dc in 4th ch from hook and in each ch across. (95 dc, 101 dc, 107 dc)
Seam cups to band: working along the lower curved edge of each cup (the side stitches of Rnds 1 through 8), sl st the cup lower edge evenly to the top edge of the band base, placing the cups centered on the band with equal spacing. Left cup attaches to sts 20 through 46 (of 95 total) for Small. Right cup attaches to sts 50 through 76. Adjust spacing proportionally for Medium and Large.
Bralette Band (worked in the round)
After cups are attached, pick up and work around the entire bralette circumference.
Setup Rnd: Join yarn at right side edge of band. Ch 1. Sc evenly around entire lower and side perimeter of band, placing 2 sc at each corner to turn. Join with sl st. Count sts and adjust to nearest multiple of 6 plus 3 for pattern alignment. Target: 168 sc (180, 192).
Rnd 1: Ch 3. [Dc in next 2 sts. Ch 1. Sk 1 st.] across, ending dc in last 2 sts. Join. (112 dc, 56 ch-1 sps for Small) (168 sts total)
Rnd 2: Ch 3. [Dc in next dc. Ch 1. Sk ch-1 sp. Dc in next dc.] repeat to end. Join. (168 sts)
Rnd 3: Rep Rnd 2. (168 sts)
Rnd 4 (elastic casing preparation): Ch 1. Sc in each st and ch-sp around. Join. (168 sc)
Rnd 5: Ch 1. Working in back loops only, sc around. Join. (168 sc)
Rnd 6: Ch 1. Sc around. Join. (168 sc)
Rnd 7: Ch 1. Sc around. Join. (168 sc)
Rnd 8 (casing fold): Fold Rnds 4 through 8 to WS along the back-loop ridge of Rnd 5. Sl st through both layers of Rnd 8 (current) and corresponding sts of Rnd 3 (the last open rnd), leaving a 3-inch opening to insert elastic. Insert elastic, overlap ends by 1 in / 2.5 cm and sew securely. Close opening with sl st. Fasten off.
Bralette Top Edge and Strap Loops
Join yarn at top right cup corner.
Row 1: Ch 1. Sc evenly across the top edge of both cups and the center front gap. Approximate sc count: 72 sc across both cups and center, with center dip naturally curved. (72 sc)
Work 2 more rows of sc. On Row 3, at each desired strap position (2 sts in from outer cup edge), ch 20 for strap loop. Skip 2 sts. Sc in next st. Continue sc to next strap position. Rep strap loop. Fasten off.
Thread adjustable bra strap hardware through strap loops as desired.
Bralette Checkpoint: After completing both cups and the band, the bralette should measure approximately 7 in / 17.8 cm from band base to cup top center, and the band should measure the correct circumference for your size.
Sew crocheted rose appliques to cup centers. Hand-stitch underwire casing below each cup along the joining seam.
Mini Skirt Instructions
The skirt is worked in the round from waist to hem. It begins with a waistband, then progresses through alternating bands: a rose mesh band, a skull motif band, a rose mesh band, a larger skull motif band, and finishes with a decorative lace hem edging.
Waistband
Foundation: Ch 156 (168, 180). Join with sl st, being careful not to twist. (156, 168, 180 ch)
Rnd 1: Ch 1. Sc in each ch around. Join. (156 sc, 168 sc, 180 sc)
Rnds 2 through 4: Ch 1. Sc around. Join. (156, 168, 180)
Rnd 5 (turning ridge for fold): Ch 1. Working in back loops only, sc around. Join. (156, 168, 180)
Rnds 6 through 8: Ch 1. Sc around. Join. Fold waistband to WS on Rnd 5 ridge to create casing. Do not close yet; insert elastic at end.
Upper Body of Skirt (transition to mesh)
Rnd 9: Ch 3 (counts as dc). Dc in each sc around. Join. (156, 168, 180 dc)
Rnd 10: Ch 3. [Dc in next 2 dc. Ch 1. Sk 1 dc.] rep to last 0 (0, 0) sts. Join. For Small: 104 dc, 52 ch-1 sps = 156. For Medium: 112 dc, 56 ch-1 sps = 168. For Large: 120 dc, 60 ch-1 sps = 180.
Rnd 11: Ch 3. [Dc in next dc. Ch 1. Sk ch-1 sp. Dc in next dc. Ch 1. Sk next dc.] rep to end. Join. (156, 168, 180)
Rnd 12: Rep Rnd 11. (156, 168, 180)
Rose Mesh Band (Rnds 13 through 18)
Rnd 13: Ch 3. [V-st in next ch-sp. Sk 2 sts. Dc in next st.] rep to end. Join. (52 V-sts, 52 dc for Small) (156 sts)
Rnd 14: Sl st to V-st ch-2 sp. Ch 3. Dc in same sp. Ch 2. [2 dc in next V-st sp. Ch 2.] rep to end. Join. (104 dc, 52 ch-2 sps) (156 sts)
Rnd 15: Ch 3. Dc in next dc. Ch 2. [Dc in next 2 dc. Ch 2.] rep to end. Join. (156 sts)
Rnd 16: Ch 3. Dc in next dc. Shell in ch-2 sp. Dc in next 2 dc. [Shell in next ch-2 sp. Dc in next 2 dc.] rep to end, omitting final 2 dc at end since they were the starting dc. Join to top of ch-3. (52 shells x 5 dc = 260 dc total for shell sts)
Rnd 17: Ch 3. Sk first 3 dc of shell. Sc in 3rd (center) dc of shell. Ch 5. [Sk rem 2 dc of shell and next 2 anchor dc. Sc in 3rd dc of next shell. Ch 5.] rep to end. Join with sl st to base of ch-3. (52 ch-5 sps, 52 sc)
Rnd 18: In each ch-5 sp: work (sc, hdc, dc, popcorn, dc, hdc, sc). Join. (52 popcorn flower clusters) (364 sts total approximately)
Transition Mesh (Rnds 19 through 21)
Rnd 19: Ch 3. [Dc3tog over cluster (treating each cluster as 3 sts), ch 1] rep to end. Adjust to 156 dc total by working increases or decreases as needed to return to base count. Target: (156, 168, 180 dc)
Rnd 20: Ch 3. Dc in each st and ch-sp around. Join. (156, 168, 180)
Rnd 21: Begin hip shaping increase. Ch 3. [Dc in next 12 sts. 2 dc in next st.] 12 times for Small. Join. (168 dc) (Medium: [dc in next 13 sts. 2 dc in next st.] 12 times = 180. Large: [dc in next 14 sts. 2 dc in next st.] 12 times = 192.)
Skull Band (Rnds 22 through 35)
The skull band uses the chart described in the Skull Motif Chart section. Each skull repeat is 18 sts wide. For Small: use 28-st groupings where each includes the 18-st skull plus 10 sts of mesh framing (5 sts on each side). Repeat 6 times for Small (6 x 28 = 168 sts).
Skull Band Setup Rnd 22: Ch 3. Dc around. (168, 180, 192)
Work Skull Rows 1 through 14 from the chart, translating X = dc and O = (ch 1, sk 1 dc), working each row as a round.
Continue the skirt by working additional rose mesh bands and skull bands as desired to reach the 14-inch length, finishing with a decorative lace hem edging using the BatWing Point Edging technique.
Insert waistband elastic through the casing, overlap ends by 1 inch, and sew securely. Close the opening.
Finishing All Pieces
Blocking: This step is essential. Wet block all pieces by soaking in lukewarm water for 15 minutes. Gently squeeze out excess water (do not wring). Pin each piece to blocking mats, stretching to finished measurements. Allow to dry completely before unpinning.
Weaving Ends: Use a tapestry needle to weave in all yarn tails securely. Work through several stitches in different directions to prevent unraveling.
Adding the Chain Belt: Thread your decorative chain through the loops at the skirt waistband. Attach dagger or tassel charms evenly spaced along the chain.
Attaching Roses: Sew the crocheted roses to the bralette cups and skirt band as shown in the reference images, using the long tails left during construction.
Tips for Success with This Crochet Pattern
Take breaks. This is a marathon, not a sprint. Breaking the project into sessions keeps your tension consistent and your enthusiasm high.
Count your stitches. Especially during the skull motif rows, counting after each round catches mistakes early.
**Use