
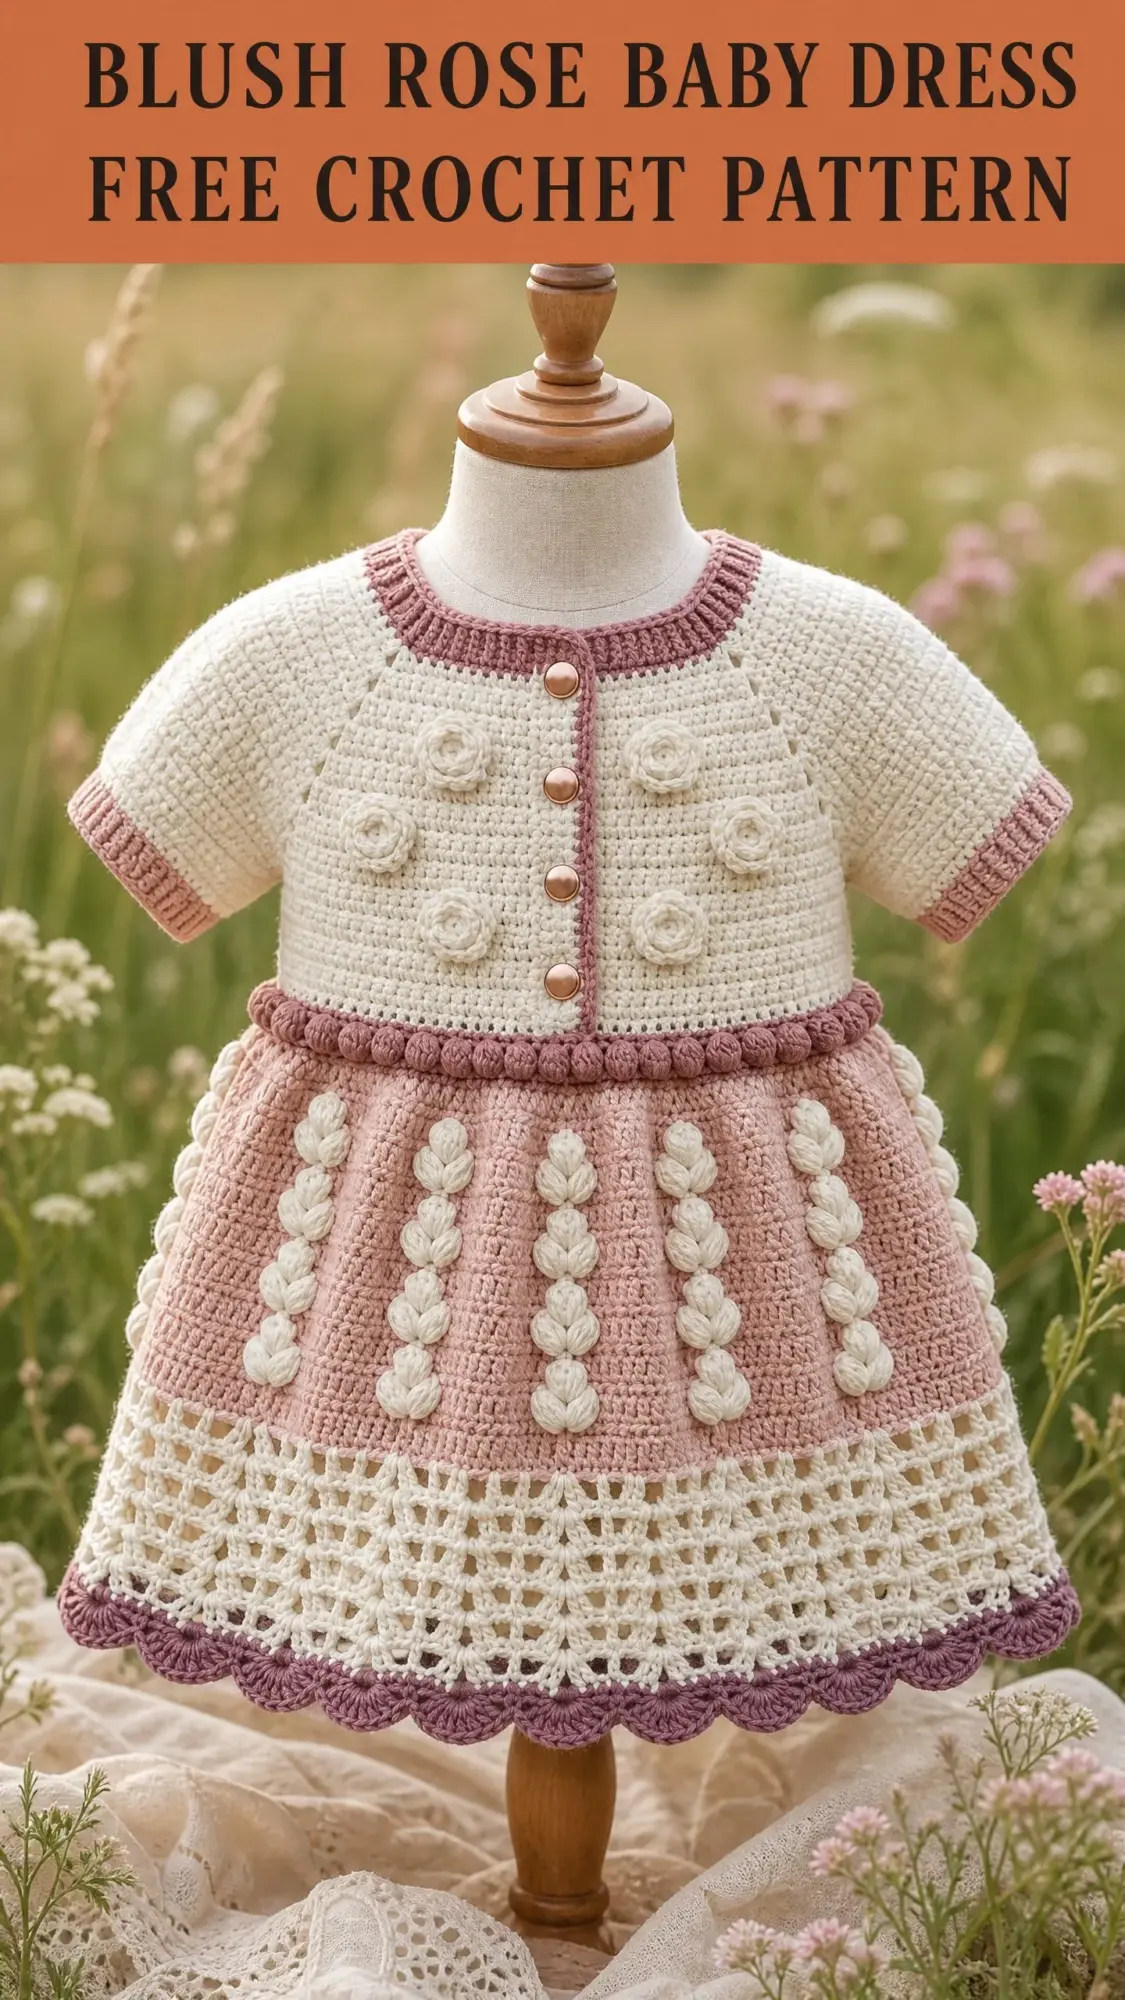
This is a top-down baby dress with raglan shaping, a button-front bodice, and a flared skirt. It uses basic stitches like single crochet, half double crochet, and double crochet, plus a few special techniques that are fully explained. You will work the bodice flat in rows, then join for a circular skirt with raised leaf clusters and a scalloped hem.
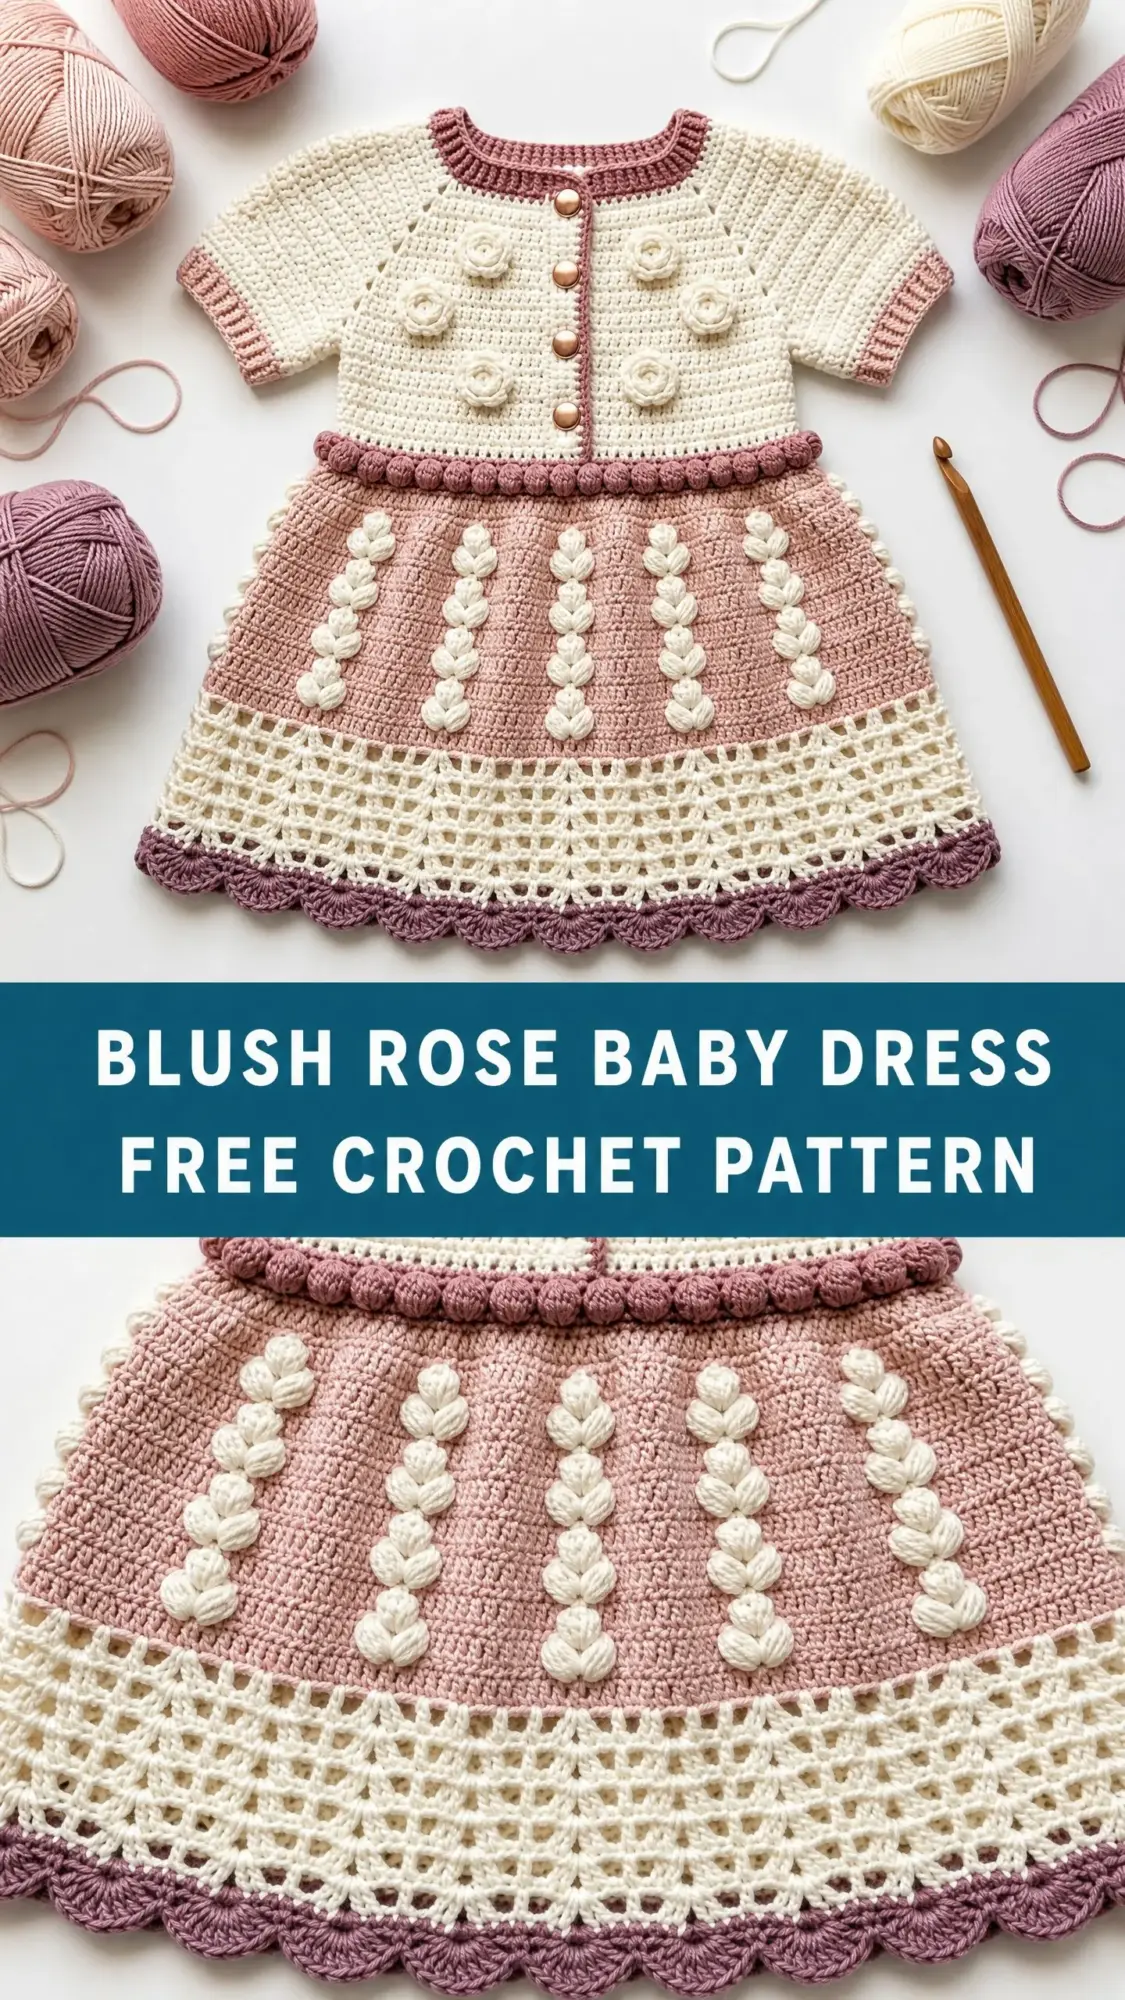
The finished piece looks intricate, but the construction is straightforward once you understand the sections. The bodice comes first, then sleeves, then a bobble waist band, and finally the skirt with its decorative elements.
Four sizes are included, from 3-6 months up to 18-24 months. The pattern works up in worsted weight yarn with a 4.0 mm hook, and the whole project takes roughly 12 to 18 hours depending on your pace.
Why This Baby Dress Pattern Works So Well
I love this design because it combines classic techniques with modern construction. The raglan shaping creates a comfortable fit across the shoulders. The top-down approach means you can try the dress on as you go, which is helpful when making gifts for little ones who seem to grow overnight.
The color palette uses three shades: Cream for the bodice (referred to as MC or Main Color), Dusty Rose for the skirt and accents (CC1 or Contrast Color 1), and Mauve for the scalloped edging (CC2 or Contrast Color 2). These soft, blush tones give the dress its vintage, heirloom quality.
The standout features include:
Materials You Will Need
Yarn: Worsted weight yarn (weight category 4)
| Color | Size 3-6 mo | Size 6-12 mo | Size 12-18 mo | Size 18-24 mo |
|---|---|---|---|---|
| MC (Cream) | 200 yards | 220 yards | 250 yards | 280 yards |
| CC1 (Dusty Rose) | 160 yards | 180 yards | 210 yards | 250 yards |
| CC2 (Mauve) | 40 yards | 50 yards | 60 yards | 70 yards |
| Total | 400 yards | 450 yards | 520 yards | 600 yards |
Hook: US size G-6 / 4.0 mm crochet hook
Notions:
Yarn Suggestions
Paintbox Yarns Simply DK works beautifully for this project. Use Champagne White for MC, Rose Pink for CC1, and Wisteria Purple for CC2. Note that this is a DK weight yarn, so you may need to size up to a US H-8 / 5.0 mm hook to match gauge.
Lion Brand Pound of Love is a budget-friendly option that matches gauge well with the G-6 hook. It is machine washable and baby-safe.
Paintbox Yarns Cotton DK is ideal for warmer climates. Cotton gives crisp stitch definition, though your tension may be slightly firmer.
Avoid fuzzy or textured yarns. They will obscure the beautiful leaf clusters and rose details.
Finished Sizes
| Size | Chest | Length |
|---|---|---|
| 3-6 months | 16 in / 40.5 cm | 12.5 in / 31.75 cm |
| 6-12 months | 18 in / 45.75 cm | 14 in / 35.5 cm |
| 12-18 months | 20 in / 51 cm | 15.5 in / 39.5 cm |
| 18-24 months | 22 in / 56 cm | 17 in / 43 cm |
Throughout this pattern, instructions are written for size 3-6 months. Larger sizes appear in parentheses in this order: (6-12 months, 12-18 months, 18-24 months). When only one number appears, it applies to all sizes.
Gauge
18 sc x 22 rows = 4 in / 10 cm in single crochet, worked flat with MC, blocked.
16 dc x 10 rows = 4 in / 10 cm in double crochet, worked flat with MC, blocked.
Gauge matters a lot for a fitted garment like this. Make a 6 inch swatch, wash and block it, then measure the center 4 inches. If your stitches are too big, go down a hook size. If they are too small, go up a hook size.
Abbreviations
Here are all the abbreviations you will encounter, with definitions:
Special Stitches for the Baby Dress Crochet Pattern
These techniques may be new to you, but each one is broken down step by step.
Bobble Stitch (bo)
This creates a textured bump that pops out from the fabric.
1. Yarn over, insert hook in stitch, pull up a loop
2. Yarn over, pull through 2 loops (2 loops remain on hook)
3. Repeat steps 1-2 four more times in the same stitch (6 loops now on hook)
4. Yarn over and pull through all 6 loops
5. Push the bobble to the right side of your work
One bobble made.
Leaf Cluster (LC)
This stitch creates a raised petal-like cluster that sits on top of the fabric. It gives the skirt its distinctive vertical pattern.
1. Insert hook in stitch, pull up a loop to approximately 1/2 inch height
2. Insert hook in the same stitch again, pull up a second tall loop
3. Insert hook in the same stitch a third time, pull up a third tall loop
4. You now have 7 loops on your hook (original loop plus 6 pulled-up loops)
5. Yarn over and pull through all 7 loops
6. Chain 1 to close and secure the cluster
One leaf cluster made. This stitch sits on the right side of the fabric.
Crocheted Rose Applique
With MC, chain 16.
Row 1 (RS): Working in the back bump of the chain, sc in 2nd ch from hook and each ch across. (15 sc)
Fasten off, leaving a long tail. Roll the strip tightly from one end to form a rose shape. Use the tail to stitch through the base several times to secure. The rose should be approximately 3/4 inch in diameter.
Make 6 (6, 8, 8) roses total.
Fan Edging
Shell = (dc, ch 1, dc, ch 1, dc) all in same stitch. This is used in the hem section.
Ribbing
Row 1: Sc in BLO (back loop only) of each st across.
Repeat this row for all ribbing sections. Working in BLO creates a stretchy ribbed texture.
Important Pattern Notes
Read these before you begin. They will save you confusion later.
Stitch markers are placed at raglan points during bodice shaping. Move markers up each row as indicated.
Color changes: When changing color, complete the last stitch of the old color until 2 loops remain, then pull the new color through both loops to complete the stitch.
Turning chain counts: In sc rows, ch 1 turns do not count as a stitch. In dc rows, ch 3 turns count as the first dc.
Crochet Pattern Instructions
Section 1: Neckline Ribbing
With MC and US G-6 hook, ch 9.
Row 1 (RS): Sc in 2nd ch from hook and in each ch across. Turn. (8 sc)
Row 2: Ch 1, sc in BLO of each st across. Turn. (8 sc)
Repeat Row 2 until ribbing measures 12 (13.5, 15, 16.5) in / 30.5 (34.25, 38, 42) cm.
Do not fasten off.
Rotate the ribbing 90 degrees so the long edge is at the top. Working along the long edge of the ribbing, sc evenly across picking up one stitch per row end. You should have 54 (61, 67, 74) sc. If your count is slightly off, adjust by skipping or adding one stitch. Turn.
Neckline Setup Row
Row 1 (WS): Ch 1, sc across all 54 (61, 67, 74) sts. Turn. (54, 61, 67, 74 sc)
Place stitch markers at the following positions to define raglan sections:
| Section | 3-6 mo | 6-12 mo | 12-18 mo | 18-24 mo |
|---|---|---|---|---|
| Right front | 10 sts | 11 sts | 12 sts | 14 sts |
| Right sleeve | 8 sts | 10 sts | 11 sts | 12 sts |
| Back | 18 sts | 19 sts | 21 sts | 22 sts |
| Left sleeve | 8 sts | 10 sts | 11 sts | 12 sts |
| Left front | 10 sts | 11 sts | 12 sts | 14 sts |
| Total | 54 sts | 61 sts | 67 sts | 74 sts |
Section 2: Bodice with Raglan Shaping
The bodice is worked in hdc (half double crochet) throughout for a smooth, dense fabric. The ch 2 at the beginning of each row does not count as a stitch.
Increase Row (RS): Ch 2, hdc in each st to 1 st before first raglan marker, 2 hdc in next st, sm, 2 hdc in next st, hdc across to 1 st before next raglan marker, 2 hdc in next st, sm, 2 hdc in next st, hdc across to 1 st before next raglan marker, 2 hdc in next st, sm, 2 hdc in next st, hdc across to 1 st before next raglan marker, 2 hdc in next st, sm, 2 hdc in next st, hdc to end. Turn.
Each Increase Row adds 8 stitches total (2 increases at each of the 4 raglan points).
Non-Increase Row (WS): Ch 2, hdc in each st across. Turn.
Work Increase Rows and Non-Increase Rows alternately:
| Size | Increase Rows | Non-Increase Rows |
|---|---|---|
| 3-6 months | 8 total | 7 total |
| 6-12 months | 9 total | 8 total |
| 12-18 months | 10 total | 9 total |
| 18-24 months | 11 total | 10 total |
Stitch count after all raglan increase rows:
Distribution after increases (for reference during separation):
Size 3-6 months: Right front 18, right sleeve 24, back 34, left sleeve 24, left front 18. Total 118.
Size 6-12 months: Right front 20, right sleeve 28, back 37, left sleeve 28, left front 20. Total 133.
Size 12-18 months: Right front 22, right sleeve 31, back 41, left sleeve 31, left front 22. Total 147.
Size 18-24 months: Right front 24, right sleeve 35, back 44, left sleeve 35, left front 24. Total 162.
Section 3: Sleeve Separation
On the next RS row, work across the right front section only, then place the right sleeve stitches on a holder (a length of waste yarn), chain 2 (this serves as the underarm), work across the back section, place the left sleeve stitches on a holder, chain 2 for underarm, work across the left front. Turn.
Stitch counts for body after separation (adding 2 ch at each underarm):
Continue working across all body stitches in hdc for 6 (7, 8, 9) more rows to complete the lower bodice.
Final bodice stitch counts:
CHECKPOINT: After the bodice section is complete, the piece should measure approximately 5.5 (6, 6.5, 7) in from the neckline ribbing to the lower bodice edge.
Section 4: Sleeves
Return to held sleeve stitches for one sleeve.
Rejoin MC at underarm edge of sleeve. Pick up and work 1 sc in each of the 2 underarm ch, then work across held sleeve sts, pick up 1 sc in each of the 2 underarm ch on the other side.
Sleeve stitch totals:
Join and work in continuous rounds.
Sleeve Round 1: Ch 2 (does not count as st), hdc in each st around, join with sl st to first hdc. (28, 32, 35, 39 hdc)
Work even in hdc for 3 (4, 5, 6) more rounds.
Decrease Round: Ch 2, hdc2tog, hdc to last 2 sts, hdc2tog, join.
Work 2 rounds even. Work one more Decrease Round.
Sleeve Cuff (worked in CC1):
Change to CC1. Work 3 rounds sc in BLO to create ribbed cuff texture.
Fasten off. Repeat for second sleeve.
CHECKPOINT: Each sleeve should measure approximately 3 (3.5, 4, 4.5) in from underarm to cuff edge.
Section 5: Waist Band (Bobble Trim)
With RS facing, rejoin CC1 at the lower right edge of the bodice.
Waist Setup Round: Join CC1, ch 1, sc evenly around the lower bodice edge, working 1 sc per stitch across the front and back. Join with sl st.
You will now join the work in the round and work the skirt from this point.
Working stitch count for the waist band join:
Adjusted waist stitch counts to nearest multiple of 3:
Bobble Band Round 1: Ch 1, sc in next 2 sts, bo in next st; rep from around, join with sl st. (75, 81, 90, 96 sts)
Bobble Band Round 2: Ch 1, sc in each st around, join with sl st. (75, 81, 90, 96 sts)
Fasten off CC1.
Section 6: Skirt
The skirt is worked in joined rounds using CC1 for the main rose-pink field, MC for the leaf clusters, and CC2 for the hem.
The skirt uses A-line shaping with increases worked every 4 rounds to create the flared silhouette.
SKIRT SETUP ROUND
Join CC1 at the waist band.
Round 1: Ch 3 (counts as first dc here and throughout skirt), dc in each st around, join with sl st to top of ch-3. (75, 81, 90, 96 dc)
Round 2: Ch 3, dc in each st around, join. (75, 81, 90, 96 dc)
Round 3: Ch 3, dc in each st around, join. (75, 81, 90, 96 dc)
Round 4 (Increase Round): Ch 3, dc in next 24 sts, 2 dc in next st; rep from 2 more times, dc to end, join. (78 dc for size 3-6 months)
Round 5: Ch 3, dc in each st around, join. (78 dc)
Round 6 (Leaf Cluster Round 1 of 3): Begin leaf clusters. With CC1 as background and MC for clusters, work as follows. Work in CC1: Ch 1, sc in first 8 sts. Drop CC1, pick up MC. Work LC in next st. Drop MC, pick up CC1. Sc in next 10 sts. LC in next st. Sc in next 10 sts. LC in next st. Sc in next 10 sts. LC in next st. Sc to end of round, join. (78 sts; 4 LC placed)
Round 7: Ch 3, dc in each st around (working dc over each LC as a regular stitch position), join. (78 dc)
Round 8 (Increase Round): Ch 3, dc in next 25 sts, 2 dc in next st; rep from 2 more times, dc to end, join. (81 dc)
Rounds 9-10: Ch 3, dc in each st around, join. (81 dc)
Round 11 (Leaf Cluster Round 2 of 3): Working same column positions as Round 6, work CC1 background with 4 MC leaf clusters, join. (81 sts)
Round 12 (Increase Round): Ch 3, dc in next 26 sts, 2 dc in next st; rep from 2 more times, dc to end, join. (84 dc)
Rounds 13-15: Ch 3, dc in each st around, join. (84 dc)
Round 16 (Increase Round): Ch 3, dc in next 27 sts, 2 dc in next st; rep from 2 more times, dc to end, join. (87 dc)
Round 17: Ch 3, dc in each st around, join. (87 dc)
Round 18 (Leaf Cluster Round 3 of 3): Work as Round 6 and Round 11, placing LC at same column positions (adjusted proportionally). (87 sts)
Rounds 19-20: Ch 3, dc in each st around, join. (87 dc)
Stitch counts for all sizes after all skirt increase rounds:
CHECKPOINT: After Round 20, the skirt should measure approximately 5.5 (6.5, 7.5, 8.5) in from the waist band.
Section 7: Lace Hem Band
Hem Round 1: Change to MC. For size 3-6 months, work sc2tog once at the start to bring count to 86 dc. Ch 3, dc in each st around, join. (86, 92, 106, 112 dc)
Hem Round 2: Ch 4 (counts as dc plus ch 1), sk 1 st, dc in next st, ch 1; rep from around, join with sl st to 3rd ch of beg ch-4.
Hem Round 3: Ch 3, dc in each dc and in each ch-1 sp around, join. (86, 92, 106, 112 dc)
Hem Round 4: Ch 1, sc in each st around, join. (86, 92, 106, 112 sc)
Hem Round 5 (Scallop Edging with CC2): Change to CC2.
Adjust stitch counts to nearest multiple of 6:
Scallop Round: In CC2: Sl st in first st. Sk 2 sts, 5 dc in next st (shell made), sk 2 sts, sl st in next st; rep from around, join.
Fasten off CC2.
CHECKPOINT: The finished dress length from neckline ribbing to bottom of scallop edging should measure approximately 12.5 (14, 15.5, 17) in.
Section 8: Front Button Band and Button Loops
Left Front Band (solid, no loops):
With RS facing, join MC at lower left front edge. Work sc evenly up the left front edge, approximately 1 sc per row end. Work 2 rows sc. Fasten off.
Right Front Band (button loops):
With RS facing, join MC at upper right front edge. Work sc evenly down the right front edge, approximately 1 sc per row end.
Next Row (Button Loop Row): Ch 1, sc down the band, placing 3 button loops evenly spaced as follows: At each button loop position, ch 3, sk 1 sc, continue sc to next loop position. Space loops so the top loop is approximately 0.5 in from the neckline, the bottom loop is approximately 0.5 in from the waist band, and the middle loop is centered between them.
Next Row: Sc in each sc and 3 sc in each ch-3 loop. Fasten off.
Finishing Your Baby Dress
Rose Appliques: Sew the crocheted roses to the bodice front. Place 3 (3, 4, 4) roses on the right front panel and 3 (3, 4, 4) on the left front panel. Arrange them in a vertical column flanking the center button band, spaced approximately 1 inch apart.
Buttons: Sew the 3 copper-toned buttons to the left front band, aligning with the button loops on the right band.
Weave in all ends using your yarn needle. Work ends into the same color sections to keep them invisible.
Blocking: Wet block the finished dress by soaking it in lukewarm water for 15 minutes. Gently squeeze out excess water (do not wring). Pin to your blocking mat, shaping the skirt into a smooth A-line and opening up the lace hem band. Let dry completely before removing pins.
Tips for Success with This Crochet Tutorial
Keep your leaf clusters consistent. Pull up those tall loops to the same height each time. This creates the uniform, raised texture you see in the finished piece.
Count your stitches after each increase row. Raglan shaping can get confusing, and catching a mistake early is much easier than frogging multiple rows.
Use locking stitch markers. They stay in place better than split rings when working raglan increases, and you will be grateful as you move them row after row.
Make a gauge swatch in the round if your round gauge differs significantly from your flat gauge. The skirt is worked in rounds, so this matters for final fit.
Block before sewing on the roses. The bodice will relax and settle into its final dimensions, making placement more accurate.
Why This Makes a Perfect Heirloom Gift
This baby dress is the kind of handmade piece that families treasure for generations. The construction is sturdy enough for actual wear, but the details, like those raised leaf clusters and delicate roses, make it special enough for photographs and celebrations.
The fitted bodice with its button front is practical for dressing squirmy babies. The A-line skirt allows plenty of room for crawling and those first wobbly steps. And the soft color palette works for any season.
Whether you are making this for your own little one, a baby shower gift, or a grandchild, the time you invest shows in every stitch.
I hope you love making this Blush Rose Baby Dress as much as I enjoyed writing up the pattern. If you found this helpful, save it to your Pinterest boards so you can find it when you are ready to start. And please leave a comment below if you make one. I would love to see your color choices and hear how it turned out!