
You know that gorgeous skein of dusty rose cotton you’ve been saving for the perfect project? This is it. Dig into your stash and pull it out, because this structured tote bag with its stunning mandala-style medallion is absolutely worth the effort.
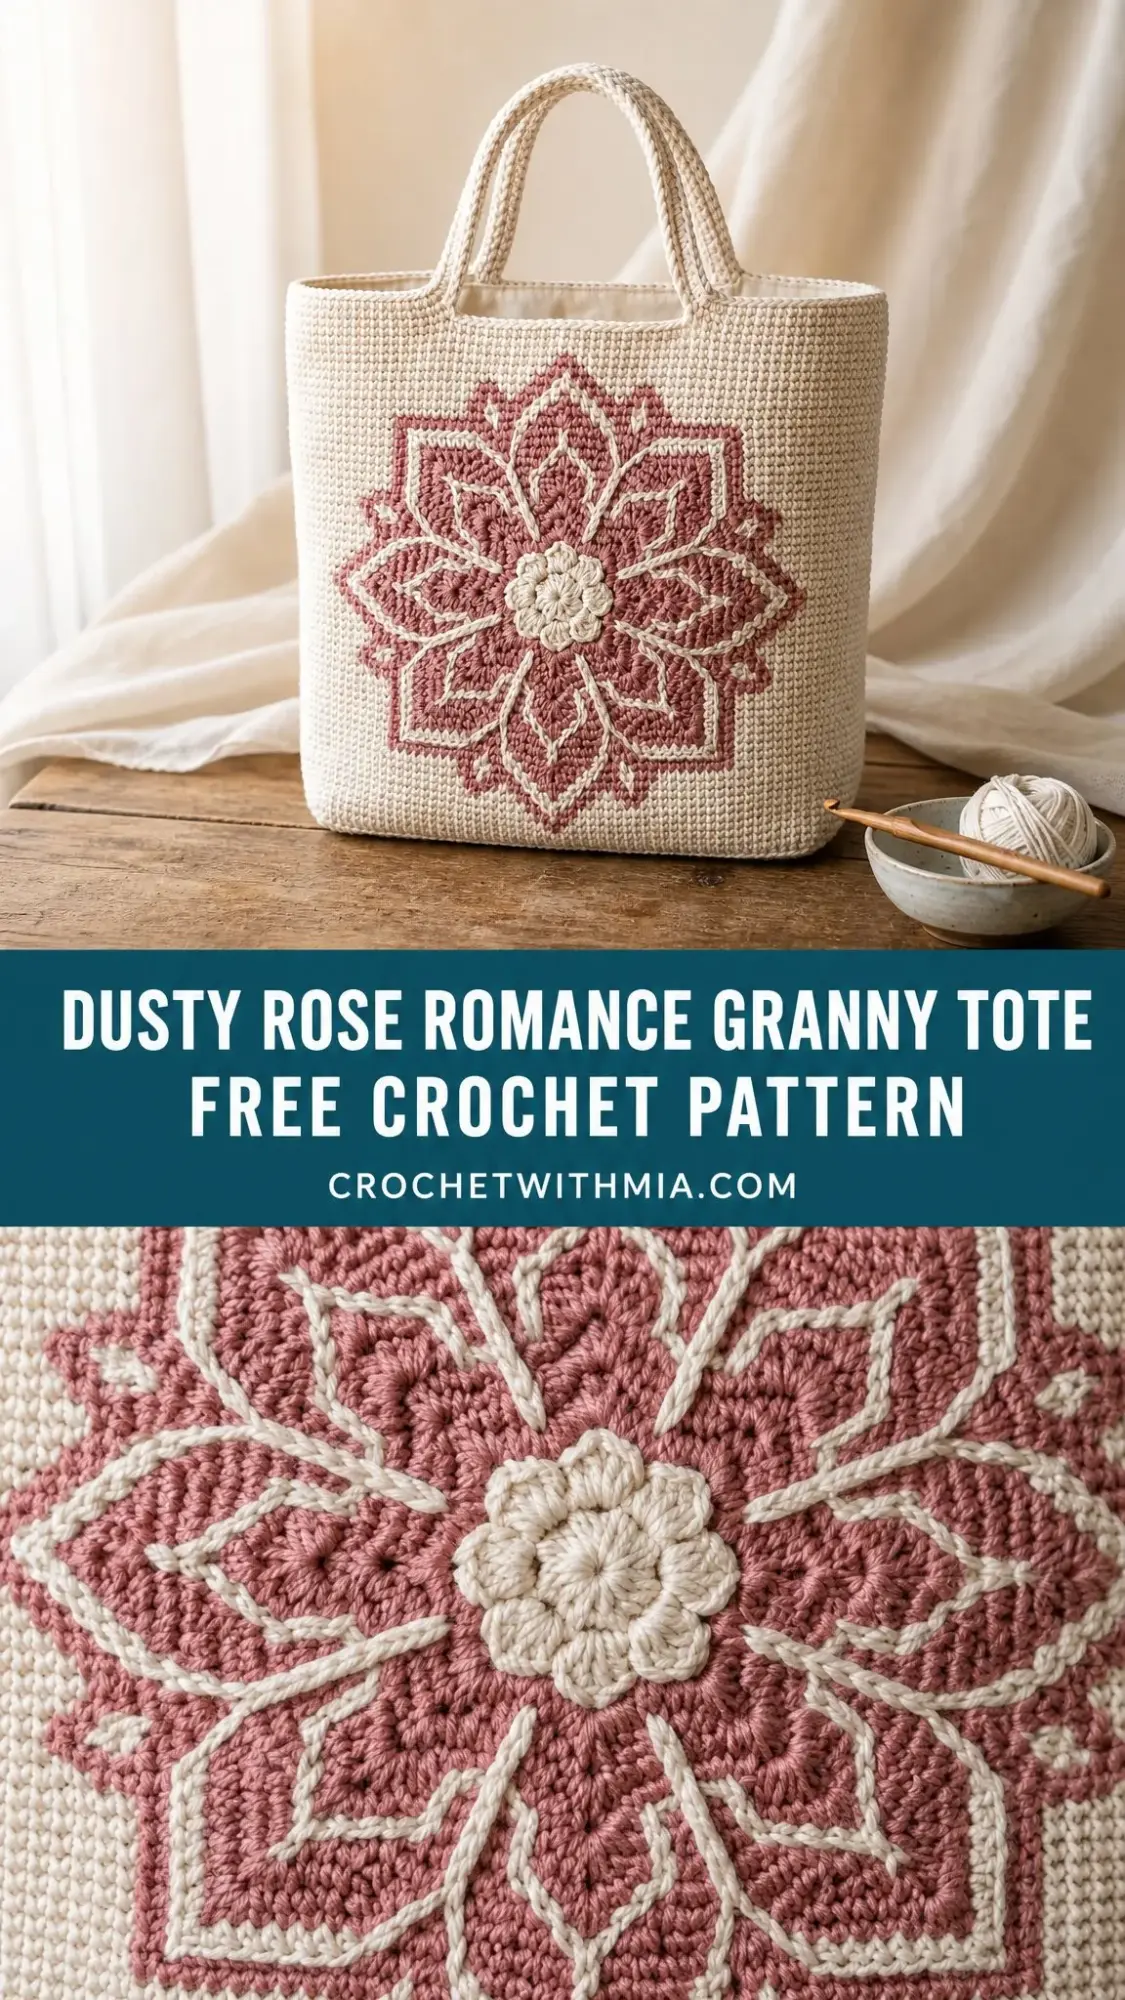
I’ll be honest with you. This is an intermediate to advanced project that requires patience and some experience with applique work. But the construction itself is surprisingly straightforward. The bag body is just single crochet worked in continuous rounds. The real magic happens in the medallion, which you create separately and then attach.
The finished piece has that handmade heirloom quality that makes people stop and ask where you bought it. Spoiler alert: you made it yourself, and you’ll be proud to say so.
About This Crochet Pattern
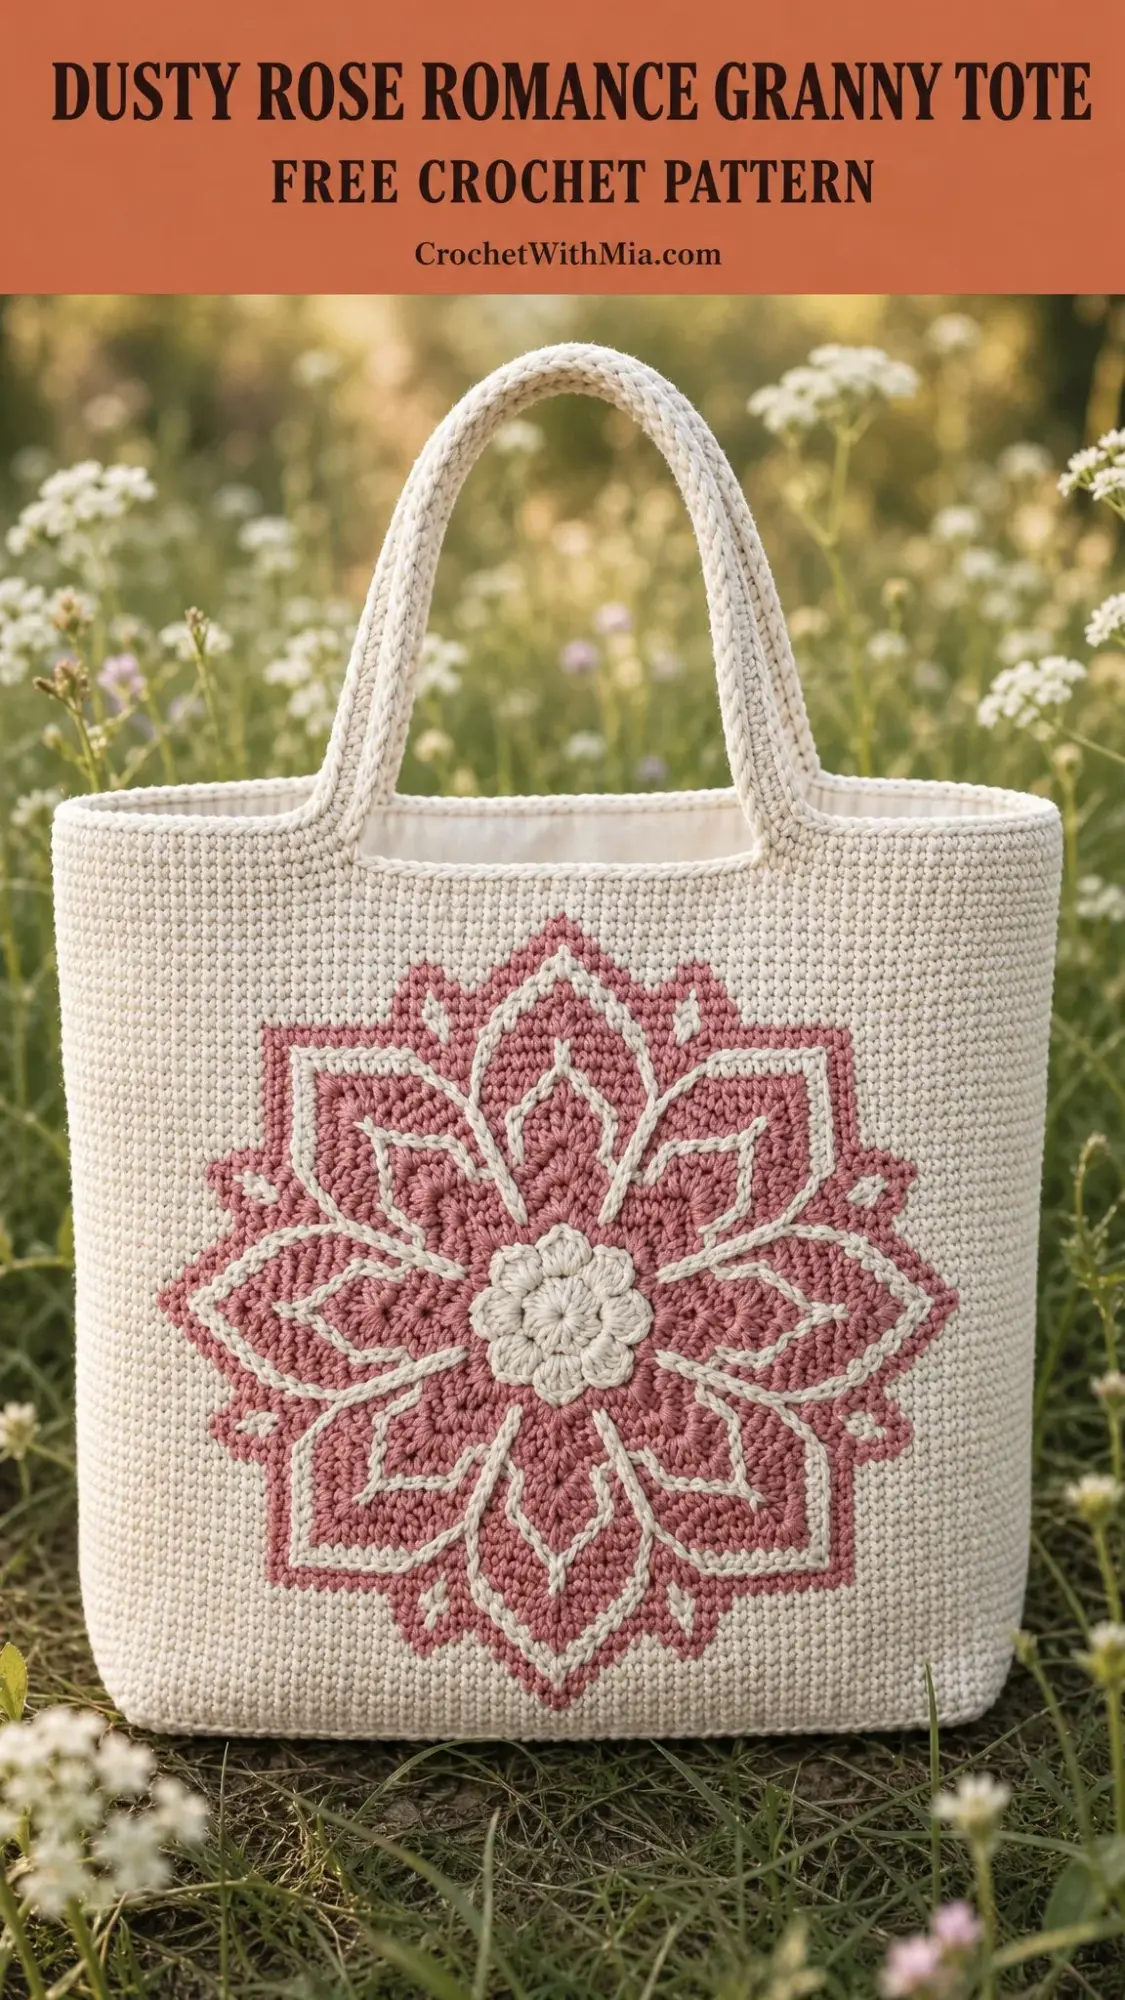
This Dusty Rose Romance Granny Tote features a firm, boxy silhouette with a flat base and squared sides. The show-stopping element is the large floral medallion on the front and back panels. Each medallion combines multiple layers of pointed petals radiating from a raised center flower, all worked in dusty rose against a natural cream background.
The bag measures approximately 13 inches wide by 12 inches tall by 4 inches deep when finished, not including handles. The handles add about 9 inches in height above the bag opening. The medallion applique measures approximately 9 inches in diameter, making it a substantial focal point.
What I love about this design is how the construction breaks down into manageable pieces. You work the bag body first, then create the medallion separately, then attach everything at the end. It feels less overwhelming when you think of it as several smaller projects that come together into one stunning piece.
Materials You’ll Need
Gathering your materials before you start makes the whole process smoother. Here’s everything you’ll need:
Yarn A (cream/natural): approximately 650 yards of worsted weight cotton yarn
Yarn B (dusty rose/antique pink): approximately 220 yards of worsted weight cotton yarn
Yarn C (cream/natural for medallion details): approximately 60 yards of worsted weight cotton yarn. You can pull this from your Yarn A yardage, but having a separate ball is more convenient.
Crochet hooks: US size G-6 (4.0 mm) for the bag body and handles, US size E-4 (3.5 mm) for the medallion motif
Additional supplies:
Yarn Suggestions
Lion Brand 24/7 Cotton in Ecru and Blush works beautifully for this project. The mercerized cotton holds stitch definition well and is machine washable.
Paintbox Yarns Simply DK Cotton in Paper White and Blush Pink is another excellent option. It’s slightly lighter than worsted but works at the same gauge for most crocheters. Swatch carefully with this one.
We Are Knitters The Pima Cotton in Off White and Dusty Pink is a premium choice with excellent drape control and a natural matte finish.
Choose a smooth, tightly plied cotton or cotton-blend yarn. Avoid chenille, fuzzy fibers, or loosely spun singles because these will obscure your stitch definition. The bag needs structural firmness, so cotton or linen blends outperform acrylic here.
Gauge Information
Getting gauge right is critical for this project. The dense single crochet (sc) fabric relies on a tight gauge to produce that boxy structure you see in the finished bag.
Bag body gauge (G-6/4.0 mm hook, single crochet in continuous rounds): 18 stitches by 20 rounds equals 4 inches by 4 inches.
Medallion gauge (E-4/3.5 mm hook, single crochet worked flat): 20 stitches by 22 rows equals 4 inches by 4 inches.
If your gauge is looser than specified, go down a hook size. Trust me on this one. A too-loose gauge will give you a floppy bag instead of the structured tote you’re aiming for.
Abbreviations and Stitch Definitions
Let me walk you through all the stitches and abbreviations you’ll encounter. I’ll define each one so you’re never left guessing.
ch = chain. Wrap yarn over hook and pull through the loop on your hook.
sl st = slip stitch. Insert hook, yarn over, pull through both the stitch and the loop on your hook in one motion.
sc = single crochet. Insert hook into stitch, yarn over and pull up a loop (2 loops on hook), yarn over and pull through both loops.
hdc = half double crochet. Yarn over, insert hook, pull up a loop (3 loops on hook), yarn over and pull through all 3 loops.
dc = double crochet. Yarn over, insert hook, pull up a loop, yarn over and pull through 2 loops, yarn over and pull through remaining 2 loops.
tr = treble crochet. Yarn over twice, insert hook, pull up a loop, [yarn over, pull through 2 loops] 3 times.
sc2tog = single crochet two together. This is a decrease. Insert hook in first stitch, pull up a loop, insert hook in next stitch, pull up a loop (3 loops on hook), yarn over and pull through all 3 loops.
blo = back loop only
flo = front loop only
RS = right side
WS = wrong side
rnd = round
st(s) = stitch(es)
pm = place marker
inc = increase (work 2 sc in the same stitch)
Special Stitches
Standing Single Crochet: This lets you join a new color without a slip knot starting chain. Insert hook into designated stitch, place a slip knot on hook or hold yarn tail against hook, pull up a loop, yarn over and draw through both loops.
Puff Stitch: Used in the center flower only. [Yarn over, insert hook into stitch, pull up a loop to about half an inch height] 3 times in the same stitch. Yarn over and draw through all 7 loops on hook. Chain 1 to close.
Surface Slip Stitch: This creates raised linear detail on finished fabric. Hold yarn on the wrong side, insert hook from right side to wrong side through fabric at your starting point, pull a loop through to the right side. Insert hook one stitch forward, pull loop through fabric and through the loop on your hook. Continue along your designated path.
Magic Ring: Wrap yarn around two fingers to form a loop, insert hook, pull working yarn through to create a slip knot, chain to begin. After working the first round into the ring, pull the tail to close the center hole.
Pattern Instructions
Bag Base
With Yarn A and G-6 hook, chain 60.
Row 1: sc in second ch from hook and in each ch across. Turn. (59 sc)
Rows 2 through 18: ch 1, sc in each st across. Turn. (59 sc)
Do not turn after Row 18. Your base rectangle should measure approximately 13 inches by 4 inches. This forms the floor of your bag.
Checkpoint: If your base doesn’t match these measurements, adjust your hook size or stitch count before moving on. Getting this right now saves headaches later.
Bag Body
You’ll now work in continuous rounds around the perimeter of the base rectangle, picking up stitches along all four edges.
Transition Round: With RS facing, ch 1. Working along Row 18 edge: sc in each of the 59 sts across the top long edge. Working along the right short end: sc evenly across 18 row ends (1 sc per row end). Working along the bottom of the foundation chain: sc in each of the 59 remaining foundation chain loops across the bottom long edge. Working along the left short end: sc evenly across 18 row ends. Place marker to mark beginning of round. (154 sc)
The total is 59 + 18 + 59 + 18 = 154 stitches. This creates a rectangular tube with two long sides of 59 stitches and two short sides of 18 stitches.
Rounds 1 through 60: sc in each st around. (154 sc)
Checkpoint: After Round 60, your bag body should measure approximately 12 inches tall.
Top Border
Round 61: sl st in each st around. (154 sl sts)
Fasten off Yarn A and weave in ends. The slip stitch border gives the top opening a clean, slightly firm edge.
Handles (Make 2)
With Yarn A and G-6 hook, chain 5.
Row 1: sc in second ch from hook and in each ch across. Turn. (4 sc)
Row 2: ch 1, sc in each st across. Turn. (4 sc)
Continue repeating Row 2 until handle measures 19 inches from beginning.
Fold the strap in half lengthwise with wrong sides together and slip stitch along the long open edge to close it into a rounded tube. Fasten off leaving a 12-inch tail for sewing.
Work the second handle identically.
Handle Placement and Attachment
On the front face of the bag, count 59 stitches across the top edge. Mark the center at stitch 30. Count 10 stitches to the left (stitch 20) and 10 stitches to the right (stitch 40). These mark the inner attachment points.
Each handle end spans 4 stitches at the top of the bag. Align one end of Handle 1 so its 4-stitch width sits between stitches 17 and 20, and the other end sits between stitches 40 and 43. Pin in place.
Using the yarn tail and tapestry needle, sew each handle end to the inside and outside of the top border. Stitch a box pattern (across the top, down the side, across the bottom, up the other side, then an X through the center) for maximum strength. Repeat for Handle 2 on the back face at the same stitch positions.
Medallion Center Flower
This small piece is worked separately and sewn on top of the assembled medallion.
With Yarn A (cream) and E-4 hook, make a magic ring.
Rnd 1: ch 1, 8 sc into the ring. Pull ring closed. Join with sl st to first sc. (8 sc)
Rnd 2: ch 1, [puff stitch in next st, ch 1] 8 times. Join with sl st to top of first puff. (8 puff stitches, 8 ch-1 spaces)
Rnd 3: sl st into first ch-1 sp, ch 1, [sc, hdc, dc, hdc, sc] in each ch-1 sp around. Join with sl st to first sc. (8 small petals, 40 sts total)
Fasten off leaving a 10-inch tail. Set aside.
Medallion Body
With Yarn B and E-4 hook, make a magic ring.
Rnd 1: ch 1, 8 sc into ring. Pull ring closed. Join with sl st to first sc. (8 sc)
Rnd 2: ch 1, 2 sc in each st around. Join with sl st to first sc. (16 sc)
Rnd 3: ch 1, [sc in next st, 2 sc in next st] 8 times. Join with sl st to first sc. (24 sc)
Rnd 4: ch 1, [sc in next 2 sts, 2 sc in next st] 8 times. Join with sl st to first sc. (32 sc)
Medallion Layer 1 (8 Small Inner Petals)
Rnd 5: ch 1, [sc in next 2 sts, ch 5, sl st in second ch from hook, sc in next ch, hdc in next ch, dc in last ch of ch-5 to form petal tip, sl st back to base, sc in next 2 sts of main ring] 8 times. Join with sl st to first sc. (8 small petals formed)
Medallion Layer 2 Foundation
Rnd 6: ch 1, [sc in next 3 sts, 2 sc in next st] 8 times. Join with sl st to first sc. (40 sc)
Rnd 7: ch 1, [sc in next 4 sts, 2 sc in next st] 8 times. Join with sl st to first sc. (48 sc)
Rnd 8: ch 1, [sc in next 5 sts, 2 sc in next st] 8 times. Join with sl st to first sc. (56 sc)
Rnd 9: ch 1, [sc in next 6 sts, 2 sc in next st] 8 times. Join with sl st to first sc. (64 sc)
Rnd 10: ch 1, [sc in next 7 sts, 2 sc in next st] 8 times. Join with sl st to first sc. (72 sc)
Medallion Layer 2 (8 Elongated Pointed Petals)
The medallion has 72 stitches divided into 8 sections of 9 stitches each. For each petal, work off 7 center stitches of the 9-stitch section:
Petal construction (repeat 8 times):
Row A: join Yarn B in first st of petal zone, ch 1, sc in same st and next 6 sts. Turn. (7 sc)
Row B: ch 1, sc2tog, sc in next 3 sts, sc2tog. Turn. (5 sc)
Row C: ch 1, sc2tog, sc in next st, sc2tog. Turn. (3 sc)
Row D: ch 1, sc2tog, sc in last st. Turn. (2 sc)
Row E: ch 1, sc2tog. (1 sc, this is the petal tip)
Fasten off. Rejoin Yarn B to ring at the stitch immediately following this petal’s 9-stitch zone.
Checkpoint: After all 8 petals of Layer 2, your medallion should measure approximately 4 inches across.
Medallion Layer 3 Ring
With Yarn B, rejoin to the back of the medallion at the base of the petal gaps.
Rnd 12: Working into the foundation stitches of Rnd 10 that were not consumed by petals, sc evenly around the petal base ring. Work sc in each of the 16 remaining stitches, and at each petal base work 3 sc to turn the corner. (40 sc)
Rnd 13: ch 1, sc in each st around. (40 sc)
Rnd 14: ch 1, [sc in next 4 sts, 2 sc in next st] 8 times. (48 sc)
Rnd 15: ch 1, sc in each st around. (48 sc)
Rnd 16: ch 1, [sc in next 5 sts, 2 sc in next st] 8 times. (56 sc)
Rnd 17: ch 1, sc in each st around. (56 sc)
Rnd 18: ch 1, [sc in next 6 sts, 2 sc in next st] 8 times. (64 sc)
Rnd 19: ch 1, sc in each st around. (64 sc)
Rnd 20: ch 1, [sc in next 7 sts, 2 sc in next st] 8 times. (72 sc)
Rnd 21: ch 1, sc in each st around. (72 sc)
Rnd 22: ch 1, [sc in next 8 sts, 2 sc in next st] 8 times. (80 sc)
Medallion Layer 4 (8 Large Outer Petals)
With 80 total stitches divided by 8, you have 10 stitches per section. Use the center 9 stitches of each section for petals.
For each of the 8 large petals:
Row A: sc in 9 center sts of zone. Turn. (9 sc)
Row B: ch 1, sc2tog, sc in next 5 sts, sc2tog. Turn. (7 sc)
Row C: ch 1, sc2tog, sc in next 3 sts, sc2tog. Turn. (5 sc)
Row D: ch 1, sc2tog, sc in next st, sc2tog. Turn. (3 sc)
Row E: ch 1, sc2tog once, sc in last st. Turn. (2 sc)
Row F: ch 1, sc2tog. (1 sc, this is the petal tip)
Medallion Layer 5 (8 Diamond Outer Tips)
Between each pair of adjacent large outer petals, work a small pointed diamond tip:
Rnd 23 tips: [sc in gap st at base of space between petals, ch 7, sl st in second ch from hook, sc in next ch, hdc in next ch, dc in next ch, hdc in next ch, sc in last ch, sl st back to base sc] 8 times, once in each gap between large petals.
Checkpoint: Your completed Yarn B medallion should measure approximately 9 inches in diameter.
Medallion Surface Details
Using Yarn A and the surface slip stitch technique, work along these paths to create the cream outline lines:
Path 1: Trace the left and right edges of each Layer 4 large outer petal from base to tip and back down. (8 petals, 16 lines total)
Path 2: Trace the center spine of each Layer 4 large petal from base to tip. (8 lines total)
Path 3: Trace the outer edge of the Layer 3 geometric band around its full circumference.
Path 4: Trace the left and right edges of each Layer 2 elongated petal from base to tip and back. (8 petals, 16 lines total)
Path 5: Trace the small arc between each Layer 1 small petal.
Weave in all Yarn A ends on the wrong side.
Attaching the Center Flower
Place the finished center flower directly at the center of the medallion, aligning its 8 petals between the 8 small inner petals of Layer 1. Using the yarn tail and tapestry needle, sew around the base of the center flower through both layers.
Attaching the Medallion to the Bag
Block the medallion flat before attaching.
Center the medallion on the front face of the bag. The front face spans stitches 1 through 59 of the bag body. Center the medallion vertically so its midpoint falls at approximately Round 30 of the bag body. Pin generously around the entire perimeter.
Using Yarn B and a tapestry needle, whipstitch the outer edge of the medallion to the bag face. Take shallow stitches through the bag fabric to avoid showing on the inside.
Repeat for the back face if desired.
Lining Instructions
Cut 2 rectangles of lining fabric, each measuring 15 inches wide by 14 inches tall. This includes 1-inch seam allowance on all sides.
Cut 1 rectangle of lining fabric measuring 6 inches by 15 inches for the base panel.
With right sides together, pin and sew the two large rectangles to the base panel along the short edges using a 1-inch seam. This creates a long banner that folds into the bag tube.
Fold the assembled lining so the two long edges of the large rectangles meet. Sew along both long side edges, creating a rectangular tube with an attached base.
Insert the lining into the bag with wrong sides facing out. Fold the top edge under and hand-stitch to the inside of the bag just below the slip stitch border.
Finishing Tips
Blocking makes a huge difference with this project. Wet block your medallion before attaching it to the bag. Pin it flat on a blocking mat and let it dry completely. This ensures all your petals lie flat and symmetrical.
For extra structure, insert a piece of rigid plastic canvas or cardboard cut to 13 by 4 inches into the base before adding your lining.
Take your time with the surface slip stitch details. These cream outline lines are what really make this design pop. Work slowly and keep even tension.
Time Estimate
Plan for approximately 20 to 30 hours total. The bag body takes about 8 to 10 hours, the medallion and center flower take 8 to 12 hours, and assembly plus lining takes 4 to 6 hours. Add extra time for gauge swatching and blocking.
I hope you absolutely love making this Dusty Rose Romance Granny Tote crochet pattern. It’s the kind of project that feels like a real accomplishment when you finish. Thank you so much for choosing to make this with me!
If you’d like to save this pattern for later, go ahead and pin it to your favorite Pinterest board. And please leave a comment below if you make one. I’d love to see your color choices and hear how the project went for you!