
I pulled this pattern out of my "desert sunset" collection, and I have been calling it my little bohemian treasure ever since. The Neutral Boho Granny Square Bucket Bag started as a sketch in my notebook after a trip through Arizona, where the warm terracotta cliffs and golden hour light inspired me to capture those tones in yarn.
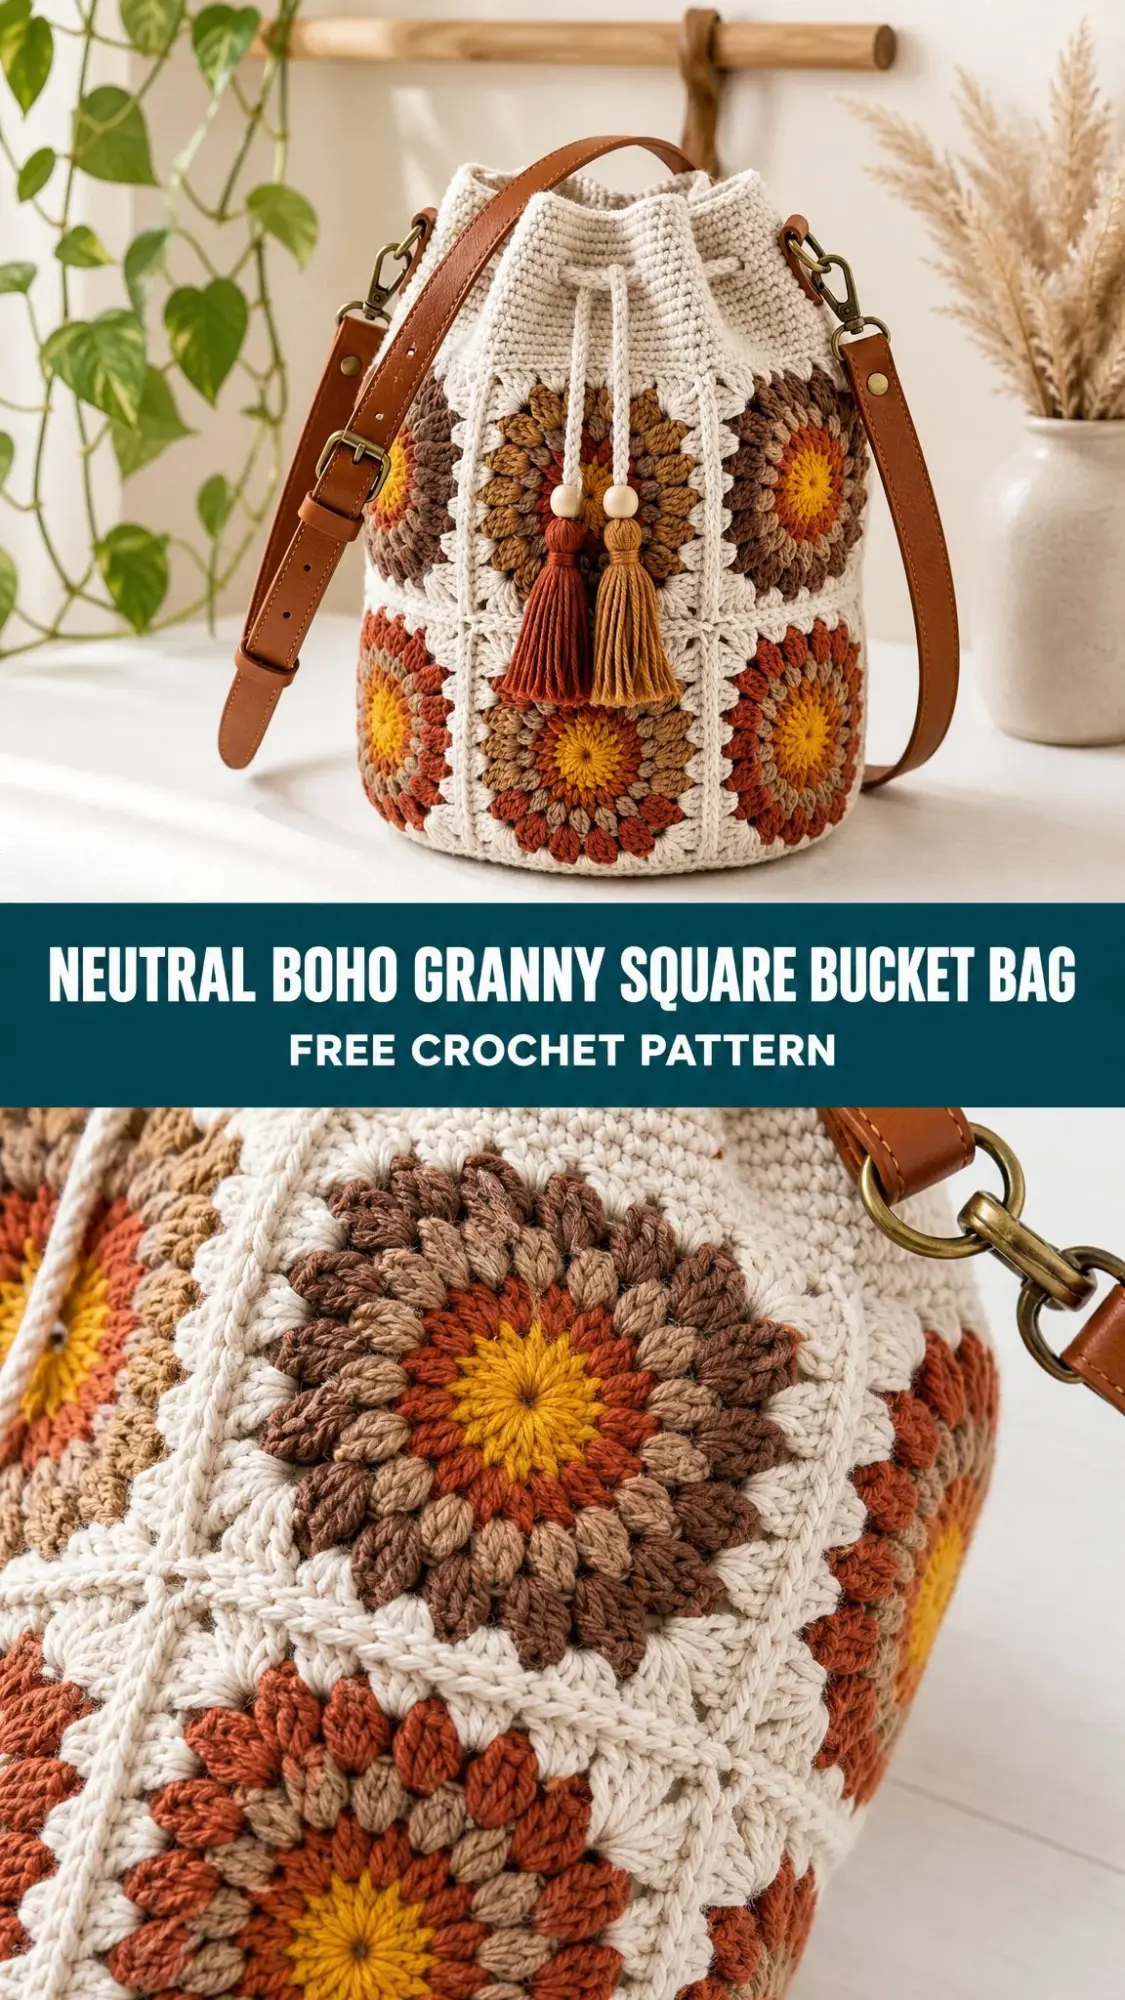
I designed this bag for a friend who wanted something earthy and practical, something that could hold her farmers market finds while still looking like a statement piece. The sunburst granny squares reminded us both of those desert sunsets, so the name stuck.
Now I am sharing this pattern with you, and I genuinely cannot wait to see your versions come to life.
About This Crochet Pattern
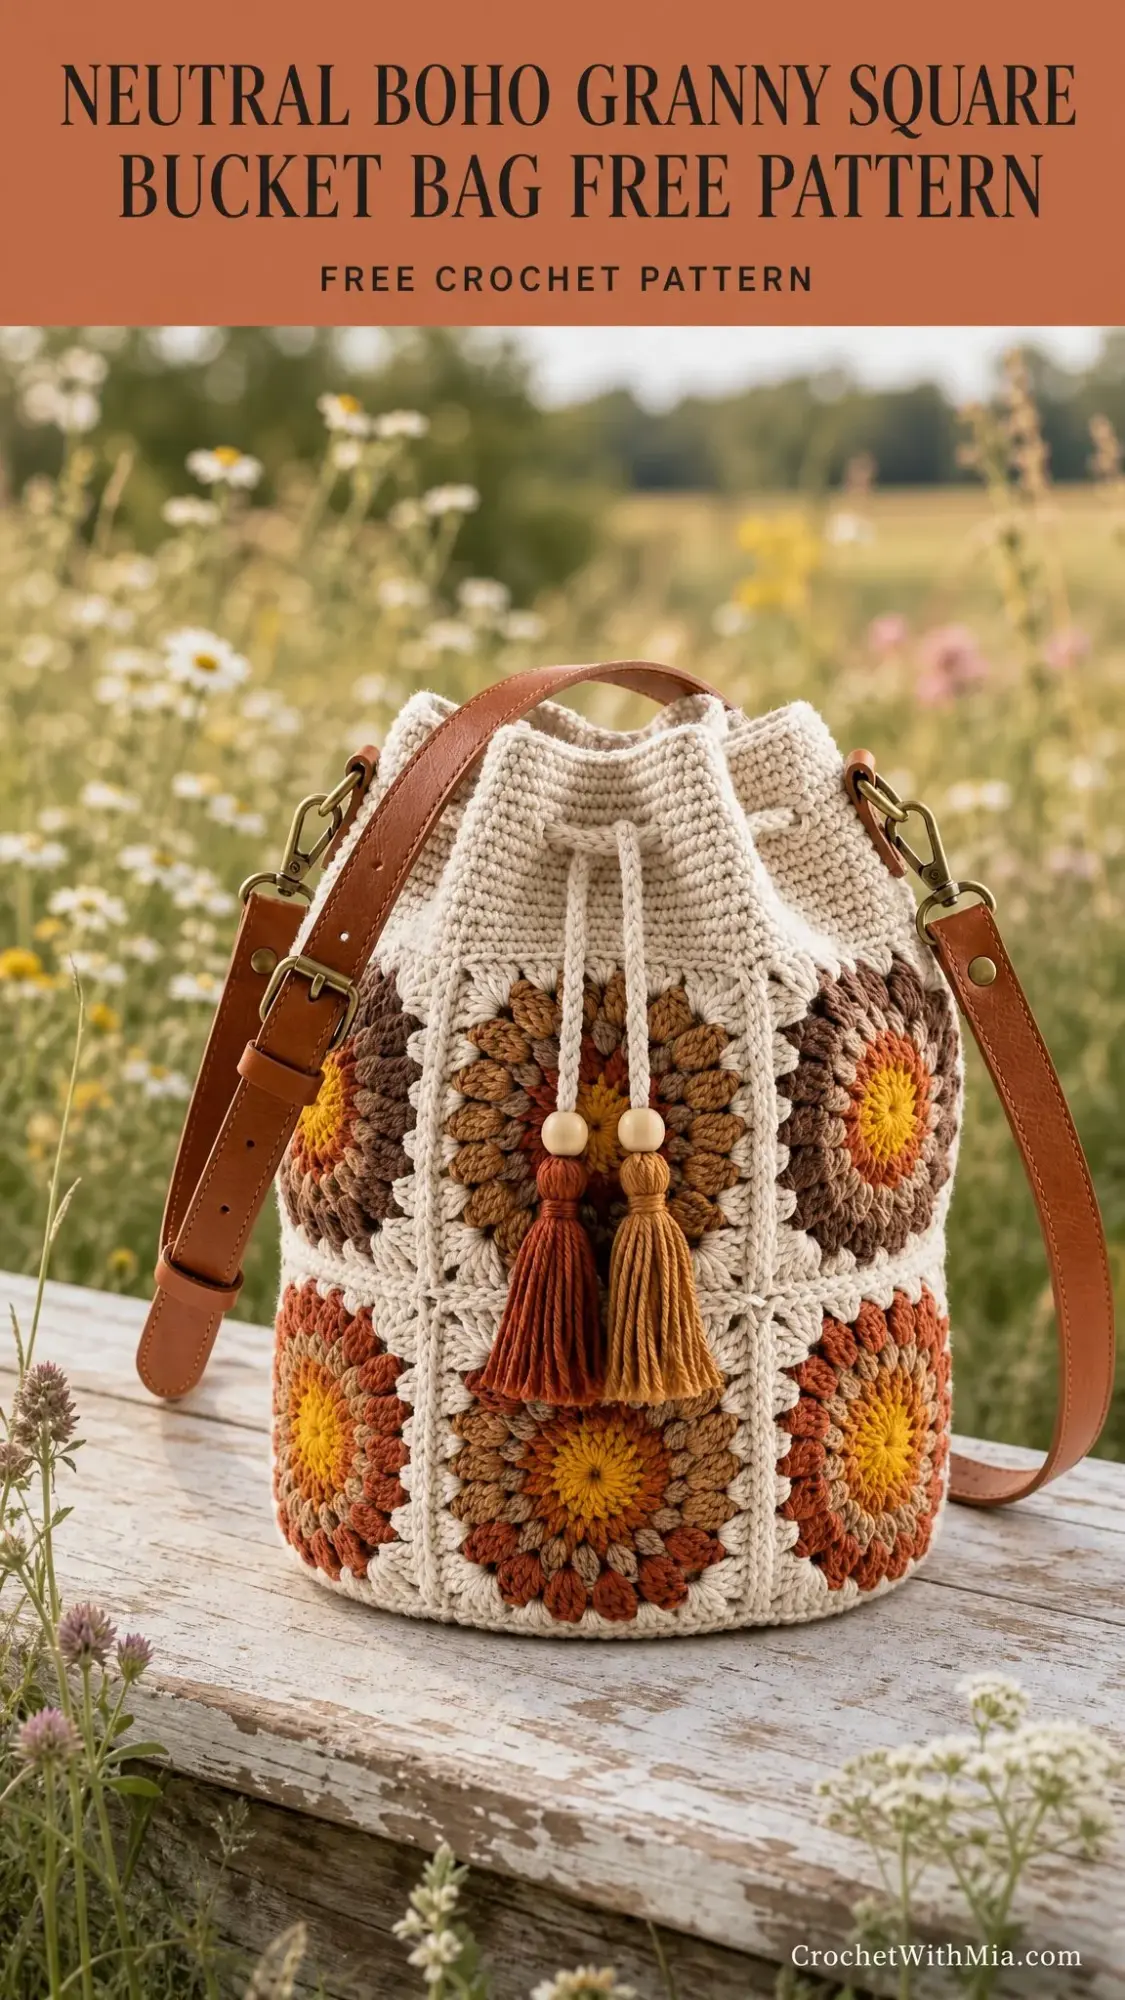
This Neutral Boho Granny Square Bucket Bag is built from 12 sunburst granny squares arranged in two rows of six, joined into a cylinder, and finished with a crocheted base, drawstring top band, beaded tassels, and a leather crossbody strap. The construction is straightforward once you understand how the pieces fit together.
The finished bag measures approximately 7 inches (18 cm) across the base and 9.5 inches (24 cm) tall to the top of the drawstring band, not including the strap. It is the perfect size for everyday essentials like your phone, wallet, keys, and a small water bottle.
This pattern is rated intermediate level and takes roughly 10 to 14 hours to complete. You will work with puff stitches, joined rounds, whip stitch seams, and continuous rounds for the base. If you have made a few granny squares before and feel comfortable with basic increasing, you are ready for this project.
Materials You Will Need
Gathering your supplies before you start makes the whole process smoother. Here is everything you need for this crochet bucket bag pattern.
Yarn
You will need worsted weight or aran weight (#4) cotton yarn, roughly 420 to 470 yards (385 to 430 meters) total. A firm cotton holds the bucket shape best and prevents sagging.
Color breakdown:
Suggested yarn brands:
Hook and Notions
Gauge
One completed sunburst square should measure 3.5 inches (9 cm) square using a 4.0 mm hook.
For the solid sections: 14 double crochet (dc) stitches by 7 rows equals 4 inches (10 cm).
Work firmly. A dense fabric keeps the bag from sagging over time. If your squares come out larger, try going down a hook size. If they are smaller, go up a hook size.
Abbreviations and Special Stitches
Understanding these abbreviations will help you follow along smoothly. This pattern uses US crochet terms throughout.
Standard Abbreviations
UK crocheters: US single crochet equals UK double crochet. US half double crochet equals UK half treble. US double crochet equals UK treble. The puff stitch is worked the same way in both.
Special Stitches
Puff stitch (puff): This creates the beautiful textured petals in the sunburst design. Here is how to work it: Yarn over, insert hook in stitch, yarn over and pull up a loop to the height of a double crochet. Repeat this sequence two more times in the same stitch (you will have 7 loops on your hook). Yarn over and draw through all 7 loops, then chain 1 to close the puff.
Invisible join: After the final stitch of a round, cut your yarn and thread the tail through a tapestry needle. Sew under the top loops of the first stitch, then back down into the last stitch for a seamless finish.
Pattern Notes Before You Begin
A few tips will make your stitching experience much easier.
The sunburst square is worked in joined rounds with the right side always facing. Do not turn your work between rounds.
Begin each round with either a standing stitch or the noted starting chain. When the pattern says "ch 3 counts as first dc," that chain substitutes for your first double crochet stitch.
Each square uses three colors: a center color (mustard), a petal color (either taupe or rust), and the border color (cream). Two colorways are used to create visual interest. The upper row uses Colorway A with taupe petals, and the lower row uses Colorway B with rust petals.
Pro tip: Weave in your ends as you complete each square. It is far easier than facing all 12 squares at once at the end.
The Sunburst Square Pattern
Make 6 squares in Colorway A (taupe petals) for the upper row and 6 squares in Colorway B (rust petals) for the lower row. All squares follow the same four rounds. Only the petal color changes.
Round 1 (Mustard)
Into a magic ring, ch 3 (this counts as your first dc), work 11 dc into the ring. Pull the ring closed tightly. Sl st to the top of the beginning ch 3 to join. (12 dc)
Round 2 (Petal Color: Taupe or Rust)
Join your petal color in any stitch. Ch 2, work a puff stitch in the same stitch, ch 1. Work [puff st in next st, ch 1] around the entire round. Sl st to the top of the first puff to join. (12 puffs, 12 ch-1 spaces)
Round 3 (Cream)
Join cream in any ch-1 space. Ch 3 (counts as dc), dc in the same space. Work [dc in top of next puff, 2 dc in next ch-1 sp] around, ending with dc in the last puff. Sl st to top of ch 3 to join. (36 dc)
Round 4 (Cream, Square Off)
Ch 3 (counts as dc), dc in same stitch, ch 2, 2 dc in same stitch. This creates your first corner.
Work dc in next 8 sts, then [2 dc, ch 2, 2 dc] in next st for a corner. Repeat from twice more. Dc in last 8 sts. Sl st to top of ch 3 to join.
(48 dc and 4 corner ch-2 spaces, which equals 12 dc per side)
Gradient tip: For the two-tone petals shown in the photos, work the first puff loop in one shade and the closing in a neighboring shade. You can also use a self-shading cotton for effortless gradient effects. A single solid petal color reads beautifully too if you prefer simplicity.
Joining the Squares
Now comes the satisfying part: watching your bag take shape.
Arranging Your Layout
Arrange all 12 squares in a grid that is 6 squares wide by 2 squares tall. Place Colorway A (taupe petals) across the top row and Colorway B (rust petals) across the bottom row. Blend the colors so neighboring petals alternate pleasingly.
Whip Stitch Seams
Using cream yarn and a tapestry needle, hold two squares with right sides together. Whip stitch through the back loops only along one side, working from corner ch-2 space to corner ch-2 space.
This catches all 13 stitch points per edge (12 dc plus 1 in the corner space).
Step 1: Join the top row into a strip of 6 squares.
Step 2: Join the bottom row into a strip of 6 squares.
Step 3: Seam the rows together. Lay the lower strip beneath the upper strip and whip stitch the long edges together so seams line up. (2 rows joined)
Step 4: Close the tube. Bring the two short ends together and whip stitch to form a cylinder. (seamless ring of 12 squares)
Counts to carry forward: The bottom opening now measures 6 squares times 13 equals 78 stitch points. The top opening matches at 78 stitch points. You will need these numbers for the base and top band.
The Base
The base is worked in cream as a flat circle using continuous single crochet rounds. Do not join at the end of each round. Instead, mark the first stitch of each round with a stitch marker and move the marker up as you go.
Base Instructions
Round 1: 6 sc into a magic ring. (6 sc)
Round 2: 2 sc in each st around. (12 sc)
Round 3: [sc in next, 2 sc in next] around. (18 sc)
Round 4: [sc 2, 2 sc in next] around. (24 sc)
Round 5: [sc 3, 2 sc in next] around. (30 sc)
Round 6: [sc 4, 2 sc in next] around. (36 sc)
Round 7: [sc 5, 2 sc in next] around. (42 sc)
Round 8: [sc 6, 2 sc in next] around. (48 sc)
Round 9: [sc 7, 2 sc in next] around. (54 sc)
Round 10: [sc 8, 2 sc in next] around. (60 sc)
Round 11: [sc 9, 2 sc in next] around. (66 sc)
Round 12: [sc 10, 2 sc in next] around. (72 sc)
Round 13: [sc 11, 2 sc in next] around. Sl st to next st to finish. (78 sc)
Attaching the Base
Hold the base against the bottom of the square tube with right sides facing out. Line up the 78 stitches on the base with the 78 stitch points on the tube.
Using cream yarn, sc the two pieces together through both layers all the way around. (78 sc, base joined)
Top Band and Drawstring
The top band is worked in cream using joined rounds. You will pick up stitches along the top opening of the tube (78 points). The band draws in slightly before forming an eyelet round for threading the drawstring.
Top Band Instructions
Round 1: Join cream in any top stitch. Ch 1, hdc evenly around the opening for a total of 78 hdc. Sl st to first hdc to join. (78 hdc)
Round 2: Ch 1, [hdc 11, hdc2tog] around. Sl st to join. (72 hdc)
Rounds 3 through 5: Ch 1, hdc in each st around. Sl st to join. (72 hdc each round)
Round 6 (Eyelets): Ch 1, [hdc 4, ch 2, skip 2] around. Sl st to join. (48 hdc and 12 ch-2 eyelets)
Round 7: Ch 1, hdc in each hdc and 2 hdc in each ch-2 sp around. Sl st to join. (72 hdc)
Rounds 8 through 9: Ch 1, hdc in each st around. Sl st to join. Fasten off and weave in ends. (72 hdc each round)
Making the Drawstring Cord
Crocheted cord method: With cream yarn, ch 110 (approximately 30 inches or 76 cm), then sl st back along the entire chain. Fasten off.
Alternatively, you can use a length of pre-made cotton cord.
Threading the cord: Weave the cord in and out through the 12 eyelets, beginning and ending at the same front eyelet so both ends emerge together at the front of the bag. Even up both ends so they hang at the same length.
Tassels and Beads
The beaded tassels add the perfect bohemian finishing touch to this crochet bucket bag.
Making the Tassels (Make 2)
Wrap and bind: Wind yarn around a 3.5 inch (9 cm) piece of cardboard approximately 20 times. Make one tassel in rust and one in mustard for variety.
Slip a 10 inch tie under the top loops and knot tightly. Cut the bottom loops to release the tassel. Wrap a separate strand around the neck several times, knot it, and bury the ends inside the tassel. Trim the bottom level to approximately 3 inches (7.5 cm).
Attaching Beads and Tassels
Thread one wooden bead onto each cord end. Slide the bead up to sit near the eyelets. Tie a tassel to each cord end below its bead so the bead locks the tassel in place.
Pro tip: A drop of craft glue inside the bead keeps it from sliding down over time.
Strap Tabs and Final Assembly
Making the Strap Tabs (Make 2)
Row 1: With cream yarn, ch 6. Sc in 2nd ch from hook and each ch across. Turn. (5 sc)
Rows 2 through 6: Ch 1, sc across. Turn. (5 sc each row)
Fasten off, leaving a long tail for sewing.
Attaching the Strap
Fold each tab through an O-ring or D-ring. Sew the tab securely to the top band at opposite sides of the bag, positioning them over the side seams.
Clip the leather strap’s swivel clasps to the two rings.
Optional: A short looped tab at the center back makes a handy top carry handle.
Finishing and Care
Final Finishing Steps
Weave in every remaining end on the wrong side and trim close to the fabric.
Turn the bag right side out and gently shape the base flat so it stands on its own.
Steam block lightly from the inside to even out the squares. Avoid crushing the puff petals.
For extra structure: Cut a circle of plastic canvas or felt to match the base size and drop it inside the bag. This helps maintain the bucket shape.
Care Instructions
Hand wash cool with mild soap. Do not wring.
Reshape while damp and dry flat with the base down, away from direct heat.
Remove or protect the leather strap before washing. Condition the leather separately.
Spot clean between full washes to keep cream tones bright.
Sizing and Customization Ideas
Want a bigger bag? Add a third row of squares (18 total) for a roomy tote. Add base rounds in multiples of 6 until the circle matches the new tube. Every extra square row adds 6 stitch points per side.
Want a smaller bag? Work 5 squares around (65 stitch points) and stop the base at round 11 (66 stitches), easing to fit. Alternatively, use a 3.0 mm hook for a more compact, denser result.
Color variations: Swap to a single petal shade for a quieter look, or use a self-striping cotton for effortless gradients without extra ends to weave in.
Taller neck: Add two more plain band rounds before the eyelets for a taller, more cinched opening.
Wrapping Up Your Bohemian Bucket Bag
This Neutral Boho Granny Square Bucket Bag crochet pattern brings together classic sunburst motifs with practical construction for a bag you will reach for again and again. The warm desert tones work beautifully with jeans, dresses, and everything in between.
I hope your bucket bag turns out beautifully and brings a little bohemian sunshine to your everyday adventures. Thank you so much for choosing this pattern.
If you loved making this bag, save this pattern to your Pinterest boards so you can find it again later or share it with your crochet friends. And please leave a comment below if you make one. I would absolutely love to see your color combinations and finished bags.