When I sat down to design this handbag, I had a very specific vision in mind. I wanted something structured enough to hold its shape, pretty enough to turn heads, and versatile enough to wear crossbody or carry by hand. The stripes needed to feel fresh and coastal, the bow had to be soft but not floppy, and those little navy pennants? They had to add just the right amount of playful detail without looking cluttered.
Get the Ad-Free PDF Pattern
You can find the free pattern below, or you can purchase the ad-free printable PDF from my shop.
Get the Printable PDF →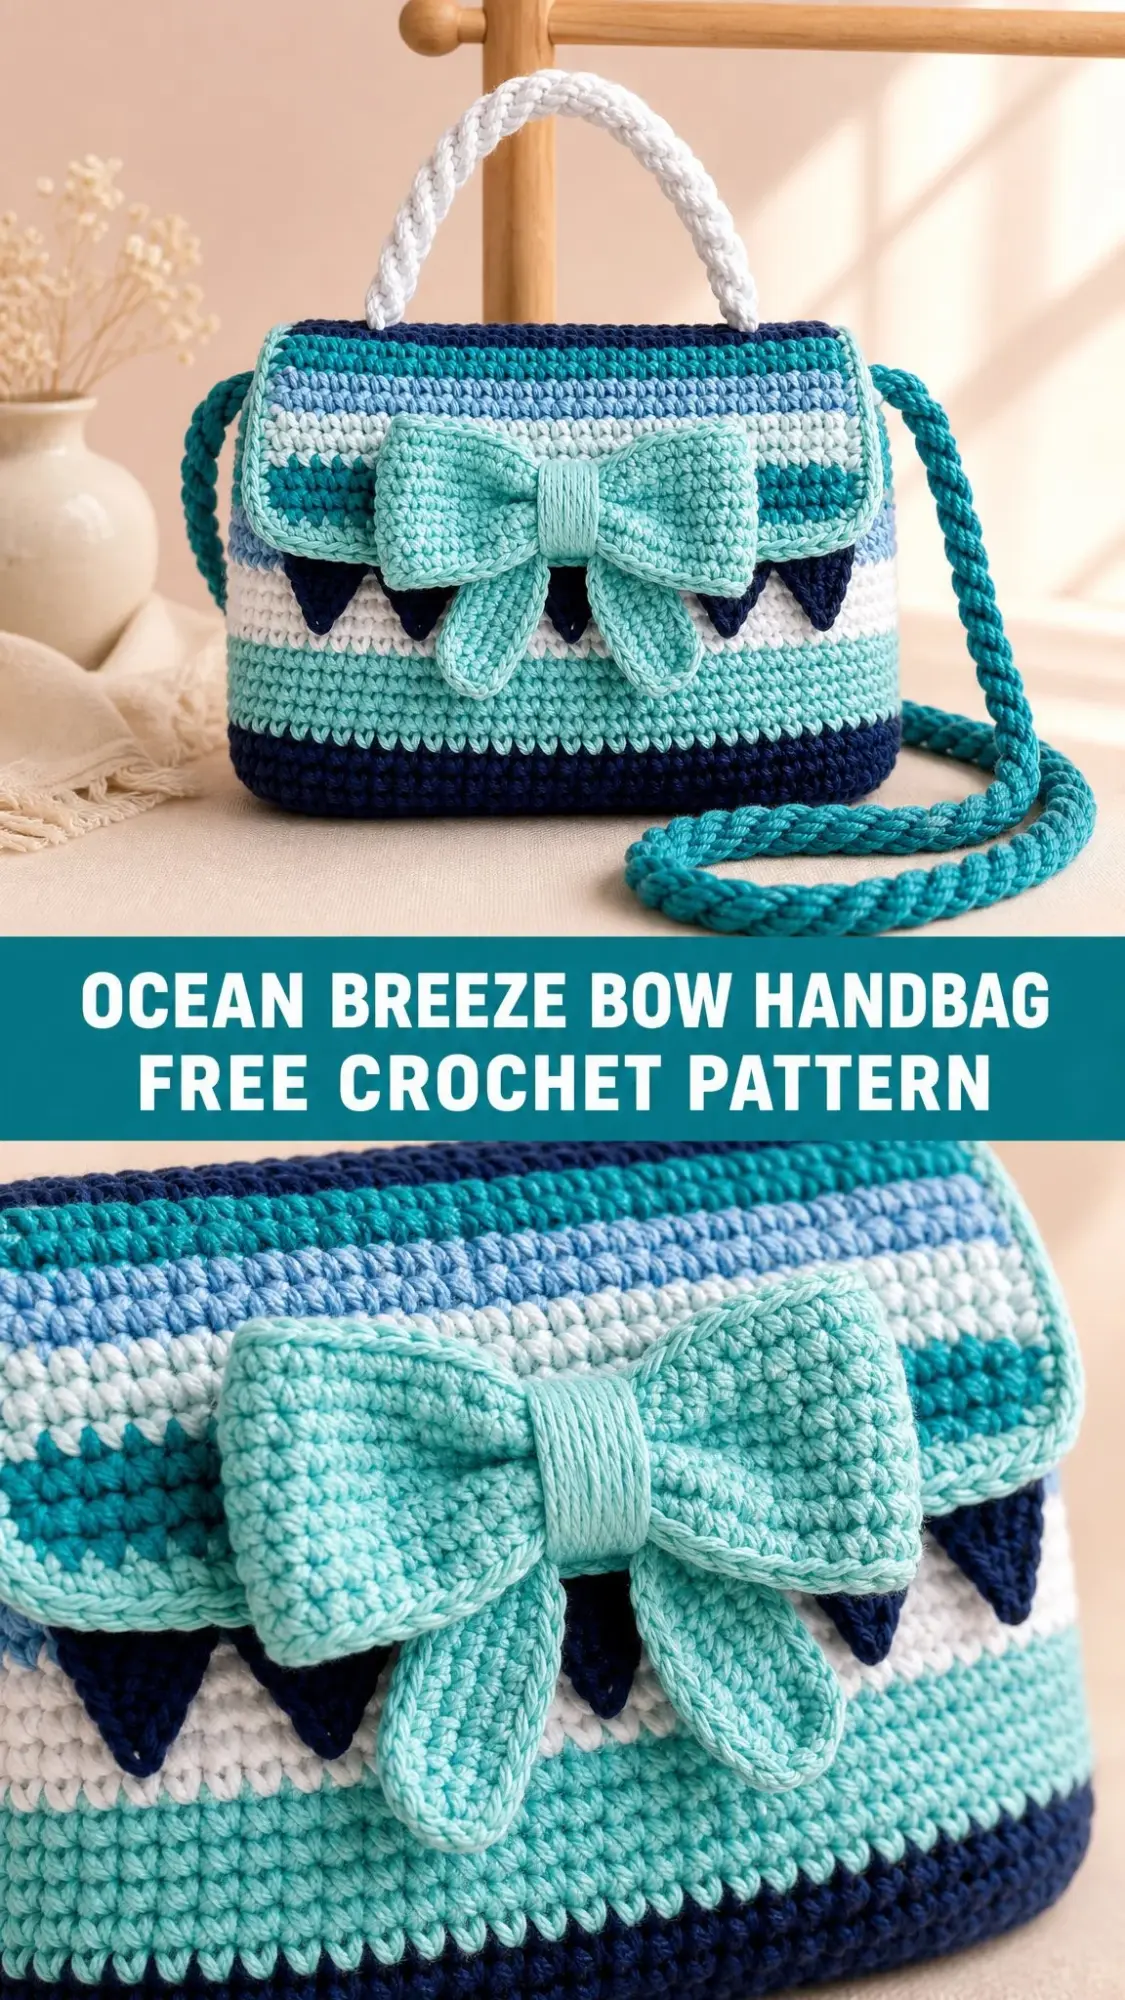
I am SO pleased with how this turned out. The Ocean Breeze Bow Handbag hits every mark I was aiming for. It looks polished, works up in firm single crochet for a professional finish, and the construction is straightforward once you understand how the pieces come together.
If you have been wanting to try a bag project but felt intimidated by shaping or assembly, this is a wonderful place to start. The panels are simple rectangles, the gusset is just a long strip, and everything gets sewn together at the end. Let me walk you through every single step.
About This Crochet Handbag Pattern
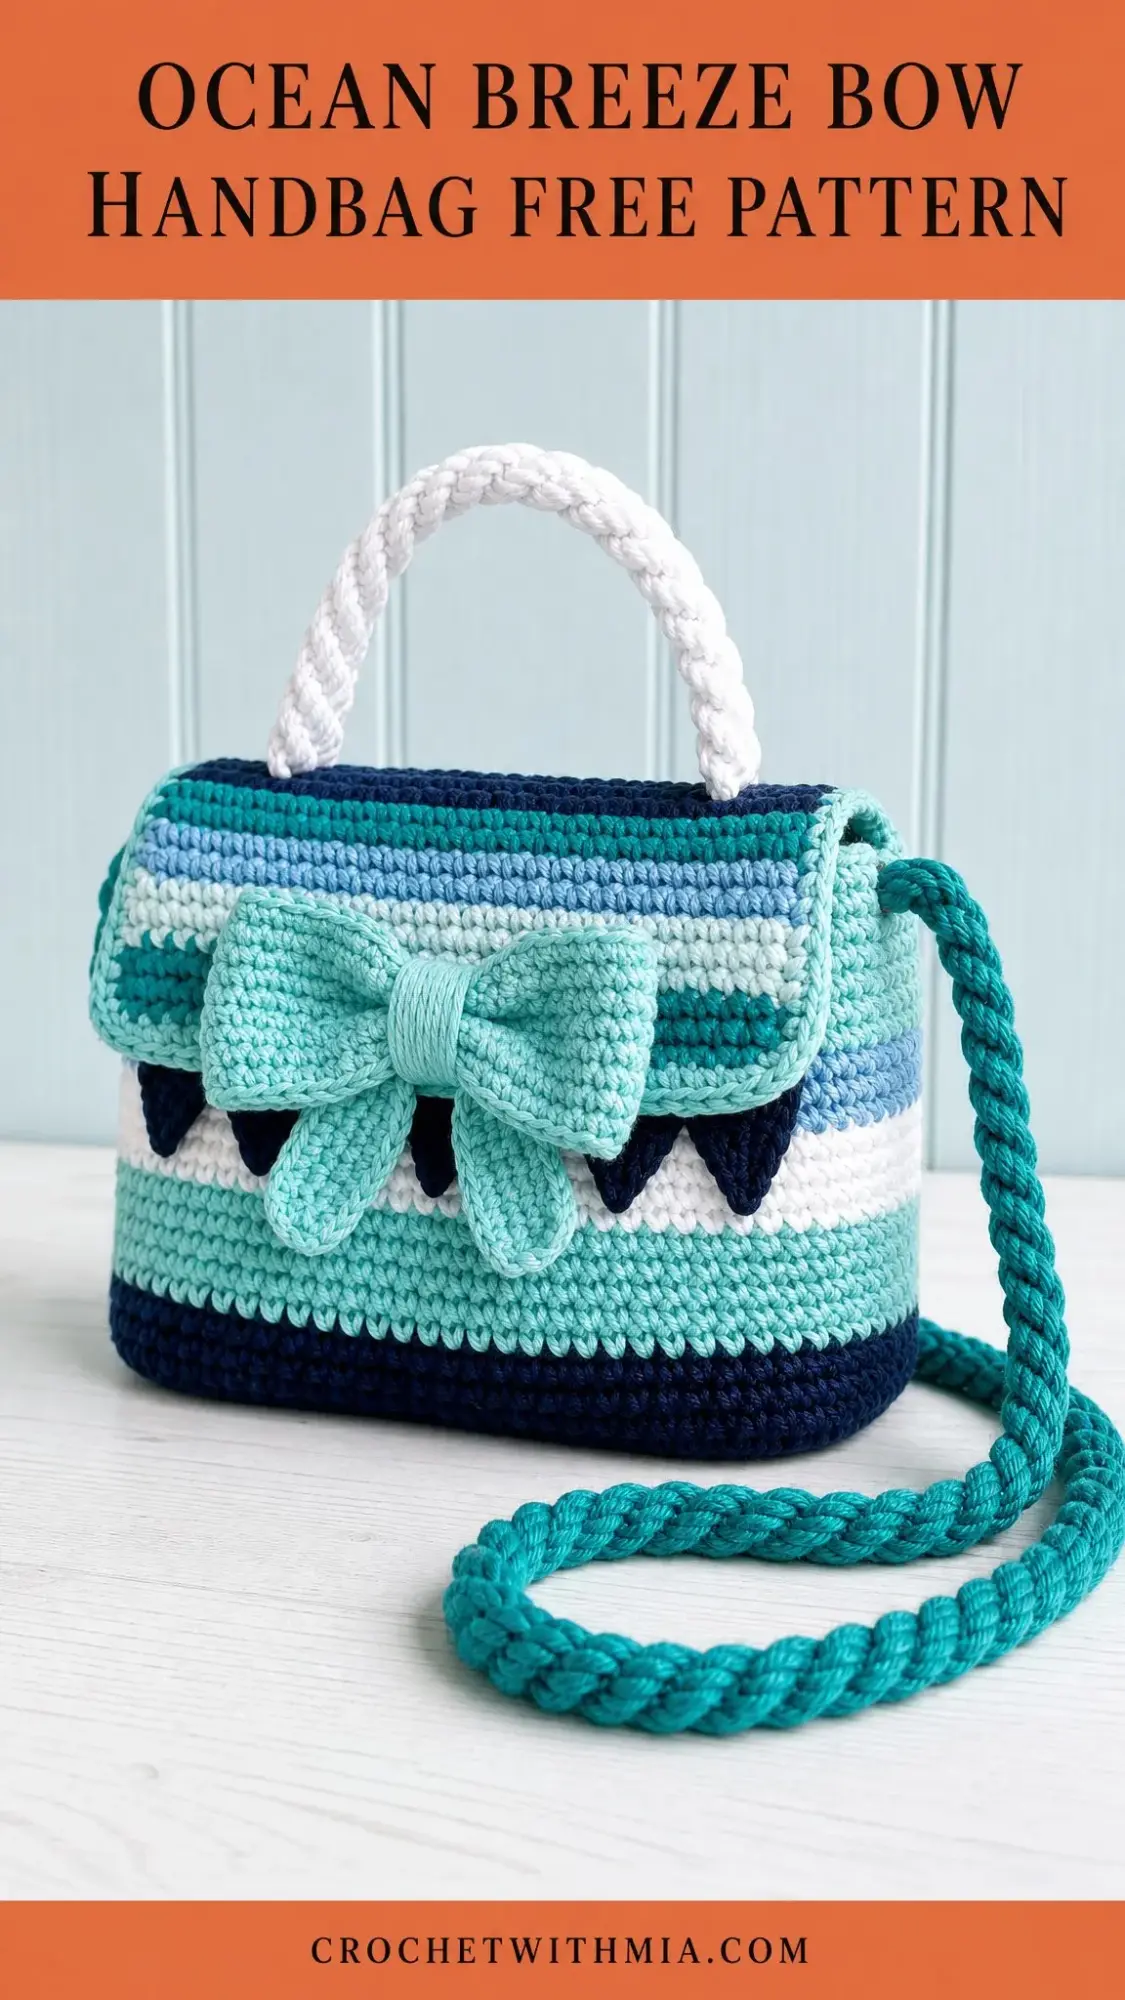
This structured striped crochet handbag features a soft bow, pennant trim, arched top handle, and rope style shoulder strap. The finished bag measures approximately 11 x 7 x 2 inches (28 x 18 x 5 cm), making it the perfect size for your phone, wallet, keys, and a few extras.
The handbag is worked in firm single crochet (sc) throughout, which creates a polished, structured fabric that holds its shape beautifully. The front and back are made as matching striped rectangles, joined with a narrow gusset strip, then finished with a fold over flap, bow, navy pennants, and sturdy crocheted cords.
Skill Level: Confident beginner to intermediate. If you can work single crochet confidently and are comfortable sewing pieces together, you can absolutely make this bag.
Time to Complete: 8 to 12 hours, depending on your pace.
Materials You Will Need
Yarn: Worsted weight cotton or cotton blend, approximately 380 to 460 yards (347 to 421 meters) total. You will need five colors:
Yarn Suggestions: Lily Sugar’n Cream, Paintbox Yarns Cotton Aran, or Lion Brand 24/7 Cotton. Any smooth worsted cotton that gives a firm fabric at gauge will work beautifully. If your fabric feels loose, choose one hook size smaller.
Hooks:
Notions: Yarn needle, stitch markers, pins or clips, scissors, tape measure, optional 10 mm magnetic snap or sew in snap, optional plastic canvas or felt lining for added structure.
Gauge
16 sc x 18 rows = 4 inches (10 cm) after light blocking.
One front or back panel should measure approximately 11 inches wide x 6.75 to 7 inches tall (28 x 17 to 18 cm) before assembly. Taking time to check your gauge will ensure your finished bag matches the intended dimensions.
Abbreviations and Stitch Guide
Before we dive into the pattern, let me define every abbreviation you will encounter:
UK crocheters: US sc equals UK dc.
Special Stitches Explained
Clean Color Change: Work the last sc before the color change until two loops remain on hook. Yarn over with the new color and pull through both loops. This creates a crisp color transition. Carry unused yarn only when it will be hidden inside a seam. Otherwise, fasten off and weave in ends.
sc2tog (Single Crochet 2 Together): Insert hook in next stitch, yarn over and pull up a loop, insert hook in next stitch, yarn over and pull up a loop, yarn over and pull through all 3 loops on hook. This counts as 1 stitch and creates a decrease.
Firm Cord: Chain the required length. Slip stitch in the back bump of the 2nd chain from hook and in each chain across. Make two identical cords and twist or braid them for a rope look.
Surface Seam: With RS facing, hold pieces together edge to edge. Whipstitch through the outer loops only for a neat raised seam, keeping tension even.
Pattern Notes
Read these before you begin. They will save you confusion later.
Work panels in rows, chain 1 to turn. The turning chain does NOT count as a stitch.
Keep color changes on the same side edge so ends can be hidden in the side seam.
Pin every seam before sewing. The gusset is intentionally one row longer than the perimeter section so you can ease it neatly at the upper corners.
Left handed makers can work rows as written. Decorative placement mirrors naturally.
For a firmer handbag, insert plastic canvas in the base and add a fabric lining.
Front and Back Panels
Make 2. Each panel is 44 stitches wide. Row 1 establishes the full width from a foundation chain of 45.
Row 1 (Navy): Ch 45. Sc in 2nd ch from hook and each ch across. Ch 1, turn. (44 sc)
Rows 2 to 5 (Navy): Sc in each st across. Ch 1, turn. (44 sc)
Rows 6 to 12 (Aqua): Sc in each st across. Ch 1, turn. (44 sc)
Rows 13 to 16 (White): Sc in each st across. Ch 1, turn. (44 sc)
Rows 17 to 23 (Sky Blue): Sc in each st across. Ch 1, turn. (44 sc)
Rows 24 to 26 (White): Sc in each st across. Ch 1, turn. (44 sc)
Rows 27 to 28 (Turquoise): Sc in each st across. Ch 1, turn. (44 sc)
Rows 29 to 30 (Navy): Sc in each st across. Fasten off on first panel. Keep working yarn on second panel if joining flap directly. (44 sc)
Checkpoint: Each panel should measure approximately 11 inches (28 cm) wide and 6.75 to 7 inches (17 to 18 cm) tall. Both panels must match before assembly.
Gusset Strip
The gusset creates the depth of your bag and connects the front and back panels.
With navy, ch 9.
Row 1: Sc in 2nd ch from hook and each ch across. Ch 1, turn. (8 sc)
Rows 2 to 109: Sc in each st across, changing colors to echo the panel stripes if desired. Fasten off, leaving a long sewing tail. (8 sc)
Suggested color placement for the gusset: Rows 1 to 18 navy, rows 19 to 45 aqua, rows 46 to 62 white, rows 63 to 89 sky/turquoise mix, rows 90 to 109 navy. Keep the strip firm and even.
Joining the Body
Now comes the exciting part where your flat pieces become a three dimensional bag.
Step 1: Mark the center bottom of one panel and row 55 of the gusset. Pin gusset row 55 to panel center bottom with RS out.
Step 2: Sew from the bottom center toward one lower corner, up the side, then stop at the top edge. Repeat from the bottom center in the other direction. The 8 stitch gusset becomes the bag depth.
Step 3: Repeat to attach the second panel to the remaining long edge of the gusset. Weave in ends.
Checkpoint: Body should stand approximately 11 inches wide x 7 inches tall x 2 inches deep (28 x 18 x 5 cm) before trim. Top opening circumference is approximately 26 inches (66 cm).
Top Edge Round
Join navy at one side seam. Work 44 sc across front top, 8 sc across side gusset, 44 sc across back top, 8 sc across other side gusset. Slip stitch to first sc. (104 sc)
Work 1 more round of sc in navy. Fasten off. (104 sc)
Fold Over Flap
Work the flap as a separate rectangle and sew it to the back top edge so it folds over the front.
Row 1 (Navy): Ch 45. Sc in 2nd ch from hook and each ch across. Ch 1, turn. (44 sc)
Rows 2 to 3 (Navy): Sc in each st across. Ch 1, turn. (44 sc)
Rows 4 to 6 (Turquoise): Sc in each st across. Ch 1, turn. (44 sc)
Rows 7 to 9 (Sky Blue): Sc in each st across. Ch 1, turn. (44 sc)
Rows 10 to 11 (White): Sc in each st across. Ch 1, turn. (44 sc)
Rows 12 to 14 (Aqua): Sc in each st across. Do not turn after row 14. (44 sc)
Edging: Ch 1. Work 42 sc across the top edge between corners, 3 sc in the corner, 12 sc down the side, 3 sc in the corner, 42 sc across the bottom, 3 sc in the corner, 12 sc up the side, 3 sc in the corner. Join and fasten off. (120 sc)
Pin the flap to the back top edge, centered across 44 front/back stitches, and sew along row 1 only.
Checkpoint: Flap should be approximately 11 inches (28 cm) wide and 3 inches (7.5 cm) tall, folding over the upper third of the front panel.
Navy Pennants
Make 5. These little triangles add such a charming detail to the flap edge.
With navy, ch 7.
Row 1: Sc in 2nd ch from hook and each ch across. (6 sc)
Row 2: Sc2tog, sc 2, sc2tog. (4 sc)
Row 3: Sc2tog twice. (2 sc)
Row 4: Sc2tog. (1 sc)
Fasten off.
Sew pennants evenly along the lower front edge of the flap, centered under the bow with small gaps between points.
Bow and Center Trim
The bow is the star of this handbag. It sits centered on the flap, covering the upper pennant joins.
Bow Loop Rectangle
With aqua, ch 29.
Row 1: Sc in 2nd ch from hook and each ch across. (28 sc)
Rows 2 to 9: Sc in each st across. (28 sc)
Fasten off, leaving a long tail. Weave the tail through the center of the rectangle and cinch tightly to form two loops.
Center Band
With aqua, ch 6.
Row 1: Sc in 2nd ch from hook and each ch across. (5 sc)
Rows 2 to 10: Sc in each st across. (5 sc)
Wrap around the cinched bow center and sew closed on the back.
Bow Tails
Make 2. With aqua, ch 9.
Row 1: Sc in 2nd ch from hook and each ch across. (8 sc)
Row 2: Sc2tog, sc 4, sc2tog. (6 sc)
Row 3: Sc across. (6 sc)
Row 4: Sc2tog, sc 2, sc2tog. (4 sc)
Row 5: Sc2tog twice. (2 sc)
Fasten off.
Sew tails behind bow center, angled downward.
Sew the completed bow to the front flap, centered horizontally and placed so the lower edge slightly overlaps the pennants.
White Top Handle
Make 3 white cords: Ch 42, slip stitch in the back bump of the 2nd ch from hook and each ch across. (41 sl sts per cord)
Braid the 3 cords together, keeping the braid flat. Finished braided handle should measure approximately 10 to 11 inches (25 to 28 cm) long.
Sew handle ends securely to the inside of the back/top edge, placing each end approximately 2 inches (5 cm) in from the side seams. Stitch through several layers for strength.
Turquoise Shoulder Strap
Make 2 turquoise cords: Ch 150, slip stitch in the back bump of the 2nd ch from hook and each ch across. (149 sl sts per cord)
Twist the two cords together and secure the ends. Finished strap should measure approximately 42 inches (107 cm). Adjust chain length before fastening off for your preferred drop.
Side Loops (make 2): Ch 14, slip stitch in back bumps across. (13 sl sts each) Fold each loop and sew one to each side seam near the top edge. Thread or stitch strap ends through the loops and secure firmly.
Closure
Sew a magnetic snap or sew in snap under the flap, hidden behind the bow. Make sure the flap lies smooth before stitching the second half to the front panel.
Strength tip: For a bag that will carry heavier items, sew the strap and handle through a fabric lining or add a small reinforcing patch inside the bag.
Customization Ideas
Wider bag: Add stitches to each panel in multiples of 2. Match the flap to the new panel width. Add the same extra width to the gusset length by adding rows at the center bottom.
Taller bag: Add panel rows in the lower aqua or sky sections before making the flap. Add 2 gusset rows for every extra panel row added to front and back height.
Longer strap: Add 3 chains for roughly 1 inch (2.5 cm) of extra strap length before twisting two cords together.
More structure: Add a fabric lining, plastic canvas base, or a thin felt insert cut slightly smaller than the front/back panels.
Troubleshooting Common Issues
Panel edges lean: Count every row. Work the first and last sc into the actual stitch, not the turning chain.
Flap ruffles: Use fewer edging stitches on the side edges or switch to a smaller hook for edging.
Body caves in: Use firmer cotton, smaller hook, plastic canvas base, or lining.
Pennants look crowded: Center all 5 first with pins. Leave small gaps and sew only along the top edge.
Strap stretches: Use two tight cords twisted together, or crochet around a non stretch cord.
Finishing and Blocking
Weave in every end with a yarn needle, splitting the cotton plies slightly for grip. Steam lightly or wet block panels before final trim if needed. Shape the bag over a box while drying so the bottom and sides set square. Do not over steam the bow. Pinch and shape it by hand.
Care Instructions
Spot clean with cool water and mild soap. Press in a towel to remove moisture, reshape, and dry flat. Avoid hanging the bag while wet because cotton can stretch.
Quick Reference Chart
| Part | Count/Size |
|---|---|
| Front panel | 44 sts x 30 rows |
| Back panel | 44 sts x 30 rows |
| Gusset | 8 sts x 109 rows |
| Top edge | 104 sc per round |
| Flap | 44 sts x 14 rows plus edging |
| Pennants | 5 total |
| Bow loop | 28 sts x 9 rows |
| Finished size | Approx. 11 x 7 x 2 in / 28 x 18 x 5 cm |
You Did It!
Thank you so much for choosing this pattern for your next crochet project. I genuinely hope you love making this Ocean Breeze Bow Handbag as much as I loved designing it. The combination of those coastal stripes, the sweet bow, and those playful pennants creates something truly special.
If you make this bag, I would absolutely love to see it! Tag me on Instagram or share a photo in our Facebook group. Nothing makes my day quite like seeing your finished projects come to life.
Do not forget to save this crochet handbag pattern to your Pinterest boards so you can find it whenever you are ready to start stitching. And if you make it, please drop a comment below. I love hearing which colors you chose and how the project turned out for you!
Want a Quick & Easy Printable Version?
Get a clean, beautifully formatted PDF of this pattern — easy to follow step by step, ready to print or save on any device. No scrolling, no distractions, just the pattern.
Get the Printable PDF →