
This dress is STUNNING and yes, it is absolutely worth every single hour you will spend on it. I am talking 40 to 60 hours of pure crochet bliss that results in the most gorgeous handmade garment you have ever created. If you have been dreaming of making a show-stopping piece that looks like it belongs in a bridal boutique or a garden party catalog, this is the one.
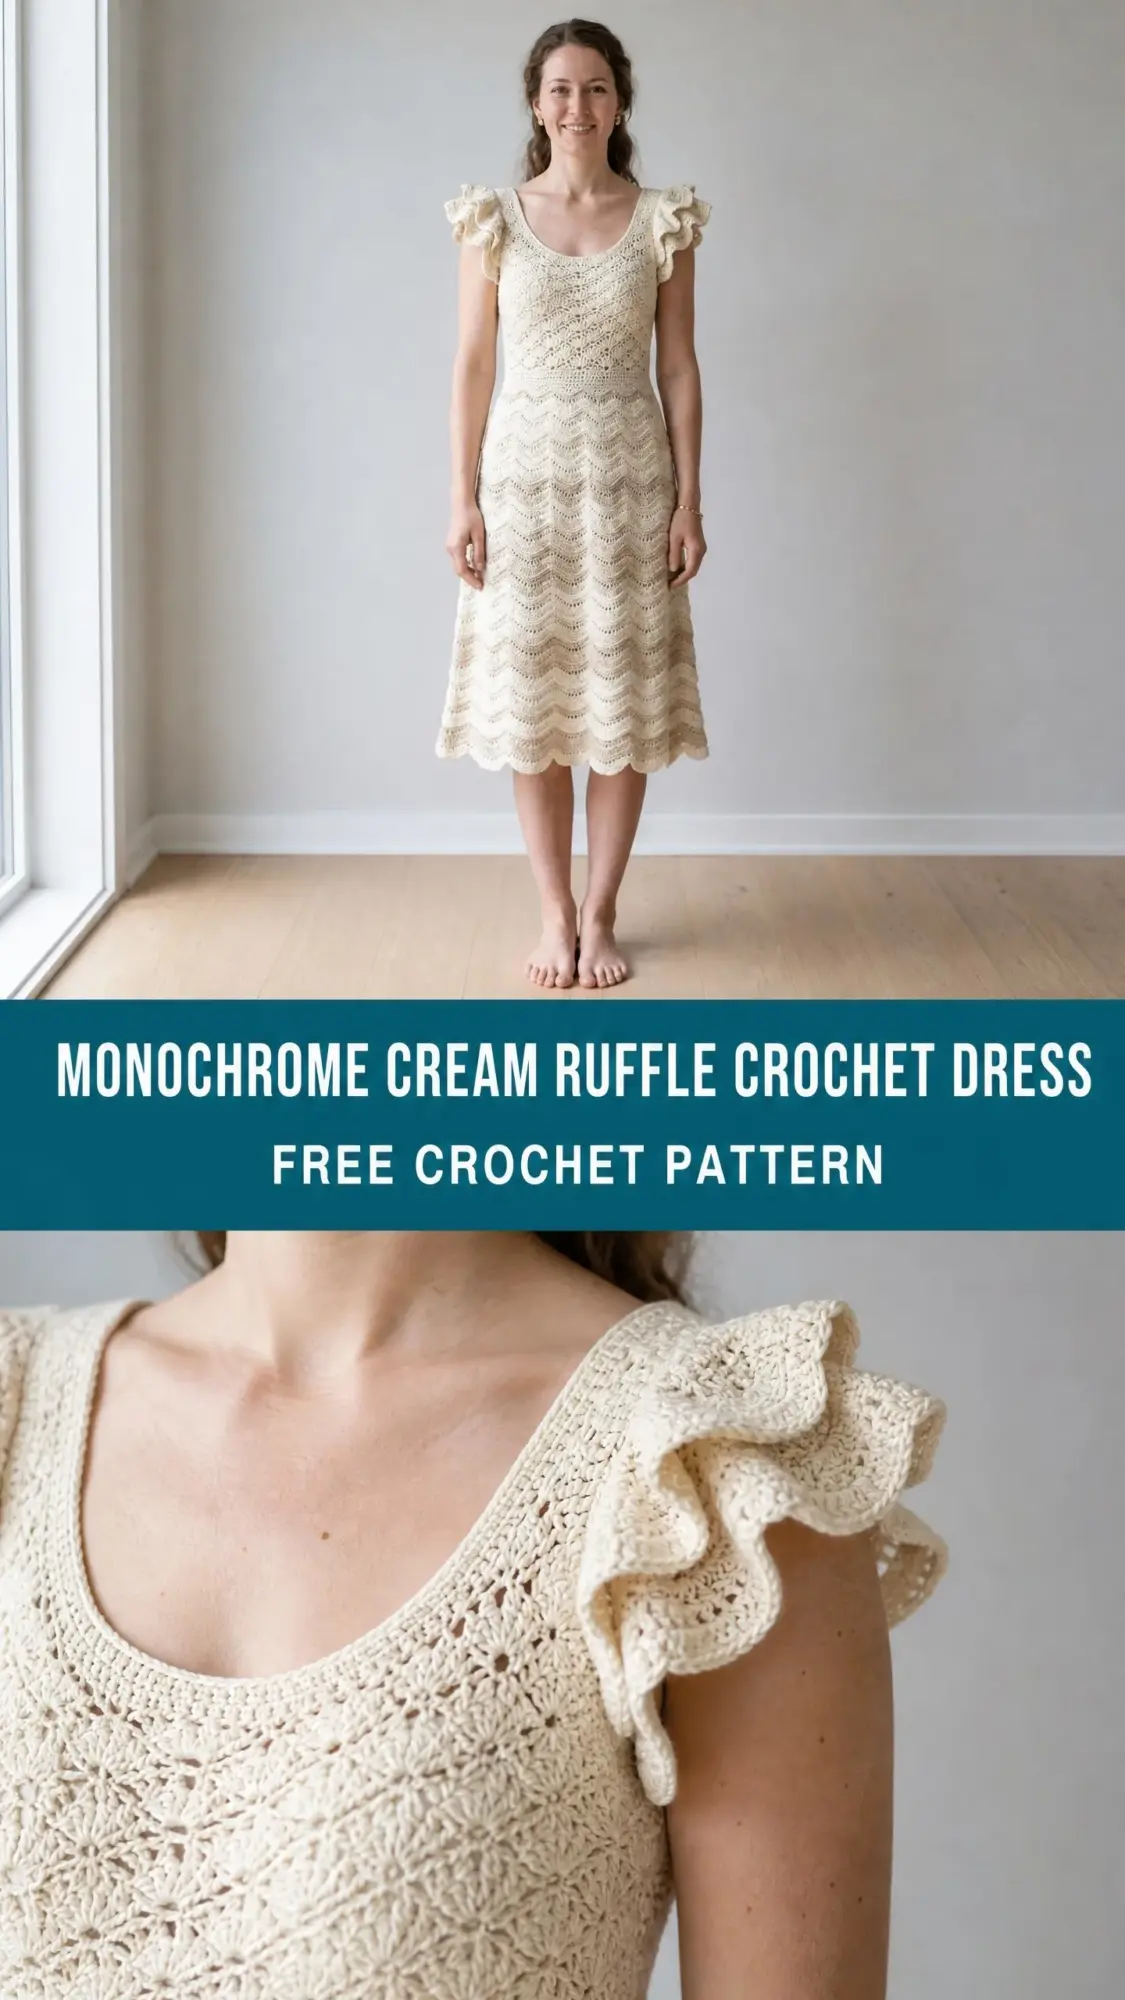
The lace fan bodice, the chevron wave skirt, those fluttery ruffled cap sleeves. Every detail comes together to create something truly breathtaking. And here is the best part: once you understand the pattern repeats, the stitches flow in a rhythm that becomes almost meditative.
Whether you are making this for yourself, a bride-to-be, or someone who deserves something handmade with love, this crochet dress pattern delivers serious wow factor. Let me walk you through everything you need to know to bring this beauty to life.
About This Crochet Dress Pattern
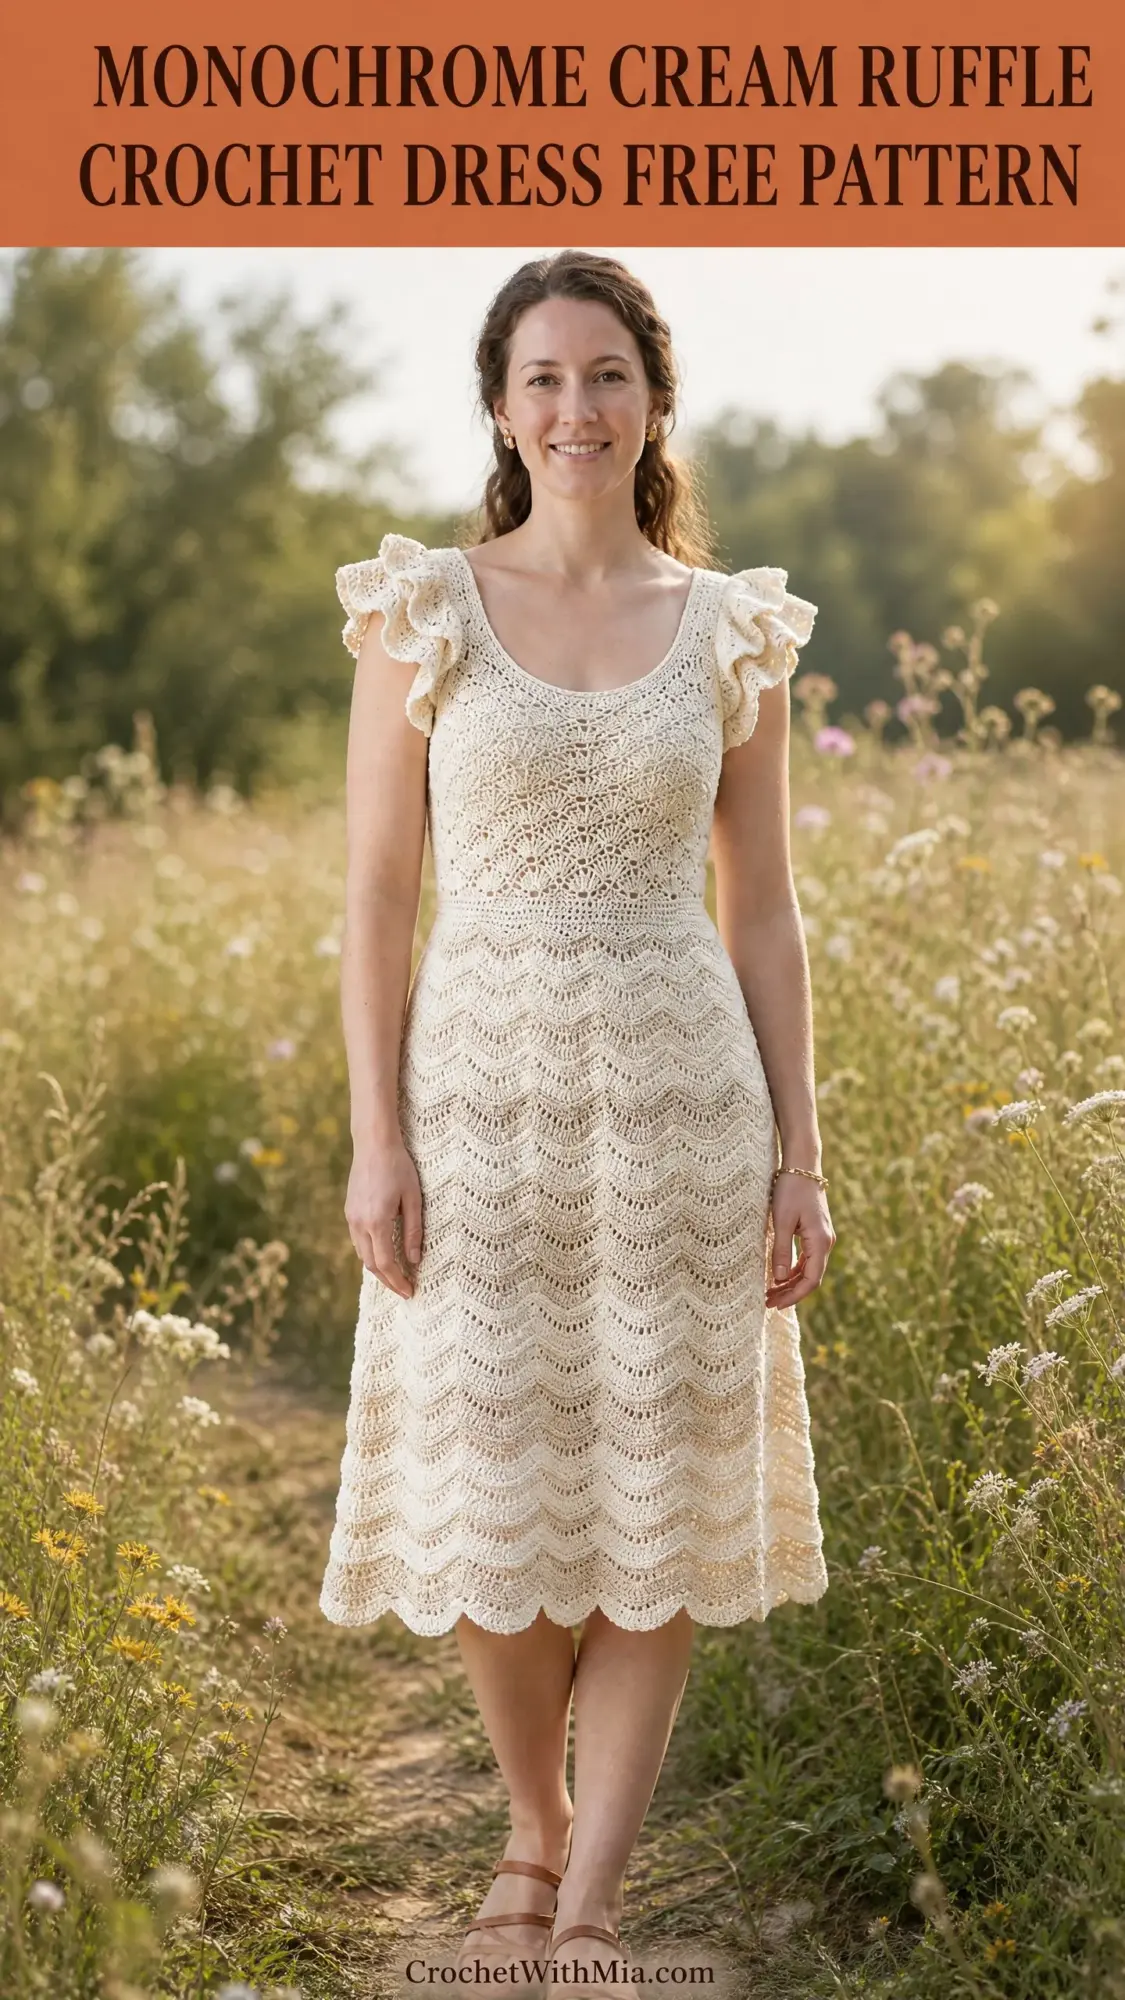
This midi-length crochet dress features a fitted bodice worked in lace fan stitch, a flared skirt in chevron wave lace, and the sweetest ruffled cap sleeves you have ever seen. The scoop neckline flatters beautifully, and an open keyhole back with a delicate button closure adds an elegant finishing touch. The scalloped hem forms naturally from the final wave repeat, giving the whole piece a cohesive, polished look.
The construction method is clever and satisfying. You work the bodice flat in two panels, front and back, then join them at the sides. The skirt gets worked in the round from the waist down. Finally, you add those gorgeous ruffled cap sleeves directly into the armhole openings. Three distinct stitch sections keep things interesting: lace fan for the bodice, a transition band at the waist, and chevron wave lace for the skirt.
The color throughout is a single cream or natural ecru. No color changes to worry about. Just pure, elegant simplicity.
Skill Level
This pattern is designed for advanced intermediate crocheters. You should feel comfortable working lace stitch patterns with chains and shells, reading stitch repeats, and managing both flat and in-the-round construction in the same project. You will also need to pick up stitches around armhole edges for the ruffle trim and work increases within a set pattern repeat.
If you have never made a garment before, I would suggest practicing with a simpler top first. But if you have tackled lace shawls or worked garments with shaping, you are ready for this challenge.
Materials You Will Need
Yarn: Approximately 1,800 to 2,200 yards of DK weight (light weight, number 3) cotton or cotton-blend yarn in cream or natural ecru.
Here are some yarn options that work beautifully:
Paintbox Yarns Simply DK (100% cotton, 137 yards per 50 gram ball). You will need approximately 14 to 16 balls in shade Paper White or Champagne White. This yarn offers excellent stitch definition for lace work.
Lion Brand 24/7 Cotton DK (100% cotton, 196 yards per 100 gram ball). You will need approximately 10 to 12 balls in Ecru or Cream. Widely available and affordable.
Drops Safran (50% cotton, 50% acrylic, 175 yards per 50 gram ball). You will need approximately 12 to 13 balls in Off White. The acrylic content adds drape and reduces stiffness.
Avoid fuzzy, bouclé, or highly textured yarns. They will obscure your beautiful lace stitch structure.
Hook: US size E-4 / 3.5 mm crochet hook (or size needed to obtain gauge)
Notions:
Finished Measurements
This pattern is written for size Small/Medium (US sizes 4 to 8).
Gauge (Please Do Not Skip This)
In Fan Lace pattern (Bodice stitch): 16 stitches and 10 rows = 4 inches / 10 cm, blocked.
In Chevron Wave Lace pattern (Skirt stitch): one full repeat of 18 stitches = 4.5 inches / 11.5 cm, and 8 rows = 4 inches / 10 cm, blocked.
Gauge is critical for this garment. A difference of even half a stitch per inch will significantly alter the bust and waist measurements. Work a swatch of at least 6 inches square in each stitch pattern, block it, and measure before beginning. I know it feels tedious, but trust me on this one.
Abbreviations and Stitch Definitions
Let me walk you through every stitch you will use. I am defining them all here so you feel confident before you start.
ch = chain: Yarn over, pull through loop on hook. This is your foundation stitch.
sl st = slip stitch: Insert hook, yarn over, pull through both the stitch and the loop on your hook in one motion.
sc = single crochet: Insert hook into stitch, yarn over and pull up a loop (2 loops on hook), yarn over and pull through both loops.
hdc = half double crochet: Yarn over, insert hook into stitch, yarn over and pull up a loop (3 loops on hook), yarn over and pull through all 3 loops.
dc = double crochet: Yarn over, insert hook into stitch, yarn over and pull up a loop (3 loops on hook), yarn over and pull through 2 loops (2 loops remaining), yarn over and pull through remaining 2 loops.
tr = treble crochet: Yarn over twice, insert hook into stitch, yarn over and pull up a loop (4 loops on hook), [yarn over and pull through 2 loops] 3 times.
sk = skip: Pass over the indicated stitch without working into it.
sp = space: The gap created by chain stitches in previous rows.
ch-sp = chain space: Work into the space created by chains, not into the chains themselves.
t-ch = turning chain: The chain(s) worked at the beginning of a row to bring your hook up to the proper height.
RS = right side: The front, public-facing side of your work.
WS = wrong side: The back, private side of your work.
pm = place marker: Add a stitch marker to hold your place.
rep = repeat: Work the instructions again as directed.
tog = together: Work multiple stitches as one to create a decrease.
yo = yarn over: Wrap yarn around hook from back to front.
Special Stitches for This Crochet Dress Pattern
Fan Shell: Work 5 double crochets into the same stitch or space. This creates a fan or shell shape sharing a common base. Beautiful and easier than it looks.
V-Stitch: Work [dc, ch 2, dc] into the same stitch or space. This creates a V-shaped unit with a chain-2 space at its center.
Ruffle Stitch: Round 1 works 1 sc into each stitch around the armhole edge. Round 2 works 3 dc into each sc around, tripling the stitch count and creating that full, ruffled effect. Round 3 works 1 sc into each dc around for a neat finish.
Scallop Edging: Work [sc, hdc, 3 dc, hdc, sc] into each ch-3 space around. This reinforces the scallop and adds visual definition to the hem.
Button Loop: Ch 8, sl st into first ch to form loop. Attach at top center of back keyhole opening.
Pattern Notes Before You Begin
The bodice front and back are worked separately as flat panels, then seamed at the side edges using a slip stitch seam on the wrong side. The back panel includes the keyhole opening.
The skirt is worked in joined rounds from the waist down. At the transition from flat bodice to circular skirt, pick up stitches evenly around the entire waist opening and join to work in the round.
Turning chains matter here. For rows worked in dc, ch 3 at the beginning of RS rows counts as first dc. For rows worked in sc, ch 1 does not count as a stitch.
Block aggressively. Wet blocking or steam blocking transforms lace crochet. The finished measurements given are post-blocking measurements. This step makes an enormous difference in how professional your dress looks.
Step by Step Instructions
Front Bodice Panel
The front bodice is worked flat from the top (neckline) down to the waist.
Foundation: Ch 75.
Row 1 (RS): Sc into 2nd ch from hook, sk 2 ch, Fan Shell (5 dc) into next ch, sk 2 ch, sc into next ch; rep from to across, ending sc into last ch. Turn. (12 Fan Shells, 13 sc = 73 working sts)
Row 2 (WS): Ch 1 (does not count as st), sc into first dc (center of first shell), ch 2, [dc, ch 2, dc] into sc between shells (V-stitch made), ch 2, sc into center dc of next shell; rep from to across, ending sc into top of t-ch. Turn. (12 sc, 12 V-stitches = 25 structural st units)
Row 3 (RS): Ch 3 (counts as dc), 2 dc into first sc, sc into ch-2 sp of V-st, Fan Shell (5 dc) into next sc; rep from to , ending sc into last ch-2 sp of last V-st, 3 dc into last sc. Turn. (2 half-shells at edges + 11 full shells + 12 sc = 77 dc/sc working sts)
Row 4 (WS): Ch 1, sc into center dc of first edge half-shell (the 2nd dc of the 3 dc), ch 2, V-st into next sc, ch 2, sc into center dc of next Fan Shell; rep from to across, ending sc into top of t-ch. Turn. (13 sc, 12 V-st units = 25 structural st units)
Rows 5 through 18: Rep Rows 3 and 4 alternately (7 more repeats).
Checkpoint: After Row 18, the front bodice panel should measure approximately 7.5 inches tall and approximately 17 to 18 inches wide.
Waist Shaping (Front Bodice, Rows 19 to 26)
Row 19 (RS): Ch 3, sk first sc, sc into ch-2 sp of first V-st, Fan Shell into next sc, sc into ch-2 sp of V-st; rep from to across to last V-st, sc into ch-2 sp of last V-st, dc into last sc. Turn. (11 Fan Shells, 12 sc, 2 single dc at edges = 69 working sts)
Row 20 (WS): Ch 1, sc into first dc (edge dc), ch 2, V-st into next sc, ch 2, sc into center of shell, ch 2, V-st into sc; rep from to across, ending ch 2, sc into top of t-ch. Turn.
Rows 21 through 26: Continue in established pattern, working edge stitches as single dc or sc without shell at edges on RS rows. Maintain 11 full Fan Shells in the center.
Checkpoint: After Row 26, the front bodice panel should measure approximately 11 inches tall. The waist section should measure approximately 14 to 15 inches wide.
Hip Transition (Front Bodice, Rows 27 to 34)
Row 27 (RS): Ch 3, 2 dc into first sc (restore half-shell at edge), sc into V-st ch-2 sp, Fan Shell into sc; rep across, ending with 2 dc more at far edge. Turn. (11 full shells + 2 half-shells = 73 working sts)
Row 28 (WS): Rep Row 4 pattern.
Rows 29 to 30: Rep Rows 3 and 4.
Row 31 (RS): Work as Row 3 but at each edge, work a full Fan Shell (5 dc) instead of half-shell (3 dc). Turn. (13 Fan Shells + 14 sc = 79 working sts)
Row 32 (WS): Ch 1, sc into center of first shell, ch 2, V-st into next sc, ch 2, sc into center of next shell; rep across. Turn. (14 sc + 13 V-st units = 27 structural units)
Rows 33 and 34: Rep Rows 3 and 4 with 13 shells.
Checkpoint: After Row 34, the front bodice should measure approximately 15 inches from cast-on edge. Width should be approximately 19 to 20 inches. Set aside.
Back Bodice Panel
The back bodice mirrors the front with the addition of the keyhole opening at center back.
Foundation: Ch 75.
Row 1 (RS): Work exactly as Front Bodice Row 1. Turn. (73 working sts, 12 Fan Shells, 13 sc)
Rows 2 through 8: Work exactly as Front Bodice Rows 2 through 8.
Keyhole Opening (Back Bodice, Row 9 onward)
The keyhole is worked by splitting the back panel into two halves at the center.
Right Back Half, Row 9 (RS): Ch 3, 2 dc into first sc, sc into V-st ch-2 sp, Fan Shell into sc; rep for 6 full Fan Shells, sc into next V-st ch-2 sp. Leave remaining sts unworked. Turn. (6 Fan Shells + 1 edge half-shell + 7 sc = 33 working sts)
Right Back Half, Rows 10 through 18: Continue in established fan lace pattern over these 33 sts.
Left Back Half: Rejoin yarn at center, work Row 9 (RS) to match Right Back Half in mirror. Work Rows 10 through 18 to match.
Rows 19 through 26: Work waist shaping on each half separately, mirroring Front Bodice.
Rows 27 through 34: Work hip transition on each half, mirroring Front Bodice. At Row 31, add full shell at outer edge only.
Side Seams and Bodice Assembly
Lay front and back panels with WS together. Align side edges. Using yarn and tapestry needle, work a slip stitch seam along each side edge.
Join the two back halves along the center back seam from Row 19 down to Row 34 using sl st seam on WS. The open keyhole occupies Rows 9 through 18 of the center back.
Neckline Finish: Work 1 round of sc evenly around the entire neckline edge. Join with sl st. Fasten off.
Keyhole Edging: Work 1 row of sc down one side of keyhole, sc across bottom, and back up the other side. At top of one keyhole edge, attach button loop: ch 8, sl st into base ch to form loop, sl st to anchor. Sew button to opposite top.
Transition Band (Waist)
Round 1: With RS facing, join yarn at right side seam at waist edge. Work sc evenly around entire waist opening. Total: 126 sc. Join with sl st to first sc.
Round 2: Ch 3 (counts as dc), dc into each sc around. Join with sl st to top of t-ch. (126 dc)
Round 3: Ch 1, sc into same st as join, sc into each dc around. Join with sl st to first sc. (126 sc)
Skirt Section 1 (Rounds 1 through 16)
Work chevron wave lace pattern over 7 repeats (126 stitches).
Round 1: Ch 1, [sc, ch 3, sc] into first st (wave peak), [ch 1, sk 1, sc] 3 times, ch 1, sk 1, [sc, ch 3, sc] into next st (second peak), [ch 2, sk 2, sc] 2 times, ch 1, sk 2; working over 18 sts per rep. Join with sl st to first sc. [7 reps]
Round 2: Ch 1, sl st into first ch-3 sp, ch 1, [sc, ch 3, sc] into ch-3 sp (peak), [ch 1, sc into next ch-1 sp] 3 times, ch 1, [sc, ch 3, sc] into next ch-3 sp (peak), ch 2, sc into ch-2 sp, ch 2, sc into next ch-2 sp, ch 2, sk to next ch-3 sp; rep from to 6 more times. Join with sl st to first sc.
Rounds 3 through 16: Continue in established chevron wave lace pattern.
Checkpoint: After Round 16, the skirt should measure approximately 8 inches below the waist transition band.
Skirt Increase Section 1 (Rounds 17 through 20)
Increase from 7 to 9 wave repeats.
Round 17 (Increase Set-up): Work existing chevron wave pattern for 3 complete repeats, then at the 4th repeat, work a wider version with extra ch-1 sc units and an extra valley sc. Insert same expansion into repeat 7.
Rounds 18 through 20: Work all 9 established wave repeat positions in standard chevron wave lace pattern. (162 working st positions)
Checkpoint: After Round 20, skirt circumference should measure approximately 40 inches.
Skirt Section 2 (Rounds 21 through 36)
Work chevron wave lace with 9 repeats for 16 rounds.
Skirt Increase Section 2 (Rounds 37 through 40)
Increase from 9 to 12 repeats.
Round 37 (Increase Set-up): Insert expanded wave at repeat positions 3, 6, and 9.
Rounds 38 through 40: Work all 12 repeat positions in standard chevron wave lace. (216 working st positions)
Skirt Section 3 (Rounds 41 through 54)
Work chevron wave lace with 12 repeats for 14 rounds.
Hem Scallop (Final Round)
Sl st across to first ch-3 peak sp, then [sc, hdc, 3 dc, hdc, sc] into each ch-3 peak sp around. Between peaks, sl st across the valley chain spaces. Join with sl st to first sc. Fasten off. (24 scallop peaks)
Cap Sleeve Ruffles
Round 1 (Base round): With RS facing, join yarn at bottom of one armhole. Work sc evenly around entire armhole opening. Target: 48 sc. Join with sl st to first sc. (48 sc)
Round 2 (Ruffle expansion): Ch 3 (counts as dc), 2 dc into same sc as join (3 dc into first sc), 3 dc into each remaining sc around. Join with sl st to top of t-ch. (144 dc)
Round 3 (Ruffle edge): Ch 1, sc into each dc around. Join with sl st to first sc. (144 sc)
Round 4 (Optional scallop finish): Work [sc, ch 3, sc] into every 3rd sc around, sl st into sts between peaks. (48 scallop peaks)
Fasten off. Repeat for second armhole.
Finishing
Weave in all yarn ends securely. Block the entire dress using wet blocking or steam blocking. Pin out the lace sections to open up the stitch patterns. Allow to dry completely before wearing.
Tips for Success
Work with consistent tension throughout. Lace patterns are sensitive to tension variation. If your skirt fabric feels stiff, consider using a hook one size larger for that section.
Count your stitches regularly, especially during the increase rounds in the skirt. Losing track of pattern repeats can throw off the wave alignment.
Take breaks. Forty to sixty hours is a lot of crochet time. Your hands and your eyes will thank you for pacing yourself.
When blocking, really take your time pinning out each scallop at the hem and each ruffle at the sleeves. This is what makes lace crochet look like magic.
Final Thoughts on This Beautiful Crochet Dress
You did it! Or you are about to do it. Either way, I am so excited for you. This monochrome cream ruffle crochet dress is the kind of project that reminds you why you fell in love with crochet in the first place. Every stitch matters. Every row builds toward something extraordinary.
When you wear this dress, people will not believe you made it yourself. But you did. And that is something to be incredibly proud of.
Thank you so much for choosing this pattern for your next project. I truly hope you love making it as much as I loved designing it. If you create this dress, I would absolutely love to see your finished piece! Tag me on Instagram or share a photo in my Facebook group. Seeing your makes is honestly the best part of my day.
If you loved this crochet dress pattern, go ahead and pin it to your Pinterest boards so you can find it whenever inspiration strikes. And please drop a comment below if you make one. I cannot wait to hear how it turns out for you!