
I don’t know about you, but I love a dress that does all the work for me. You slip it on, tie the sash, and suddenly you look like you spent hours getting ready.
Get the Ad-Free PDF Pattern
Scroll down for the full pattern, or get the ad-free printable PDF from the shop.
Get the Printable PDF →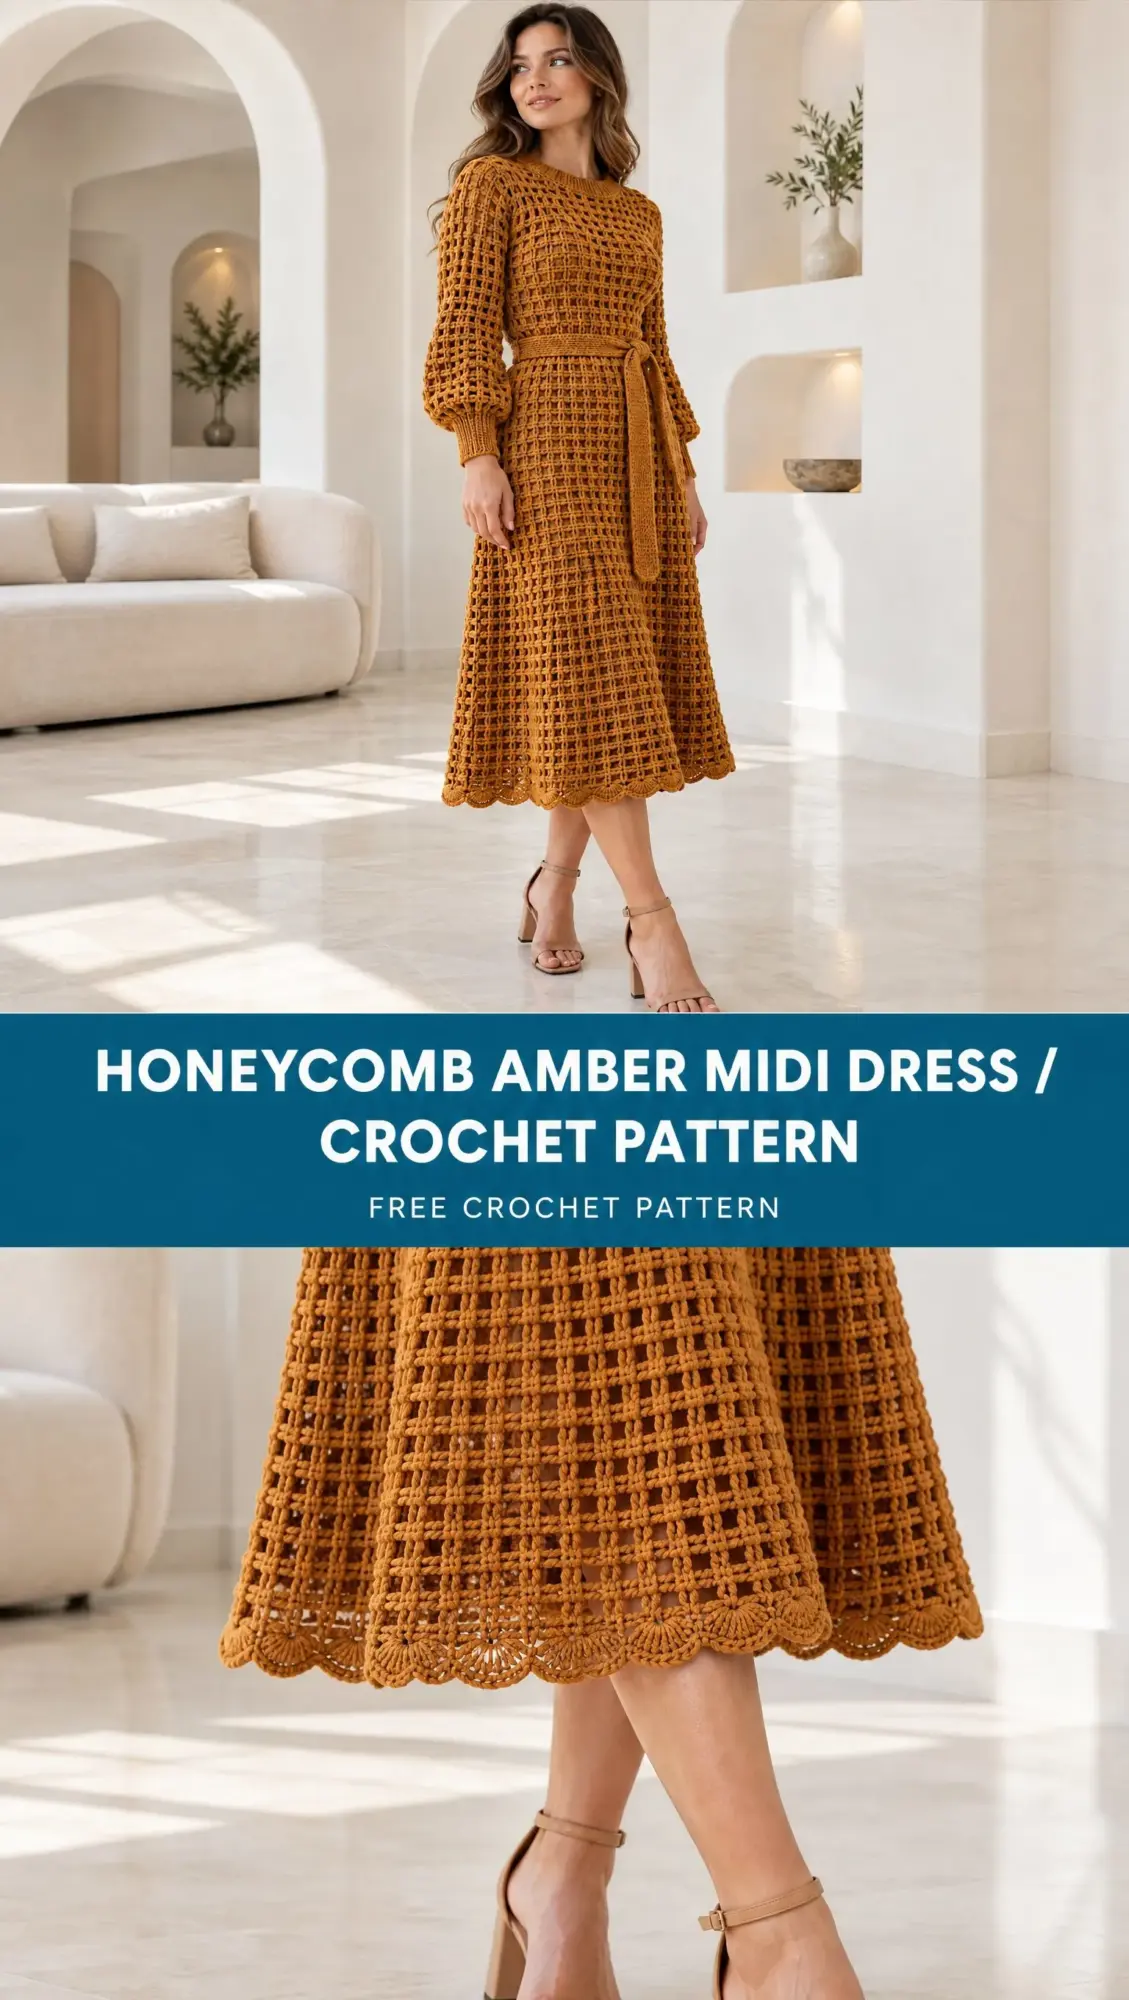
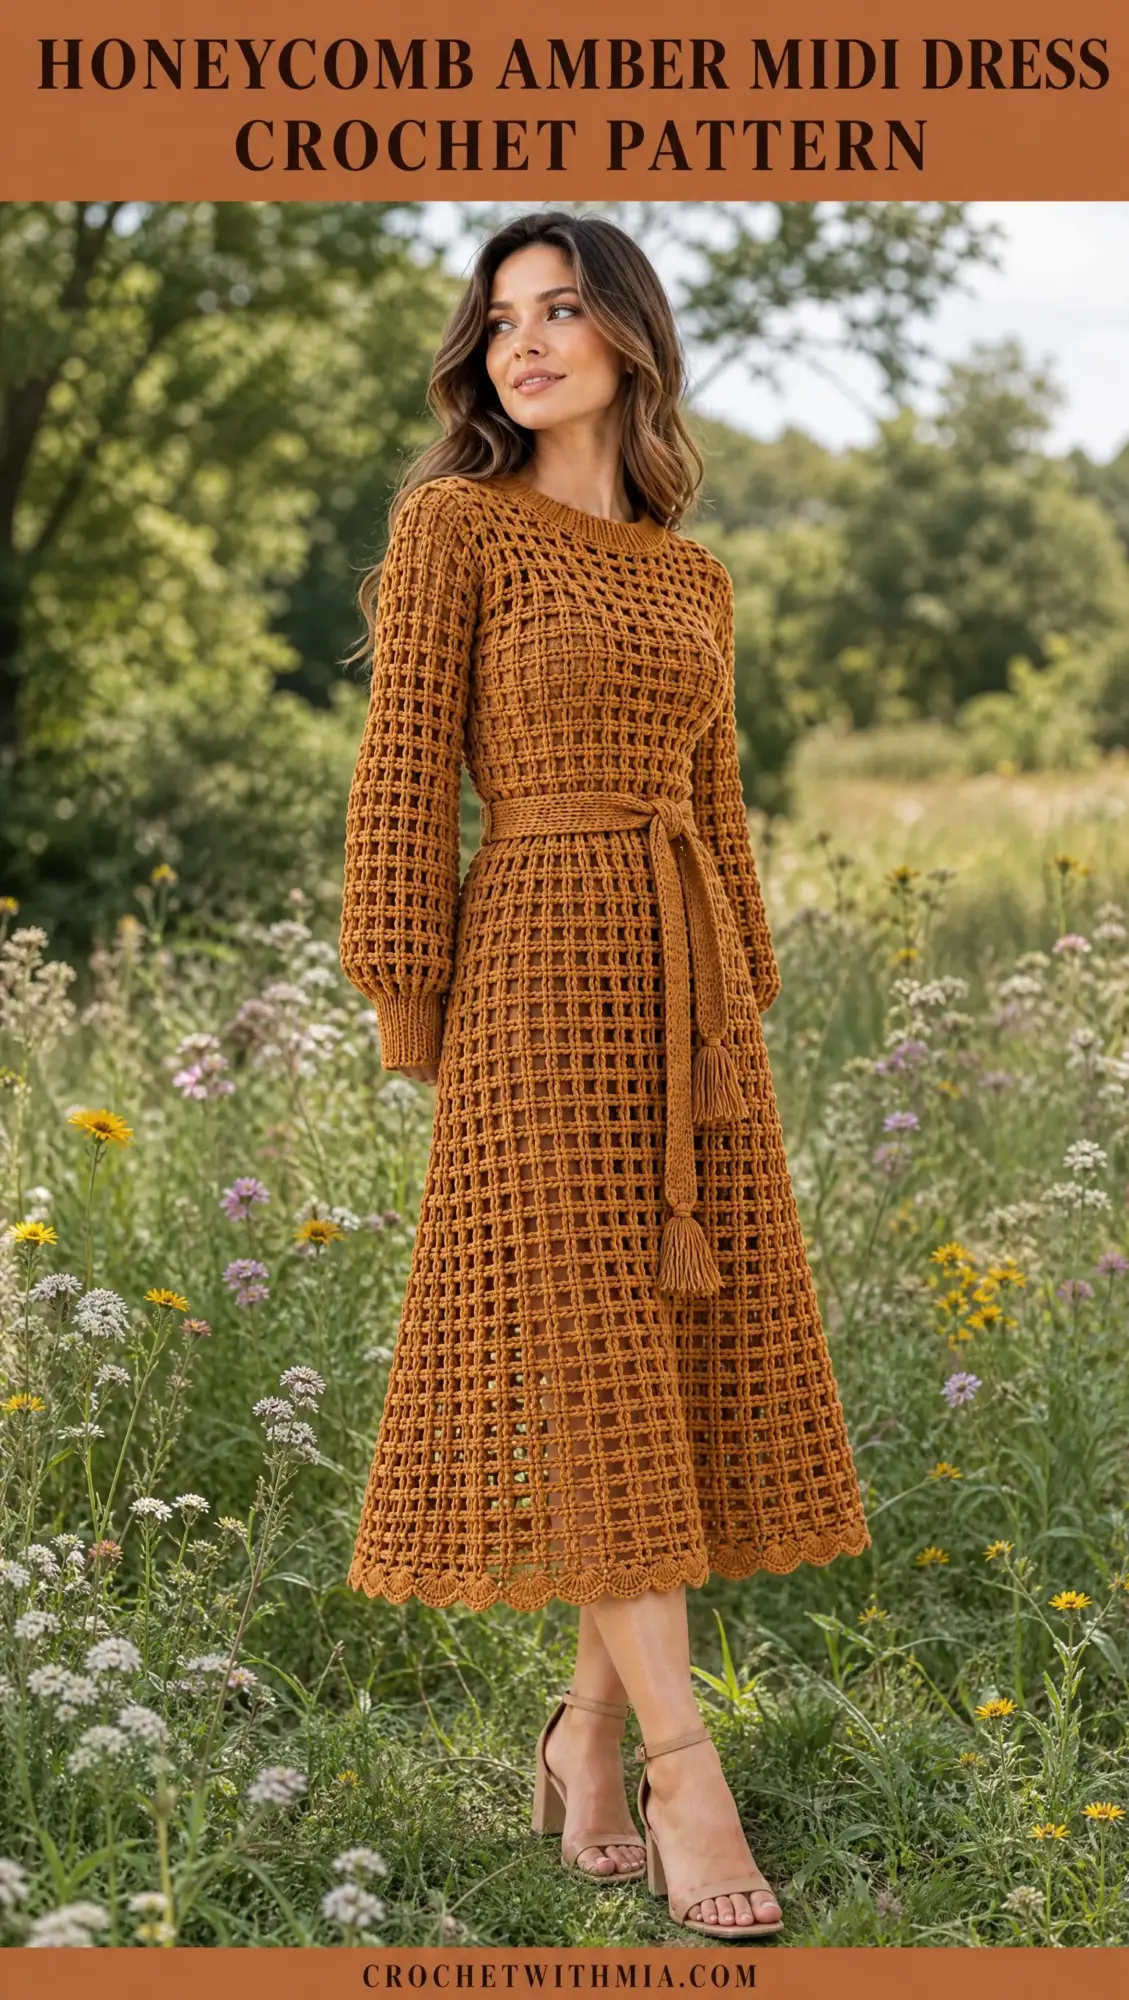
This Honeycomb Amber Midi Dress is exactly that kind of piece. The waffle-textured fabric creates visual interest without requiring complicated colorwork or intricate motifs. The warm amber shade feels elegant for autumn events, cozy dinner parties, or even a special brunch. And that scalloped hem? It adds just the right amount of feminine detail to balance the structured texture above.
The construction is straightforward once you understand the rhythm. You’ll work flat panels from hem to shoulder, seam everything together, then add ribbed cuffs and a simple neckline. If you’ve conquered garment construction before and feel comfortable with post stitches, this dress is well within your reach.
Why This Dress Design Works
The genius of this pattern lies in its simplicity. The main stitch pattern uses just three elements: regular double crochet (dc), front post double crochet (FPdc), and back post double crochet (BPdc). These stitches create the honeycomb waffle texture you see in the reference photos. No cables to memorize, no complex charts to follow.
The silhouette is intentionally straight from shoulder to hem. This means no shaping math, no increases or decreases scattered throughout the body. The included belt does all the waist-defining work, letting you adjust the fit to your preference each time you wear it.
Set-in rectangular sleeves keep the construction beginner-friendly compared to shaped sleeve caps. You’ll mark your armhole depth, center each sleeve at the shoulder seam, and sew. The broad ribbed cuffs pull the look together and echo the texture of the neckline edging.
Finished Measurements and Fit
Finished body circumference: approximately 108 to 110 cm (42.5 to 43.3 inches)
Intended for: bust and hip measurements of 98 to 102 cm (38.6 to 40.2 inches), with 6 to 12 cm ease
Length before edging: 107.7 cm (42.4 inches) from shoulder to hem
Sleeve panel: 36.9 cm, plus approximately 4 cm cuff
This is one size, not a graded size range. Measure your largest relevant circumference (bust or hips) to confirm this size works for you. The pattern notes recommend blocking pieces and basting seams before final assembly to check that the neckline passes over your head, the hips have walking ease, and the hem clears the floor in your intended footwear.
Materials and Tools
| Item | Amount / Specification |
|---|---|
| Main yarn | DK / category 3, smooth plied cotton-acrylic blend, approximately 220 m per 100 g; warm amber: 2450 m (buy 12 x 100 g balls). Includes generous trim allowance; estimated, not measured. |
| Hooks | 4.0 mm for fabric; 3.5 mm for ribbed trims and appliques, or sizes needed to meet blocked gauge |
| Notions | Yarn needle, 12 markers, tape measure, scissors, blocking mats; sewing needle and matching thread. 6 sew-on pearl beads optional for tassel ends. |
| Lining | Separate matching slip or professionally fitted lining recommended for opacity. Lining sewing is not part of these crochet instructions. |
The cotton-acrylic blend yarn gives this dress nice drape while maintaining stitch definition for the textured pattern. Pure cotton might be too heavy and prone to stretching, while pure acrylic might not breathe as well. The blend offers the best of both worlds.
Gauge
Blocked main fabric: 18 stitches (or mesh positions) and 13 rows = 10 x 10 cm / 4 x 4 inches
Gauge matters enormously for a garment this size. A long dress can grow under its own weight, so the pattern recommends hanging your dry swatch for 24 hours and remeasuring. If your row gauge changes when hanging, use the hanging row gauge to choose a shorter row total before starting.
Make a 51-stitch swatch for the texture, plus 3 turning chains. Work at least 22 rows using the stitch instructions, wash and dry flat, then measure the central 10 cm. Change hook until both dimensions match. Do not force-stretch the swatch.
Record your yarn, hook size, and measured gauge on paper before beginning.
Abbreviations and Special Stitches
ch = chain
st(s) = stitch(es)
sp = space
sl st = slip stitch
sc = single crochet (insert hook, yarn over, pull up loop, yarn over, draw through both loops)
hdc = half double crochet
dc = double crochet (yarn over, insert hook, pull up loop, yarn over, draw through 2 loops, yarn over, draw through remaining 2 loops)
tr = treble crochet
RS / WS = right side / wrong side
yo = yarn over
rep = repeat
BLO = back loop only
FPdc = front post double crochet (work around the vertical post of the indicated stitch instead of its top loops; insert hook from front to back to front, complete dc normally)
BPdc = back post double crochet (work around the vertical post from back to front to back, complete dc normally)
sc2tog = single crochet two together (insert in next stitch, yo and pull up loop; repeat in following stitch; yo and draw through all three loops). Two stitches consumed, one stitch produced.
Shell = 5 dc into one stitch
Picot = ch 3, sl st into first chain; decorative, not a base stitch
Pattern Notes
Turn after every flat row. Chain 3 (ch 3) before each dc-based row and chain 1 (ch 1) before each sc row; turning chains never count as a stitch. Work into the first stitch. Stitch counts appear in brackets at the end of each row.
Brackets within directions enclose one repeat. Fasten off with a 20 cm tail when instructed. Join rounds with slip stitch (sl st) into first actual stitch; joining sl st and starting chains never count.
Keep a row counter handy. When a shoulder begins mid-repeat, preserve the marked physical columns; do not restart the texture at a new offset. Work edge stitches as plain dc if a cable would cross a cut edge.
Construction Overview
The dress is made in five main stages:
- Front panel: Work from hem to shoulder with neck shaping
- Back panel: Work from hem to shoulder with shallower neck shaping
- Sleeves: Work two rectangular panels from cuff edge upward
- Assembly: Join shoulders, set sleeves, close underarms and sides
- Edgings: Add neckline, cuffs, hem, and belt
Main Stitch Pattern for Body Panels
With 4.0 mm hook and main color, ch 102 for each 99-stitch panel. The first 3 chains are height only; begin in fourth chain from hook.
Row 1 (RS): Dc in fourth ch from hook and each ch. [99 sts]
Row 2 (WS): [Dc in next 2 sts, BPdc around next post] 33 times. [99 sts]
Row 3 (RS): [Dc in next st, FPdc around next 2 posts] 33 times. [99 sts]
Following rows: Repeat Rows 2 and 3. [99 sts]
This creates the honeycomb waffle texture. The alternating front and back post stitches push and pull the fabric to create dimensional squares.
Front Dress Panel
Work the main stitch pattern through Row 132. [99 sts]
Row 133: Work next 33 positions in established pattern for first shoulder; leave remaining 66 unworked. Turn. [33]
Rows 134 to 140: Continue over these 33 positions, preserving pattern columns. Fasten off. [33 each row]
Return to Row 132. Leave center 33 positions unworked. Join main yarn at outer edge of other 33 positions with correct side facing for Row 133; work its 8 rows to match. [33 each row]
Back Dress Panel
Work a second 99-position panel through Row 138. [99]
Rows 139 to 140: Work each outer group of 33 positions separately for 2 rows, leaving center 33 unworked. Fasten off. [33 per shoulder each row]
Notice the back neck is shallower than the front, only 2 rows compared to 8 rows. This is standard for most garment construction and ensures proper fit.
Sleeves (Make Two)
With main yarn and 4.0 mm hook, ch 78. Work the sleeve repeat below through Row 48; fasten off. The starting edge is cuff side, the last row is shoulder side. [75 positions per row]
Row 1 (RS): Dc in fourth ch from hook and each ch. [75 sts]
Row 2 (WS): [Dc in next 2 sts, BPdc around next post] 25 times. [75 sts]
Row 3 (RS): [Dc in next st, FPdc around next 2 posts] 25 times. [75 sts]
Following rows: Repeat Rows 2 and 3. [75 sts]
Belt
With main yarn and 3.5 mm hook, ch 10.
Row 1: Sc in second ch and each ch. [9 sc]
Rows 2 to 320: Ch 1, turn, sc BLO in every st. [9 sc each row]
Target 160 cm long and approximately 4.5 cm wide; use a belt swatch gauge of 20 rows per 10 cm. Lengthen or shorten by whole rows to reach 160 cm. Fasten off.
The back loop only (BLO) technique creates a ribbed texture that matches the cuffs and neckline, tying the whole design together visually.
Assembly
You’ll need main-color yarn, tapestry needle, and 4.0 mm hook for any slip-stitch joining. Use mattress stitch unless noted. Match row ends and keep seams flexible.
Join 1: With RS facing outward, mattress-seam each front shoulder to matching back shoulder, one stitch to one stitch. [33 paired stitches per shoulder; 2 seams]
Join 2: Mark 26 row ends down from each shoulder on both front and back. Center each sleeve last row at shoulder seam; ease half sleeve width to front, half to back. Pin four equal sections and sew. [52 body row ends per sleeve; 2 sleeve seams]
Join 3: Close both sleeve underarms; close body sides from below armhole marker to hem. [48 row pairs per sleeve; 114 body row pairs per side]
Checkpoint: Shoulder widths should match; sleeves should be centered and hang without twisting. The assembled chest should measure approximately 108 to 110 cm around after seam take-up. Try over intended slip before edging. Both sleeve seams must match in length.
Edgings and Details
Switch to main-color yarn and 3.5 mm hook. Mark first stitch of every round.
Neckline
Neck Round 1: Attach at back neck. Sc into 33 center back positions, 2 sc in each of 2 back neck row ends, 2 sc in each of 8 front neck row ends, 33 center front positions, then mirror both side edges. Join. [106 sc]
Neck Round 2: Ch 3, dc in each sc, join. [106 dc]
Neck Round 3: Ch 3, [FPdc, BPdc] 53 times, join. [106 sts]
Neck Round 4: Repeat Neck Round 3. Fasten off. [106 sts]
Cuffs (Each Sleeve)
Cuff Round 1: Sc into first 9 foundation stitches; sc2tog 33 times. Join. [42 sc]
Cuff Round 2: Dc in each sc. Join. [42 dc]
Cuff Rounds 3 to 6: [FPdc, BPdc] 21 times, join. [42 sts]
Fasten off after Round 6.
Hem
Hem Row/Round 1: With RS facing, sc once into each foundation position; treat both panels as one open row if there is a slit, otherwise join a round. [198 sc]
Hem Row/Round 2: [Sc in next st, skip 2 sts, 5 dc in next st, skip 2 sts] 33 times. At open hem, fasten off after final skipped stitches; for closed hem join to first sc. [33 shells + 33 sc = 198 worked sts]
Checkpoint: Neckline lies flat and stretches over head; cuffs are approximately 21 to 23 cm around without forcing. Hem has 33 scallops. If an edging flares or pulls, adjust hook size and rework while keeping listed counts.
Finishing
Pass each tail through at least 5 cm of adjacent stitch backs, reverse direction and repeat; trim after checking security.
Damp-block flat to schematic dimensions; pin scallops evenly and support all garment weight. Avoid heat on acrylic and avoid pressing textured stitches. Target body circumference of 108 to 110 cm around with 2 equal sleeves.
Let dry completely, fit over intended lining, and inspect each seam, cord end, and bead. Fold for storage instead of hanging long term.
Care Instructions
Follow yarn-label care. Hand wash cool with mild detergent if compatible with the chosen yarn, support while wet, roll in a towel and dry flat. Remove detachable embellishments first. Keep beads, needles, and cut threads away from children and pets.
Long cords, tassels, and open lace can snag; keep clear of machinery and flame. Shorten a dragging hem if needed.
Tips for Success
Block your swatch twice. Once flat, once hanging. A dress this long will stretch under its own weight. Better to know before you commit to 140 rows.
Use markers generously. The pattern recommends 12 markers. Use them to mark shoulder divisions, armhole depths, and pattern repeat boundaries.
Try it on before edging. Baste the seams first and check the fit. It’s much easier to adjust before adding the neckline and cuffs.
Consider your lining options. The waffle texture has natural openings. A matching slip or professionally fitted lining is recommended for opacity, especially in lighter colors.
Who This Pattern Is For
This pattern is rated for experienced intermediate crocheters. You should be comfortable with:
- Working flat panels and seaming garments
- Front post and back post stitches
- Reading pattern repeats
- Maintaining stitch counts over many rows
- Basic garment construction and blocking
If post stitches are new to you, practice on a small swatch first. Once you feel the rhythm of wrapping around the post instead of through the top loops, you’ll find it becomes almost automatic.
Thank you so much for choosing this pattern. I hope you love the process of watching this beautiful dress come together row by row. When you finish yours, please share a photo on Instagram or Facebook. Seeing your makes is truly the best part. Happy crocheting!
If you love this Honeycomb Amber Midi Dress pattern, save it to your Pinterest boards so you can find it when you’re ready to cast on. And please leave a comment below if you make it. I’d love to hear how it turns out for you!
Want a Quick & Easy Printable Version?
Get a clean, beautifully formatted PDF of this pattern — easy to follow step by step, ready to print or save on any device. No scrolling, no distractions, just the pattern.
Get the Printable PDF →