
I don’t know about you, but I have a serious weakness for statement dresses. The kind that make people stop mid-conversation and ask, "Wait, you made that?"
Get the Ad-Free PDF Pattern
Scroll down for the full pattern, or get the ad-free printable PDF from the shop.
Get the Printable PDF →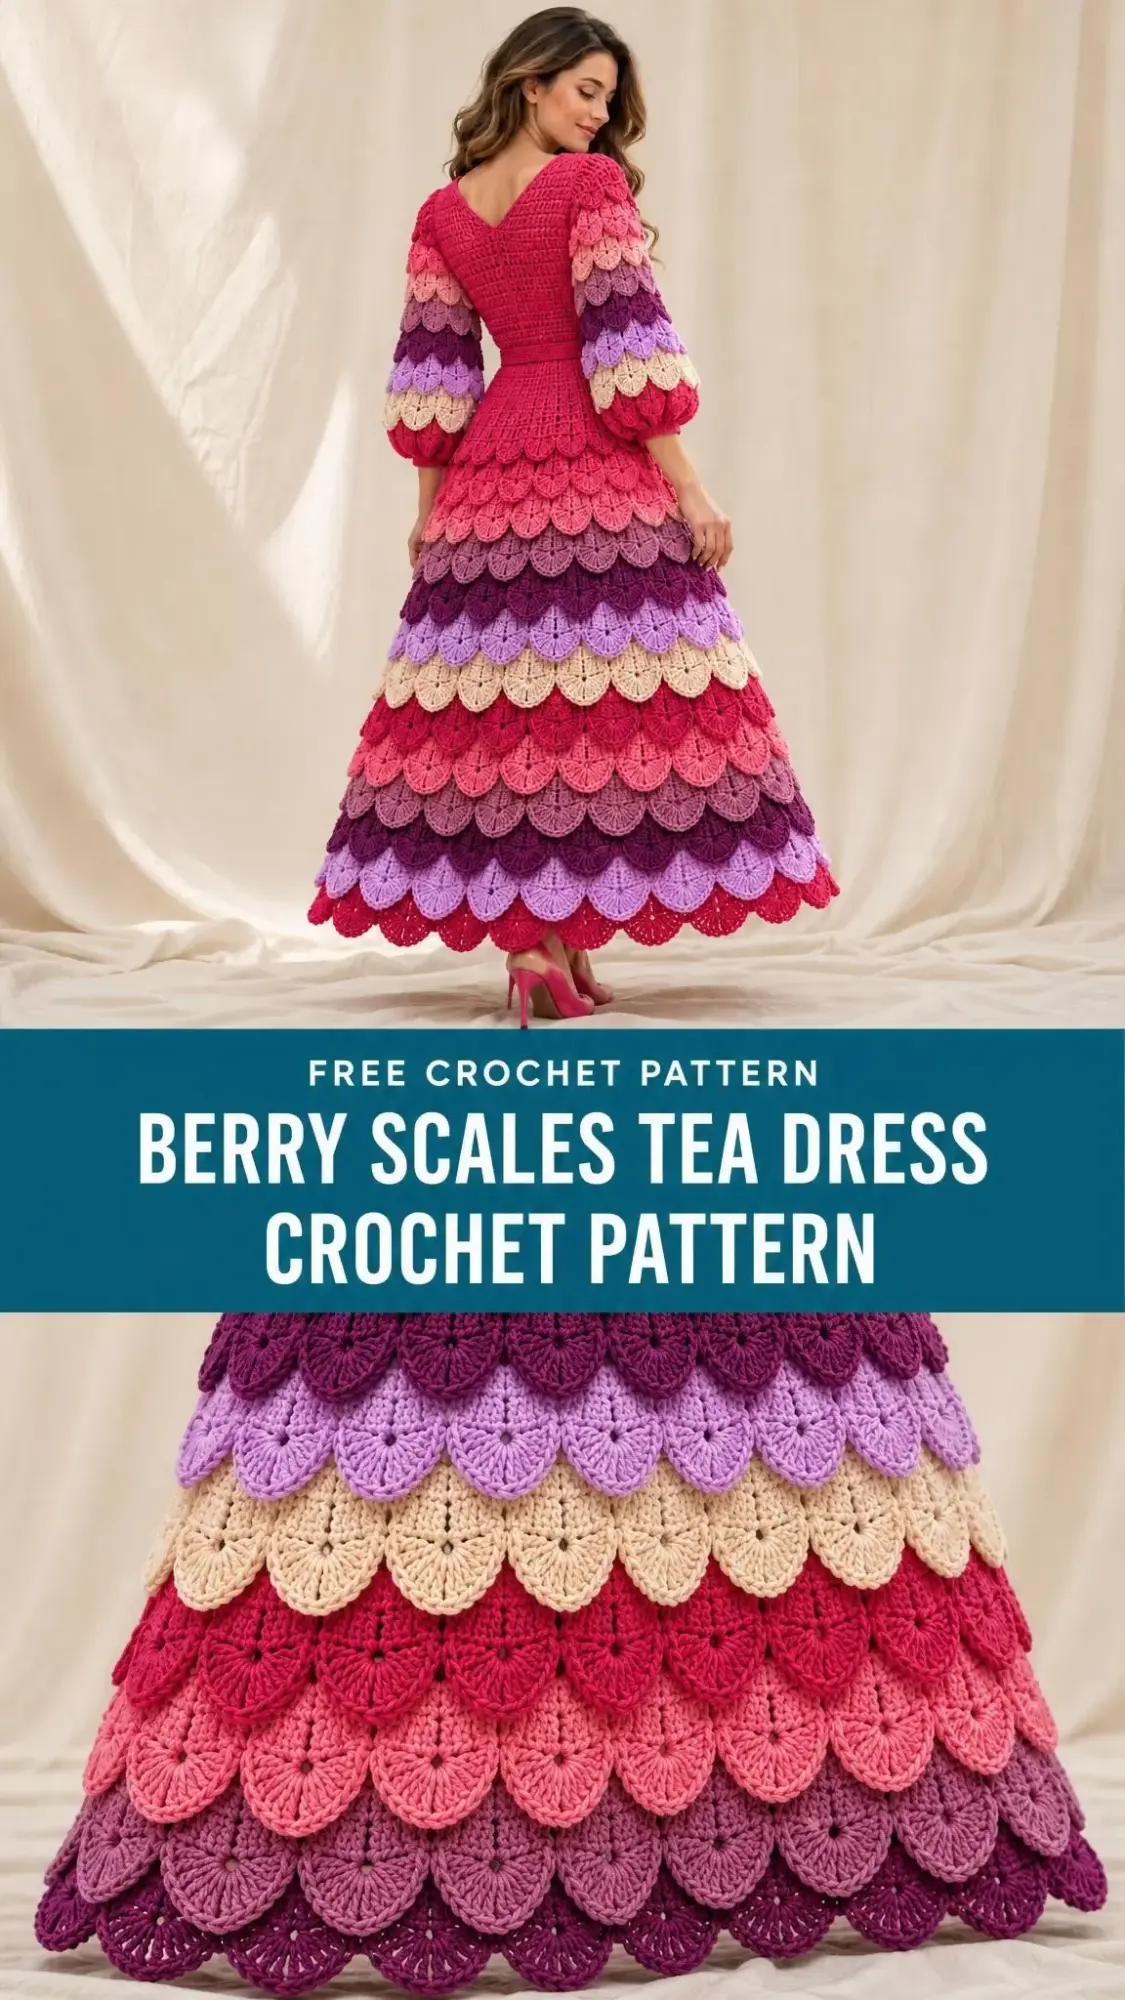
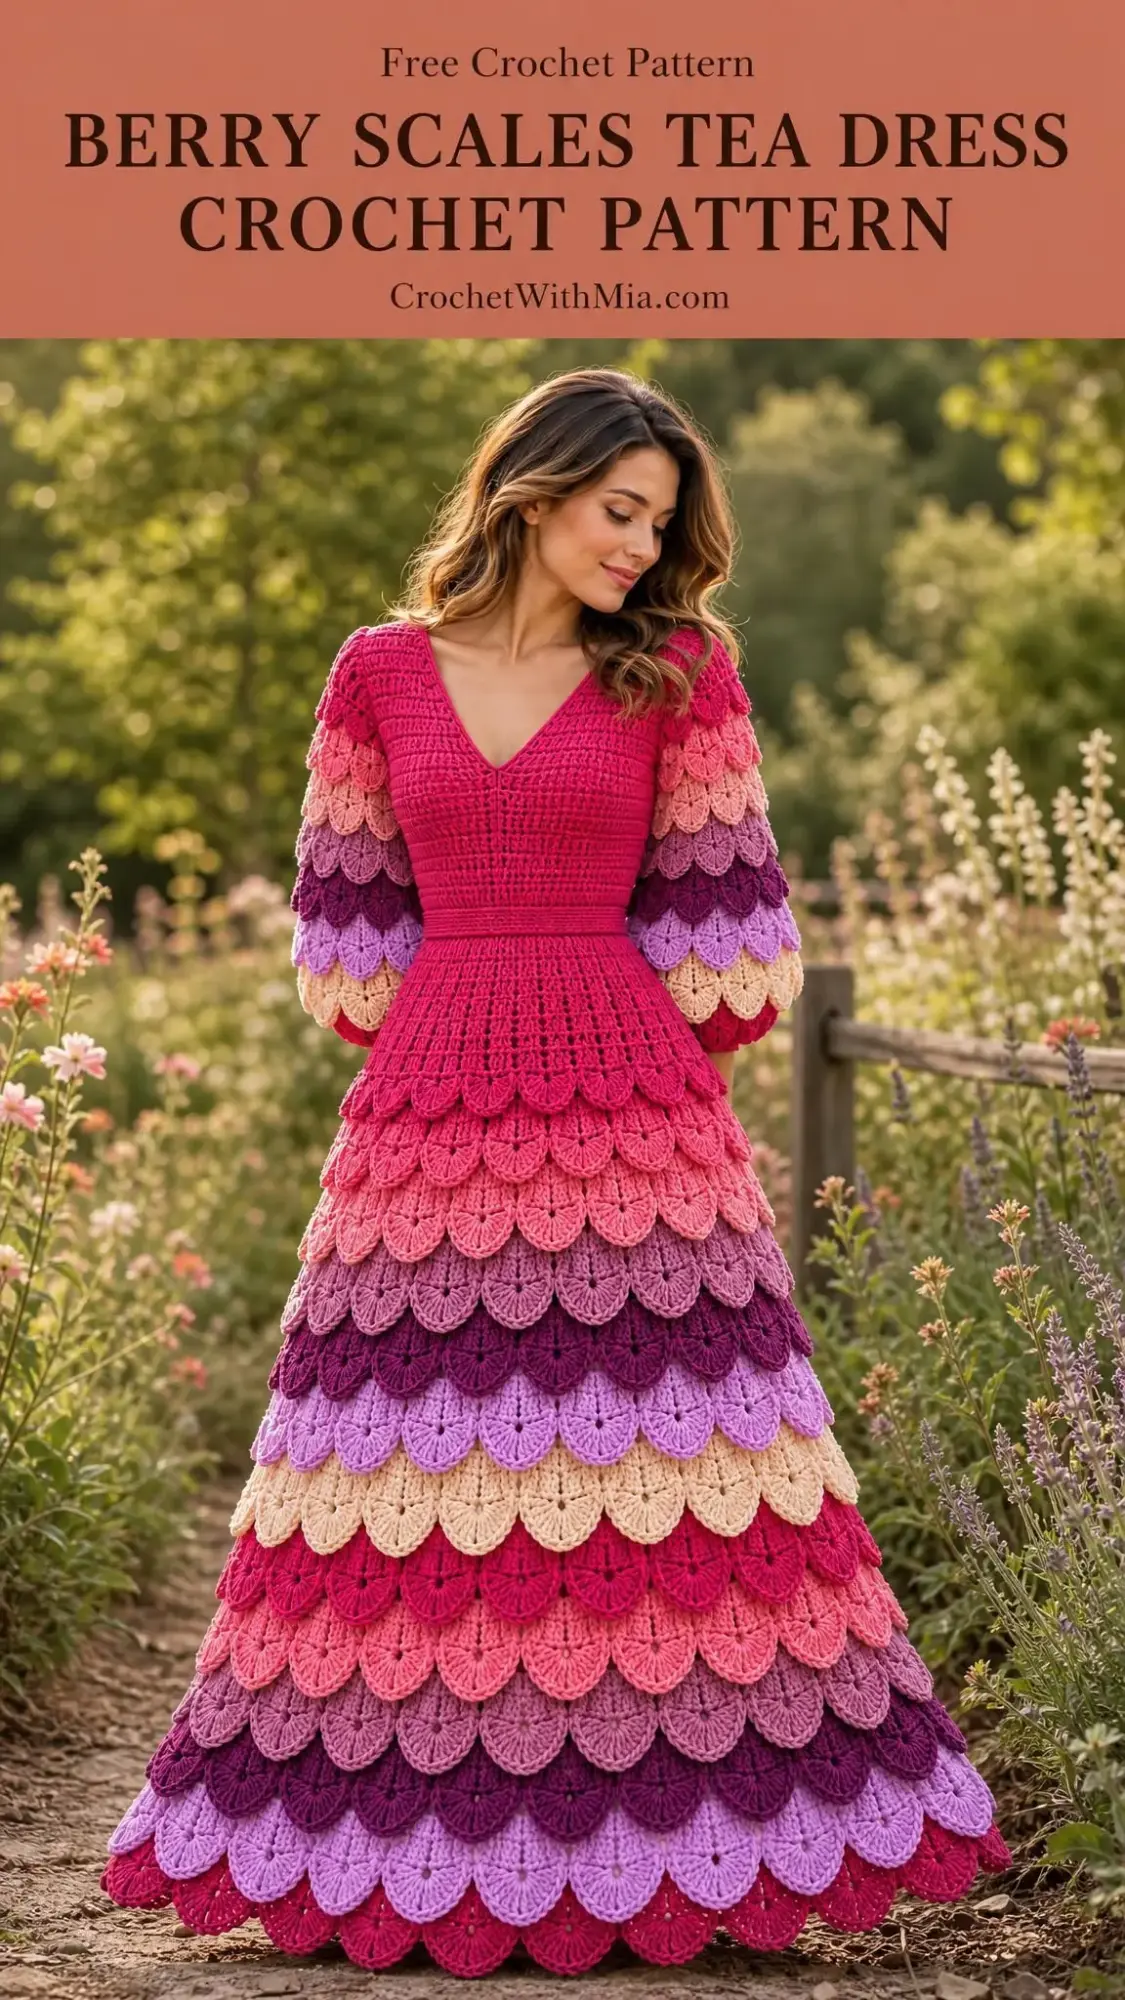
This Berry Scales Tea Dress is exactly that kind of project. Rainbow crocodile scales cascading from waist to hem, a fitted raspberry bodice, and those gorgeous balloon sleeves that look straight off a runway. It’s dramatic, it’s feminine, and yes, it’s absolutely crochet.
If you’ve been dreaming of a showstopper garment that lets you flex your skills and play with color, this is your sign. Let’s dive into everything you need to bring this beauty to life.
About This Stunning Crochet Dress Pattern
This tea-length dress combines classic garment construction with the eye-catching texture of crocodile stitch (also called scale stitch). The bodice is worked flat from the waist up in simple double crochet, creating a smooth, fitted foundation. The real magic happens in the skirt, where overlapping scales in a rainbow color sequence create that signature mermaid-meets-garden-party look.
The design fits a 90-92 cm bust with finished measurements of 96 cm at the bust, 84 cm at the waist, and approximately 110 cm from shoulder to hem. The three-quarter balloon sleeves echo the scale pattern of the skirt, tying the whole look together beautifully.
Skill level: Intermediate to advanced. You’ll need comfort with garment shaping, working in the round, and the crocodile stitch technique. If you’ve never tried scales before, practice on a swatch first. Once you get the rhythm, it’s surprisingly meditative.
Materials You’ll Need
Before you start, gather everything on this list. Scale fabric is yarn-hungry, so don’t skimp on quantities.
Yarn
You’ll need a smooth sport-weight cotton blend with approximately 150 meters per 50 grams. The pattern uses six colors:
| Color | Name | Estimated Amount |
|---|---|---|
| A | Raspberry | 950 g / 2850 m |
| B | Rose | 450 g / 1350 m |
| C | Mauve | 450 g / 1350 m |
| D | Plum | 450 g / 1350 m |
| E | Lilac | 450 g / 1350 m |
| F | Cream | 450 g / 1350 m |
Important tip: Scale fabric consumes substantial yarn. Weigh your scale swatch, calculate the area needed for your project, and add 15% before purchasing. The amounts listed are generous planning estimates.
Hooks and Tools
- 3.5 mm hook for the body and scales
- 3.0 mm hook for firm edging and cuffs
- Yarn needle
- Stitch markers
- Tape measure
- Blocking mats
- 40 cm back zipper
- Matching sewing thread
- 6 mm stay tape
- Full opaque stretch slip (essential for wearing)
- Three 12 mm decorative buttons (if adding buttons to the design)
Gauge Information
Getting gauge right is crucial for a fitted garment like this. Don’t skip the swatch.
Bodice gauge: 20 double crochet (dc) stitches x 10 rows = 10 x 10 cm using the 3.5 mm hook.
Scale gauge: One finished scale unit, including adjacent spacing, spans approximately 3.5 cm. Two successive scale rows (one color tier) measure about 7 cm in height after gentle blocking.
Swatch at least 24 dc x 14 rows for the bodice, plus a separate 6-scale sample following the foundation and scale instructions. Wash your swatch, dry it flat, then measure from the center. Adjust your hook size if needed before starting the actual project.
This is a one-size draft pattern. It requires fitting over your intended slip, so measure carefully and don’t assume sizing based on clothing labels.
Abbreviations and Special Stitches
This pattern uses US crochet terminology. Here’s your complete reference:
- ch = chain
- sl st = slip stitch
- sc = single crochet (insert hook, yarn over, pull up a loop, yarn over, pull through both loops)
- hdc = half double crochet
- dc = double crochet (yarn over, insert hook, pull up loop, yarn over and pull through 2 loops twice)
- tr = treble crochet
- st(s) = stitch(es)
- sp = space
- RS/WS = right side/wrong side
- rep = repeat
- inc = increase
- dec = decrease
Special Stitches
dc2tog (double crochet two together): Yarn over, insert hook into next stitch, pull up a loop, yarn over and pull through two loops. Repeat in the next stitch. Yarn over and pull through all three loops on your hook. This decreases two stitches into one.
P (support pair): Work 2 dc in one anchor stitch. This creates the post foundation for your scale.
A (single anchor): Work 1 dc in one anchor stitch.
Scale: Rotate your work and make 5 dc downward around the first post of P, chain 1, then 5 dc upward around its second post. Work around the posts themselves, not into their top loops. Finish by working a slip stitch into the following A. Each scale contains 10 dc plus a ch-1 at the tip.
Stitch counts exclude joining slip stitches unless specifically stated.
Construction Overview
Understanding how this dress comes together will help you tackle each section with confidence.
- Work the bodice from waist to underarm as a flat piece
- Divide for armholes and shape the front neckline with decreases
- Work each back half separately (the center back stays open for the zipper)
- Join shoulders
- Attach the skirt to the lower bodice edge and work in joined rounds
- Create two flat sleeve panels with the scale pattern
- Seam sleeves and set into armholes
- Add the back zipper, neck edging, cuffs, and sash
Target Measurements
| Area | Measurement |
|---|---|
| Bust | 96 cm |
| Waist | 84 cm |
| Bodice length | 40 cm |
| Armhole depth | 20 cm |
| Skirt length | 70 cm |
| Sleeve panel length | 42 cm plus cuff |
Step-by-Step Pattern Instructions
Section A: Bodice from Waist Upward
Using color A (raspberry) and your 3.5 mm hook:
Foundation: Chain 170.
Row 1: Dc in the third chain from the hook and in each chain across. [168 dc]
Rows 2-13: Chain 2, turn. Work 2 dc in the first stitch, dc in each stitch to the last, 2 dc in the last stitch. You’re increasing 2 stitches per row.
- Row 2: [170 dc]
- Row 3: [172 dc]
- Row 4: [174 dc]
- Row 5: [176 dc]
- Row 6: [178 dc]
- Row 7: [180 dc]
- Row 8: [182 dc]
- Row 9: [184 dc]
- Row 10: [186 dc]
- Row 11: [188 dc]
- Row 12: [190 dc]
- Row 13: [192 dc]
Rows 14-20: Chain 2, turn. Dc in each stitch across with no increases. [192 dc]
At the end of Row 20, your lower bodice measures approximately 20 cm deep. Mark your stitches from left to right: 48 back-half stitches, 96 front stitches, 48 back-half stitches. The back opening remains at the two outside edges.
Section B: Upper Back Halves
You’ll work both back halves simultaneously but separately.
Row 21: On the first back half, dc across 44 stitches, leaving the last 4 stitches unworked for the armhole. On the second back half, skip the first 4 stitches and work the remaining 44. [44 dc each half]
Rows 22-40: Chain 2, turn. Dc across each back half. [44 dc per half]
Keep the center-back opening unseamed. Each half measures approximately 22 cm wide x 20 cm high above the underarm.
Section C: Upper Front and Neckline
Row 21: Join color A after the first 4 front stitches. Dc across the next 88 stitches, leaving the last 4 unworked for the armhole. [88 dc]
Divide the front into two 44-stitch halves at center. Work each separately, mirroring the neck decreases.
Row 22: Dc across each half, decreasing 2 stitches at the neck edge using 2 dc2tog. Keep the armhole edge straight. [42 dc each half]
Rows 23-40: Dc across each half, decreasing 1 stitch at the neck edge using dc2tog each row. Keep the armhole edge straight.
Your stitch counts decrease as follows:
- Row 23: [41 dc each half]
- Row 24: [40 dc each half]
- Row 25: [39 dc each half]
- Row 26: [38 dc each half]
- Row 27: [37 dc each half]
- Row 28: [36 dc each half]
- Row 29: [35 dc each half]
- Row 30: [34 dc each half]
- Row 31: [33 dc each half]
- Row 32: [32 dc each half]
- Row 33: [31 dc each half]
- Row 34: [30 dc each half]
- Row 35: [29 dc each half]
- Row 36: [28 dc each half]
- Row 37: [27 dc each half]
- Row 38: [26 dc each half]
- Row 39: [25 dc each half]
- Row 40: [24 dc each half]
Section D: Skirt Foundation and Support System
Close only the waist edge at center back with a secure seam stitch. Join color A at this point.
Setup round: Sc in each of the 168 foundation chains around, join. [168 sc]
Support round 1: [P in next sc, ch 1, skip 2 sc, A in next sc, ch 1, skip 3 sc] 24 times. Join in first dc. [24 P, 24 A, 48 ch-1 spaces; 72 dc]
Scale round 1: Work one scale around every P and slip stitch into the following A. Join. [24 scales; 240 dc, 24 ch-1 tips]
Next support round (same count): Work a P into the center of every scale (between its two 5-dc wings) and an A into each intervening anchor, with ch 1 between every P and A. Keep these stitches behind the scale layer.
Next scale round: One scale on each P, secured in the following A.
Increase support round (+2 scales): Choose two anchors opposite each other. At each chosen anchor, replace the single A with (dc, ch 1, 2 dc, ch 1, dc) all in that anchor. All other positions follow the same-count support round. Each replacement adds one P and one A.
Skirt Tier-by-Tier Instructions
Each tier consists of two support/scale cycles. Follow this color sequence: A, B, C, D, E, F, then repeat.
| Tier | Color | Instructions | Scales per Round |
|---|---|---|---|
| 1 | Raspberry | Support/scale round 1, then one same-count cycle | 24 |
| 2 | Rose | One +2 increase cycle, then one same-count cycle | 26 |
| 3 | Mauve | One +2 increase cycle, then one same-count cycle | 28 |
| 4 | Plum | One +2 increase cycle, then one same-count cycle | 30 |
| 5 | Lilac | One +2 increase cycle, then one same-count cycle | 32 |
| 6 | Cream | One +2 increase cycle, then one same-count cycle | 34 |
| 7 | Raspberry | One +2 increase cycle, then one same-count cycle | 36 |
| 8 | Rose | Two same-count cycles (no increase) | 36 |
| 9 | Mauve | Two same-count cycles (no increase) | 36 |
| 10 | Plum | Two same-count cycles (no increase) | 36 |
Finish after the last scale round. The lower edge remains beautifully scalloped. Do not add a straight band over the scallops.
Section E: Sleeves (Make Two)
Using color A and your 3.5 mm hook:
Foundation: Chain 77.
Row 1: Dc in the third chain from the hook and across. [75 dc; approximately 37.5 cm]
Support row: Chain 2, turn. [P in next st, ch 1, skip 2 sts, A in next st, ch 1, skip 3 sts] 10 times, then P in next st, ch 1, skip 2 sts, A in next st, dc in last st. [11 P, 11 A, 1 edge dc; 34 dc]
Scale row: Turn work so scales face RS. Work 11 scales, one on each P, anchoring in each following A. End at the edge stitch. [11 scales]
Following support rows: Chain 2, turn. Work P in each scale center and A in each intervening anchor, with ch 1 between. Retain one edge dc at the end.
Work sleeve tiers following the same color sequence, with 11 scales per row throughout:
| Tier | Color | Scales per Tier |
|---|---|---|
| 1 | Raspberry | 22 |
| 2 | Rose | 22 |
| 3 | Mauve | 22 |
| 4 | Plum | 22 |
| 5 | Lilac | 22 |
| 6 | Cream | 22 |
For tapered sleeves: Use a 3.0 mm hook for the final two tiers without changing the stitch count. Pin the straight sleeve top into the dropped armhole to check fit before seaming.
Assembly Instructions
Shoulders, Sleeves, and Zipper
Seam 1: Sew the outer 24 front shoulder stitches to the corresponding outer 24 back stitches at each shoulder. Leave inner back stitches open for the neck. [2 seams x 24 stitches]
Seam 2: Join each sleeve’s long edge with mattress stitch, aligning every color tier. [2 sleeve seams]
Seam 3: Mark the sleeve-top center and attach at the shoulder seam. Ease each approximately 37.5 cm sleeve top around its approximately 40 cm armhole. Sew without stretching the scales. [2 set-in sleeves]
Sewing pass 4: Stabilize center-back edges with stay tape and sew in the zipper. Close any gap beneath the zipper to the waist. [1 back closure]
Sewing pass 5: Tack the opaque slip at shoulders and underarms. [4 tacks]
Checkpoint: Bust should measure approximately 96 cm, waist approximately 84 cm. Raise your arms, sit, and walk. Seams should remain relaxed.
Edgings and Details
Cuffs
Using color A and your 3.0 mm hook:
Round 1: Sc 56 stitches evenly around the sleeve end behind the scales, catching the structural anchors. Join. [56 sc]
Rounds 2-4: Chain 1, sc in each sc, join. [56 sc]
The cuff should fit comfortably without squeezing, measuring approximately 2 cm in length. Repeat identically on the second sleeve.
Neck Edging and Sash
Using color A and your 3.0 mm hook:
Neck row 1: Sc around the neckline at one sc per horizontal stitch and 2 sc per vertical dc-row end. Stop at the zipper. Record your total stitch count.
Neck row 2: Chain 1, turn. Slip stitch loosely in each sc.
Sash row 1: Chain 321. Sc in the second chain and across. [320 sc]
Sash rows 2-3: Chain 1, turn. Sc across. [320 sc]
Your sash measures approximately 160 cm long. For a broader sash, repeat row 3 until 5 cm wide.
Optional tassels: Wrap yarn 20 times around an 8 cm card. Tie firmly at the top, cut the lower loops, and bind 1 cm below the top. Make two and sew to the sash ends.
If adding decorative buttons, sew three down the center front. The back zipper serves as the functional opening.
Finishing Your Dress
Blocking and Final Checks
Finishing pass 1: Weave all ends through structural backing stitches. Never weave across a scale tip. Ensure no unsecured ends remain.
Blocking pass 2: Wash gently, lay flat to target measurements, and lift each scale tip into shape without pressing it flat. Check that both sleeves match and the hem is even.
Final checkpoint: Shoulder-to-hem should measure approximately 110 cm. Verify you have 10 skirt tiers and 6 tiers per sleeve. Allow the fabric to dry completely before the final fitting.
Care and Safety Instructions
This dress requires gentle care to maintain its structure and beauty:
- Hand wash in cool water
- Dry flat, fully supporting the heavy wet fabric
- Avoid tumble drying, hot ironing, and hanging storage
- Check sewn buttons and tassels before each wear
- Keep small detachable parts away from children
- Keep ties away from flame and moving equipment
- Adjust the hem clear of the floor for safe walking
Pattern Notes to Remember
A few final reminders as you work through this project:
- Read the complete instructions before starting
- Brackets enclose repeats. Work them the stated number of times
- Join rounds to the first counted stitch
- Keep the RS facing for motifs
- Change colors on the final yarn-over of the last stitch
- Chain 2 to turn bodice rows. It does not count as a dc
- Skirt rounds are not turned
- All garments need the opaque slip because the scale backing has gaps
You’ve Got This
This Berry Scales Tea Dress crochet pattern is ambitious, beautiful, and absolutely worth the effort. The combination of structured bodice work and flowing scale tiers creates a garment that’s both technically impressive and utterly wearable. Whether you’re making it for a special event, a photoshoot, or simply because you want to prove to yourself that you can, this dress delivers.
Take your time with each section. Trust your gauge swatch. And don’t forget to breathe when you see those first scales start to form. It’s going to be stunning.
Thank you so much for choosing this pattern. If you make this dress, I would absolutely love to see your version. Share your photos on Instagram or Facebook and tag your creation. Seeing your work is the best part of this whole process.
If this pattern inspired you, save it to your Pinterest boards so you can find it when you’re ready to start. And please drop a comment below if you make it. Your feedback and photos make all the difference, and I can’t wait to see those gorgeous rainbow scales come to life in your hands.
Want a Quick & Easy Printable Version?
Get a clean, beautifully formatted PDF of this pattern — easy to follow step by step, ready to print or save on any device. No scrolling, no distractions, just the pattern.
Get the Printable PDF →