
Go ahead and dig into your stash for that beautiful butter yellow mercerized cotton you’ve been saving. This is the project it’s been waiting for.
Get the Ad-Free PDF Pattern
Scroll down for the full pattern, or get the ad-free printable PDF from the shop.
Get the Printable PDF →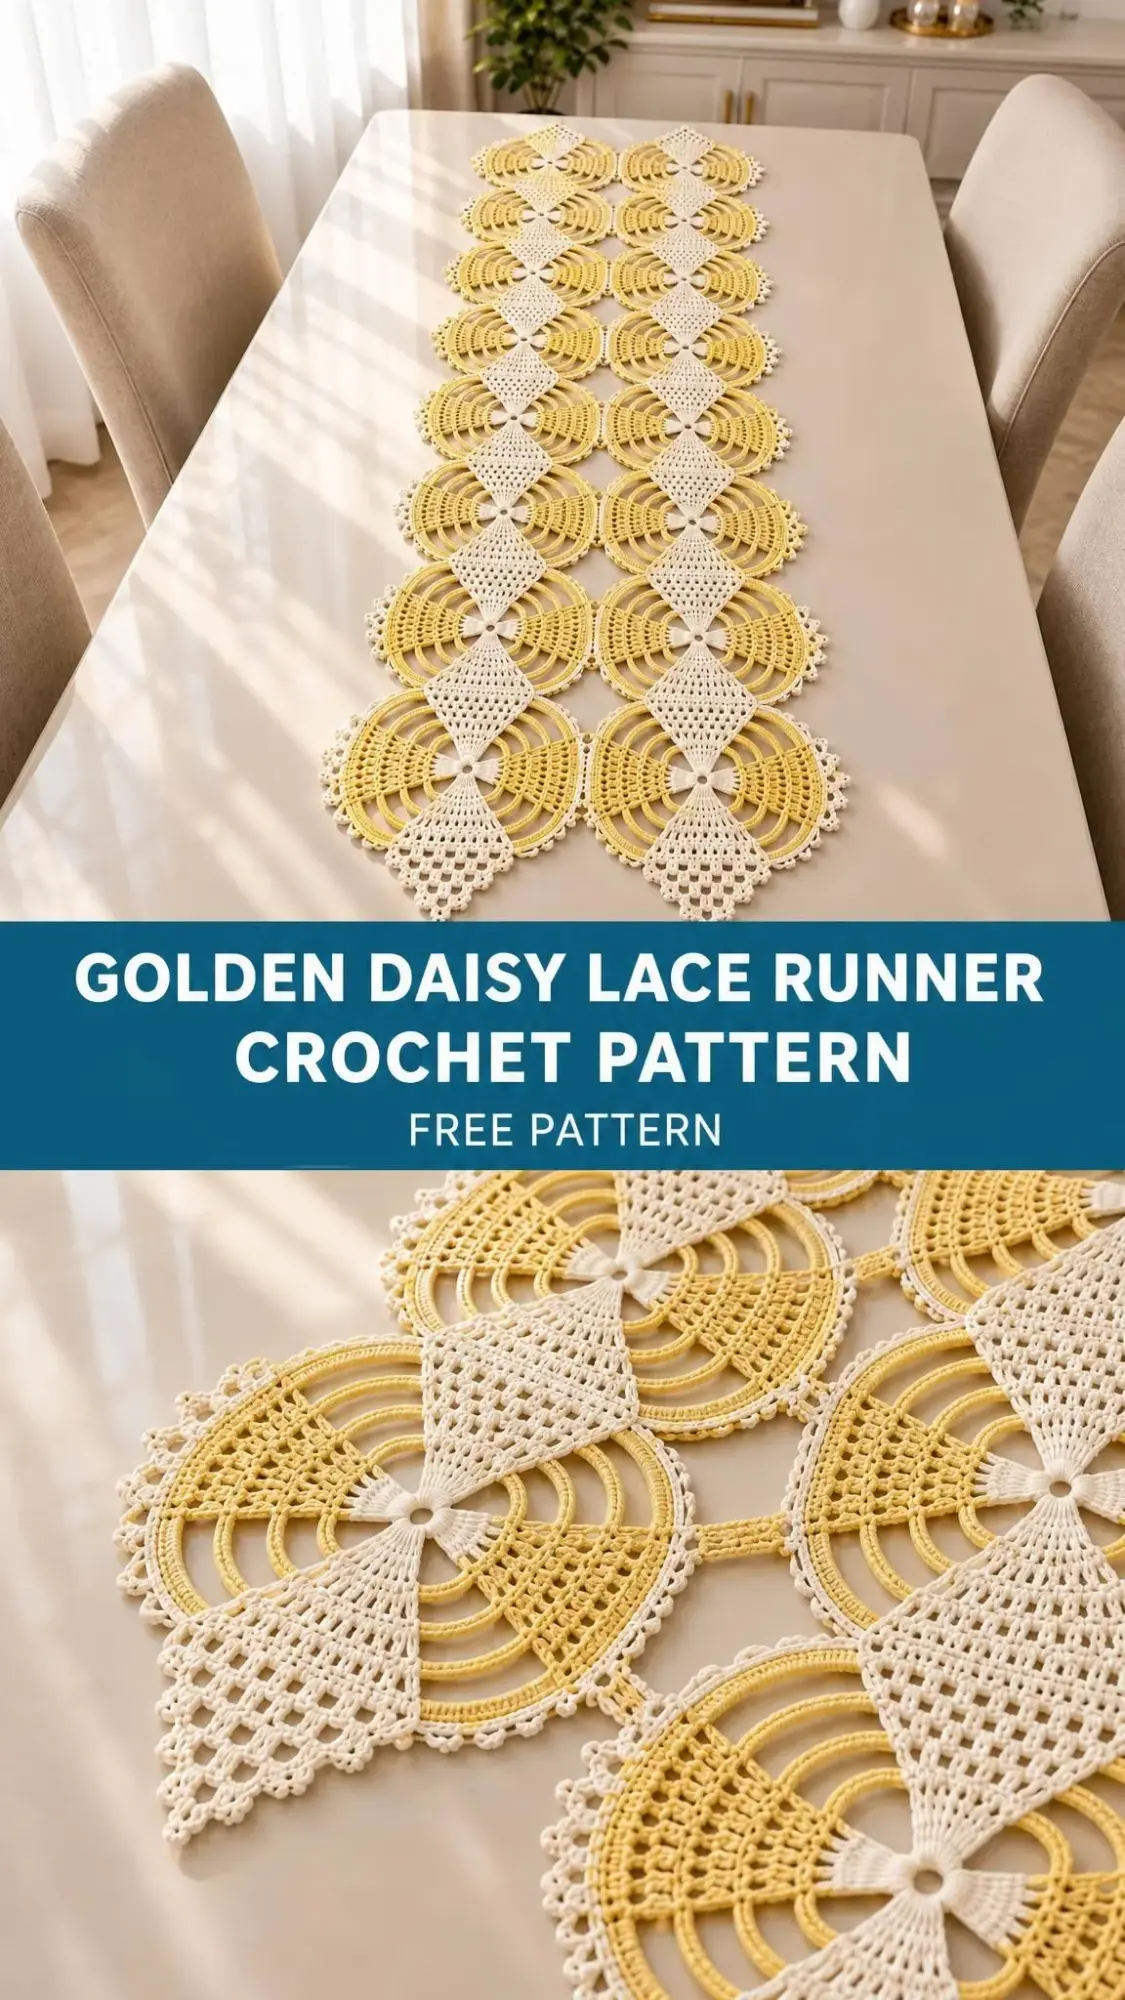
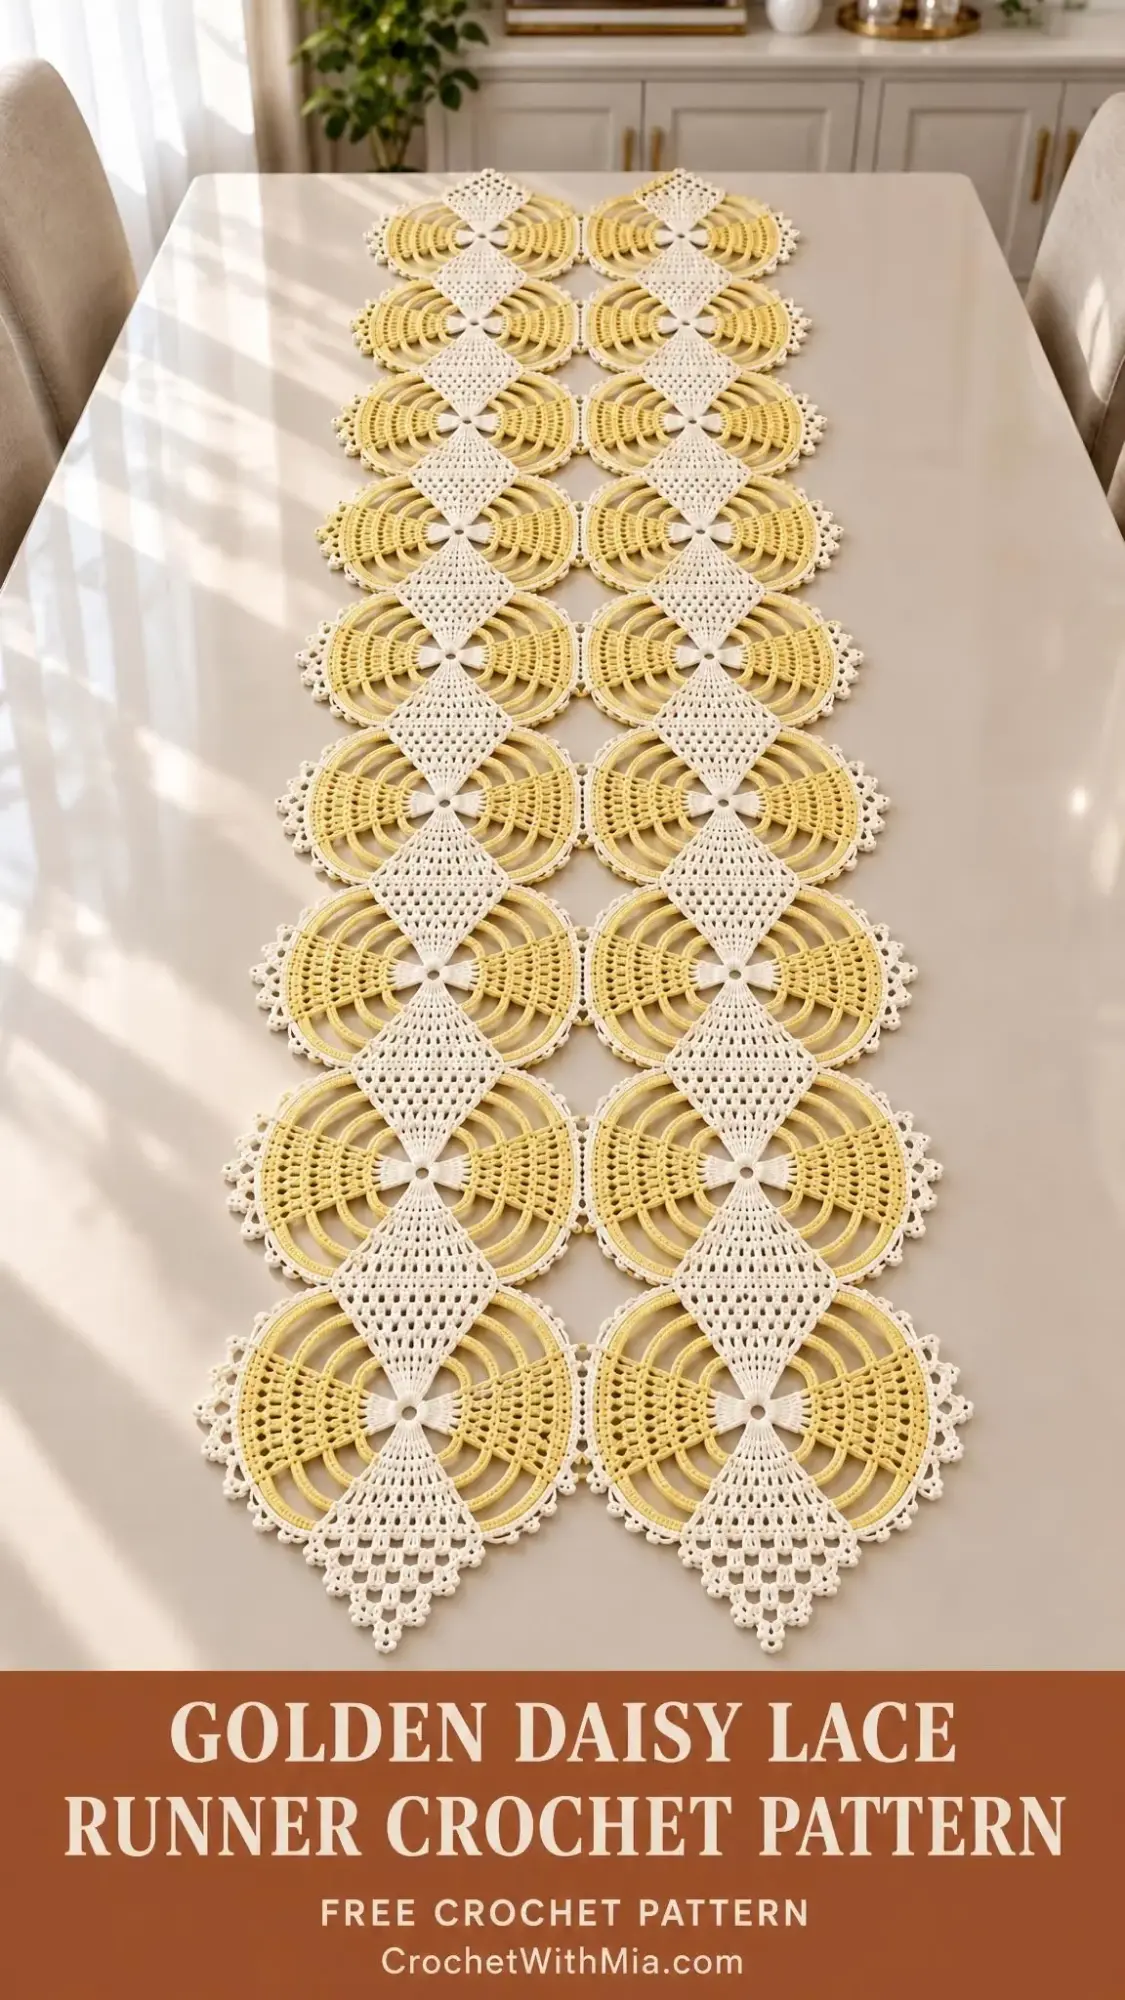
The Golden Daisy Lace Runner combines circular arch medallions with elongated filet diamond appliques to create a stunning two-tone table piece. The construction is more interesting than your typical doily. You’ll crochet 14 separate medallions, 14 filet diamonds, join them into a grid, and then layer the diamonds on top. It sounds complex, but each individual piece is straightforward once you understand the rhythm.
This pattern works best for intermediate crocheters comfortable with treble crochet and filet techniques. If you’ve made doilies or worked with thread before, you’ll feel right at home. If this is your first thread project, take your time with the gauge swatch and don’t skip blocking.
About This Lace Runner Design
This runner creates a delicate, heirloom-quality piece measuring approximately 112 x 32 cm (about 44 x 12.5 inches) after blocking. The design features 14 circular medallions arranged in a 7 x 2 grid, with matching filet diamond appliques layered on top of each circle.
The color scheme uses butter yellow (Color A) for the concentric arch rounds and ivory (Color B) for the center details, filet diamonds, and finishing. This two-tone approach gives the runner depth and visual interest while remaining elegant enough for formal table settings.
Each medallion has 16 radial repeats, creating those beautiful scalloped edges you see in the finished piece. The filet diamonds add a classic lace element that bridges traditional doily aesthetics with a more modern runner shape.
Materials You’ll Need
Gather these supplies before you begin:
| Item | Amount/Specification |
|---|---|
| Color A (butter yellow) | 150 g |
| Color B (ivory) | 100 g |
| Thread | Size 3 mercerized crochet cotton, about 250 m/50 g |
| Hook | 2.5 mm or size needed for gauge |
| Notions | Fine tapestry needle, rustproof pins, tape, blocking mat |
Important note about thread: Use colorfast cotton from one dye lot for each color. A smooth mercerized thread gives crisp, defined arches. Fuzzy yarn will obscure the delicate lace details you’re working so hard to create.
The material amounts include a small allowance, so you should have enough even if your tension runs slightly loose.
Gauge
Getting gauge right matters enormously for lace work. Your blocked circular medallion should measure 16 cm in diameter. Your filet diamond should measure approximately 9 cm wide x 14 cm long after blocking.
Make one of each motif, wash it, block it, and measure it completely dry before committing to all 14 pieces.
Troubleshooting gauge issues:
- If your medallion cups (pulls inward like a bowl), loosen your chain arches
- If your medallion ruffles (waves at the edges), check that you have exactly 16 repeats
- Change your hook size to reach 16 cm without forcing the lace flat
The join spacing between medallions is about 0 to 0.5 cm, so your finished total dimensions are approximate.
Abbreviations and Special Stitches
This pattern uses US crochet terminology. Here are all the abbreviations you’ll encounter:
- ch = chain
- sl st = slip stitch
- sc = single crochet (insert hook, yarn over, pull through, yarn over, pull through both loops)
- hdc = half double crochet
- dc = double crochet (yarn over, insert hook, yarn over, pull through, yarn over, pull through two loops, yarn over, pull through remaining two loops)
- tr = treble crochet (yarn over twice, insert hook, yarn over, pull through, [yarn over, pull through two loops] three times)
- st(s) = stitch(es)
- sp = space
- RS/WS = right side/wrong side
- rep = repeat
Special stitch definitions:
Filet cell = ch 2 followed by tr in the next tr. An open cell has two chains between its treble posts.
Turning ch 4 counts as the first tr on diamond rows. Ch 6 at an increase edge counts as one tr plus ch 2.
Picot = ch 3, sl st in the first of those three chains. This creates a small decorative loop.
Joining bridge = ch 2, sl st in corresponding edge loop of next medallion, ch 2, sl st back into starting loop.
Stitch counts exclude joining slip stitches unless stated otherwise.
Pattern Notes Before You Begin
Read all instructions completely before starting. This will help you understand how the pieces fit together.
- Brackets [ ] enclose a repeat. Work the bracketed instructions the stated number of times.
- Join each round to its first counted stitch.
- Keep the right side facing for all motifs.
- Change colors on the final yarn over of the last stitch and fasten off unused colors.
- All measurements refer to washed, dry, blocked fabric. (1 inch = 2.54 cm)
Loop numbering system: All medallions have 16 radial repeats. Number the outer loops 1 through 16 clockwise, with loop 1 at the top. Loop 5 points right, loop 9 points to the bottom, and loop 13 points left. This numbering system becomes essential during assembly.
Construction Overview
Here’s the big picture of how this runner comes together:
- Crochet 14 circular medallions
- Crochet 14 filet diamonds
- Block all pieces separately
- Join circles into a 7 x 2 grid
- Center one diamond on each circle, sew lightly, and add trim
| Piece | Quantity | Blocked Measurement |
|---|---|---|
| Round medallion | 14 | 16 cm diameter |
| Filet diamond | 14 | 9 x 14 cm |
| Joined runner | 1 | 112 x 32 cm |
Circles touch at cardinal points (top, bottom, left, right), while paired secondary joins prevent twisting.
Instructions: Circular Medallions (Make 14)
Round 1 (Color B): Make an adjustable ring, ch 3 (counts as dc), 15 dc in ring. Tighten ring, join to top of ch 3. [16 dc]
Round 2 (Color B): Ch 4 (counts as dc + ch 1), [dc in next dc, ch 1] 15 times. Join to third starting chain. [16 dc, 16 ch-1 spaces]
Round 3 (Color A): Join in any ch-1 sp, ch 1. [Sc in next ch-1 sp, ch 3] 16 times. Join to first sc. [16 sc, 16 ch-3 arches]
Round 4 (Color A): Sl st into first arch, ch 1. [Sc in next arch, ch 5] 16 times. Join. [16 sc, 16 ch-5 arches]
Round 5 (Color A): Sl st into first arch, ch 1. [Sc in next arch, ch 7] 16 times. Join. [16 sc, 16 ch-7 arches]
Round 6 (Color A): Sl st into first arch, ch 1. [Sc in next arch, ch 9] 16 times. Join. [16 sc, 16 ch-9 arches]
Round 7 (Color A): Sl st into first arch, ch 1. [Sc in next arch, ch 11] 16 times. Join. [16 sc, 16 ch-11 arches]
Round 8 (Color B): Join in any outer arch. [5 sc, picot, 6 sc] in each arch around. Join and fasten off. [176 sc, 16 picots]
Make 14 identical medallions. When blocking, pin each outer picot evenly around a 16 cm circle.
Instructions: Elongated Filet Diamonds (Make 14)
Row 1 (Color B): Ch 7. Tr in seventh chain from hook. The initial six chains count as the first tr plus ch 2. [2 tr posts, 1 open cell]
Row 2: Ch 6, turn. Tr in first tr (first new cell). Ch 2, tr in last tr. Ch 2, tr in same last tr. [4 tr posts, 3 cells]
Row 3: Ch 6, turn. Tr in first tr. [Ch 2, tr in next tr] 3 times. Ch 2, tr in same last tr. [6 tr posts, 5 cells]
Row 4: Ch 6, turn. Tr in first tr. [Ch 2, tr in next tr] 5 times. Ch 2, tr in same last tr. [8 tr posts, 7 cells]
Row 5: Ch 6, turn. Tr in first tr. [Ch 2, tr in next tr] 7 times. Ch 2, tr in same last tr. [10 tr posts, 9 cells]
Row 6: Turn. Sl st across first ch-2 sp into second tr. Ch 4 (first tr). [Ch 2, tr in next tr] 7 times. Leave last cell unworked. [8 tr posts, 7 cells]
Row 7: Turn. Sl st across first ch-2 sp into second tr. Ch 4. [Ch 2, tr in next tr] 5 times. Leave last cell unworked. [6 tr posts, 5 cells]
Row 8: Turn. Sl st across first ch-2 sp into second tr. Ch 4. [Ch 2, tr in next tr] 3 times. Leave last cell unworked. [4 tr posts, 3 cells]
Row 9: Turn. Sl st across first ch-2 sp into second tr. Ch 4, ch 2, tr in next tr. Leave last cell unworked. Fasten off. [2 tr posts, 1 cell]
Make 14 diamonds. Block them elongated, distributing the increases evenly so the widest point (the 9-cell center row) measures about 9 cm wide.
Placement and Assembly
Setting up your layout:
Lay all circles right side up in 7 rows by 2 columns. Orient all loop 1 points toward one end of the runner. Place diamonds lengthwise over the circles, but keep the four cardinal join points (loops 1, 5, 9, and 13) accessible for now.
Joining the Medallions
Join Pass 1 (lengthwise connections): Along each lane, bridge loop 9 of one circle to loop 1 of the next. Also bridge adjacent loop 8 to loop 2 and loop 10 to loop 16 to stabilize each connection. [12 joins x 3 bridges]
Join Pass 2 (crosswise connections): Join loop 5 of each left circle to loop 13 of its right neighbor. Add stabilizing joins from loop 4 to loop 14 and loop 6 to loop 12. [7 joins x 3 bridges]
Checkpoint: Your grid should have 14 medallions with 19 motif-to-motif joins and no twisted circles.
Attaching the Diamonds
Sewing Pass 1: Center each diamond vertically on a circle. Tack the upper and lower tips and both widest corners with two small stitches per point. [56 tack points total]
Sewing Pass 2: Tack the diamond center to the ring without collapsing the open filet cells. [14 central tacks]
Checkpoint: Every diamond should lie flat. The arches remain open, and the underside has no long loose floats.
Edging and Details
Edging Pass 1: Retain the Round 8 picots on all exposed loops. At joined loops, fold picots inward and secure under the join with one tack.
Detail Pass 2: Check that every exposed picot has exactly 3 chains and a closing slip stitch.
Checkpoint: The outside contour should be balanced. All attachments should withstand a gentle pull, and no joining tails should be visible on the right side.
Finishing Your Lace Runner
Finishing Pass 1: Weave all ends through dense single crochet sections in two directions for at least 2 cm. Trim only after blocking.
Blocking Pass 2: Soak the runner briefly in cool water. Roll in a towel to remove excess moisture. Pin to approximately 112 x 32 cm. Set all medallions to 16 cm diameter and all diamonds to their matching dimensions.
Checkpoint: Allow the runner to dry fully before removing pins. The finished piece should lie flat without cupping, twisting, or overstretched chain arches.
Care Instructions
Hand wash in cool water with a color-safe mild detergent. Do not wring. Roll in a towel to remove moisture and reblock flat.
Avoid chlorine bleach and direct high heat. This decorative runner is not heat-resistant, so use a protective mat under hot dishes. Keep cotton away from candles and open flames. Do not leave loose threads where children or pets can pull them.
UK Crochet Terminology Conversion
If you use UK terms, here are the conversions:
- US sc = UK dc
- US hdc = UK htr
- US dc = UK tr
- US tr = UK dtr
This Golden Daisy Lace Runner makes a beautiful centerpiece for dining tables, sideboards, or dressers. The butter yellow and ivory combination works wonderfully for spring and summer decor, but the elegant design suits any season. Whether you’re making this for your own home or as a cherished gift, the finished piece has true heirloom quality.
Thank you so much for choosing this pattern. If you make your own Golden Daisy Lace Runner, I’d love to see it! Share your finished piece on Instagram or Facebook and tag your photos so fellow crocheters can admire your beautiful work.
Save this pattern to your Pinterest boards so you can find it when you’re ready to start, and leave a comment below if you make one. I’d love to hear how your runner turns out!
Want a Quick & Easy Printable Version?
Get a clean, beautifully formatted PDF of this pattern — easy to follow step by step, ready to print or save on any device. No scrolling, no distractions, just the pattern.
Get the Printable PDF →