
I have been dreaming about designing a statement bag for months. Something with structure, texture, and those gorgeous dimensional flowers that make people stop and ask where you bought it. I wanted warm autumn tones, a satisfying drawstring closure, and enough visual interest to keep the project exciting from start to finish.
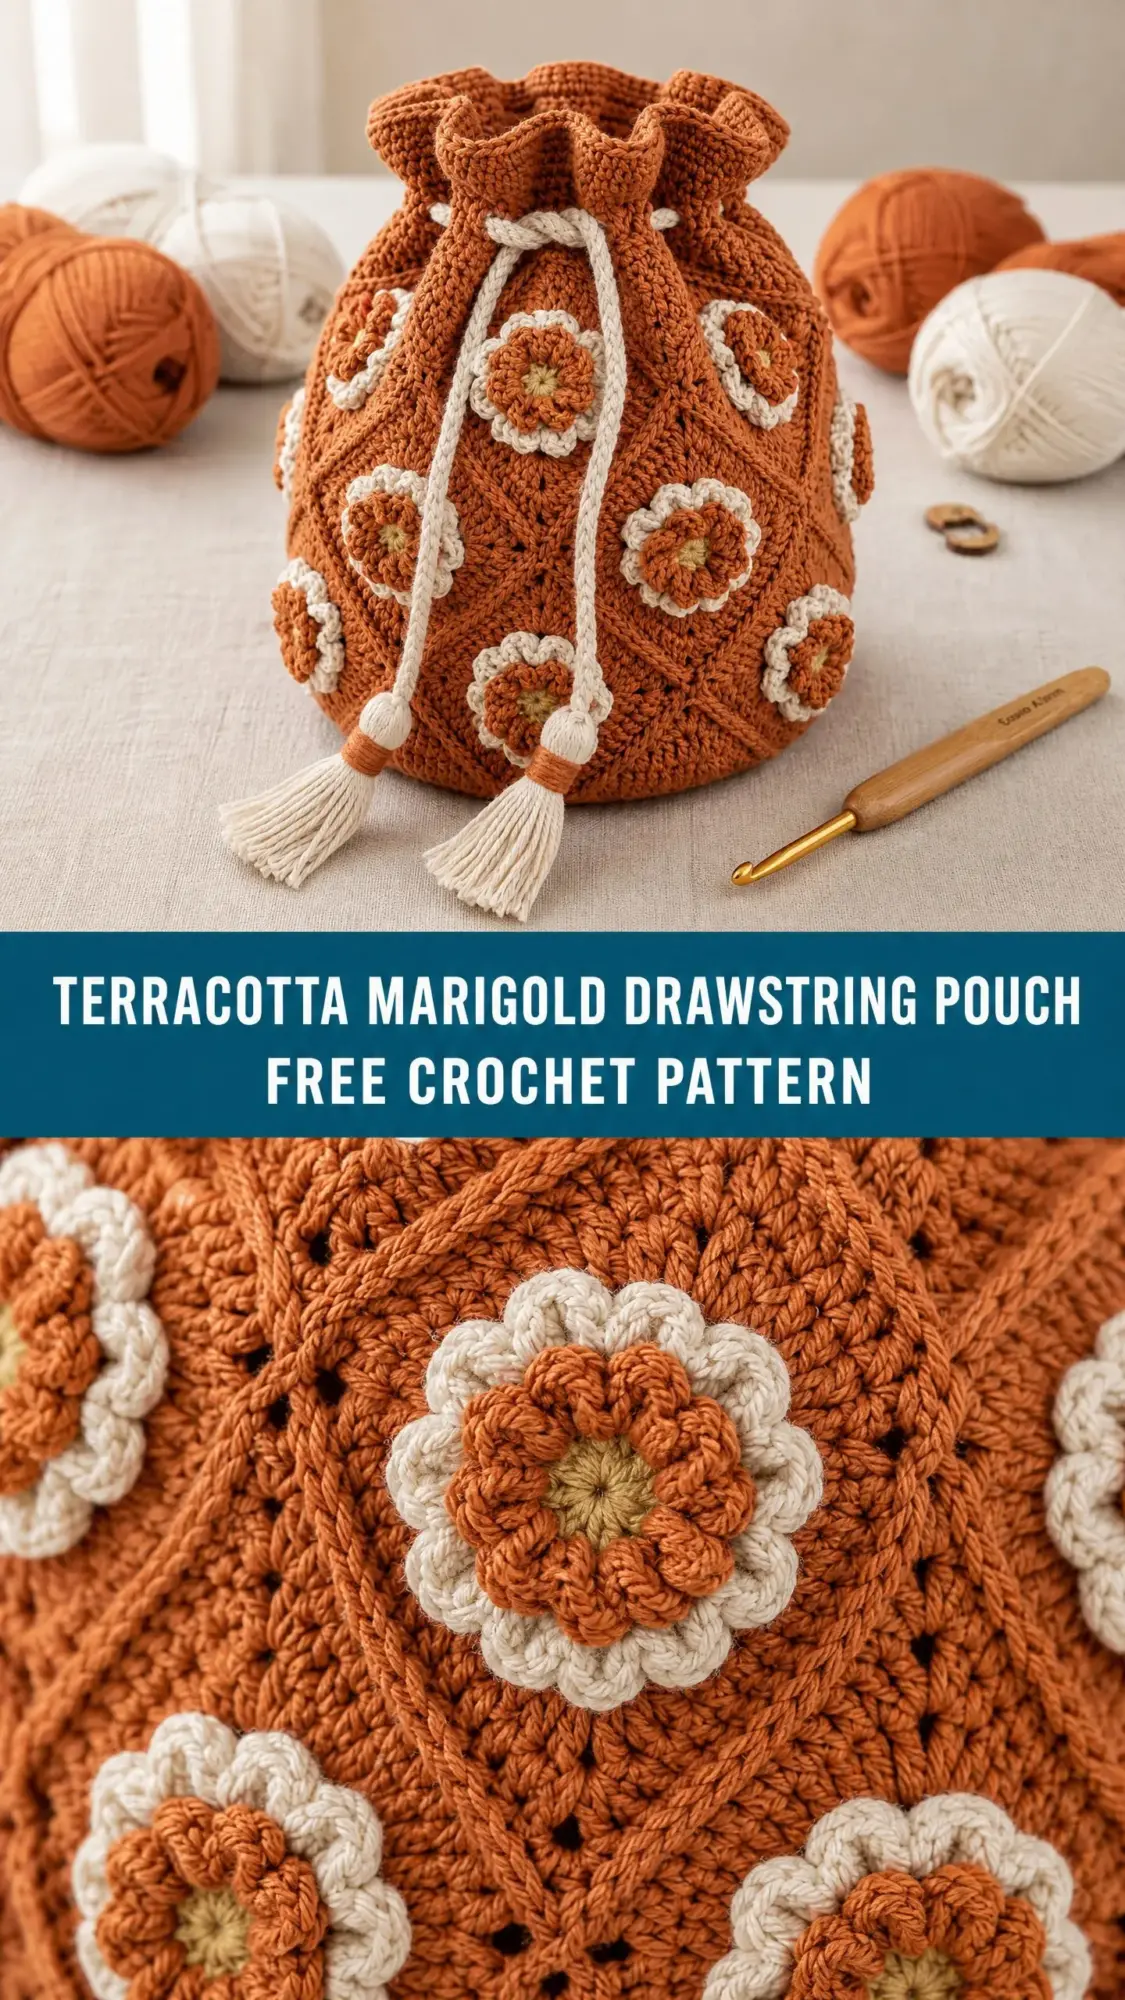
When I finally sat down to work out the details, I had three main goals. First, I needed that beautiful diagonal lattice texture across the body. Second, I wanted the African Flower motifs to pop against the terracotta background. Third, the whole thing had to hold its shape without a stiff liner.
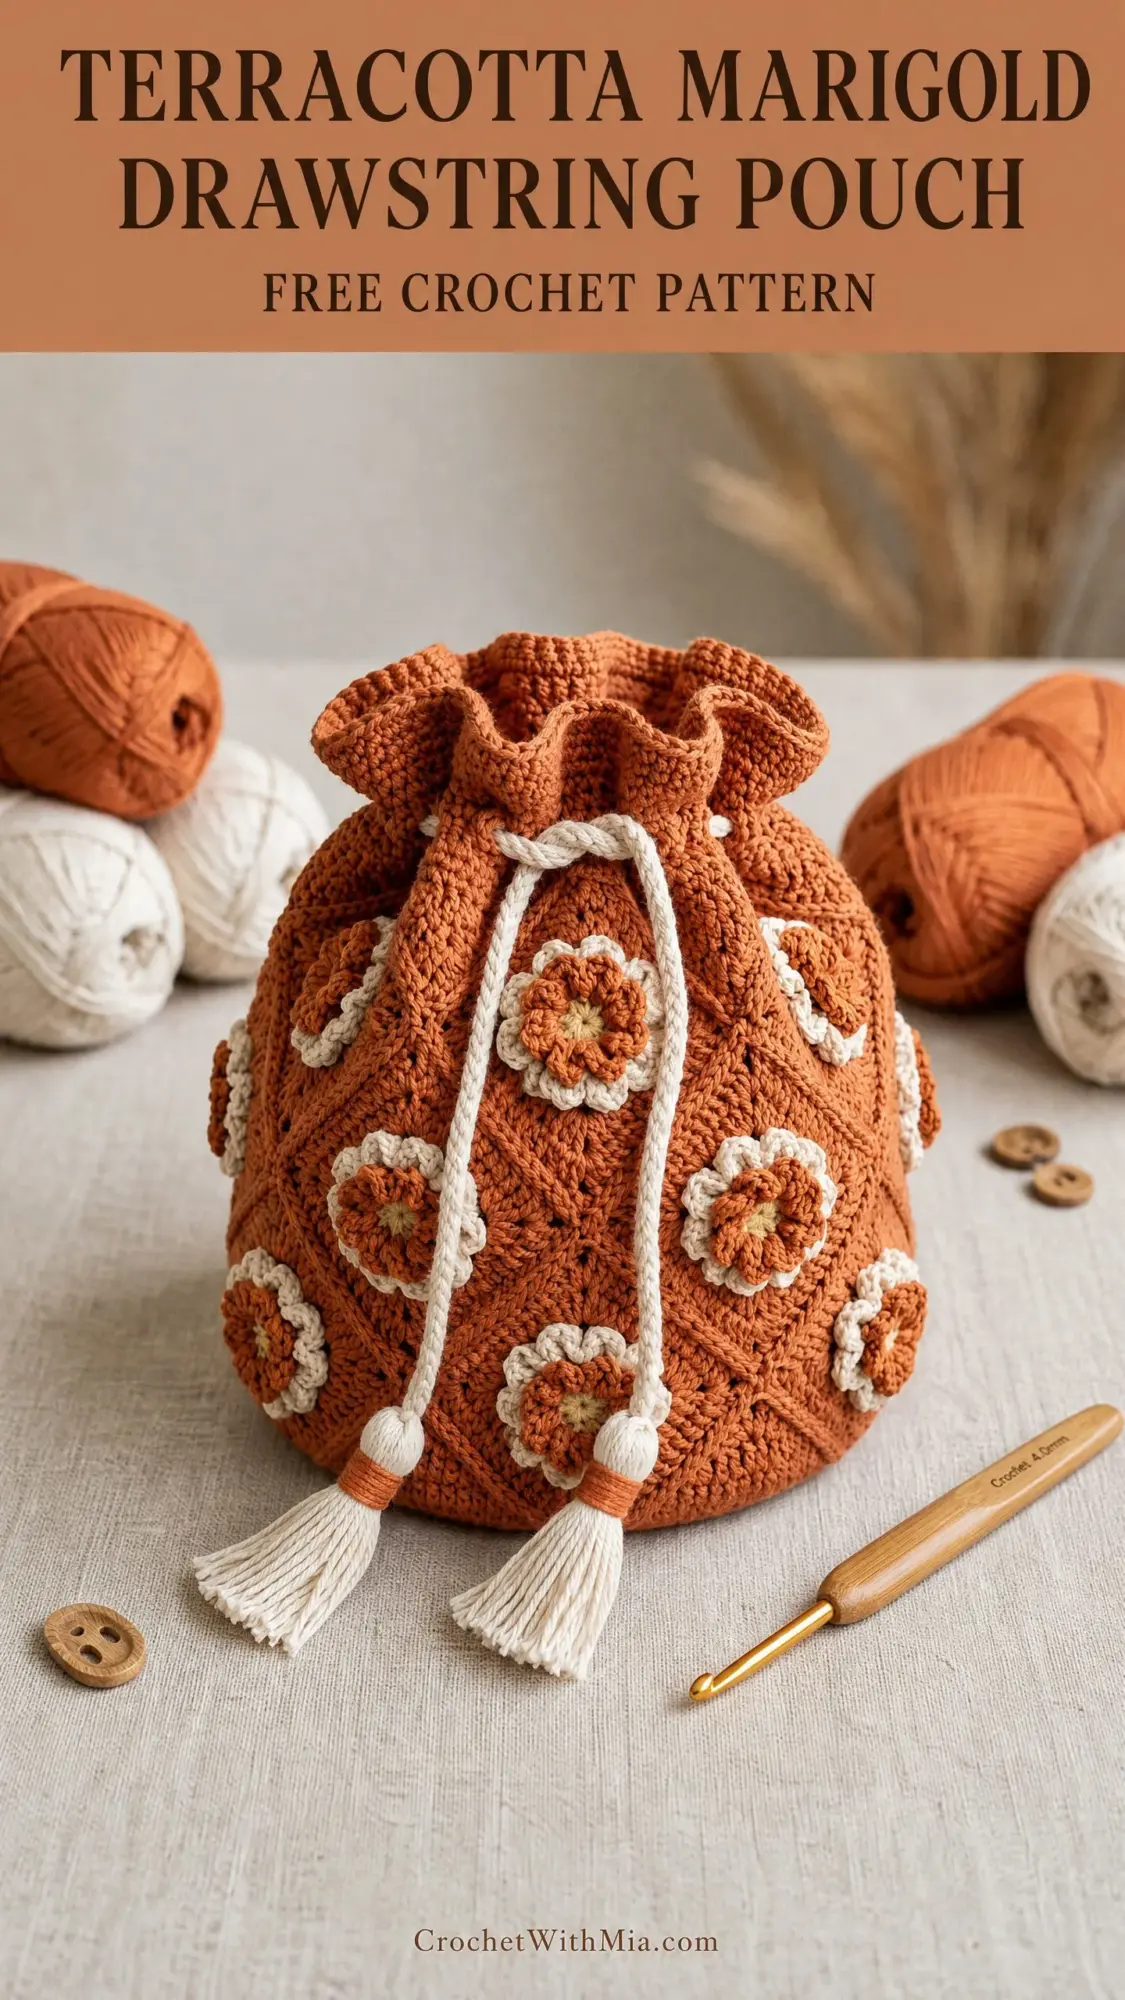
I am SO pleased with how this turned out. The bucket silhouette is perfect. The cream drawstring cords with their little tassels add just the right finishing touch. And those flowers? Absolutely stunning scattered across the surface in that staggered diamond pattern. This one is a showstopper.
About This Crochet Pattern
This Terracotta Marigold Drawstring Pouch is a structured bucket-style bag worked from the bottom up in continuous rounds. The body features a dense diagonal lattice texture created by working half double crochet (hdc) stitches in the back loop only. Fourteen separately crocheted African Flower motifs are sewn onto the surface in a beautiful staggered grid pattern.
The bag closes with a twisted drawstring cord threaded through evenly spaced eyelet holes near the top. A ruffled collar finishes off the opening with elegant flair. Cream tassels hang from each cord end, adding that handmade boutique feel.
This is an intermediate to advanced level project. You should be comfortable working in continuous rounds, managing stitch markers, creating consistent increases, and sewing motifs neatly. If you have made granny squares before and feel confident with basic shaping, you will do great here.
The finished bag measures approximately 11 inches wide by 10.5 inches tall, not including the tassels. The circumference at the widest point is about 34 inches, and the base diameter is approximately 7.5 inches.
Plan for about 18 to 25 hours of work. That breaks down to roughly 6 to 8 hours for the bag body, 8 to 10 hours for all 14 flower motifs, and 2 to 4 hours for finishing, assembly, and the cord with tassels.
Materials You Will Need
Yarn:
Hook:
Additional Supplies:
Yarn Suggestions
Lion Brand 24/7 Cotton in Terracotta and Ecru works beautifully here. This 100% mercerized cotton gives excellent stitch definition for the lattice texture and blocks nicely for flat motifs. It is machine washable and durable.
Paintbox Yarns Simply DK in Baked Terra and Champagne White is another great option. This smooth 100% cotton is widely available and affordable.
Drops Safran in Burnt Orange and Natural gives the bag a polished boutique feel with its slight sheen.
A quick note on substitutions: any smooth DK weight cotton or cotton-blend yarn will work well. Avoid acrylic or high-stretch yarns because the bag will lose its structured shape. Cotton yarns vary significantly in thickness across brands, so please swatch before starting.
Gauge
18 stitches and 20 rows equal 4 inches in half double crochet worked in continuous rounds using a G-6 (4.0 mm) hook.
For the motifs, one completed African Flower motif should measure approximately 3.25 inches across from edge to edge.
Gauge matters here. A bag worked too loosely will not hold its shape and will look floppy. A bag worked too tightly may use more yarn than estimated. Please make a swatch and adjust your hook size if needed.
Abbreviations
Before we dive into the instructions, here are all the abbreviations used in this crochet tutorial:
Special Stitches
Diagonal Lattice Half Double Crochet (DLHDC)
This is the primary texture stitch that creates the diagonal grid effect on the bag body. Here is how it works:
Work all hdc stitches in the back loop only throughout the bag body. This leaves the front loops exposed on the surface, creating diagonal ridges.
At the end of every fourth round, shift your stitch alignment by one stitch to the left. Work the final stitch of that round into the stitch one position before where your round marker sits. Continue the next round from this shifted position and reposition your marker.
The exposed front loops accumulate diagonally, and the ridges gradually travel across the surface. This creates that gorgeous lattice grid you see in the finished bag.
African Flower Motif
These dimensional flower appliques are worked in rounds using both MC and CC.
Round 1 (MC): Make a magic ring. Ch 2 (counts as first hdc), work 11 hdc into the ring, sl st to top of ch-2 to join. (12 hdc)
Round 2 (MC): Ch 1, work 2 sc in each stitch around, sl st to first sc to join. (24 sc)
Round 3 (MC): Ch 1, (sc in next st, ch 3, sk 1 st) 12 times, sl st to first sc to join. (12 sc, 12 ch-3 loops)
Round 4 (MC): Sl st into first ch-3 loop, ch 3, work 4 dc into same ch-3 loop, ch 3, sl st into same loop to close petal, (sl st into next ch-3 loop, ch 3, 4 dc into same loop, ch 3, sl st into same loop) 11 times, sl st to beginning. (12 petals)
Round 5 (CC): Working behind the petals, insert hook under the skipped sc from Round 2, ch 1, sc in that st, (ch 5, sc in next skipped sc from Round 2) 11 times, ch 5, sl st to first sc. (12 ch-5 loops)
Round 6 (CC): Into each ch-5 loop work (sc, hdc, 3 dc, hdc, sc), sl st to first sc. (12 petals in CC surrounding the MC petals)
Round 7 (CC): Ch 1, working into the back of Round 6, sc in each stitch across the outer scalloped edge, working 3 sc in each outer dc point of every petal to form the ruffled border, sl st to join. Fasten off. (approximately 108 sc total)
If you want the flower centers to look more golden, begin Round 1 with a tan or golden ochre yarn, then switch to MC for Rounds 2 through 4. This is optional and purely decorative.
Step by Step Instructions
Section 1: Base
Using MC, make a magic ring.
Round 1: Ch 2 (counts as first hdc here and throughout base), work 9 hdc into the ring, sl st to top of ch-2 to join. (10 hdc)
Round 2: Ch 2, hdc in same stitch, 2 hdc in each stitch around, sl st to top of ch-2 to join. (20 hdc)
Round 3: Ch 2, hdc in same stitch, hdc in next st, (2 hdc in next st, hdc in next st) 9 times, sl st to top of ch-2 to join. (30 hdc)
Round 4: Ch 2, hdc in same stitch, hdc in next 2 sts, (2 hdc in next st, hdc in next 2 sts) 9 times, sl st to top of ch-2 to join. (40 hdc)
Round 5: Ch 2, hdc in same stitch, hdc in next 3 sts, (2 hdc in next st, hdc in next 3 sts) 9 times, sl st to top of ch-2 to join. (50 hdc)
Round 6: Ch 2, hdc in same stitch, hdc in next 4 sts, (2 hdc in next st, hdc in next 4 sts) 9 times, sl st to top of ch-2 to join. (60 hdc)
Round 7: Ch 2, hdc in same stitch, hdc in next 5 sts, (2 hdc in next st, hdc in next 5 sts) 9 times, sl st to top of ch-2 to join. (70 hdc)
Round 8: Ch 2, hdc in same stitch, hdc in next 6 sts, (2 hdc in next st, hdc in next 6 sts) 9 times, sl st to top of ch-2 to join. (80 hdc)
Round 9: Ch 2, hdc in same stitch, hdc in next 7 sts, (2 hdc in next st, hdc in next 7 sts) 9 times, sl st to top of ch-2 to join. (90 hdc)
Round 10: Ch 2, hdc in same stitch, hdc in next 8 sts, (2 hdc in next st, hdc in next 8 sts) 9 times, sl st to top of ch-2 to join. (100 hdc)
Round 11: Ch 2, hdc in same stitch, hdc in next 9 sts, (2 hdc in next st, hdc in next 9 sts) 9 times, sl st to top of ch-2 to join. (110 hdc)
Round 12: Ch 2, hdc in same stitch, hdc in next 10 sts, (2 hdc in next st, hdc in next 10 sts) 9 times, sl st to top of ch-2 to join. (120 hdc)
Checkpoint: Your flat circle should measure approximately 7.5 inches in diameter. If it is smaller, your tension is too tight. If it is larger, consider going down half a hook size.
Section 2: Bag Body Sides
From this point forward, do not join rounds. Place a stitch marker in the first stitch of the round and move it up as you work. Work all hdc in the back loop only throughout the entire body section.
Rounds 13 through 15: Working in blo, hdc in each stitch around. (120 hdc)
Round 16 (shift round): Working in blo, hdc in next 119 sts, shift marker one stitch to the left. (120 hdc)
Continue this pattern of working 3 regular rounds followed by 1 shift round all the way through Round 56.
Rounds 17-20, 21-24, 25-28, 29-32, 33-36, 37-40, 41-44, 45-48, 49-52, 53-56: Working in blo, hdc in each stitch around, shifting on every fourth round (Rounds 20, 24, 28, 32, 36, 40, 44, 48, 52, and 56). (120 hdc each round)
Checkpoint: After Round 56, the bag body should measure approximately 8.5 inches from base to current working edge. The diagonal ridges should be clearly visible. Count 120 stitches before continuing.
Section 3: Drawstring Eyelet Round
Round 57 (eyelet round, work in both loops): Sl st to join at marker, ch 1, (sc in next 8 sts, ch 2, sk 2 sts) 12 times, sl st to first sc to join. (96 sc, 12 ch-2 spaces)
Round 58: Ch 1, sc in each sc and 2 sc in each ch-2 space around, sl st to first sc to join. (120 sc)
Checkpoint: You should have 12 evenly spaced eyelet holes around the circumference.
Section 4: Upper Band
Rounds 59 through 62: Working in blo, hdc in each stitch around, do not join. (120 hdc each round)
At the end of Round 62, sl st to join.
Section 5: Ruffle Collar
Round 63 (increase round, work in both loops): Ch 2 (counts as first hdc), hdc in same stitch, 2 hdc in each stitch around, sl st to top of ch-2 to join. (240 hdc)
Round 64: Ch 2, hdc in each stitch around, sl st to top of ch-2 to join. (240 hdc)
Round 65: Ch 1, sc in first st, (ch 3, sk 1 st, sc in next st) 120 times, ch 3, sk 1 st, sl st to first sc to join. (120 sc, 120 ch-3 loops)
Round 66: Sl st into first ch-3 loop, ch 1, (sc, hdc, dc, hdc, sc) into each ch-3 loop around, sl st to first sc to join. Fasten off and weave in ends. (120 shell stitches)
Checkpoint: The collar should flare outward and ruffle gently, measuring approximately 1.5 inches deep.
Section 6: African Flower Motifs
Work 14 motifs total following the African Flower Motif instructions in the Special Stitches section above.
Motif Placement:
For the front and back panels (4 motifs each, 8 total): Place one motif centered at approximately 3 inches from the base. Place a second motif directly above at approximately 6.5 inches from the base. Offset a third motif to the opposite side at 3 inches from the base, and a fourth directly above at 6.5 inches. This creates a staggered diamond grid.
For the side panels (3 motifs each, 6 total): Place one motif centered at 5 inches from the base. Place one above and slightly left at 7.5 inches. Place one below and slightly right at 2.5 inches.
Pin each motif in place before sewing. Using CC yarn and a yarn needle, whipstitch each motif around its outer edge to the bag surface. Take care to sew through only the outer surface so stitches do not show on the interior.
Section 7: Drawstring Cords and Tassels
To make the twisted cord: Cut 8 strands of CC yarn, each 5 yards long. Fold the bundle in half. Secure the loop end to a fixed point. Twist all 16 strands clockwise until the cord begins to kink when relaxed. Fold the twisted length in half and allow it to twist back on itself. Tie a knot at the loose end. Make two cords.
To make the tassels: Wrap CC yarn around a 4-inch cardboard strip 20 times. Slide a strand underneath and tie at the top. Cut the loops at the bottom. Wrap another strand around the bundle about 0.5 inch down from the top, securing tightly. Trim ends to about 3 inches. Make 4 tassels total.
Attach 2 tassels to each cord end. Thread cord 1 through all 12 eyelets, exiting through the same opening. Thread cord 2 starting from the opposite side. When pulled, both cords tighten simultaneously.
Finishing and Care
Weave in all ends securely, burying tails through at least 1 inch of stitches.
Wet blocking is recommended for cotton yarns. Submerge the finished bag in cool water and gently squeeze out excess moisture. Shape over a rounded form like a bowl or inflated balloon. Smooth the lattice ridges and fluff the motif petals. Allow to dry completely.
Care instructions: Hand wash in cool water with mild detergent. Lay flat or reshape over a form to dry. Do not tumble dry or bleach. Store stuffed with tissue paper to maintain shape.
Size Customization Tips
To make the bag smaller (approximately 9 inches wide): Stop at Round 10 of the base for a 96-stitch count. Adjust the eyelet round to (sc in next 6 sts, ch 2, sk 2 sts) 12 times.
To make the bag larger (approximately 13 inches wide): Add 2 more increase rounds to the base for a 140-stitch count, and work 10 additional body rounds.
Thank you so much for choosing this pattern! I hope you love making this Terracotta Marigold Drawstring Pouch as much as I loved designing it. If you have any questions along the way, do not hesitate to reach out. I would absolutely love to see your finished bags on Instagram or Facebook.
If this crochet pattern caught your eye, go ahead and save it to your Pinterest boards so you can find it when you are ready to start. And please drop a comment below once you make yours. Seeing your creations is honestly the best part of sharing these patterns!