
Last summer, my best friend texted me in a panic. She had a garden party in two weeks and nothing to wear. "Something floral but not too fussy," she said. "Something that looks like I spent way more than I did." I started sketching that night, and this lavender mini dress was born from that frantic but fun creative burst.
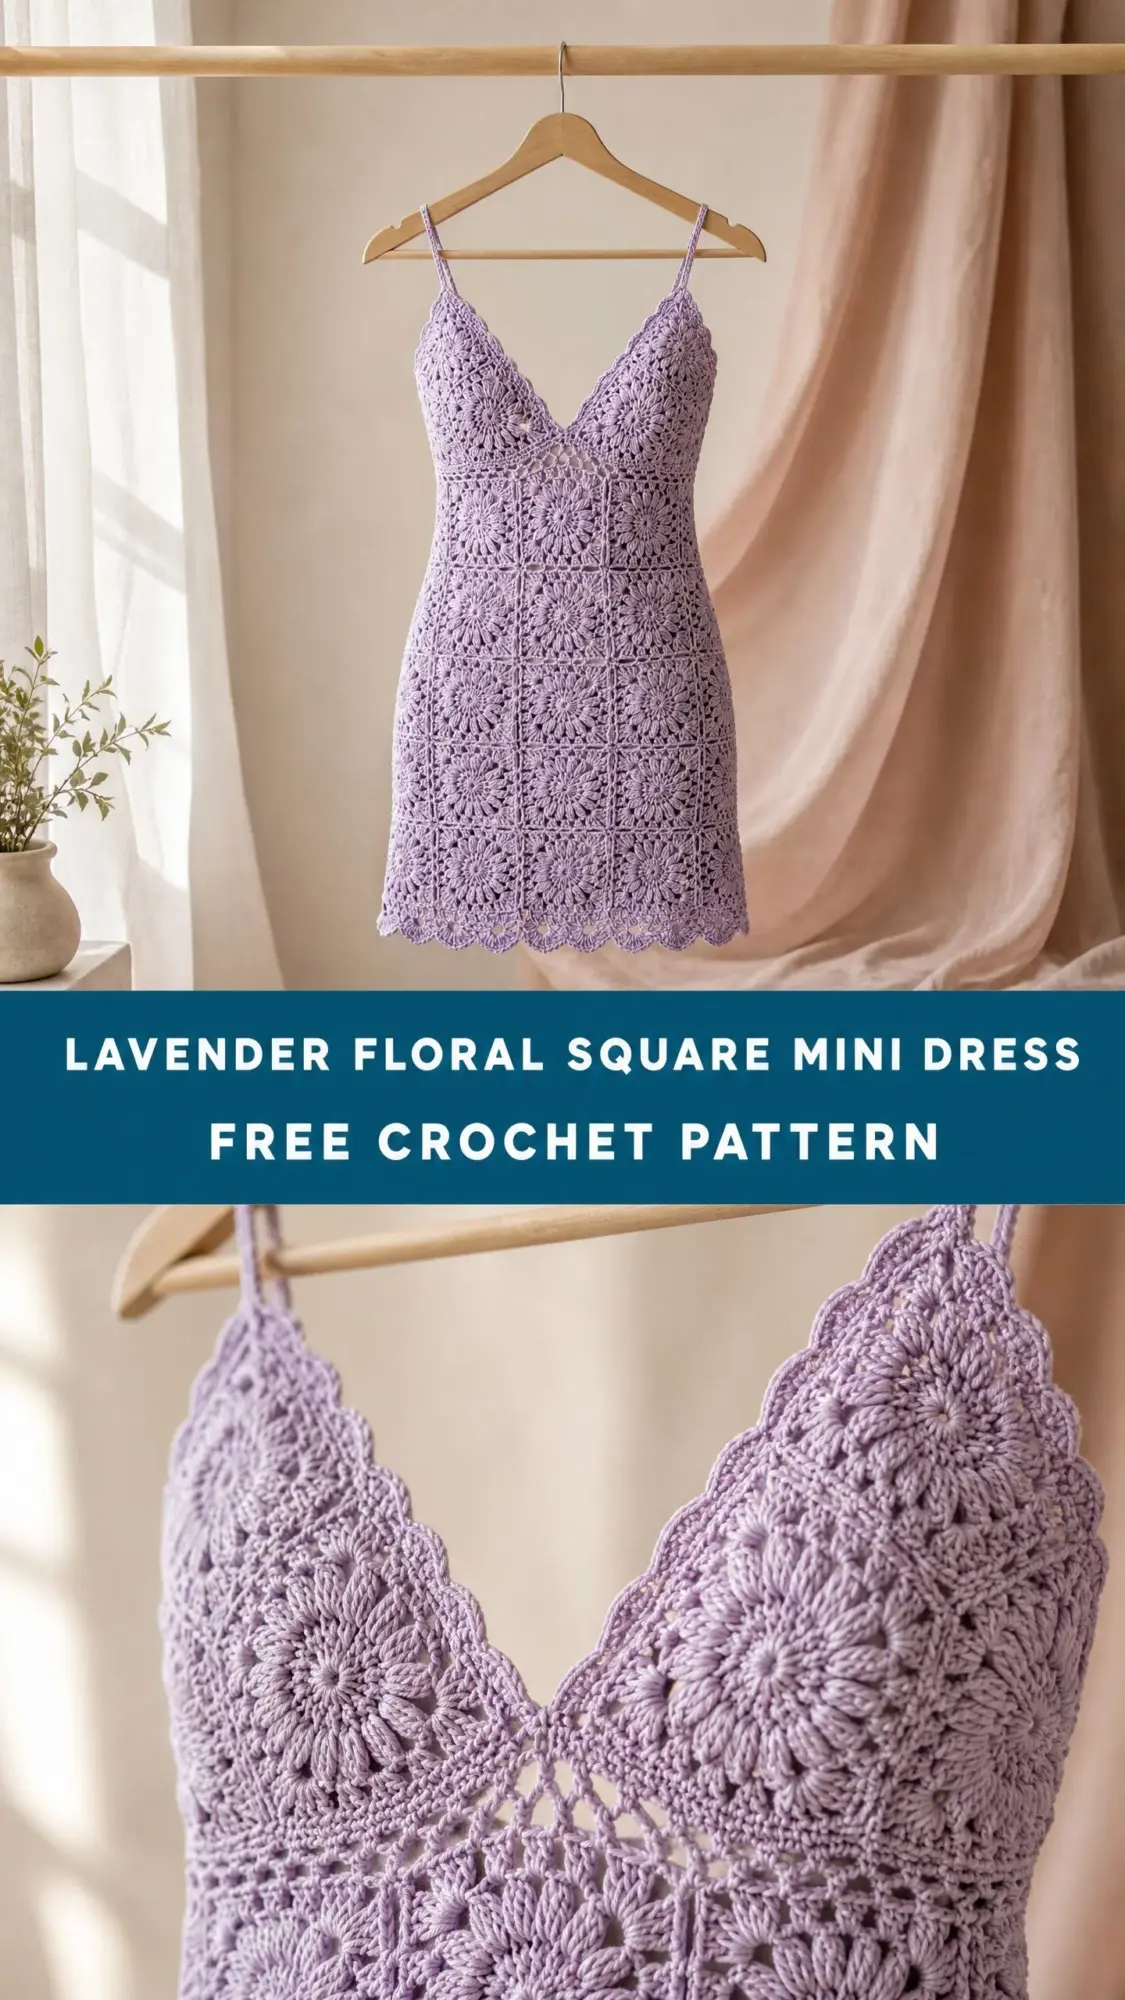
What I love about this design is that it looks incredibly intricate, but the construction is actually quite logical once you understand the building blocks. You are essentially making a bunch of beautiful floral granny squares and then puzzling them together like a gorgeous textile jigsaw. The hardest part is being patient enough to block all your squares before joining.
If you have ever wanted to crochet yourself a wearable piece that turns heads, this is your project. Fair warning: strangers will ask where you bought it. You will get to say "I made it," and that feeling never gets old.
About This Crochet Pattern
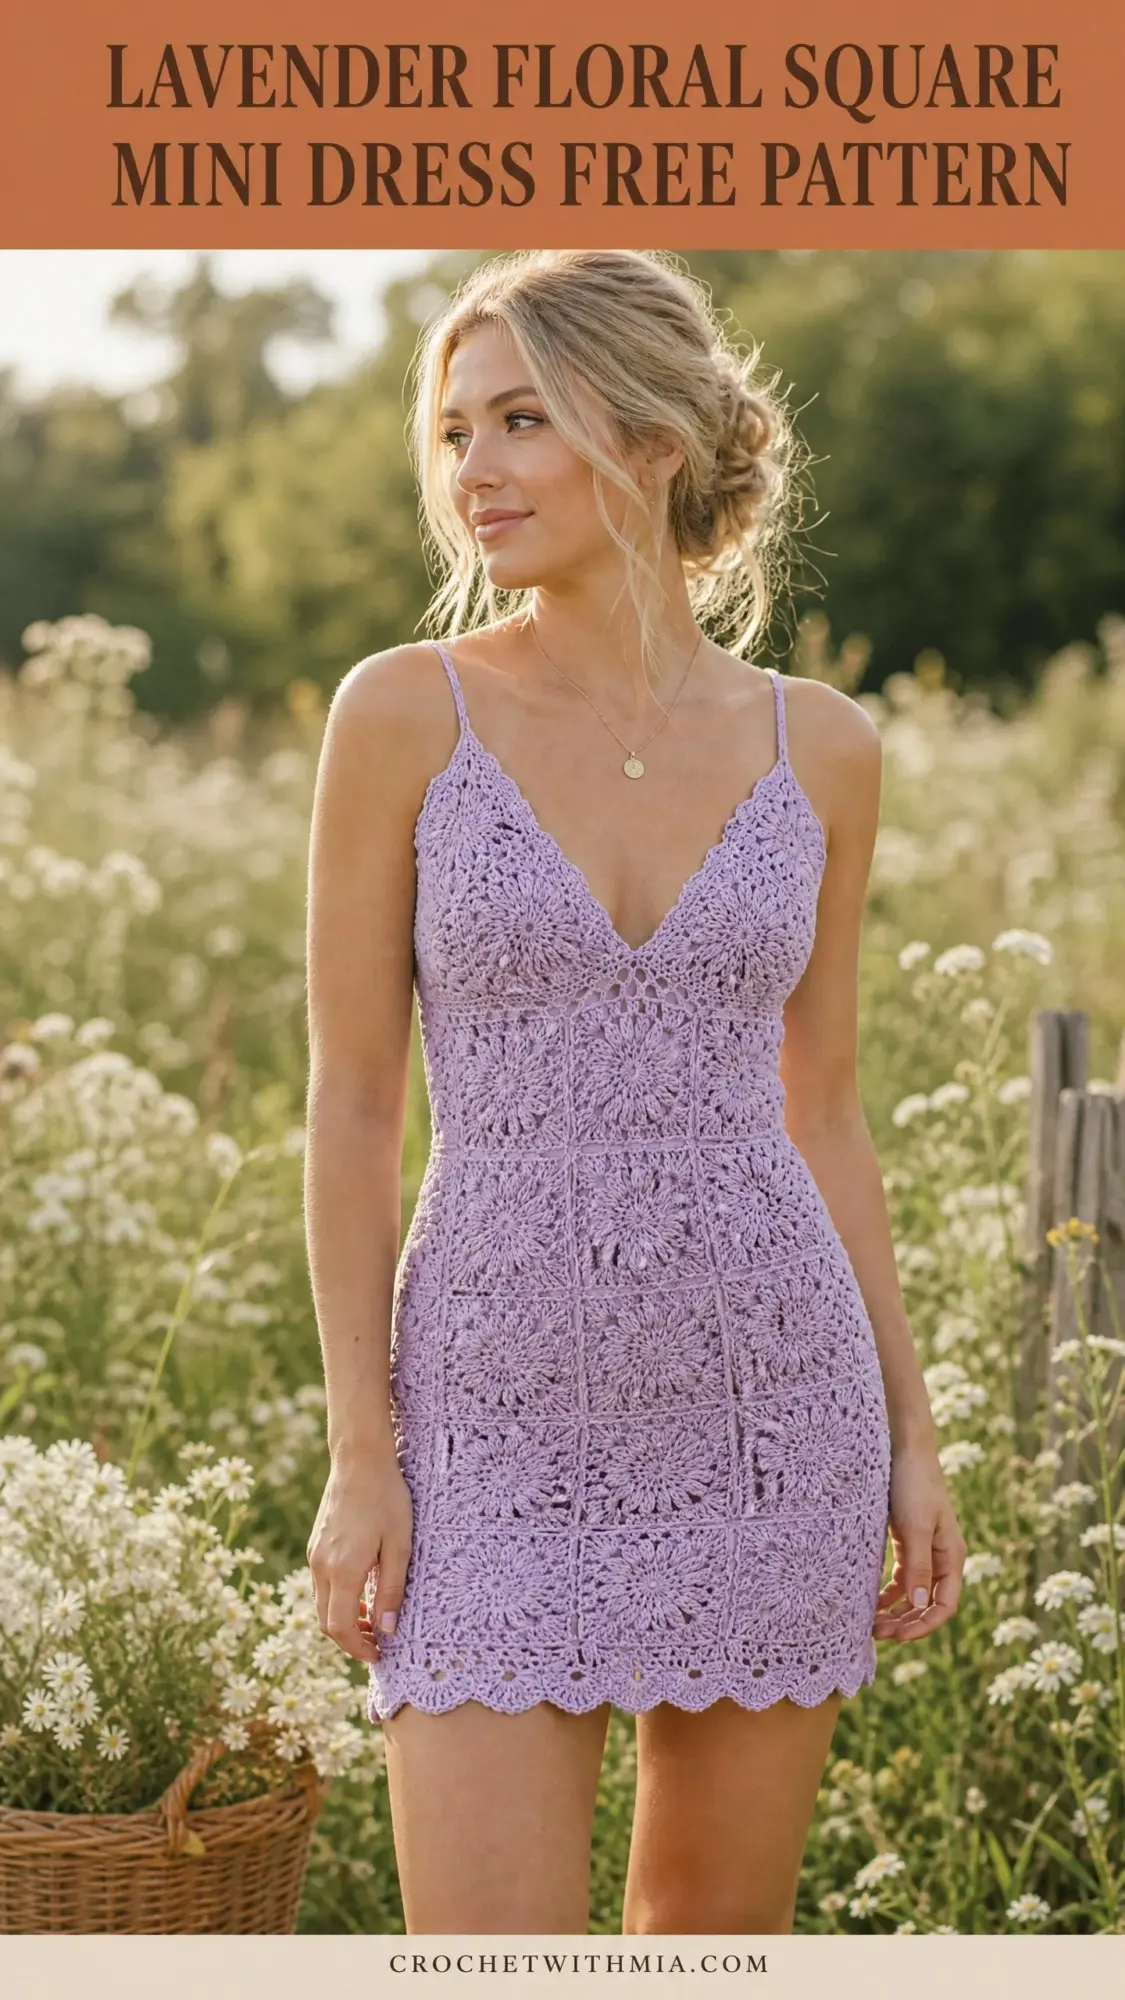
This fitted mini dress is constructed entirely from joined floral granny squares. The body forms a tube silhouette, while the bodice uses partial squares and triangle fill-in pieces to create that romantic V-neckline. Delicate spaghetti straps and scalloped edging complete the look.
The skill level is intermediate. If you can crochet a basic granny square and you are comfortable with seaming pieces together, you can absolutely make this dress. The individual squares are beginner-friendly. The tricky part is joining them precisely and fitting everything to your measurements.
Expect this project to take approximately 30 to 45 hours for an experienced crocheter working at a steady pace. This is not a weekend project, but it is absolutely worth the time investment.
Finished Measurements
This pattern is written for size Small (US 4-6) with notes for Medium and Large.
Small: Bust 32-34 inches, Waist 26-28 inches, Hip 34-36 inches, Total length approximately 24 inches from top of bodice to hem.
Medium: Bust 36-38 inches, Waist 30-32 inches, Hip 38-40 inches, Total length approximately 24 inches.
Large: Bust 40-42 inches, Waist 34-36 inches, Hip 42-44 inches, Total length approximately 24 inches.
The dress is designed with approximately 0 to 1 inch of positive ease at the bust for a body-conscious fit. If you need additional room, add one extra column of squares per side for 4 inches of additional circumference.
Materials Needed
Yarn: Approximately 900 (1000, 1100) yards of DK weight (CYCA 3) 100 percent cotton or cotton-blend yarn in a soft lavender colorway.
Here are my yarn recommendations:
Avoid acrylic-only yarns for this project. They reduce drape and cause the dress to stretch out of shape over time. Cotton or cotton-blend yarns give you that beautiful fluid movement you see in the photos.
Hooks:
Notions:
Optional: 0.5 yard of stretch jersey fabric in nude or lavender for a modesty lining. I highly recommend this since the openwork design is somewhat sheer.
Gauge
One completed Floral Granny Square after blocking = 4 inches x 4 inches.
Gauge is critical for fit here. Measure each finished square after blocking. Do not proceed with construction until your blocked square matches this measurement exactly. If your square measures larger than gauge, go down one hook size. If smaller, go up one hook size.
For reference, in standard single crochet (sc) fabric on the E-4 hook: 18 sc x 22 rows = 4 inches x 4 inches.
Abbreviations
Let me walk you through every abbreviation used in this pattern. Even if you are familiar with these stitches, it helps to have them all in one place.
Special Stitches and Techniques
The Floral Granny Square
This is the building block of your entire dress. Each square is worked from the center outward in 5 rounds. After blocking, each square should measure exactly 4 inches x 4 inches.
Round 1: MR, ch 3 (counts as first dc), 2 dc in ring, ch 2, (3 dc in ring, ch 2) 3 times, join to top of beg ch-3. (4 clusters of 3 dc, 4 ch-2 corner spaces)
Round 2: sl st to corner ch-2 sp, ch 3, (2 dc, ch 2, 3 dc) in same ch-2 sp, ch 1, (3 dc, ch 2, 3 dc) in next corner ch-2 sp, ch 1, rep from beginning 2 more times, join to top of beg ch-3. (8 clusters of 3 dc, 4 ch-2 corner spaces, 4 ch-1 side spaces)
Round 3: sl st to corner ch-2 sp, ch 3, (2 dc, ch 2, 3 dc) in same sp, ch 1, 3 dc in ch-1 sp, ch 1, (3 dc, ch 2, 3 dc) in corner ch-2 sp, ch 1, 3 dc in ch-1 sp, ch 1, rep from beginning 2 more times, join to top of beg ch-3. (12 clusters of 3 dc, 4 ch-2 corner spaces, 8 ch-1 side spaces)
Round 4 (Floral Petal Round): sl st to corner ch-2 sp, ch 1, (sc, ch 3, sc) in corner sp, ch 2, sk 3 dc, (sc, ch 5, sc) in ch-1 sp, ch 2, sk 3 dc, (sc, ch 5, sc) in ch-1 sp, ch 2, sk 3 dc, rep from (sc, ch 3, sc) in each corner and (sc, ch 5, sc) in each side ch-1 sp around, join to beg sc. (4 corner ch-3 arches, 8 side ch-5 petal arches)
Round 5 (Outer Square Round): sl st to corner ch-3 sp, ch 3 (counts as dc), (2 dc, ch 3, 3 dc) in same sp, ch 1, (3 dc, ch 1) in each ch-5 sp across the side (2 ch-5 sps per side), (3 dc, ch 3, 3 dc) in each corner ch-3 sp, ch 1, rep around, join to top of beg ch-3. (16 clusters of 3 dc total: 4 corner double clusters plus 2 single clusters per side; 4 ch-3 corner spaces)
Fasten off and weave in ends. Block each square to 4 inches x 4 inches.
Half Square (Triangle Fill-In for Bodice)
These triangular pieces fill in the V-neckline area.
Work Rounds 1 through 3 of the Floral Granny Square. Then work Row 4 as a turning row, not in the round: Turn, ch 3, work across one side of the square only following the established pattern, ending at the next corner. Do not close into a round.
This creates a right-triangle shaped fill-in piece. The hypotenuse aligns with the V opening.
Flat Join Method
This is how you will connect all your squares together.
Hold two finished squares with RS facing each other (WS outward). Using the D-3 / 3.25 mm hook, insert hook through the corresponding ch-1 side spaces or ch-3 corner spaces of both squares simultaneously and sl st through both layers. Work one sl st per stitch pair across the shared edge.
This creates a flat, nearly invisible seam on the RS. Do not sl st through the ch-3 corner spaces when joining straight edges; leave corners free to form the four-corner intersection.
Scallop Edging
This pretty finishing detail goes on the hem and neckline.
(sc, hdc, 3 dc, hdc, sc) in the same ch-sp, sl st in next joining seam or ch-1 sp, rep around.
Step-by-Step Instructions
Section 1: Making the Squares
Make 56 full Floral Granny Squares following the instructions above.
Make 4 Half Square triangles following the Half Square instructions.
Block all squares and triangles. Squares should measure 4 inches x 4 inches. Triangles should form a 4 inch x 4 inch right-triangle shape. Allow everything to dry completely before joining.
I cannot stress this enough: blocking before joining makes a huge difference in how professional your finished dress looks. Take the time to do this step properly.
Section 2: Arranging the Grid
Lay out your blocked squares on a flat surface.
Label columns 1 through 8 from left to right. When joined side to side, columns 1 and 8 will be seamed together to form the side seam.
Section 3: Joining the Body Panel
Step 1: Join squares in each row horizontally.
Take Row A squares 1 and 2. Place RS together. Using the D-3 / 3.25 mm hook, begin flat join at the top-right corner ch-3 space of square 1 and the top-left corner ch-3 space of square 2.
Work sl st through both corner sps once, then work 1 sl st through each corresponding ch-1 side sp and dc cluster top across the shared edge: sl st in corner, (sl st through next ch-1 sp pair) 2 times, sl st in corner. This gives 5 joining points per square edge. Fasten off.
Continue joining squares 2 to 3, 3 to 4, 4 to 5, 5 to 6, 6 to 7, and 7 to 8 in Row A. You now have a strip of 8 squares joined horizontally.
Repeat for Rows B, C, D, E, and F. You now have 6 joined horizontal strips.
Step 2: Join the strips vertically.
Place Row A and Row B strips with RS together. Align the top edge of Row A with the bottom edge of Row B. Join using Flat Join method, working across all 8 square-widths.
At each column intersection, work the sl st join through all four corner sps that meet at that cross-point: insert hook through all four corner ch-3 sps simultaneously, yo, pull through all loops, pull through loop on hook.
Continue joining Row B to Row C, Row C to Row D, Row D to Row E, and Row E to Row F. You now have a flat rectangular panel: 8 squares wide by 6 squares tall, measuring 32 inches x 24 inches.
Step 3: Join the side seam.
Fold the panel with RS together so that the left edge (column 1) meets the right edge (column 8). Using Flat Join, seam the full left edge to the right edge from hem to top of Row F. This creates the body tube. Do not seam Row G yet. Turn RS out.
Checkpoint: Your body tube should be approximately 32 inches in circumference and 24 inches tall.
Section 4: Bodice Construction
Back bodice (Row G back): Join 4 full squares in a horizontal strip. This covers columns 1 through 4, which will be the back of the dress. Join to the top of Row F squares at the back positions using Flat Join.
Front bodice lower (Row G front): Place 2 full squares at the outer edges of the front, at columns 5 and 8 (left and right bust sides). These anchor the base of the V on each side.
Front bodice V-shaping: Place one half-square triangle on each side of the center-front V opening. The right-angle corner of each triangle aligns with the inner top corner of the outer bodice square. The hypotenuse of each triangle faces the center, creating the diagonal V-neckline edge.
Use flat join to attach the straight edges of each triangle to the adjacent full squares and to Row F below.
For sizes Medium and Large: Add one full square to each side of the front bodice, moving the V inward one square per side. Adjust triangle placement accordingly.
Section 5: Neckline and Armhole Edging
Using the D-3 / 3.25 mm hook and RS facing, join yarn at the center back top edge.
Back neckline Round 1: Work sc evenly across the top of the 4 back bodice squares. Work 3 sc in each ch-3 corner space, 1 sc in each ch-1 space, and 1 sc over each joining seam. Approximately 72 sc across. Join to first sc. (72 sc)
Armhole edging: Work 2 sc in each ch-3 corner sp, 1 sc in each ch-1 sp around each armhole perimeter. Approximately 32 sc per armhole. Join. (32 sc per armhole)
Back neckline Round 2: Work scallop edging. (sc, hdc, 3 dc, hdc, sc) in first ch-1 sp or st, sl st in next sp, rep across. Approximately 9 scallops across back.
Front V-neckline: Join yarn at base of V center. Work sc along the left diagonal hypotenuse of the left triangle, 1 sc in the corner at the shoulder edge, sc across the top of the left outer bodice square to the left armhole, continue sc down and across the right side symmetrically to return to V base. Work 3 sc in the base V point to allow the V to lie flat. Approximately 64 sc total. Join. (64 sc)
Work scallop edging along front neckline same as back.
Section 6: Hem Edging
With D-3 / 3.25 mm hook, join yarn at any bottom edge ch-3 corner sp of Row A.
Round 1: Work sc along the entire bottom edge of the 8 squares in Row A. Work 3 sc in each ch-3 corner space, 1 sc in each ch-1 space, 1 sc over each joining seam. Approximately 112 sc around the hem circumference. Join. (112 sc)
Round 2: Work scallop edging all the way around the hem. (sc, hdc, 3 dc, hdc, sc) in first sp, sl st in next sp, rep. 14 scallops for size Small. Join. Fasten off. (14 scallops)
Section 7: Straps
Left front strap: Join yarn at the top of the outer left front bodice square, at the shoulder corner ch-3 space. Ch 100 (adjust length for desired strap length; 100 ch gives approximately 14 inches of strap).
Row 1: sl st in 2nd ch from hook and in each ch across. (99 sl sts)
Fasten off, leaving a long tail. Attach the other end to the corresponding left back position on the back bodice top edge, at the matching shoulder corner ch-3 space. Use the tail to whipstitch securely. Weave in end.
Right front strap: Work identically to the left front strap, attaching at the outer right front shoulder corner and right back shoulder corner.
Back strap loop (optional): After attaching both straps to the back, add a short connecting chain of 15 ch between the two back strap attachment points, sl st back along the chain (15 sl sts), and fasten off. This creates the decorative back loop.
Size Customization Tips
Each column of squares adds or removes 4 inches of circumference. Each row of squares adds or removes 4 inches of length.
Size XS (US 0-2): Use 7 columns instead of 8. Circumference: 28 inches.
Size Medium (US 8-10): Use 9 or 10 squares per row for a circumference of 36-40 inches.
Size Large (US 12-14): Use 11 squares per row for a circumference of 44 inches.
To lengthen the dress by 4 inches: Add one complete additional row of 8 full squares below Row A before working the hem edging.
Always re-check strap length when resizing. Add or subtract 7 ch per inch of additional strap length needed.
Finishing and Care
Weave in all yarn ends securely using a tapestry needle. Weave each end in at least 2 directions to prevent unraveling. For cotton yarn, duplicate stitch each end for extra security.
Hand wash the completed dress in cool water with gentle soap. Do not wring. Press gently in a towel to remove excess water.
Block the dress on blocking mats, pinning to correct finished measurements. Stretch each square to the full 4 inch x 4 inch measurement. Ensure the side seam is straight, the hem is even, and the V-neckline is symmetrically shaped. Allow to dry completely before removing pins.
Care instructions: Machine wash on delicate cycle in a mesh laundry bag, or hand wash. Use mild detergent. Do not tumble dry. Lay flat or hang to dry. Store folded flat or hung on a padded hanger.
You Did It!
I really hope you enjoy making this lavender floral square mini dress crochet pattern as much as I enjoyed designing it. There is something incredibly satisfying about watching all those individual squares come together into a wearable garment. My friend wore hers to that garden party, by the way, and she got compliments all afternoon.
Thank you so much for choosing this pattern. If you make this dress, I would absolutely love to see it! Tag me on Instagram or share a photo in our Facebook group. Seeing your finished projects is honestly the best part of my day.
If you want to find this pattern again later, go ahead and pin it to your Pinterest boards. And please leave a comment below if you make it or if you have any questions along the way. I am always happy to help, and I love hearing from fellow makers who take on bigger projects like this one. Happy crocheting!