
A hooded cardigan made entirely from granny squares sounds intimidating. I get it. All those squares, all that joining, all that potential for things to go sideways. But here is the truth: if you can crochet a basic granny square, you already have the hardest skill this pattern requires.
The rest is just repetition and assembly. You will make the same square over and over until you have a pile of them. Then you will join them into panels. Then you will seam those panels into a garment. No complicated shaping. No confusing increases or decreases. Just squares, seams, and a simple border.
Whether you have never made a garment before or you have dozens under your belt, this construction method meets you where you are. The granny square is forgiving. The modular assembly lets you check your progress constantly. And the dramatic result looks far more complex than the actual stitches involved.
About This Monochrome Granny Square Cardigan Pattern
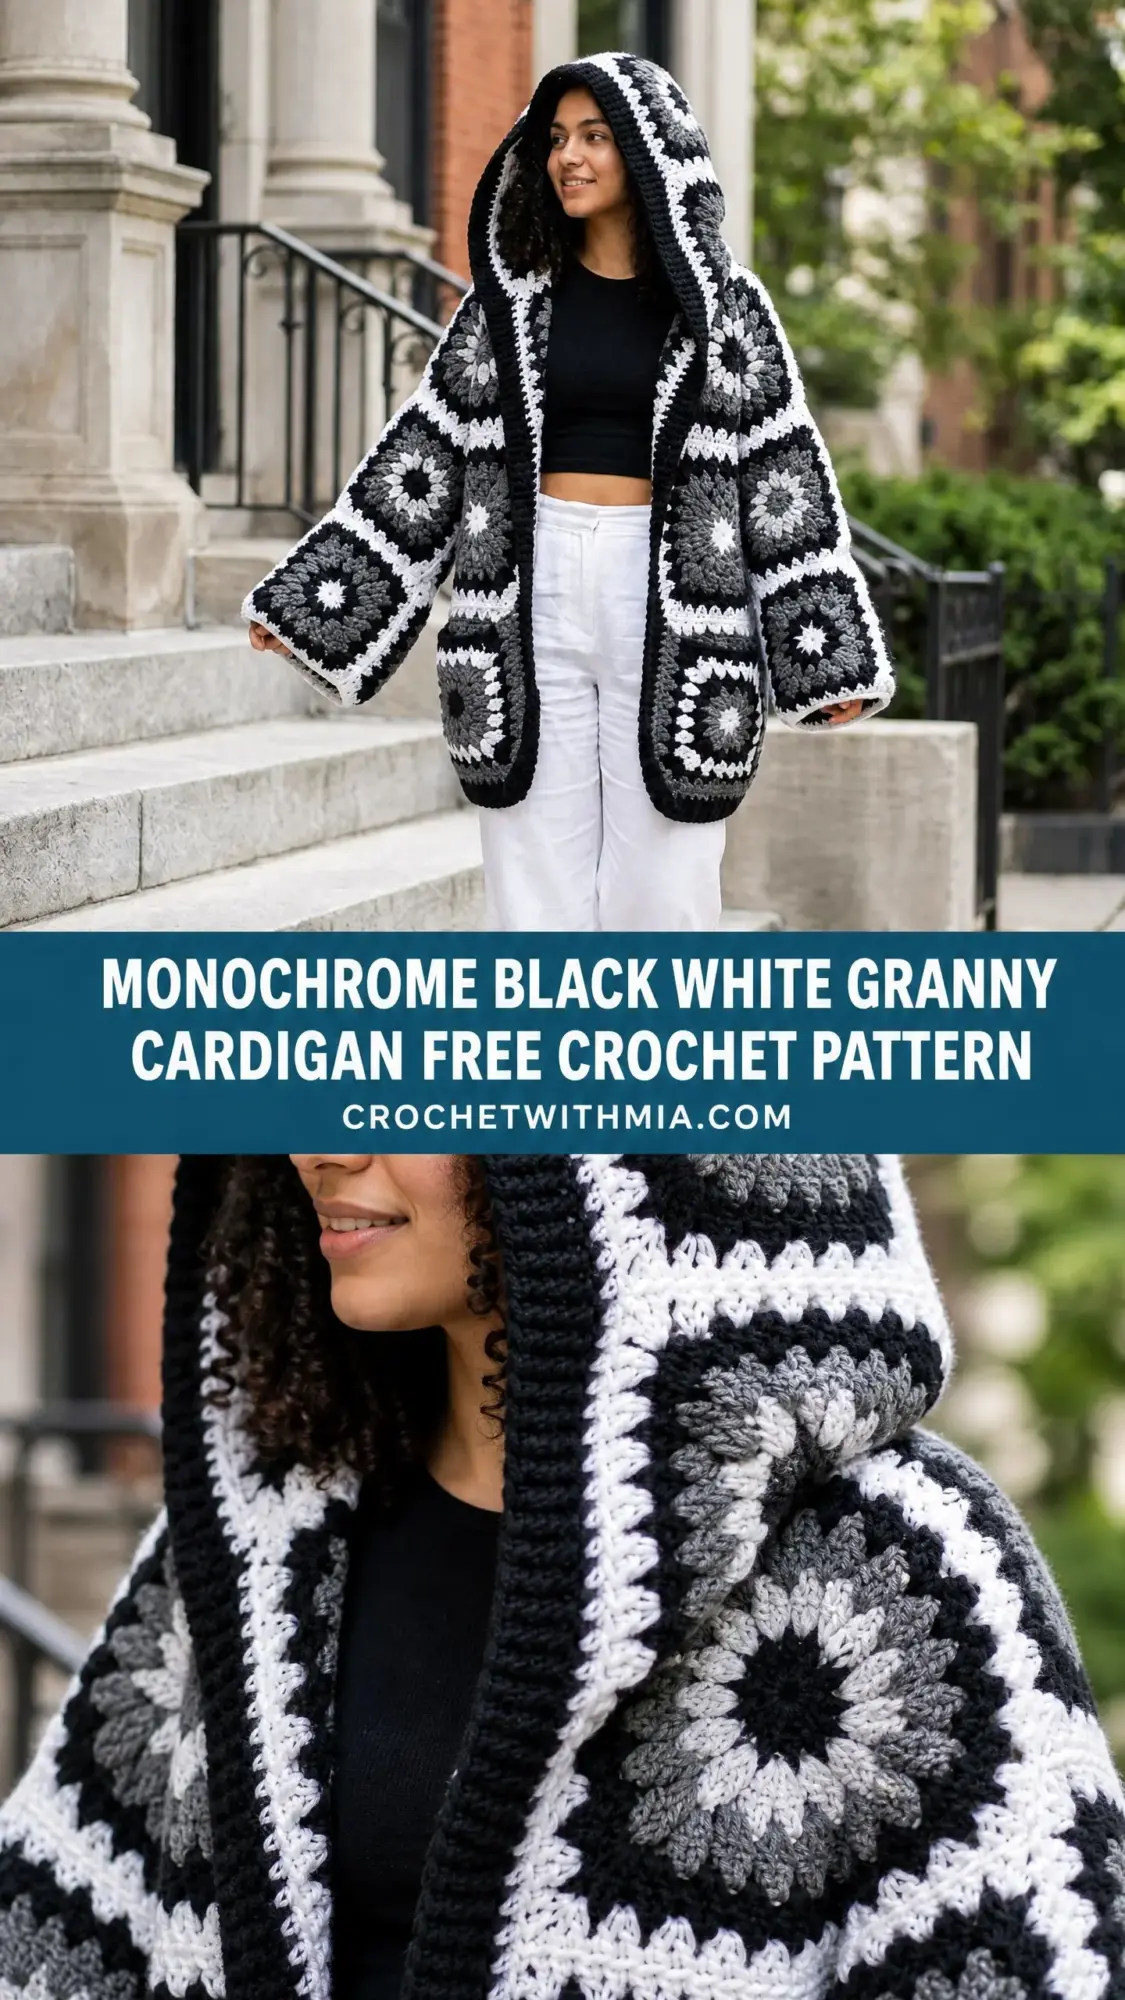
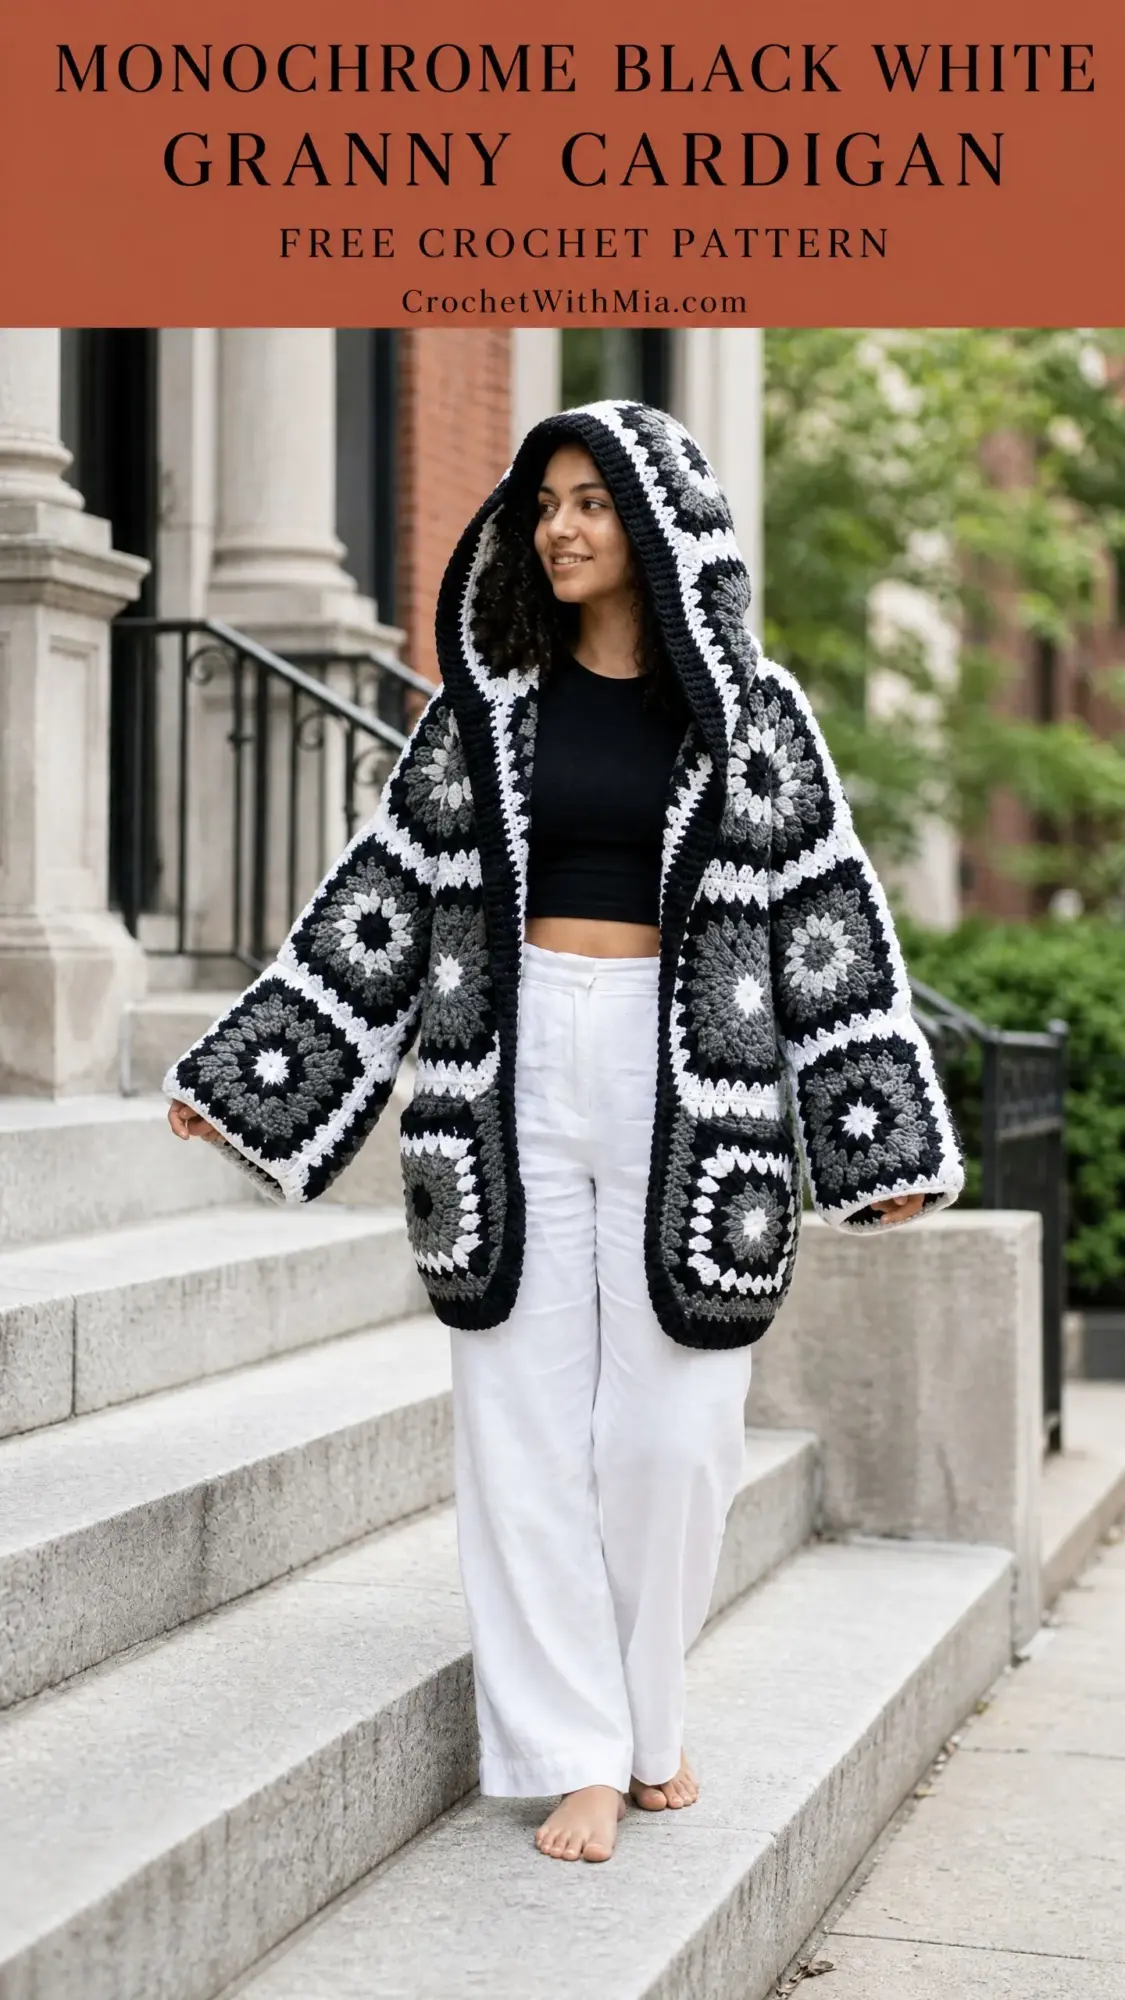
This oversized hooded cardigan features a bold graphic colorway that graduates from white at the center of each square through medium grey and charcoal to black on the outermost round. The effect is striking and modern while using the most classic crochet motif there is.
The silhouette is deliberately relaxed with dropped shoulders, wide sleeves, and a length that falls around mid-thigh. There are no buttons or closures. The open front drapes beautifully and the large hood adds drama and warmth. A thick black border frames the front opening and hood edge for a polished finish.
The cardigan is constructed from flat panels of joined granny squares. You will make a back panel, two front panels, two sleeve panels, and a hood panel. Each panel is assembled separately, then the panels are seamed together into the finished garment.
Skill Level
This pattern is rated intermediate. The granny square itself is a beginner stitch, but completing this project requires consistent tension across many squares, accurate joining technique, seaming multiple panels, and picking up stitches evenly for the border.
If you have completed at least one garment project and feel comfortable joining motifs, you will work through this pattern confidently.
Time Estimate
Expect to spend 60 to 90 hours on a medium size depending on your working speed. The pattern requires approximately 93 squares for size medium. Experienced crocheters working 6 to 8 squares per hour can expect to spend 20 to 25 hours on squares alone, with additional time for joining, border construction, and hood assembly.
Finished Measurements
These measurements are for size medium with an intentionally oversized fit.
Bust circumference at underarm: 52 in / 132 cm
Total length from center back shoulder to hem: 34 in / 86 cm
Sleeve length from shoulder seam to cuff: 24 in / 61 cm
Hood height: 14 in / 35.5 cm
Each granny square after blocking: 6 in x 6 in / 15 cm x 15 cm
See the size chart section below for adjustments from XS through 3XL.
Materials
Yarn: Bulky weight yarn (CYCA 5), 100% acrylic or wool-acrylic blend recommended for durability and ease of care.
Color A (Black): 1,600 yards / 1,463 meters
Color B (Charcoal Grey): 900 yards / 823 meters
Color C (Medium Grey): 700 yards / 640 meters
Color D (White): 500 yards / 457 meters
Total yardage: approximately 3,700 yards / 3,383 meters
Hook: US Size K-10.5 / 6.5 mm (adjust as needed to meet gauge)
Notions:
Suggested Yarns
Lion Brand Wool-Ease Thick and Quick in Black, Oatmeal, Fisherman, and Grey Marble works beautifully for this project. It is widely available, machine washable, and gives excellent stitch definition.
Paintbox Yarns Simply Super Chunky in Midnight Black, Graphite Grey, Slate Grey, and Paper White offers a budget-friendly option with consistent color saturation.
Cascade Yarns Magnum in Black, Asphalt, Silver Grey, and White provides a 100% wool option with beautiful drape for those comfortable with hand washing.
Any bulky weight yarn can be substituted. Avoid yarns with heavy texture, boucle, or extreme halo as they will obscure the granny square definition.
Gauge
With US K-10.5 / 6.5 mm hook: 1 completed granny square (4 rounds) = 6 in x 6 in / 15 cm x 15 cm after blocking.
Do not skip blocking your gauge square. Granny squares can draw in significantly before blocking and the final garment dimensions depend on consistent square size.
To check gauge, make one complete square following the instructions below, weave in ends, and wet block. Measure after drying completely.
If your square is larger than 6 inches, go down one hook size.
If your square is smaller than 6 inches, go up one hook size.
Abbreviations
ch = chain: yarn over, pull through loop on hook
sl st = slip stitch: insert hook, yarn over, pull through both loops
sc = single crochet: insert hook, yarn over, pull up loop, yarn over, pull through both loops
dc = double crochet: yarn over, insert hook, yarn over, pull up loop, yarn over, pull through 2 loops, yarn over, pull through remaining 2 loops
sp = space
ch-sp = chain space
st/sts = stitch/stitches
beg = beginning
RS = right side
WS = wrong side
BLO = back loop only
pm = place marker
Brackets [ ] indicate instructions to repeat the specified number of times.
Special Stitches
Granny Cluster: Work 3 double crochet (dc) stitches into the same stitch or space. This is the foundational stitch of the granny square. Each cluster counts as one unit when counting corners and sides.
Flat Join: Hold two squares with wrong sides together. Insert hook through the back loops of both corresponding edge stitches simultaneously, pull up a loop of joining yarn (Color A/Black), chain 1, then single crochet (sc) through both layers evenly across the edge. Fasten off. This creates a visible ridge on the right side that adds graphic texture.
Pattern Notes
All squares are worked in rounds with the right side always facing. Do not turn between rounds.
Each square uses all four colors. Color A (Black) is always the final round and is the color used for all joins and border work.
Color sequence for every square:
Fasten off each color after its round. Join new color in any corner chain-2 space unless otherwise stated.
Square Panel Layout for Size Medium
Back panel: 5 squares wide x 6 squares tall = 30 squares
Right front panel: 2 squares wide x 6 squares tall = 12 squares
Left front panel: 2 squares wide x 6 squares tall = 12 squares
Right sleeve: 3 squares wide x 4 squares tall = 12 squares
Left sleeve: 3 squares wide x 4 squares tall = 12 squares
Hood: 5 squares wide x 3 squares tall = 15 squares
Total squares: 93
Before joining any panels, lay out all 93 blocked squares in their panel configurations to verify the layout.
Granny Square Instructions
Make 93 total for size medium.
Foundation: Using Color D (White), make a magic ring. Alternatively, chain 4 and join with slip stitch to form a ring.
Round 1 (Color D, White):
Chain 3 (counts as first dc), work 2 dc into ring, ch 2, [3 dc into ring, ch 2] 3 times, sl st to top of beg ch-3 to join. Fasten off Color D.
(4 clusters of 3 dc, 4 ch-2 corner spaces)
Round 2 (Color C, Medium Grey):
Join Color C in any ch-2 corner sp.
Ch 3 (counts as first dc), work 2 dc in same corner sp, ch 2, 3 dc in same corner sp (first corner made), ch 1, [3 dc, ch 2, 3 dc] in next ch-2 corner sp, ch 1. Rep from [ ] 2 more times. Sl st to top of beg ch-3 to join. Fasten off Color C.
(8 clusters of 3 dc, 4 ch-2 corner spaces, 4 ch-1 side spaces)
Round 3 (Color B, Charcoal Grey):
Join Color B in any ch-2 corner sp.
Ch 3, 2 dc in same corner sp, ch 2, 3 dc in same corner sp, ch 1, 3 dc in next ch-1 sp, ch 1, [3 dc, ch 2, 3 dc in next ch-2 corner sp, ch 1, 3 dc in next ch-1 sp, ch 1] 3 times. Sl st to top of beg ch-3 to join. Fasten off Color B.
(12 clusters of 3 dc, 4 ch-2 corner spaces, 8 ch-1 side spaces)
Round 4 (Color A, Black):
Join Color A in any ch-2 corner sp.
Ch 3, 2 dc in same corner sp, ch 2, 3 dc in same corner sp, ch 1, [3 dc in next ch-1 sp, ch 1] 2 times, [3 dc, ch 2, 3 dc in next ch-2 corner sp, ch 1, [3 dc in next ch-1 sp, ch 1] 2 times] 3 times. Sl st to top of beg ch-3 to join. Fasten off Color A.
(16 clusters of 3 dc, 4 ch-2 corner spaces, 12 ch-1 side spaces)
Checkpoint: After completing one square, block it. It should measure exactly 6 in x 6 in / 15 cm x 15 cm. Adjust hook size if needed before making the remaining squares.
Blocking the Squares
Before joining, wet block all 93 squares. This step is essential for neat assembly.
Soak each square in cool water for 10 to 15 minutes. Gently press out excess water without wringing. Pin each square to blocking mats at exact 6 in x 6 in dimensions, paying particular attention to pulling corners out to right angles. Allow to dry completely before unpinning. This may take 12 to 24 hours.
Assembling the Panels
Work all five panels separately using the flat join method with Color A.
Back panel: Join 5 squares across x 6 squares tall.
Right front panel: Join 2 squares across x 6 squares tall.
Left front panel: Join 2 squares across x 6 squares tall.
Right sleeve panel: Join 3 squares across x 4 squares tall.
Left sleeve panel: Join 3 squares across x 4 squares tall.
Flat join instructions:
Hold two squares with WS together, edges aligned. Join Color A with a sl st in the first ch-2 corner sp of the outer edges. Ch 1, sc evenly across both layers, working 1 sc into each ch-1 sp between clusters and 3 sc into each ch-2 corner sp where panels share a corner. Fasten off.
Join all squares in rows first (horizontal seams), then join rows together (vertical seams).
Checkpoint: Back panel should measure 30 in wide x 36 in tall. Each front panel should measure 12 in wide x 36 in tall. Each sleeve panel should measure 18 in wide x 24 in tall.
Assembling the Cardigan Body
Step 1: With WS together and Color A, flat join the right side edge of the right front panel to the right side edge of the back panel along the full 36-inch side seam.
Step 2: Repeat for the left front panel on the left side.
Step 3: On each side seam, measure down 12 inches from the top edge and place a stitch marker. The top 12 inches of each side seam remains open as the armhole.
Step 4: Using Color A and flat join method, seam each side from the stitch marker down to the hem (the lower 24 inches of each side seam).
Attaching the Sleeves
Fold each sleeve panel in half lengthwise and flat join the sleeve side seam to form a tube. Each sleeve tube should measure 9 inches in circumference at the cuff edge and 18 inches at the top open edge.
With WS of sleeve and body together, align the sleeve tube top edge with the armhole opening. Join Color A in the underarm corner, then flat join around the full armhole perimeter, distributing the sleeve evenly. Fasten off and weave in ends. Repeat for second sleeve.
Hood Construction
Step 1: Join 15 squares into a panel 5 squares wide x 3 squares tall using flat join method. This panel measures 30 in wide x 18 in tall.
Step 2: Fold the panel in half widthwise so the two short ends meet. The folded top edge now measures 15 inches wide.
Step 3: Flat join along the top folded edge only, leaving the bottom opening (the neckline) open.
Step 4: Align the bottom edge of the hood with the top edge of the back panel and front panels. Pin generously. Flat join hood to neckline using Color A. Fasten off.
Border
The border frames the entire front opening in Color A.
With RS facing, join Color A at the lower right-hand corner of the right front hem edge.
Foundation row: Work sc evenly up the right front edge, around the hood front opening, and down the left front edge. Work 1 sc into each ch-1 sp, 1 sc into each joining seam, and 3 sc into each outer corner. Do not turn.
Row 1: Sc across entire front and hood edge. Ch 1, turn.
Row 2: Working in BLO, sc across. Ch 1, turn.
Row 3: Working in both loops, sc across. Sl st to first sc. Fasten off.
Weave in all remaining ends.
Final Blocking
Wet block the complete cardigan in a bathtub or large basin. Soak for 20 minutes, press out water gently, and lay flat to dry completely. This may take 24 to 48 hours.
Size Chart (Squares Per Panel)
| Size | Back | Each Front | Each Sleeve | Hood | Total |
|---|---|---|---|---|---|
| XS | 4×6=24 | 2×6=12 | 3×4=12 | 4×3=12 | 84 |
| S | 4×6=24 | 2×6=12 | 3×4=12 | 4×3=12 | 84 |
| M | 5×6=30 | 2×6=12 | 3×4=12 | 5×3=15 | 93 |
| L | 6×6=36 | 3×6=18 | 3×4=12 | 6×3=18 | 114 |
| XL | 7×6=42 | 3×6=18 | 4×4=16 | 7×3=21 | 131 |
| 2XL | 8×6=48 | 3×6=18 | 4×4=16 | 8×3=24 | 148 |
| 3XL | 9×6=54 | 4×6=24 | 4×4=16 | 9×3=27 | 169 |
Care Instructions
For acrylic yarn, machine wash on cold gentle cycle and lay flat to dry. Do not tumble dry.
For wool or wool-blend yarn, hand wash in cool water with gentle wool wash and lay flat to dry. Do not hang wet.
You Did It!
Thank you so much for choosing this pattern for your next project. I hope you love making this granny cardigan as much as I loved designing it. The repetitive square-making is genuinely meditative once you get into a rhythm, and watching those panels come together is so satisfying.
If you make one, I would absolutely love to see it! Tag me on Instagram or share a photo in my Facebook group. Seeing your finished projects honestly makes my whole week.
Pin this monochrome granny cardigan crochet pattern to your Pinterest boards so you can find it when you are ready to start. And please drop a comment below if you make it. I read every single one!