
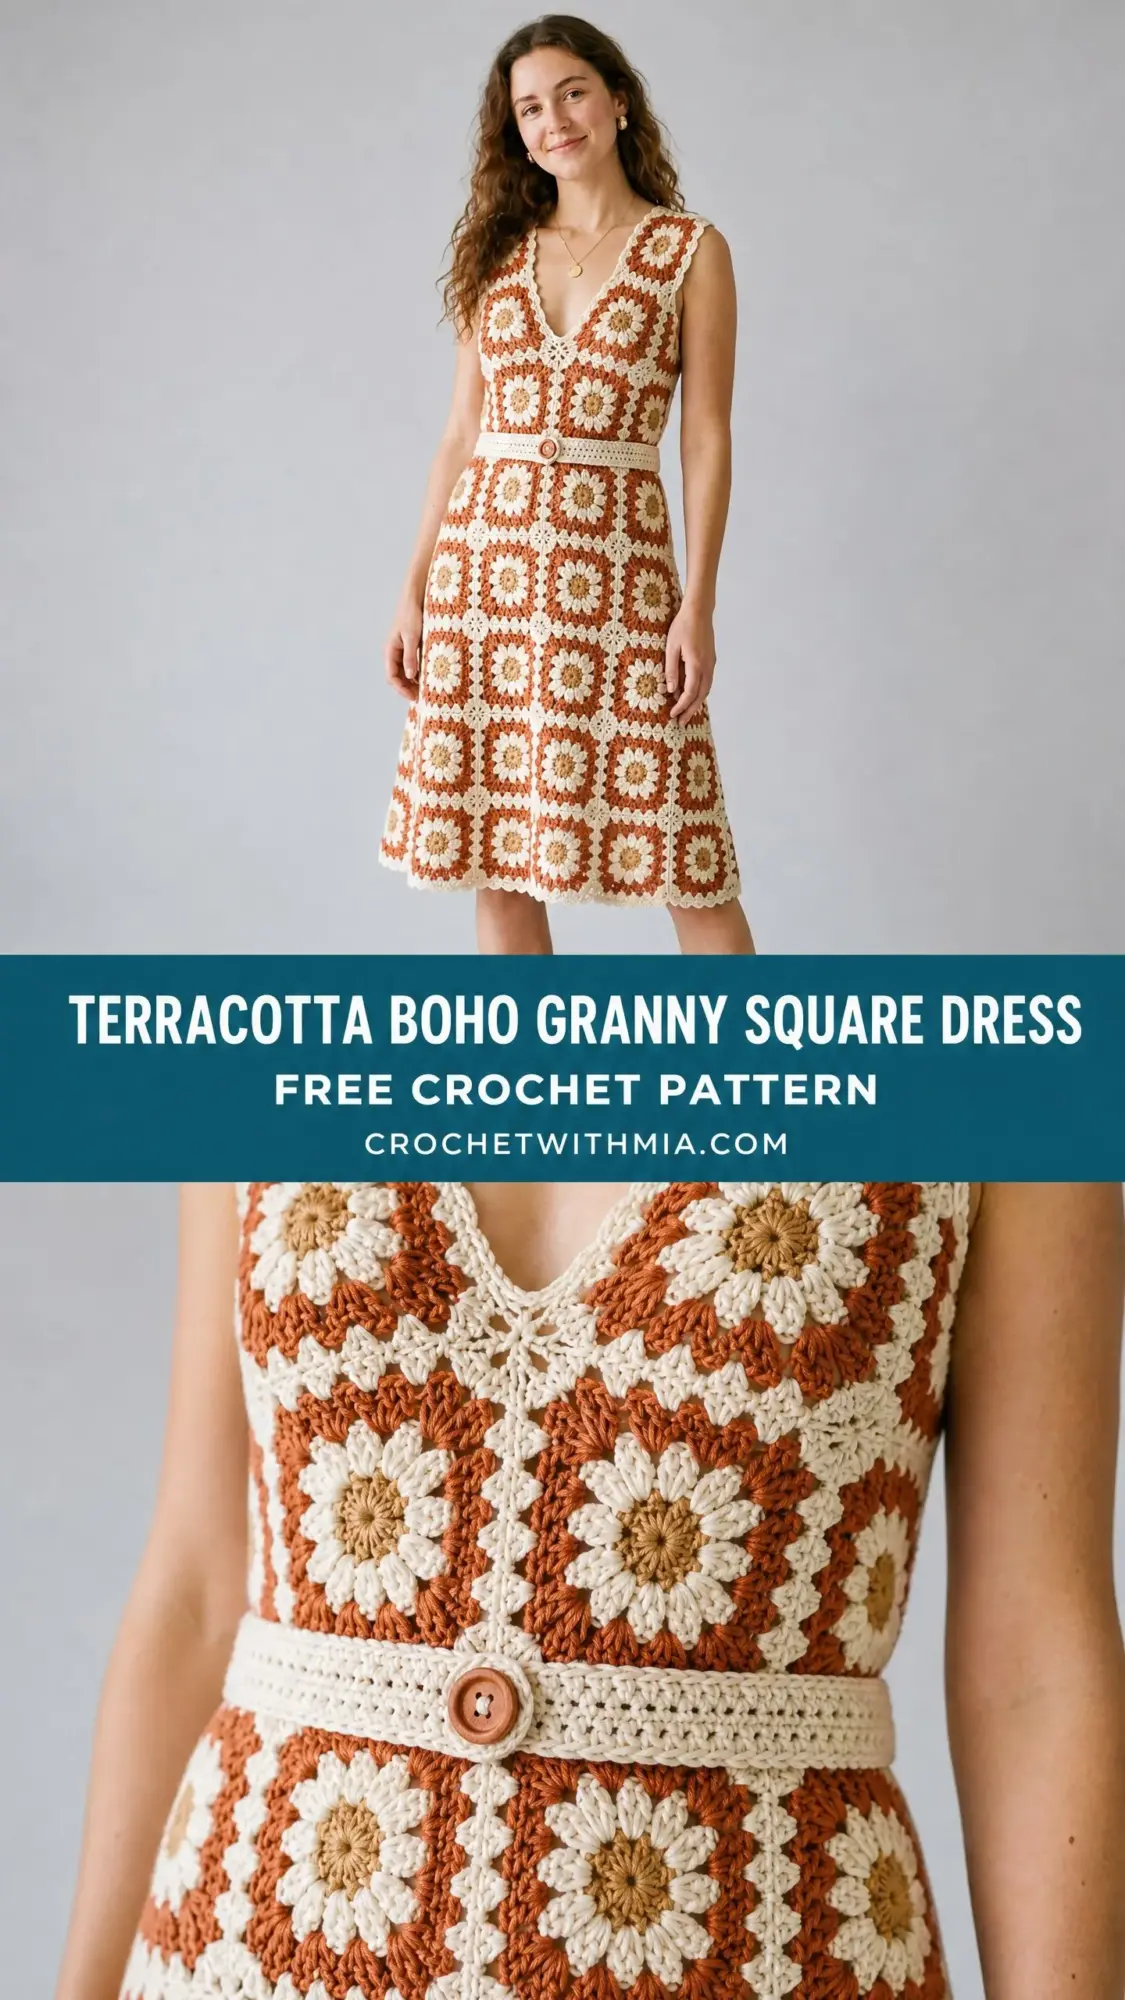
This is THE dress pattern you have been waiting for. I am not even exaggerating when I say this terracotta boho granny square dress is one of the most stunning garments you will ever make with your own two hands. It looks like something straight off a boutique rack, but you can create it yourself with just basic granny square skills and a whole lot of gorgeous yarn.
Yes, it takes time. We are talking 80 to 120 hours of work here. But every single one of those hours is worth it when you slip this beauty over your head and feel like the boho goddess you truly are.
The best part? Each individual square is completely manageable. If you can make a granny square, you can make this dress. You just need patience, a solid blocking routine, and the willingness to weave in a whole lot of ends. Let me walk you through everything you need to know.
Why This Granny Square Dress Pattern Works So Well
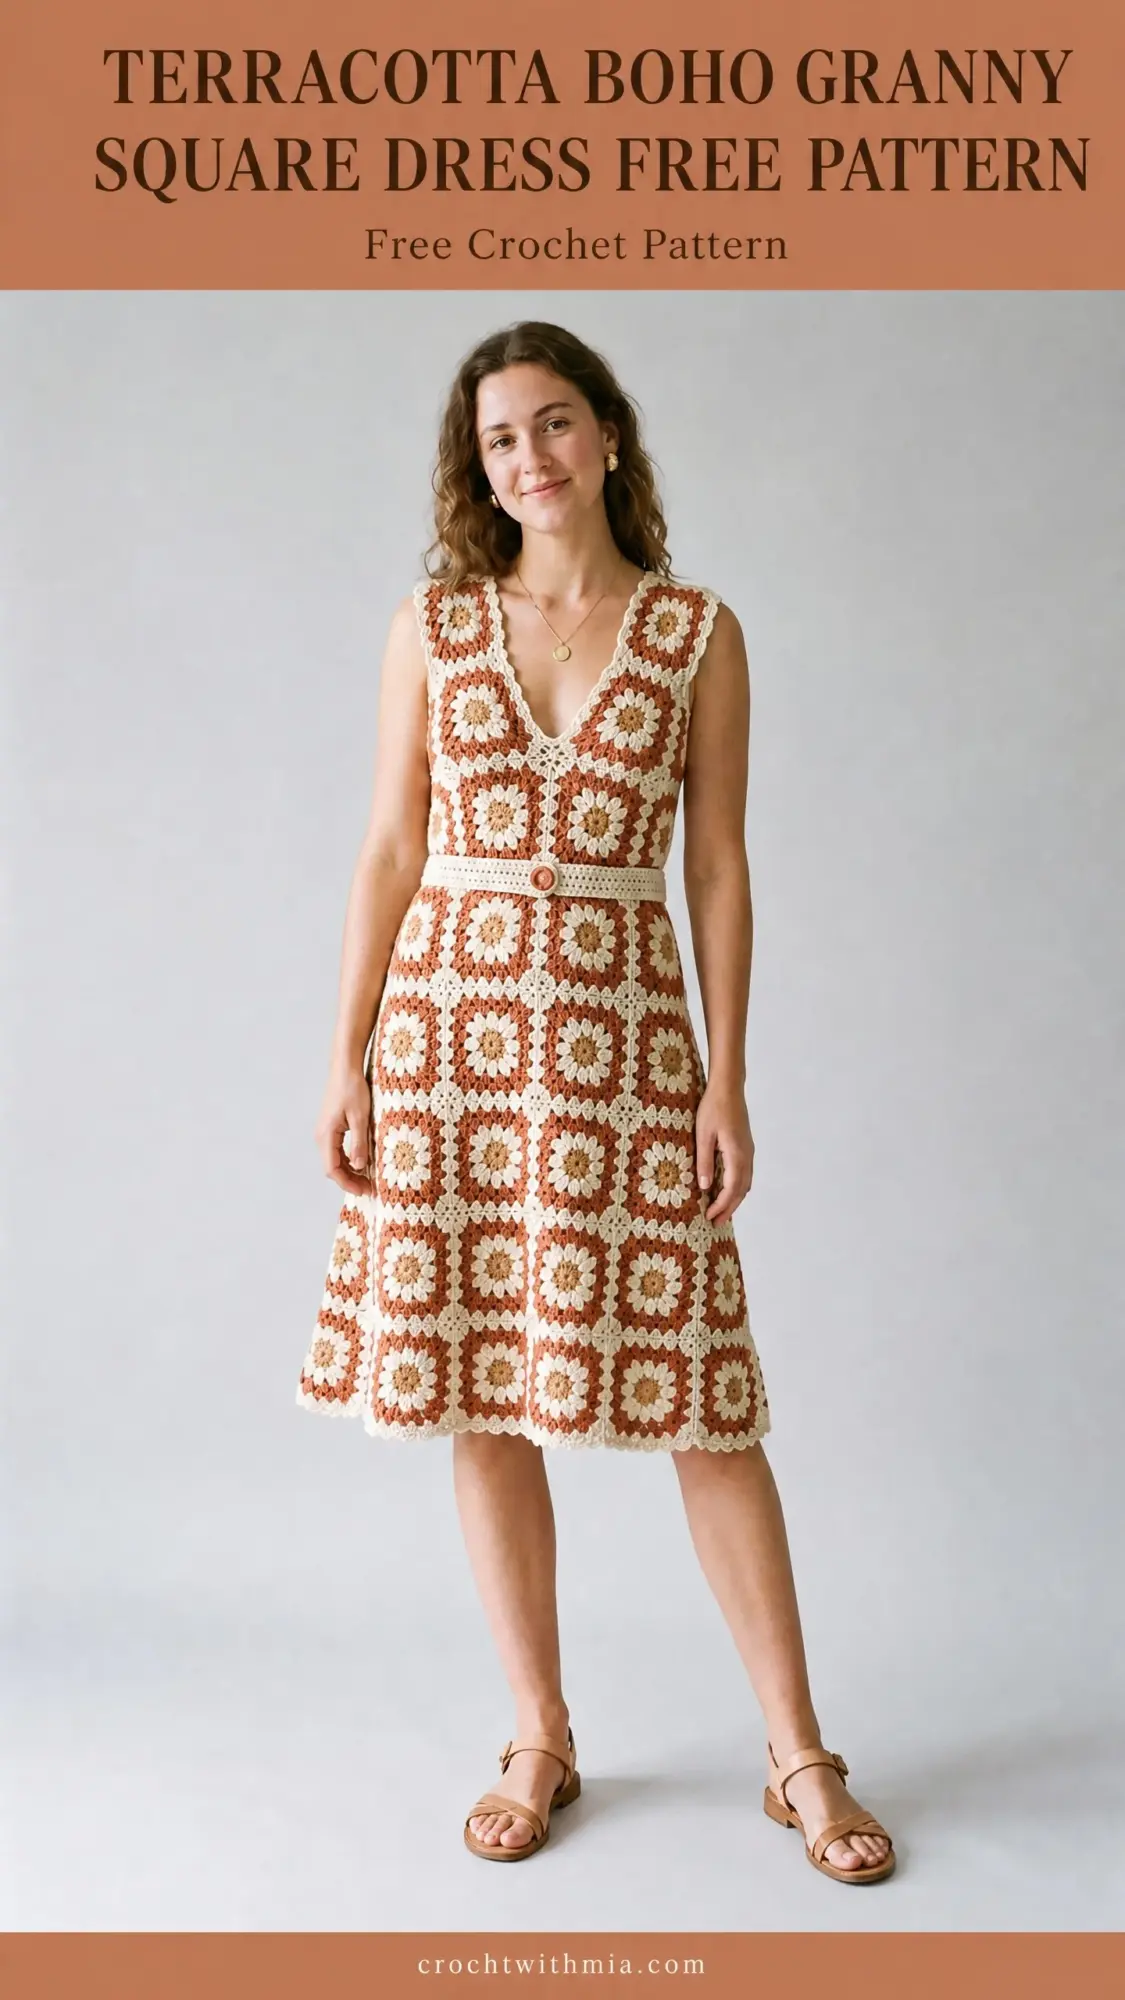
This midi length dress is constructed entirely from joined granny circle squares worked in two colors. A warm terracotta rust and a soft off white cream. Each square measures approximately 3.5 inches after blocking, and they are assembled flat into front and back panels before being joined at the shoulders and side seams.
The silhouette is absolutely flattering. The bodice uses a 4 by 5 grid of squares while the skirt uses a 5 by 6 grid, creating a natural A-line shape that skims your curves beautifully. A crocheted belt cinches the waist, and delicate scalloped edging finishes the V neckline and hem.
The construction method is straightforward even though the finished result looks incredibly complex. You make all your squares, block them carefully, join them together, add edging, and create the belt. That is it. No complicated shaping or decreases within the squares themselves.
Skill Level and Time Commitment
I would rate this pattern as intermediate to advanced. The individual granny circle square is genuinely straightforward if you have made any kind of granny square before. The challenge comes from the construction details.
You will need to be comfortable with flat motif construction, join as you go techniques, working a shaped V-neck edge, and executing garment finishing. If those terms make you nervous, do not panic. I will explain everything as we go.
Budget approximately 5 to 7 minutes per completed square. With around 126 full squares to make, that is 30 to 40 hours just for the squares. Add another 20 to 30 hours for joining, edging, the belt, and all your finishing work.
This is a project to savor over weeks or even months. Put on your favorite show, settle into your comfy chair, and enjoy the meditative rhythm of making square after beautiful square.
Materials You Will Need
Yarn:
You will need DK weight yarn (CYCA #3) in two colors.
Hooks:
Notions:
Yarn Suggestions
For beautiful stitch definition, try Lion Brand LB Collection Cotton Bamboo in Persimmon and Magnolia. You will need approximately 5 skeins of each color.
If you want something machine washable, Paintbox Yarns Simply DK works wonderfully. Go for Vintage Pink (close to terracotta) and Paper White. You will need approximately 5 skeins of Color A and 4 skeins of Color B.
For a luxurious feel, Cascade 220 Superwash Sport at DK gauge in Ginger and Ecru is gorgeous. Plan on 9 skeins of Color A and 8 skeins of Color B.
Whatever you choose, pick a smooth DK weight yarn with good stitch definition and moderate drape. Avoid fuzzy or heavily textured yarns because they will obscure the pretty petal rounds that make this dress so special.
Gauge (This Is Non-Negotiable)
Using your G-6 / 4.0 mm hook, one completed granny circle square should measure 3.5 inches by 3.5 inches after blocking.
For the belt and edging with your F-5 / 3.75 mm hook, 20 single crochet (sc) by 24 rows should equal 4 inches in single crochet fabric.
I cannot stress this enough. Gauge is mandatory for a fitted garment. Make at least three test squares and block them before measuring. If your squares are larger than 3.5 inches, go down one hook size. If they are smaller, go up one hook size.
The entire dress sizing depends on square count multiplied by square dimension. Get this wrong and your dress will not fit properly.
Abbreviations and Special Stitches
Let me define all the stitches and terms you will encounter in this crochet pattern.
Basic Abbreviations:
Special Stitches:
Granny Circle Square (GCS): The main motif of this dress. Worked in the round from center outward with five rounds. Color changes happen between rounds.
Shell Stitch: Work 5 dc all into the same stitch or space. This creates a pretty fan shape. When the pattern says shell, work all 5 dc into that single spot.
Picot: Chain 3, then slip stitch into the first chain of those 3 to form a small decorative loop. Used at shell peaks and along neckline edges.
Join As You Go (JAYG) Flat Join: Hold two squares with wrong sides facing each other. Work a slip stitch through the corresponding corner spaces or side spaces of both squares at the same time. This creates a flat visible ridge on the right side that looks like a decorative seam line.
V-Neck Decrease Row: Work sc2tog across the inner V point by inserting hook into the last sc of one V side, drawing up a loop, inserting hook into the first sc of the other V side, drawing up another loop, then yarn over and pull through all three loops. This smoothly closes the V angle.
Finished Measurements
This pattern is written for size Medium with these finished measurements:
Square Count Layout
Before you start, here is exactly how many squares you need and where they go:
Total squares to complete: approximately 126 full squares plus partial motif material.
How to Make the Granny Circle Square (Make 126)
All rounds are worked on the right side. Do not turn your work.
Round 1 (Color A):
Make a magic ring (adjustable loop).
Ch 3 (counts as first dc here and throughout), work 11 more dc into the ring. Pull ring closed.
Join with sl st to top of ch-3. (12 dc)
Round 2 (Color B):
Fasten off Color A. Join Color B with standing dc in any st.
Ch 2, dc in same st (first petal begun).
(Dc, ch 2, dc) in each remaining dc around. (12 petals formed as 12 pairs of dc with ch-2 sps between pairs)
Join with sl st to top of first standing dc. (24 dc, 12 ch-2 sps)
Round 3 (Color A):
Fasten off Color B. Join Color A with sl st in any ch-2 sp.
Ch 3, 2 dc in same ch-2 sp (first cluster).
Ch 1.
(3 dc in next ch-2 sp, ch 1) around.
Join with sl st to top of ch-3. (12 clusters of 3 dc = 36 dc, 12 ch-1 sps)
Round 4 (Color B):
Fasten off Color A. Join Color B with sl st in any ch-1 sp.
Work into the ch-1 sps as follows to create four corners:
In first ch-1 sp: (3 dc, ch 2, 3 dc) for corner.
Ch 1.
In next ch-1 sp: 3 dc. Ch 1.
In next ch-1 sp: 3 dc. Ch 1.
(3 dc, ch 2, 3 dc) in next ch-1 sp for corner. Ch 1.
3 dc in next ch-1 sp. Ch 1.
3 dc in next ch-1 sp. Ch 1.
Repeat two more times for remaining two corners.
Join with sl st to top of ch-3.
(4 corner ch-2 sps, 8 side ch-1 sps, 24 clusters of 3 dc = 72 dc total)
Round 5 (Color B, continued without fastening off):
Sl st into corner ch-2 sp.
Ch 3, (2 dc, ch 2, 3 dc) in corner sp.
Ch 1.
(3 dc in next ch-1 sp, ch 1) twice.
(3 dc, ch 2, 3 dc) in next corner sp. Ch 1.
(3 dc in next ch-1 sp, ch 1) twice.
Repeat for all four sides.
Join with sl st to top of ch-3. Fasten off Color B.
(4 corner ch-2 sps, 12 side ch-1 sps, 32 clusters of 3 dc = 96 dc total)
Your completed square has 4 corners (each a ch-2 sp flanked by two 3-dc groups) and 3 ch-1 sps per side between corners.
Block each square to 3.5 inches by 3.5 inches. This step is non-negotiable for even seams.
Pattern Notes for Square Making
Checkpoint 1: After completing and blocking your first five squares, they should each measure exactly 3.5 inches on each side. If they do not, adjust your hook size before making more.
Assembling the Bodice Panels
Work all joins with Color B and your smaller F-5 hook for neater seams.
Front Bodice Panel:
Arrange 20 squares in a grid of 4 columns by 5 rows.
Using the JAYG Side Join method, join squares into rows of 4 first (join horizontally), then join the resulting rows to each other (join vertically).
You will have 31 joining seam lines total on the front bodice.
Back Bodice Panel:
Work identically. 20 squares in 4 by 5 grid. 31 joining seam lines.
Checkpoint 2: Your completed front bodice panel should measure approximately 14 inches wide and 17.5 inches tall after blocking.
V-Neck Shaping on Front Bodice Panel
The V-neck is formed by creating a gap in the center of the top row. The top row has 4 squares. Between the 2nd and 3rd squares, leave the interior join unwoven. Do not join those two squares along their shared inner top edges. This creates your neckline opening.
V-Neck Edging (Front Panel Only):
With RS facing, join Color B with sl st at the inner top right corner of the second square in the top row.
Row 1 of V edging: Working down the inner diagonal V edge, sc evenly. Work approximately 9 sc across the side of one square into corner and chain spaces. For a two square depth V, work 9 sc down the right side of square 2 in the top row, then 9 sc down the right side of square 2 in row 2. (18 sc per V side)
At the V point (center bottom of neckline opening), work 1 sc into the join point.
Repeat for left V side symmetrically.
Do not fasten off. Continue to Neckline Border.
Neckline Border
Working continuously around entire neckline opening:
Round 1: Sc evenly around entire opening including V sides and straight top edges of outer shoulder squares. Work 3 sc in each outer corner st and sc2tog at V inner point. Join with sl st. Do not turn.
Round 2: Ch 1, sc around, working 3 sc in each outer corner and sc2tog at V point. Join with sl st.
Round 3 (Picot Edging): Ch 1. (Sc in next 2 sts, picot) around. Adjust spacing so picots fall at natural intervals. Join with sl st. Fasten off.
Shoulder Seam
Align front and back bodice panels at the top. The top row outer 1 square on each side forms the shoulder. Join the top edge of the front panel top right square to the top edge of the back panel top right square using JAYG. Repeat for left shoulder. Leave the center 2 squares of each panel top row open for the neckline.
Back Neckline Border
With RS facing, join Color B at left back shoulder seam.
Round 1: Sc evenly across the top edge of the 2 center back squares. (approximately 18 sc)
Round 2: Sc in each st. (18 sc)
Round 3: (Sc in 2 sts, picot) across. Fasten off.
Side Seams (Bodice)
Align front and back bodice panels at side edges. Join right side seam using JAYG along the full 5 square height right edge. Repeat for left side seam. Leave armhole open. The correct armhole opening equals 2 squares multiplied by 3.5 inches, which is 7 inches.
Armhole Border
With RS facing, join Color B at underarm seam point.
Round 1: Sc evenly around entire armhole opening. Work approximately 9 sc per square edge encountered. Aim for 72 sc total. Join with sl st. (72 sc)
Round 2: Sc in each sc around. Join with sl st. (72 sc)
Round 3: (Sc in 2 sts, picot) around. (24 picots) Join with sl st. Fasten off.
Repeat for second armhole.
Checkpoint 3: Your completed bodice shell should measure approximately 28 inches circumference at bust and 17.5 inches tall from shoulder to lower edge.
Assembling the Skirt Panels
Front Skirt Panel:
Arrange 30 squares in a grid of 5 columns by 6 rows.
Join using JAYG as for bodice. All 30 squares joined with 49 joining seam lines total.
Back Skirt Panel:
Work identically to front skirt panel.
Checkpoint 4: Your completed front skirt panel should measure approximately 17.5 inches wide and 21 inches tall after blocking.
Joining Bodice to Skirt
The bodice lower edge (4 squares wide per panel) joins to the skirt upper edge (5 squares wide per panel). This width difference creates the A-line flare.
Center the bodice panel over the skirt panel, leaving approximately half a square (1.75 inches) of skirt extending beyond the bodice on each side.
Waist Join Row (worked with F-5 hook, Color A):
With RS facing, align bottom edge of front bodice to top edge of front skirt.
Row 1: Join Color A at right side edge. Ch 1. Working across the top edge of the skirt panel simultaneously with the bottom edge of the bodice panel, insert hook through corresponding chain spaces of both panels and sc them together where they overlap. At the half square extension on each side, sc into only the skirt panel edge. (approximately 38 sc across)
Waist Join Row 2: Ch 1, sc in each sc across, working a sc2tog at each transition point between single layer and double layer sections. (36 sc)
Waist Join Row 3: Ch 1, sc in each sc across. (36 sc)
Fasten off.
Repeat for back panel.
Side Seams (Skirt)
Join right side seam of front and back skirt panels using JAYG along full 6 square height. Repeat for left side seam.
Join the bodice side seam extension to the skirt side seam with Color B, creating a smooth continuous side seam from shoulder to skirt hem.
Checkpoint 5: Your assembled dress body should measure approximately 36 inches bust circumference, approximately 32 inches at natural waist join, and approximately 40 inches at hip. Total length from shoulder to lowest skirt edge should be approximately 39 inches before adding the hem border.
Adding the Hem Border
With RS facing and F-5 hook, join Color B at right side seam at hem edge.
Round 1: Ch 1, sc evenly around entire hem edge. Work approximately 9 sc per square bottom edge for 180 sc total. Join with sl st. (180 sc)
Round 2: Ch 1, sc in each sc around. Join with sl st. (180 sc)
Round 3 (Shell Round with Color B): Ch 3, skip 2 sc, (5 dc shell in next sc, skip 2 sc, sc in next sc, skip 2 sc) around. End with sl st to top of ch-3. (30 shells, 30 sc)
Round 4 (Picot Round): Sl st to top of first dc of first shell. (Sc in first dc, sc in next dc, (sc, picot, sc) in center 3rd dc of shell, sc in 4th dc, sc in 5th dc, sc in sc between shells) around. Join with sl st. Fasten off.
The hem border adds approximately 1.5 inches to your total length.
Making the Belt
The belt is worked as a long rectangular strip in Color A with a Color B border, then finished with buttonhole loops and wooden buttons.
Using G-6 hook and Color A, ch 7.
Row 1: Sc in 2nd ch from hook and in each ch across. Turn. (6 sc)
Row 2: Ch 1, sc in each sc. Turn. (6 sc)
Repeat Row 2 until belt measures 38 inches from starting chain. Fasten off.
Belt Border (Color B, F-5 hook)
Join Color B at one short end.
Round 1: Sc evenly around entire belt perimeter, working 3 sc in each corner. Join with sl st.
Round 2: Ch 1, (sc in 2 sts, picot) around, working 3 sc in each corner. Join with sl st. Fasten off.
Buttonhole Loops (make 2, Color B)
At one short end of the belt, approximately 0.5 inch from each long edge, join Color B and ch 8. Sl st back into the belt edge 0.5 inch from the starting point, forming a loop. Fasten off and reinforce with a whip stitch.
Button Placement
Sew both wooden buttons to the opposite short end of the belt, spaced to match the buttonhole loops.
Belt Carriers at Waist
At the waist join row on the dress, use Color B and F-5 hook to work a row of ch-2 sps evenly spaced along the waist join row. Work sc in waist row, ch 2, skip 1 sc, sc in next sc, and repeat. Place carriers every 2 inches around the waist circumference. These hold the belt in place when threaded through.
Finishing Your Terracotta Boho Granny Square Dress
Weave in all remaining ends if not already done.
Wet block your assembled dress by soaking in cool water for 20 minutes. Gently press out water without wringing. Lay flat on blocking mats and pin to the correct measurements: 36 inches bust, 40 inches hip, 44 inches length. Allow to dry fully before moving.
Sew in your two wooden buttons on the belt. Thread the belt through your waist carriers.
Size Customization Tips
Each granny circle square measures 3.5 inches by 3.5 inches. To resize the dress:
For a smaller bust (Size Small, 32 inches): Reduce square gauge by using a 3.5 mm hook to achieve squares at 3.25 inches, keeping the same square count. Alternatively, remove one square column from each panel and compensate with wider joining seams.
For a larger bust (Size Large, 40 inches): Add one column of squares to each bodice panel (5 squares wide equals 17.5 inches per panel, which doubles to 35 inches circumference, approximately 40 inches with ease). Also add one column to skirt panels for proportional flare.
For length adjustment: Each additional or removed row of squares changes total length by 3.5 inches.
For head circumference over 22 inches: Widen the V-neck opening by extending the center gap between neckline squares.
The A-line silhouette is maintained as long as the skirt panels are always one square wider per side than the bodice panels.
Care Instructions
Hand wash in cool water with gentle detergent. Do not wring. Press out water by rolling the dress in a clean dry towel. Lay flat to dry. Do not tumble dry or hang wet, as the weight of wet yarn will stretch the squares out of shape. Do not iron directly. Steam blocking on a flat surface is acceptable. Store folded, not hung, to prevent stretching.
You Did It!
Thank you so much for choosing this terracotta boho granny square dress pattern for your next big project. I know it is a significant time investment, but I promise the finished dress is absolutely worth every single stitch. You are going to look incredible.
I would love to see your finished dress! Tag me on Instagram or share your photos in our Facebook group. Seeing your creations is genuinely the best part of my day.
If you loved this crochet tutorial, please save it to your Pinterest boards so you can find it easily when you are ready to start. And if you make this dress, leave a comment below to let me know how it turned out. I cannot wait to hear from you!