
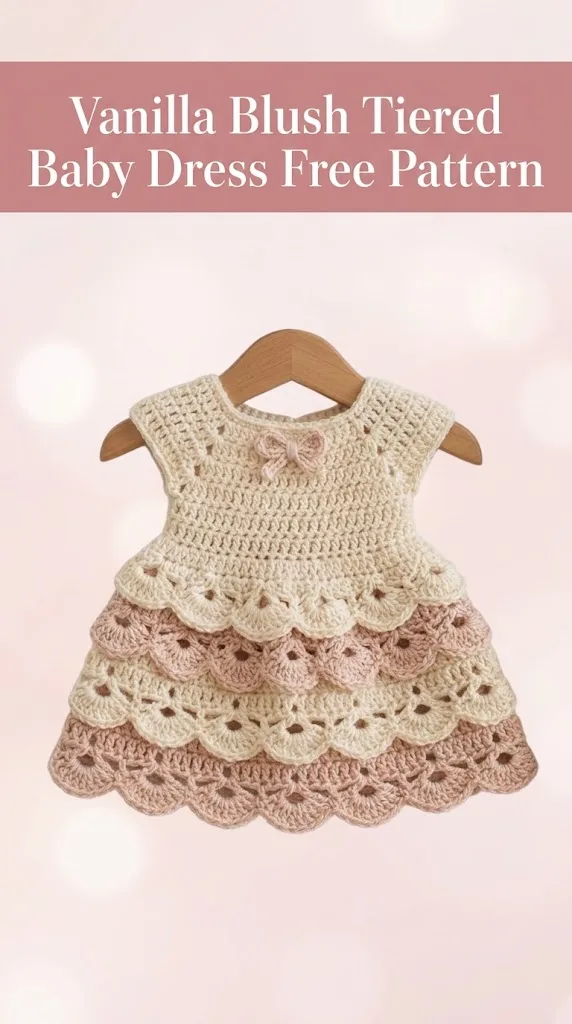
Go dig through your yarn stash right now because I know you have some soft cotton or baby acrylic tucked away waiting for the perfect project. This Vanilla Blush Tiered Baby Dress is exactly the kind of pattern that deserves your prettiest skeins. The construction is genuinely interesting. You start with a simple yoke worked in rows, then build those gorgeous layered shell tiers from the top down. Each tier overlaps the one below it, creating that dreamy ruffled effect. I will be honest with you. This pattern sits at an intermediate level, but if you are comfortable with shell stitches and working in the round, you will do just fine.
Why This Crochet Baby Dress Pattern is Worth Your Time
This dress features a classic raglan yoke construction with cap sleeves that naturally form as you shape the shoulders. The bodice uses straightforward double crochet rows with a simple open-work detail at the neckline. But the real showstopper is that tiered skirt. Four rows of overlapping shell ruffles cascade down, alternating between a soft cream and dusty rose. The effect looks incredibly impressive, but the technique is more approachable than you might think.
The finished dress includes a sweet little bow detail at the center front, which you can add or skip depending on your preference. This is an optional embellishment, so do not stress if bows are not your thing.
Materials You Will Need
Yarn:
Hook:
Notions:
Gauge:
16 stitches and 8 rows = 4 inches in double crochet
Always check your gauge before starting
Finished Size:
This pattern is written for 6 to 12 months. The chest measures approximately 18 inches, and the length from shoulder to hem is about 12 inches.
Abbreviations and Stitch Definitions
Before we dive into the pattern, let me walk you through every stitch you will use. I want you to feel confident before you pick up your hook.
Ch = Chain. Wrap yarn over hook and pull through the loop on your hook. This creates one chain stitch.
Sl st = Slip stitch. Insert hook into stitch, yarn over, pull through both the stitch and the loop on your hook in one motion.
Sc = Single crochet. Insert hook into stitch, yarn over and pull up a loop (2 loops on hook), yarn over and pull through both loops.
Dc = Double crochet. Yarn over, insert hook into stitch, yarn over and pull up a loop (3 loops on hook), yarn over and pull through 2 loops, yarn over and pull through remaining 2 loops.
Dc2tog = Double crochet two together. This is a decrease stitch. Work a dc but stop before the final yarn over (2 loops remain on hook). Work another dc in the next stitch, stopping at the same point (3 loops on hook). Yarn over and pull through all 3 loops.
Shell = 5 dc worked into the same stitch or space. This creates a fan shape.
Skip = Pass over the indicated number of stitches without working into them.
The Yoke: Rows 1 Through 10
The yoke is worked flat in rows, then joined to work the skirt in the round. We will start at the neckline and work down to the underarms.
Foundation Row: With Color A, ch 49.
Row 1: Dc in 4th ch from hook (the skipped chains count as your first dc), dc in each ch across. Turn. (47 dc)
Row 2: Ch 3 (counts as dc here and throughout), dc in each of the next 5 sts, 2 dc in next st, dc in next 8 sts, 2 dc in next st, dc in next 14 sts, 2 dc in next st, dc in next 8 sts, 2 dc in next st, dc in last 6 sts. Turn. (51 dc)
These increase points create your four raglan lines. Place a stitch marker at each increase point to help you track the shaping.
Row 3: Ch 3, dc in each st to first marker, 2 dc in marked st, move marker to second dc, dc to next marker, 2 dc in marked st, continue this pattern across. Turn. (55 dc)
Rows 4 through 8: Repeat Row 3, adding 4 stitches each row. (75 dc after Row 8)
Row 9: Ch 3, dc in each of the next 13 sts (this is the left back), ch 3, skip the next 15 sts (this creates the armhole for one sleeve), dc in next 19 sts (front), ch 3, skip next 15 sts (second armhole), dc in remaining 14 sts (right back). Turn.
Row 10: Ch 3, dc in each dc across, working 3 dc into each ch-3 space. Turn. (52 dc)
Do not fasten off. We will continue directly into the bodice.
The Bodice: Rows 11 Through 14
Row 11: Ch 3, dc in each st across. Turn. (52 dc)
Row 12: Ch 3, dc in each st across. Turn. (52 dc)
Row 13: Ch 3, dc in next st, *ch 1, skip 1 st, dc in next 2 sts* repeat across. Turn.
This row creates a subtle open-work detail that adds visual interest without being fussy.
Row 14: Ch 3, dc in each dc and each ch-1 space across. Turn. (52 dc)
Now we join to work in the round for the skirt.
Joining for the Skirt
Bring the two back edges together, overlapping by about 1 inch to create a back opening for dressing baby. Sl st to join into a round at the center back.
If you prefer a closed back, you can seam the back edges together before joining.
First Tier: Round 1
Setup Round: With Color A still attached, ch 1, sc evenly around the entire bottom edge of the bodice, placing approximately 60 sc total. Sl st to first sc to join. Do not turn. (60 sc)
Shell Round: Ch 3, 2 dc in same st (this is half of your first shell), skip 2 sts, sc in next st, *skip 2 sts, shell (5 dc) in next st, skip 2 sts, sc in next st* repeat around, ending with 2 dc in same st as beginning ch-3 to complete first shell. Sl st to top of ch-3 to join. (10 shells)
Fasten off Color A.
Second Tier: Round 2
You will work this tier into the row directly behind the first tier, creating that beautiful layered effect.
Attach Round: Join Color B with a sl st to any sc from the setup round (you will be working behind the shells). Ch 1, sc in same st.
Shell Round: *Shell in next sc from setup round, sc in center dc of shell from previous tier* repeat around. Sl st to first sc to join. (10 shells)
See how the shells overlap? That is exactly what we want. The tiers stack on top of each other.
Fasten off Color B.
Third Tier: Round 3
Attach Round: Join Color A with a sl st to any sc from the previous tier (again, working behind). Ch 1, sc in same st.
Shell Round: *Shell in next sc, sc in center dc of shell below* repeat around. Sl st to join. (10 shells)
Fasten off Color A.
Fourth Tier: Round 4
Attach Round: Join Color B with a sl st to any sc from the previous tier. Ch 1, sc in same st.
Shell Round: *Shell in next sc, sc in center dc of shell below* repeat around. Sl st to join. (10 shells)
Fasten off Color B. Weave in all ends.
Adding the Bow Embellishment
This is completely optional, but it adds such a sweet finishing touch.
With Color B, ch 25.
Row 1: Sc in 2nd ch from hook, sc in each ch across. (24 sc)
Rows 2 through 4: Ch 1, turn, sc in each st across.
Fasten off, leaving a long tail.
Pinch the rectangle at the center to form a bow shape. Wrap the tail around the center several times to secure. Use the remaining tail to sew the bow to the center front of the bodice, just below the neckline.
Finishing Your Baby Dress
Weaving Ends: Thread each yarn tail onto your yarn needle. Weave through the backs of several stitches, then double back in the opposite direction. Trim close to the fabric.
Blocking: Wet block your finished dress by soaking it in lukewarm water for 15 minutes. Gently squeeze out excess water (never wring). Lay flat on a blocking mat or clean towel. Smooth the tiers so they fan out nicely. Allow to dry completely.
Back Closure: If you created the overlapping back opening, you can add one or two small buttons to keep it secure. Sew buttons to one side and use the natural gaps in the stitches as buttonholes.
Customization Ideas for Your Crochet Baby Dress
Want to make this pattern your own? Here are some ideas.
Size Adjustments: For a smaller size (0 to 6 months), reduce the foundation chain to 45 and adjust stitch counts proportionally. For a larger size (12 to 18 months), increase to 53 chains.
Color Variations: Try a solid color for a classic look. Or go bold with three colors, alternating through the tiers.
Extra Tiers: Add a fifth tier for a longer dress. Just repeat the shell round pattern with your chosen color.
Different Edging: Replace the final tier with a simple scallop edge if you want a less ruffled look.
Tips for Crochet Beginners Tackling This Pattern
If this is your first garment, take a deep breath. You can absolutely do this.
Work slowly through the yoke increases. They establish the whole shape of the dress, so getting them right matters.
Count your stitches at the end of every row. Yes, every single row. It takes an extra few seconds and saves hours of frustration later.
The tiered shells might feel tricky at first. Practice the shell stitch on a swatch before starting the skirt section. Once your hands learn the rhythm, it goes quickly.
Do not be afraid to rip back and redo a section. Even experienced crocheters frog their work constantly. It is part of the process.
Making This as a Gift
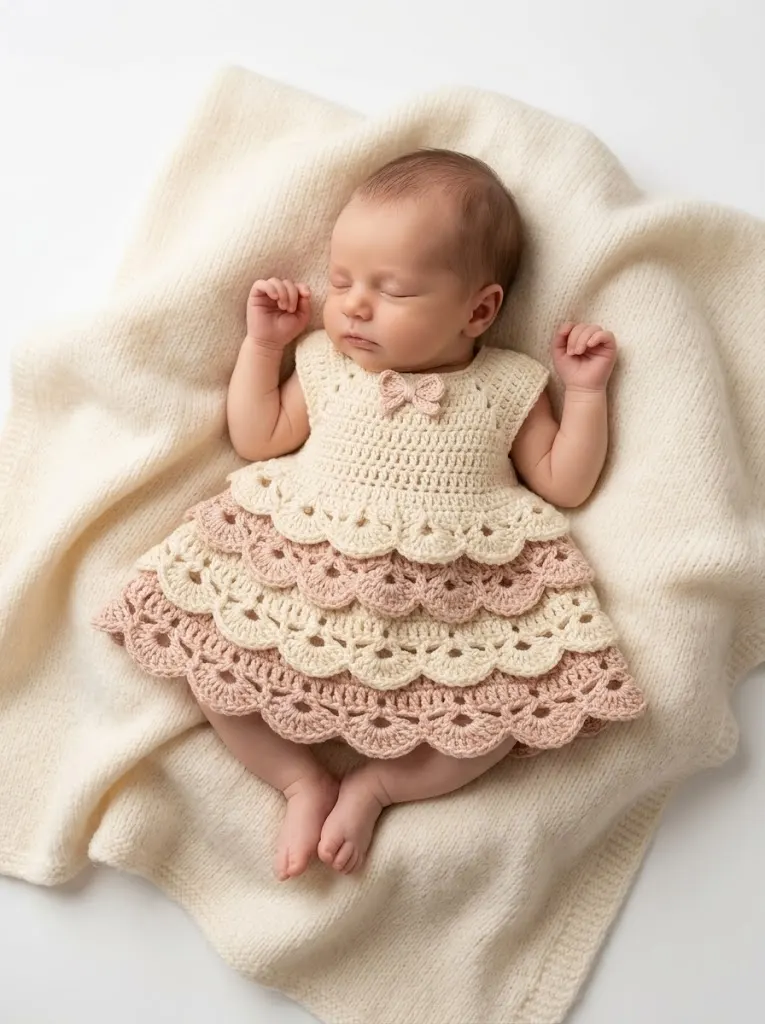
This Vanilla Blush Tiered Baby Dress makes an unforgettable baby shower gift. Pair it with a matching headband or booties for a complete set. Package it in a simple white box with tissue paper for a presentation that looks professionally made.
The dress works up in approximately 6 to 8 hours for an intermediate crocheter. Plan ahead if you have a shower deadline.
I really hope you love making this sweet little dress as much as I loved designing it. If you create one, please save this pattern to your Pinterest boards so you can find it again later. And I would absolutely love to see your finished projects, so drop a comment below or tag me on social media when you finish yours.