A handmade bridal bikini makes a truly thoughtful gift for a bride-to-be, or a special keepsake you create for yourself. This two-piece set features sculpted shell cups with raised texture, scalloped edges throughout, layered decorative hip shells, and optional pearl accents. The stitches used include single crochet (sc), double crochet (dc), and front post double crochet (fpdc) for the signature shell ribs. The pattern works up in approximately 12 to 18 hours, making it a rewarding project for an intermediate to advanced crocheter looking to create something elegant and memorable.
Get the Ad-Free PDF Pattern
You can find the free pattern below, or you can purchase the ad-free printable PDF from my shop.
Get the Printable PDF →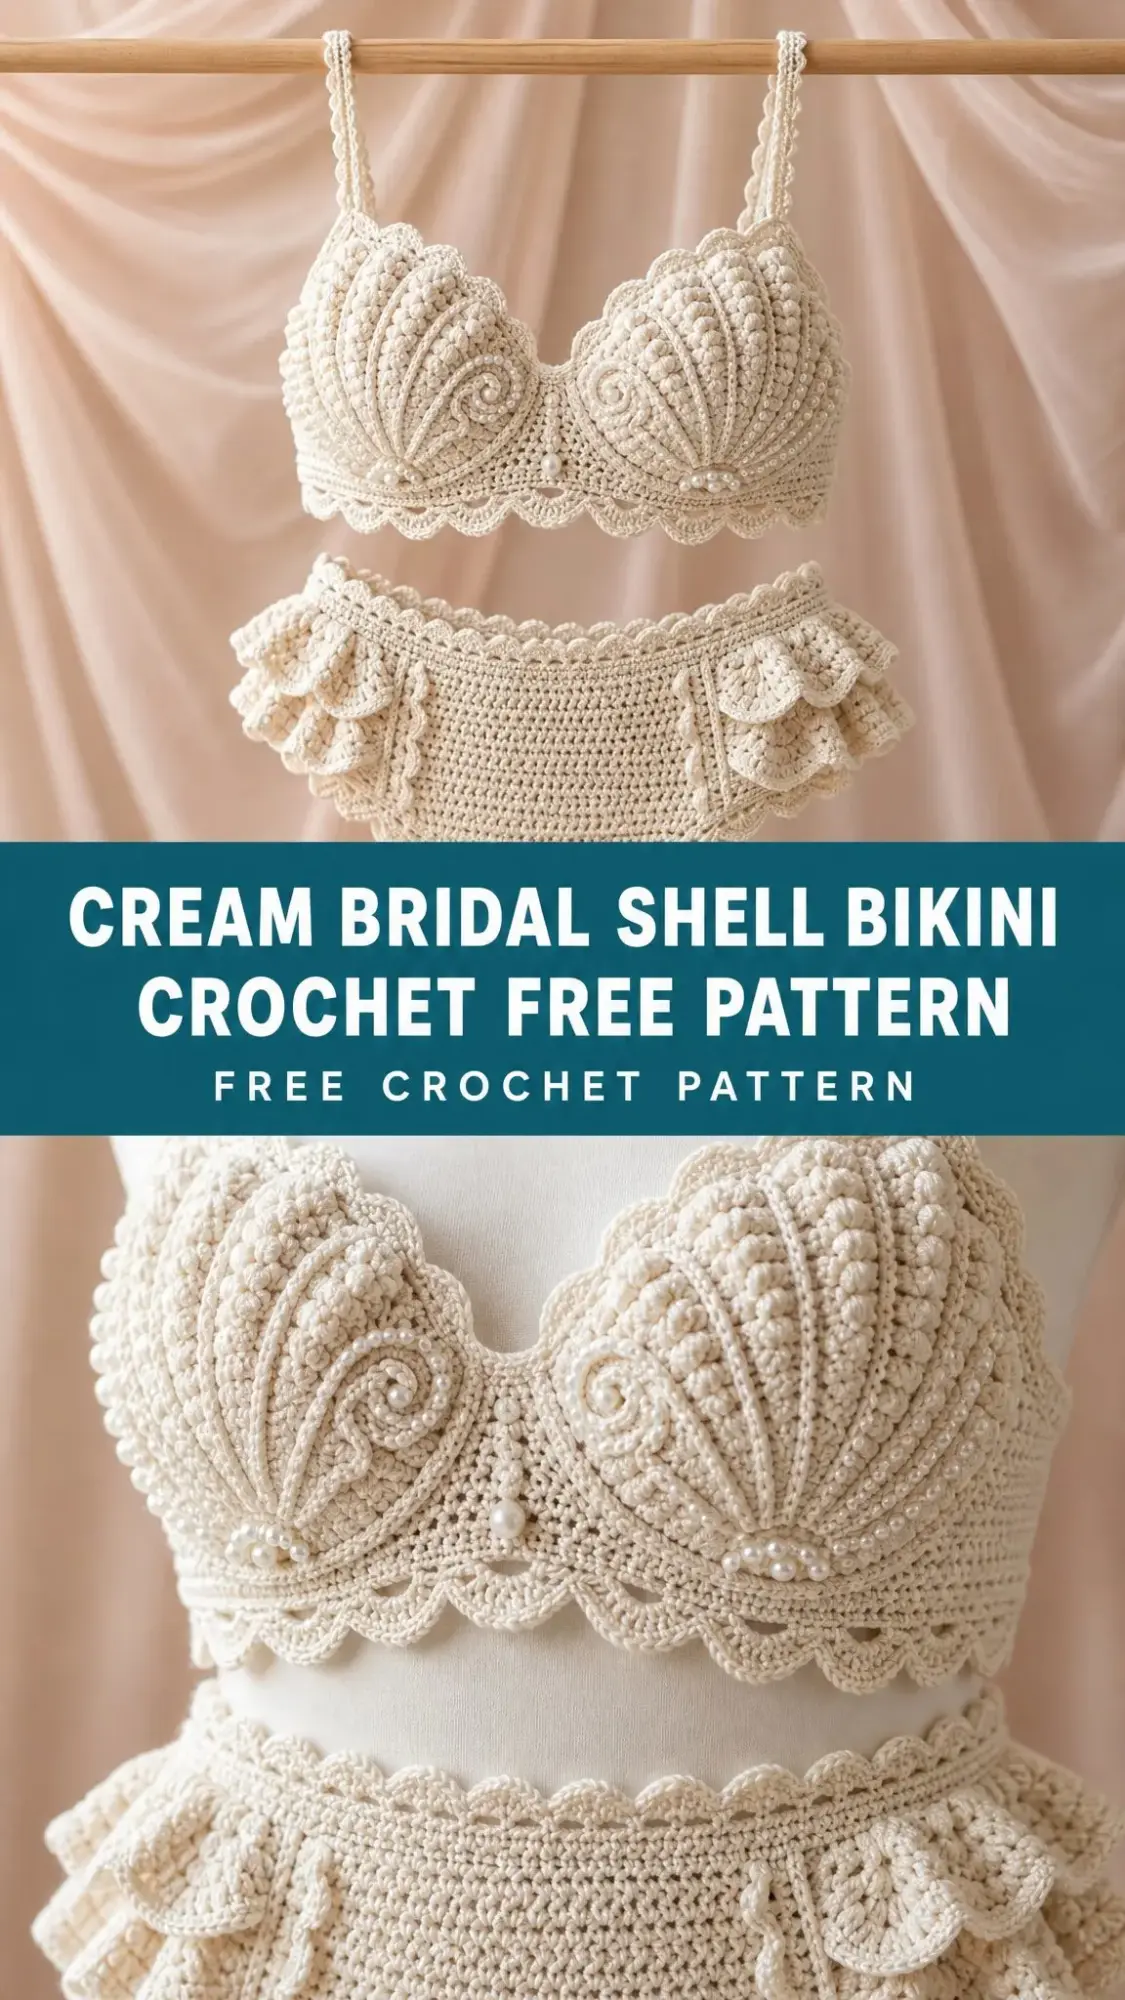
About This Bridal Shell Bikini Crochet Pattern
This romantic crochet bikini set combines several techniques to achieve its polished bridal look. The top features two shaped shell cups worked from an adjustable ring outward, creating the distinctive radiating shell texture you see in the photographs. These cups attach to a narrow underbust band with adjustable straps and back ties.
The high-waist bottom is constructed from separate front and back panels, shaped from the crotch upward with gradual increases. Once seamed, you add a waistband with elastic casing for a secure fit, scalloped leg edgings, and six small decorative shell motifs at the hips.
The soft ivory cotton yarn creates that classic bridal aesthetic, while the optional pearl beads add a touch of elegance to the cups and hip shells.
Skill Level and Time Estimate
Skill level: Intermediate to advanced. You will work shaped rows, front post texture, scalloped edging, joining pieces, elastic casing, and decorative motif placement.
Time estimate: 12 to 18 hours, plus blocking and drying time.
Finished Size
Cup dimensions: Approximately 6.75 inches (17 cm) tall and 7.5 inches (19 cm) wide after blocking.
Bottom waist: Approximately 21 inches (53.5 cm) unstretched, comfortably fitting 26 to 32 inches (66 to 81 cm) with elastic and side shaping.
Bottom rise: Approximately 9.5 inches (24 cm).
Intended ease: The bottom uses negative ease at the waist with elastic. The cup has light structure and adjustable straps. I recommend swatching and matching gauge before starting to ensure a wearable fit.
Materials Needed
Gathering your supplies before you begin makes the process much smoother. Here is everything you need:
Yarn:
Yarn Suggestions:
Hook:
Notions:
Optional:
Gauge
24 sc and 26 rows = 4 inches (10 cm) in blocked single crochet.
20 dc and 10 dc rows = 4 inches (10 cm) in blocked shell cup fabric.
Matching both stitch and row gauge is important for a wearable fit. Take the time to swatch before diving into the main pieces.
Abbreviations (US Terms)
Before we begin, let me walk you through every stitch abbreviation you will encounter:
Special Stitches Explained
Scallop: Work 5 dc in the same stitch, skip 2 sts, sl st in next st, skip 2 sts. A scallop uses 6 base stitches.
Small picot: Ch 3, sl st in the first ch made. Use picots at cup points and strap edges if desired.
Pattern Notes
Before you begin crocheting, please review these important notes:
This pattern is designed to help you create a similar crochet project, but individual results may vary depending on your yarn, tension, hook size, and finishing technique. You may need to make small adjustments to achieve the closest possible result to the finished project shown.
Shell Cups (Make 2)
Work flat in turned rows. Keep the RS of the raised ribs facing you on odd-numbered rows.
Row 1: Make adjustable ring. Ch 3, work 7 dc in ring. Turn. (8 dc)
Row 2: Ch 3, dc in same st, 2 dc in each st across. Turn. Place 8 ridge markers evenly. (16 dc)
Row 3: Ch 3, fpdc in marked st, 2 dc in next st; rep from across, moving markers to fpdc. Turn. (24 dc)
Row 4: Ch 3, fpdc in marked st, dc in next st, 2 dc in next st; rep from across. Turn. (32 dc)
Row 5: Ch 3, fpdc in marked st, dc in next 2 sts, 2 dc in next st; rep from across. Turn. (40 dc)
Row 6: Ch 3, fpdc in marked st, dc in next 3 sts, 2 dc in next st; rep from across. Turn. (48 dc)
Row 7: Ch 3, fpdc in marked st, dc in next 4 sts, 2 dc in next st; rep from across. Turn. (56 dc)
Row 8: Ch 3, fpdc in marked st, dc in next 5 sts, 2 dc in next st; rep from across. Fasten off. (64 dc)
Cup Edge
Join yarn at one lower corner. Work 1 sc into each row end up the side, 3 sc in top center point, 1 sc into each row end down the other side, then 64 sc across the lower curved edge. Sl st to first sc.
Work scallops across the lower curved edge only: *skip 2, 5 dc in next, skip 2, sl st in next; rep across, easing the final scallop as needed. Fasten off.
Cup shaping tip: Steam lightly and pinch the lower center inward by about 0.5 inches (1.25 cm) before sewing to the band. This makes the cup curve toward the body for a more natural fit.
Checkpoint
After cup Row 8, each cup has 64 dc and measures about 6.75 inches (17 cm) tall before edging. If your measurements differ significantly, check your gauge.
Underbust Front Band
Row 1: Ch 79. Sc in 2nd ch from hook and each ch across. Turn. (78 sc)
Rows 2-5: Ch 1, sc across. Turn after each row. (78 sc)
Row 6: Ch 1, sc in first 38 sts, ch 2, skip 2 center sts, sc in final 38 sts. Turn. (76 sc + ch-2 space)
Row 7: Ch 1, sc in each sc and 2 sc in ch-2 space. Fasten off. (78 sc)
Attach Cups
Straps and Back Ties
For each shoulder strap: Join yarn at the upper cup point, ch 72, turn, sc in 2nd ch from hook and across, sl st to cup point. Work one scalloped edge along the outer side: *skip 2, 5 dc in next, skip 2, sl st in next; repeat to the end.
For each back tie: Join at band end, ch 92, turn, sl st in each ch back to band. Repeat on the other side.
Checkpoint
Finished front band with cups attached should measure about 14 inches (35.5 cm) across before ties. Lengthen straps or back ties before weaving ends if you need more adjustability.
High-Waist Bottom Panels
Use sc throughout. Ch-1 does not count as a stitch. Work front and back separately from crotch to waist.
Front Panel
Row 1: Ch 15. Sc in 2nd ch from hook and across. Turn. (14 sc)
Rows 2-24: Ch 1, 2 sc in first st, sc to last st, 2 sc in last st. Turn. (+2 each row; Row 24 = 60 sc)
Rows 25-50: Ch 1, sc across. Turn. Fasten off after Row 50. (60 sc)
Back Panel
Row 1: Ch 17. Sc in 2nd ch from hook and across. Turn. (16 sc)
Rows 2-26: Ch 1, 2 sc in first st, sc to last st, 2 sc in last st. Turn. (+2 each row; Row 26 = 66 sc)
Rows 27-52: Ch 1, sc across. Turn. Fasten off after Row 52. (66 sc)
Panel measurements after blocking: Front approximately 10 inches (25.5 cm) wide at top and 9.25 inches (23.5 cm) tall. Back approximately 11 inches (28 cm) wide at top and 9.5 inches (24 cm) tall.
Size Customization
Bottom Assembly and Edgings
Crotch Seam
With WS together, seam the foundation edges of front and back using mattress stitch. The crotch seam joins 14 front sts to the center 14 of the back foundation edge. Ease the extra back stitch at each side into the leg edge.
Side Seams
Match the top corners. Seam each side for 42 rows from waist downward, leaving the lower leg opening unseamed. This creates a high waist and open leg curve.
Waistband
Join yarn at one side seam.
Round 1: Sc evenly around the top waist edge, working 60 sc across front, 66 sc across back, and 1 sc into each side seam join. (128 sc)
Round 2: Sc around. (128 sc)
Round 3: Ch 1, sc around, leaving a 1 inch (2.5 cm) opening for elastic. (128 sc)
Insert elastic to comfortable fit, overlap and sew elastic ends, then close opening.
Leg Edging
For each leg opening, join yarn at crotch.
Round 1: Pick up sc at a ratio of about 3 sts for every 4 row ends around the curve, adjusting to 96 sc.
Round 2: *Skip 2, 5 dc in next st, skip 2, sl st in next st; rep around for 16 scallops. Fasten off.
Top Scallop
Work a decorative scallop around the upper waist over 126 of the 128 sts: *skip 2, 5 dc in next st, skip 2, sl st in next st; rep 21 times. Work 1 sl st in each of the 2 remaining seam sts to finish invisibly.
Decorative Hip Shells (Make 6)
Make 6 small shell motifs. Sew 3 layered shells on each hip, placing the top shell closest to the waist and staggering the lower two shells by about 0.75 inches (2 cm).
Row 1: Make adjustable ring. Ch 3, work 5 dc in ring. Turn. (6 dc)
Row 2: Ch 3, dc in same st, 2 dc in each st across. Turn. (12 dc)
Row 3: Ch 3, fpdc in next st, 2 dc in next st; rep from across. Turn. (18 dc)
Row 4: Ch 3, fpdc in next st, dc in next st, 2 dc in next st; rep from across. (24 dc)
Edge: Across curved edge, work 4 scallops using the 6-st repeat. (4 scallops)
Placement
Finishing, Blocking, and Care
Finishing
Care Instructions
Troubleshooting Common Issues
Cup too flat: Steam over a rounded form and add a slightly deeper lower pinch before sewing.
Cup too small: Add Row 9 using the same 8-ridge increase logic: fpdc, dc in next 6, 2 dc in next. (72 dc)
Waist too tight: Use longer elastic or add 2 to 4 even rows to each side before seaming.
Scallops ruffle: Use a smaller hook for edging or skip fewer picked-up stitches only at curves.
Fabric see-through: Use lining fabric behind cups and bottom panels.
Final Maker Check
Before wearing or gifting, tug gently on straps, ties, elastic, and pearl attachments. Reinforce any point that receives tension.

Wrapping Up Your Bridal Shell Bikini
Thank you so much for choosing this pattern for your next crochet project. Creating handmade bridal pieces carries so much meaning, whether you are making this for yourself or as a gift for someone special. The shell texture really does create such a stunning effect, and I hope you enjoy every stitch of the process.
If you make this bridal shell bikini, I would absolutely love to see how it turns out. Save this pattern to your Pinterest boards so you can find it easily when you are ready to start, and please leave a comment below sharing your experience or any questions you have along the way. Happy crocheting!
Want a Quick & Easy Printable Version?
Get a clean, beautifully formatted PDF of this pattern — easy to follow step by step, ready to print or save on any device. No scrolling, no distractions, just the pattern.
Get the Printable PDF →