
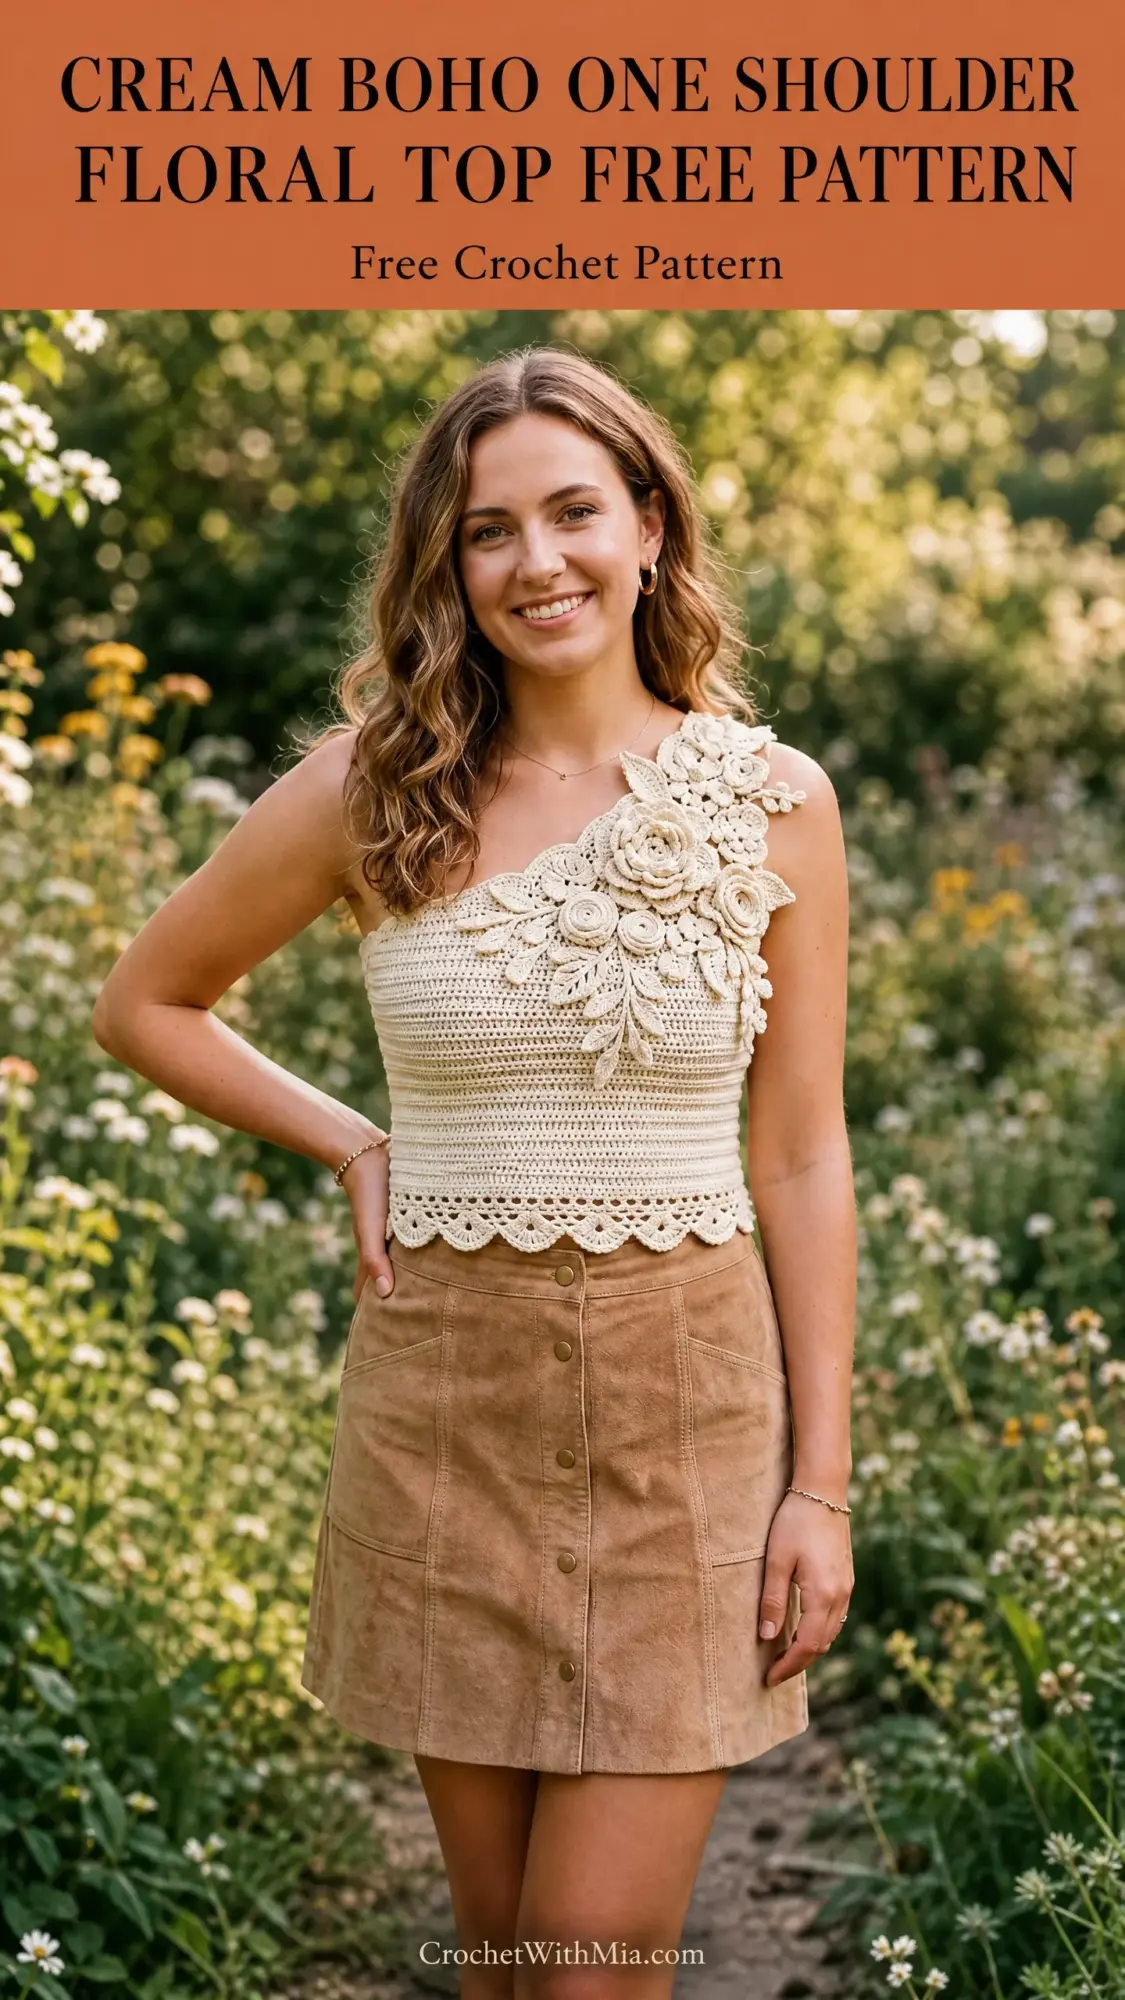
This is a fitted one-shoulder crop top with stunning Irish crochet floral appliques cascading from the right shoulder. The body uses half double crochet worked in the round. The dimensional roses, blossoms, and leaves are crocheted separately and sewn on at the end.
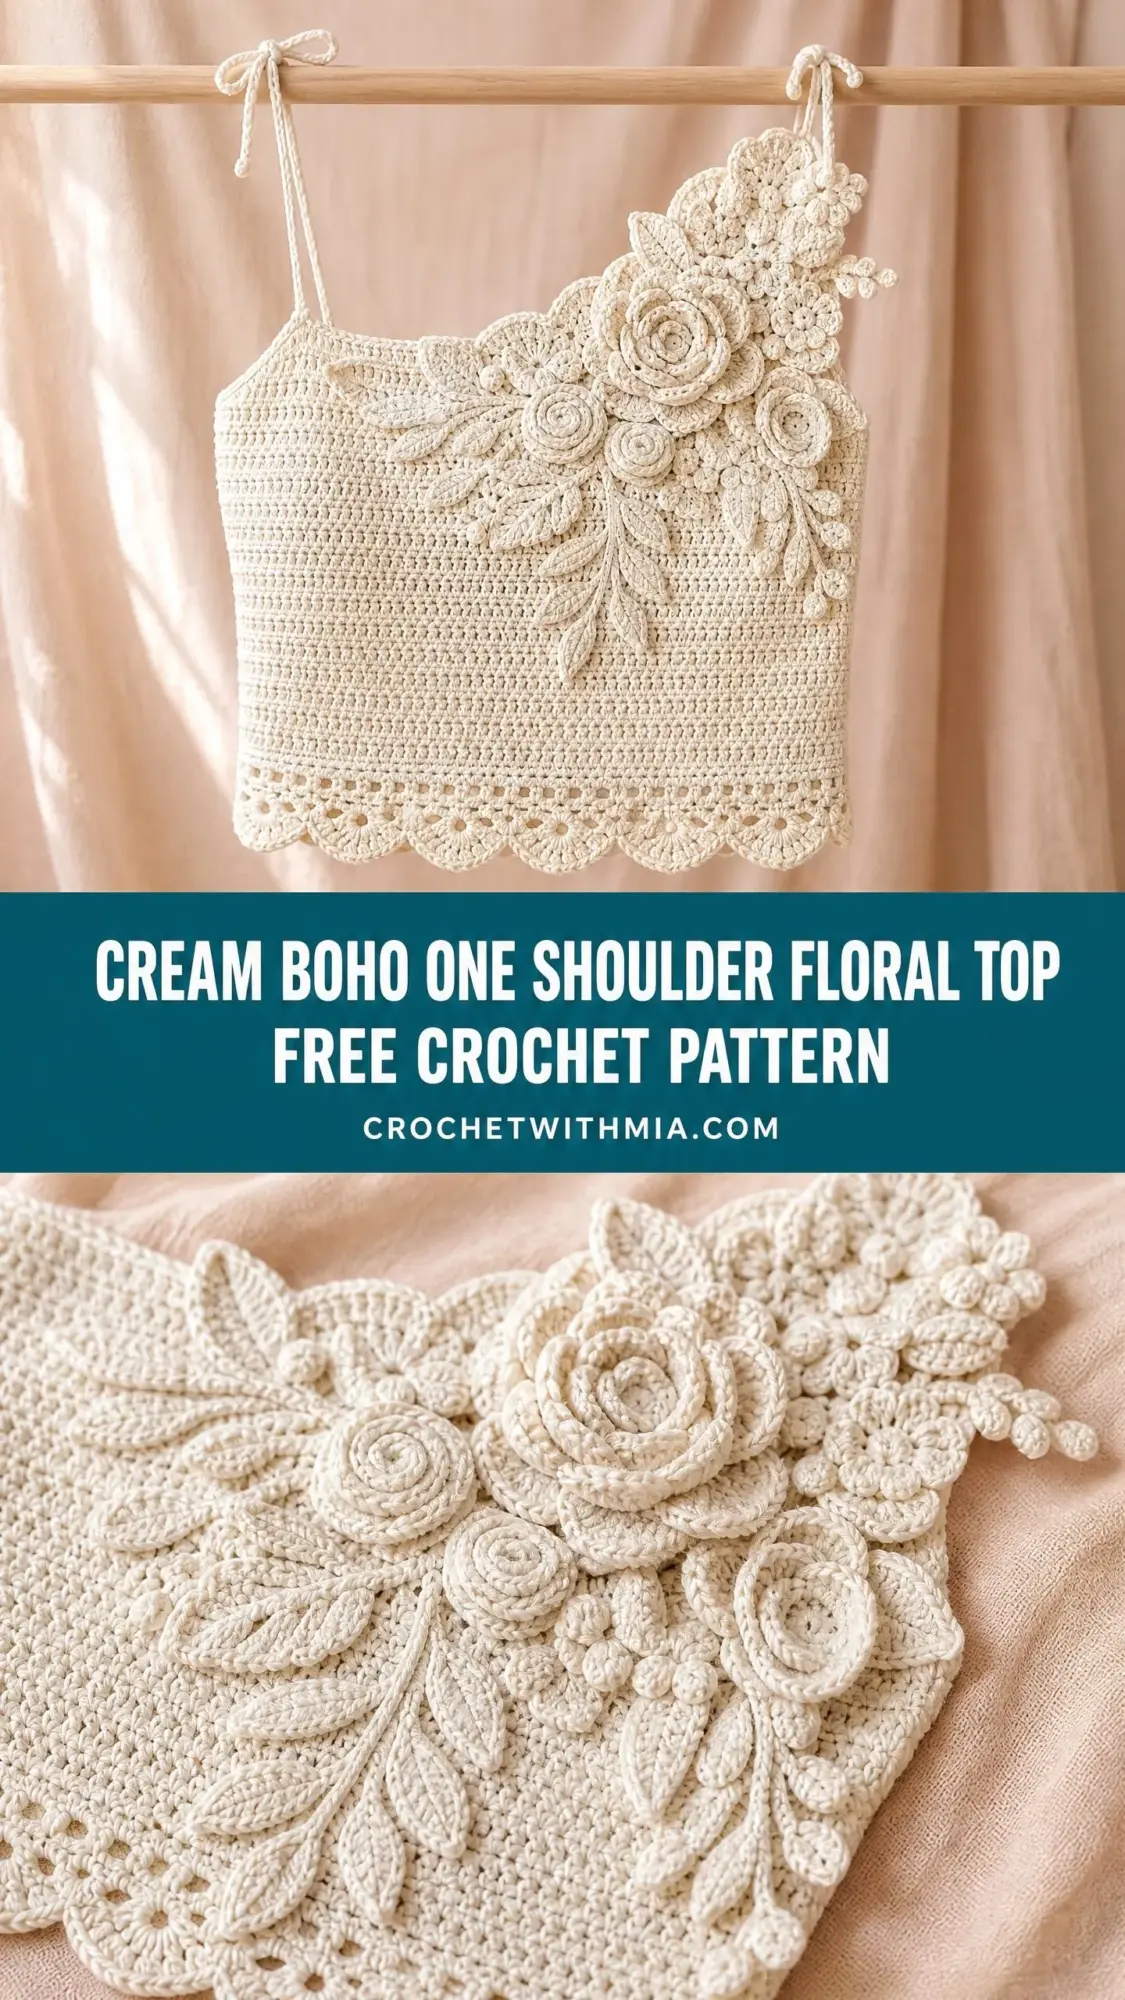
If you have been wanting to try Irish crochet florals but felt intimidated, this is your project. The body construction is straightforward tube work with simple shaping. The fancy stuff happens in small, manageable motifs that you assemble like a puzzle.
This cream boho one shoulder floral top crochet pattern sits at advanced intermediate level. You will need comfort working in the round, basic garment shaping, and willingness to tackle three-dimensional petal construction. But I promise the finished piece is absolutely worth every stitch.
Why This Crochet Top Pattern Works
The construction is smarter than it looks. You start with a scallop hem border, join it into a ring, then build the body tube upward. The fitted silhouette comes from gentle decreases at the underbust and increases through the bust. No complicated seaming until the very end.
The real showstopper is the floral cascade. Three large roses, five small blossoms, and eight leaves combine into an arrangement that looks like it took months. In reality, each motif works up in minutes once you get the rhythm.
The one-shoulder design eliminates the need for complex armhole shaping on both sides. The left side stays open with a clean curved neckline. The right side gets a strap that crosses over and attaches at the back. Simple and elegant.
Materials You Will Need
Yarn: 550 to 650 yards of worsted weight cotton or cotton blend in cream or natural ecru. A smooth, tightly spun yarn works best for crisp floral detail.
Yarn Suggestions:
Avoid fuzzy or textured yarns. They will obscure your beautiful floral work. Skip acrylic alone because the piece will not block properly and you will lose that structured drape.
Hooks:
Notions:
Finished Measurements
This pattern is written for size Small/Medium:
Size customization guidance is included at the end of this pattern.
Gauge
Body gauge with G-6 hook in half double crochet worked in the round: 16 hdc x 11 rounds = 4 inches / 10 cm after blocking
Motif gauge with E-4 hook:
Gauge matters for fit. Work a swatch of at least 20 stitches by 15 rows in hdc worked flat, then join and work 5 rounds. Block before measuring. Adjust hook size if needed.
Abbreviations
Special Stitches
Scallop Shell: Skip 2 stitches. Work 5 dc into the next stitch. Skip 2 stitches. Slip stitch into the next stitch. This creates one complete scallop spanning 6 stitches.
Hdc Twisted Rib: Work hdc in BLO across one round, then hdc in FLO the next round. Alternating creates a subtle ribbed texture for compression at the underbust.
Bobble Stitch: Yarn over, insert hook, pull up loop. Repeat this sequence twice more into the same stitch until you have 7 loops on hook. Yarn over and draw through all 7 loops. Chain 1 to close.
Picot: Chain 3. Slip stitch into the first of those 3 chains.
Irish Crochet Leaf: Chain 15. Working back along the chain: sc in 2nd ch from hook, hdc in next, dc in next 3, hdc in next 3, sc in next 3, hdc in next ch, then work 5 sc into the last chain at the leaf tip. Rotate and work back along the opposite side mirroring the sequence. Slip stitch to close. Work a row of sl sts up the center for the vein.
Pattern Notes Before You Begin
1. The body is worked in joined rounds from hem upward. Do not turn between rounds unless instructed. Join each round with a slip stitch to the top of the first stitch.
2. Chain 2 at the beginning of each hdc round counts as the first hdc.
3. The piece is seamless in the round for the main body. The shoulder strap is worked flat and seamed.
4. All floral motifs are worked separately and sewn on after blocking. Do not attach before blocking.
5. Right side of fabric faces outward throughout.
6. Left and right designations are as worn, not as you look at the fabric.
7. Read the entire pattern before starting. Construction order: hem border, body tube, underbust shaping, bust shaping, upper chest panel, shoulder strap, floral assembly.
Step by Step Instructions
Section 1: Foundation and Hem Border
The hem border is worked first as a strip, then joined into a ring.
Row 1 (Hem Border Foundation): Using G-6 hook, chain 175. Sc in 2nd ch from hook and in each ch across. (174 sc)
Row 2 (Picot Edge Row): Chain 1, turn. Sc in first st. Work picot. Skip 1 st. Sc in next st. Work picot. Continue in pattern (sc, picot, skip 1) to end. Fasten off, leaving a 12 inch tail.
With WS facing, fold this strip and join into a ring using sl st through both end stitches. Make sure the strip is not twisted.
Checkpoint: The hem ring should measure approximately 32 inches / 81 cm in circumference before blocking.
Section 2: Body Tube
Join yarn with sl st into the top loop of any sc on the foundation row of the hem border ring, opposite the picot edge.
Round 1: Chain 2 (counts as hdc). Hdc in each st around. Join with sl st to top of ch-2. (174 hdc)
Rounds 2 through 8: Chain 2. Hdc in each st around. Join with sl st. (174 hdc each round)
Checkpoint: After Round 8, the body tube should measure approximately 3 inches / 7.5 cm from the hem picot edge.
Section 3: Underbust Shaping
This section tapers the body for a fitted silhouette.
Round 9 (Decrease Round 1): Chain 2. Hdc in next 27 sts. Hdc2tog over next 2 sts. Place marker. Hdc in next 54 sts. Hdc2tog over next 2 sts. Place marker. Hdc in next 27 sts. Hdc2tog over next 2 sts. Place marker. Hdc in next 54 sts. Hdc2tog over next 2 sts. Join. (170 hdc)
Round 10: Chain 2. Hdc in each st around. Join. (170 hdc)
Round 11 (Decrease Round 2): Chain 2. Hdc to 1 st before each marker, hdc2tog over the marked st and the st after it. Move markers up. Work 4 decreases total evenly spaced. Join. (166 hdc)
Round 12: Chain 2. Hdc in each st around. Join. (166 hdc)
Round 13 (Decrease Round 3): Chain 2. Work 4 evenly spaced hdc2tog as established. Join. (162 hdc)
Round 14: Chain 2. Hdc in each st around. Join. (162 hdc)
Checkpoint: After Round 14, the body should measure approximately 5.5 inches / 14 cm from the hem picot edge.
Section 4: Underbust Rib Band
Work 3 rounds of twisted rib for the fitted band.
Round 15 (Rib Round 1, BLO): Chain 2. Working in BLO only, hdc in each st around. Join. (162 hdc)
Round 16 (Rib Round 2, FLO): Chain 2. Working in FLO only, hdc in each st around. Join. (162 hdc)
Round 17 (Rib Round 3, BLO): Chain 2. Working in BLO only, hdc in each st around. Join. (162 hdc)
Checkpoint: The rib band creates a denser section approximately 1 inch / 2.5 cm tall. Total body should now measure approximately 6.5 inches / 16.5 cm from the hem.
Section 5: Bust Section
The body expands to accommodate the bust.
Round 18: Chain 2. Hdc in each st around. Join. (162 hdc)
Round 19 (Increase Round 1): Chain 2. (Hdc in next 40 sts, inc in next st) 4 times. Hdc in last 2 sts. Join. (166 hdc)
Round 20: Chain 2. Hdc in each st around. Join. (166 hdc)
Round 21 (Increase Round 2): Chain 2. (Hdc in next 41 sts, inc in next st) 4 times. Hdc in last 2 sts. Join. (170 hdc)
Round 22: Chain 2. Hdc in each st around. Join. (170 hdc)
Round 23 (Increase Round 3): Chain 2. (Hdc in next 42 sts, inc in next st) 4 times. Hdc in last 2 sts. Join. (174 hdc)
Rounds 24 through 28: Chain 2. Hdc in each st around. Join. (174 hdc each round)
Checkpoint: After Round 28, the body should measure approximately 9.5 inches / 24 cm from the hem picot edge.
Section 6: Upper Chest Shaping and Division
Now the round divides into front and back panels worked flat.
Place marker at left side seam point between stitch 87 and stitch 88. Place second marker at right side seam point at your current join.
Front Panel
Row 1 (RS, Front): Attach yarn at right side seam marker. Chain 2. Hdc across next 87 sts. Do not work across the back. Turn. (87 hdc)
Row 2 (WS): Chain 2. Hdc across. Turn. (87 hdc)
Row 3 (Armhole Shaping, RS): Sl st across first 5 sts. Chain 2. Hdc to last 5 sts. Turn, leaving last 5 sts unworked. (77 hdc)
Row 4 (WS): Chain 2. Hdc2tog at beg. Hdc to last 2 sts. Hdc2tog. Turn. (75 hdc)
Row 5 (RS): Chain 2. Hdc2tog at beg. Hdc to last 2 sts. Hdc2tog. Turn. (73 hdc)
Row 6 (WS): Chain 2. Hdc across. Turn. (73 hdc)
Row 7 (RS): Chain 2. Hdc2tog at beg. Hdc to last 2 sts. Hdc2tog. Turn. (71 hdc)
Rows 8 and 9: Chain 2. Hdc across. Turn. (71 hdc each row)
Checkpoint: After Row 9, the armhole depth should measure approximately 2.5 inches / 6.5 cm.
Left Side of Chest (Wide Side, No Strap)
Row 10 (RS, Begin Left Chest): Chain 2. Hdc across first 46 sts. Turn. Leave remaining 25 sts on hold for strap foundation. (46 hdc)
Row 11 (WS): Chain 2. Hdc across. Turn. (46 hdc)
Row 12 (RS): Chain 2. Hdc2tog at left armhole edge. Hdc to end. Turn. (45 hdc)
Row 13 (WS): Chain 2. Hdc across. Turn. (45 hdc)
Row 14 (RS): Chain 2. Hdc2tog at left edge. Hdc to end. Turn. (44 hdc)
Row 15 (WS): Chain 2. Hdc across. Turn. (44 hdc)
Row 16 (RS): Chain 2. Hdc2tog at left edge. Hdc to end. Turn. (43 hdc)
Rows 17 and 18: Chain 2. Hdc across. Turn. (43 hdc each row)
Row 19 (RS): Chain 2. Hdc2tog at left edge. Hdc to end. Turn. (42 hdc)
Rows 20 through 24: Chain 2. Hdc across. Turn. (42 hdc each row)
Fasten off the left chest panel after Row 24.
Right Chest and Strap Foundation
Rejoin yarn to the 25 held stitches at the right chest.
Row 1 (RS): Chain 2. Hdc across all 25 sts. Turn. (25 hdc)
Rows 2 through 5: Chain 2. Hdc across. Turn. (25 hdc each row)
Row 6 (Strap Begin Taper): Chain 2. Hdc2tog. Hdc to last 2 sts. Hdc2tog. Turn. (23 hdc)
Row 7: Chain 2. Hdc across. Turn. (23 hdc)
Row 8: Chain 2. Hdc2tog. Hdc to last 2 sts. Hdc2tog. Turn. (21 hdc)
Rows 9 and 10: Chain 2. Hdc across. Turn. (21 hdc each row)
Row 11: Chain 2. Hdc2tog. Hdc across. Turn. (20 hdc)
Rows 12 through 18: Chain 2. Hdc across. Turn. (20 hdc each row)
Do not fasten off. Continue to Section 7.
Back Panel
Rejoin yarn at right side seam marker to the 87 back stitches.
Row 1 (RS): Chain 2. Hdc across 87 sts. Turn. (87 hdc)
Row 2 (WS): Chain 2. Hdc across. Turn. (87 hdc)
Row 3 (Armhole Shaping): Sl st across first 5 sts. Chain 2. Hdc to last 5 sts. Turn, leaving last 5 sts unworked. (77 hdc)
Row 4 (WS): Chain 2. Hdc2tog. Hdc to last 2 sts. Hdc2tog. Turn. (75 hdc)
Row 5 (RS): Chain 2. Hdc2tog. Hdc to last 2 sts. Hdc2tog. Turn. (73 hdc)
Row 6 (WS): Chain 2. Hdc across. Turn. (73 hdc)
Row 7 (RS): Chain 2. Hdc2tog. Hdc to last 2 sts. Hdc2tog. Turn. (71 hdc)
Rows 8 through 24: Chain 2. Hdc across. Turn. (71 hdc each row)
Fasten off, leaving a long tail for seaming.
Seaming: Using yarn tail and yarn needle, mattress stitch the right side of the back panel to the right chest panel along the right shoulder area for approximately 3 inches / 7.5 cm.
Section 7: Shoulder Strap
Continue from the 20 live stitches at the top of the right chest panel.
Rows 1 through 4: Chain 2. Hdc across. Turn. (20 hdc each row)
Row 5: Chain 2. Hdc2tog. Hdc to last 2 sts. Hdc2tog. Turn. (18 hdc)
Rows 6 and 7: Chain 2. Hdc across. Turn. (18 hdc each row)
Row 8: Chain 2. Hdc2tog. Hdc to last 2 sts. Hdc2tog. Turn. (16 hdc)
Rows 9 through 12: Chain 2. Hdc across. Turn. (16 hdc each row)
Row 13: Chain 2. Hdc2tog. Hdc to last 2 sts. Hdc2tog. Turn. (14 hdc)
Rows 14 through 18: Chain 2. Hdc across. Turn. (14 hdc each row)
Fasten off, leaving a 20-inch sewing tail.
Strap Attachment: Position the strap end on the back panel, centered over the right shoulder line. Pin securely. Whip stitch the strap end to the back panel top edge firmly.
Section 8: Armhole Edging
Right Armhole: With E-4 hook, join yarn at the right underarm. Work 1 round of sc evenly around the armhole opening, approximately 2 sc per row end and 1 sc per stitch across bound-off rows. Join with sl st. Fasten off. Target approximately 54 to 60 sc.
Left Armhole and Neckline Edge: With E-4 hook, join yarn at lower left chest opening. Work 1 round of sc up the left open edge, across the top left chest area, and back down. Join. Fasten off.
Section 9: Large Rose Motifs (Make 3)
Round 1 (Center): Using E-4 hook, make a magic ring. Chain 1. Work 8 sc into ring. Join with sl st to first sc. (8 sc)
Round 2 (Inner Petals): Chain 1. (Sc in next st, ch 2, dc in same st, ch 2, sc in same st) in each st around. Join. 8 inner petals formed.
Round 3 (Petal Layer 2): Working behind Round 2 petals, insert hook from front to back around the post of each sc from Round 1. (Sc around post, ch 3, 3 dc around same post, ch 3, sc around same post) in each of the 8 Round 1 posts. Join. 8 mid petals formed.
Round 4 (Outer Petals): Working behind Round 3 petals into Round 1 base stitches, slightly lower: (sc into base, ch 4, 5 dc, ch 4, sc) around each of 8 base points. Join. 8 large outer petals formed.
Round 5 (Back Ring Stabilizer): Work sc evenly around the back base of all petals. Approximately 24 to 28 sc. Join. Fasten off, leaving a 15-inch tail.
Section 10: Small Blossom Motifs (Make 5)
Round 1: Using E-4 hook, make a magic ring. Chain 1. Work 6 sc into ring. Join. (6 sc)
Round 2: Chain 1. In each sc work (sc, ch 3, 3 dc, ch 3, sc). Join. 6 petals formed.
Round 3 (Optional): Work raised petals around the post of each Round 1 stitch for a layered effect.
Fasten off, leaving a 12-inch sewing tail.
Section 11: Leaf Motifs (Make 8)
Make 4 large leaves using foundation chain of 15 as described in Special Stitches.
Make 4 small leaves using foundation chain of 11, reducing dc section to 2 dc instead of 3 and omitting 1 sc on each side of the return pass.
Fasten off each leaf leaving a 12-inch tail.
Section 12: Floral Applique Assembly
Block all motifs and the body before assembly.
Lay the blocked body flat with the right front facing up. The applique cascade runs from the right shoulder diagonally toward the left center chest.
Position 1 (Shoulder crown): 1 large rose at the top of the right shoulder strap, approximately 0.5 inches from the shoulder seam edge. Add 2 small leaves angled outward and 1 small blossom.
Position 2 (Upper chest): 1 large rose centered on the upper right chest, approximately 3 inches below the shoulder rose. Add 2 large leaves pointing downward at 45-degree angles and 2 small blossoms.
Position 3 (Mid chest diagonal): 1 large rose approximately 3 inches below the upper chest rose, slightly left of center. Add 2 large leaves below and 2 small blossoms.
Position 4 (Scatter fill): Use remaining blossoms and leaves to fill gaps naturally.
Pin all elements before sewing. Sew each piece using small whip stitches around the perimeter, at least 6 to 8 anchor points per motif. Allow outer rose petals to remain unsewn for dimensional effect.
Size Customization Tips
Medium/Large (36 to 38 inch bust): Start with 198 stitches for the hem border. Work 6 decrease points instead of 4 in underbust shaping. Work 6 increase points in bust section. Front and back panels become 99 stitches each.
XS (30 to 32 inch bust): Start with 150 stitches. Begin decreases 1 round earlier. Front and back panels are 75 stitches each.
Lengthening: Add hdc rounds in Section 2 before underbust shaping. Each round adds approximately 0.36 inches.
Adjusting strap length: Add or subtract rows in pairs from Section 7.
Time Estimate
Plan for approximately 30 to 45 hours total. The body construction takes 12 to 16 hours. Floral motifs need 12 to 18 hours. Assembly and finishing require 4 to 6 hours. Your timeline will vary based on experience with Irish crochet techniques.
Thank you so much for making this cream boho one shoulder floral top with me. This is one of those projects that looks absolutely stunning when finished, and I hope you feel proud wearing it. If you make one, I would love to see it! Tag me on Instagram or share in my Facebook group.
Save this crochet pattern to your Pinterest boards so you can find it when you are ready to start. And please leave a comment below if you make this top. I genuinely love hearing how your projects turn out and seeing the color combinations you choose.