
A sturdy market tote makes every trip to the farmer’s market or weekend outing feel a little more put together. This Mustard Yellow Autumn Tote combines a beautiful bobble texture on the lower body with crisp vertical ribbing up top, creating a bag that holds its shape and looks gorgeous doing it. The pattern uses basic stitches that intermediate crocheters will find comfortable, and the construction from the bottom up makes it easy to customize the size. Whether you are making this for yourself or as a thoughtful handmade gift, the warm goldenrod color and charming leaf and tassel embellishments give it serious autumn vibes.
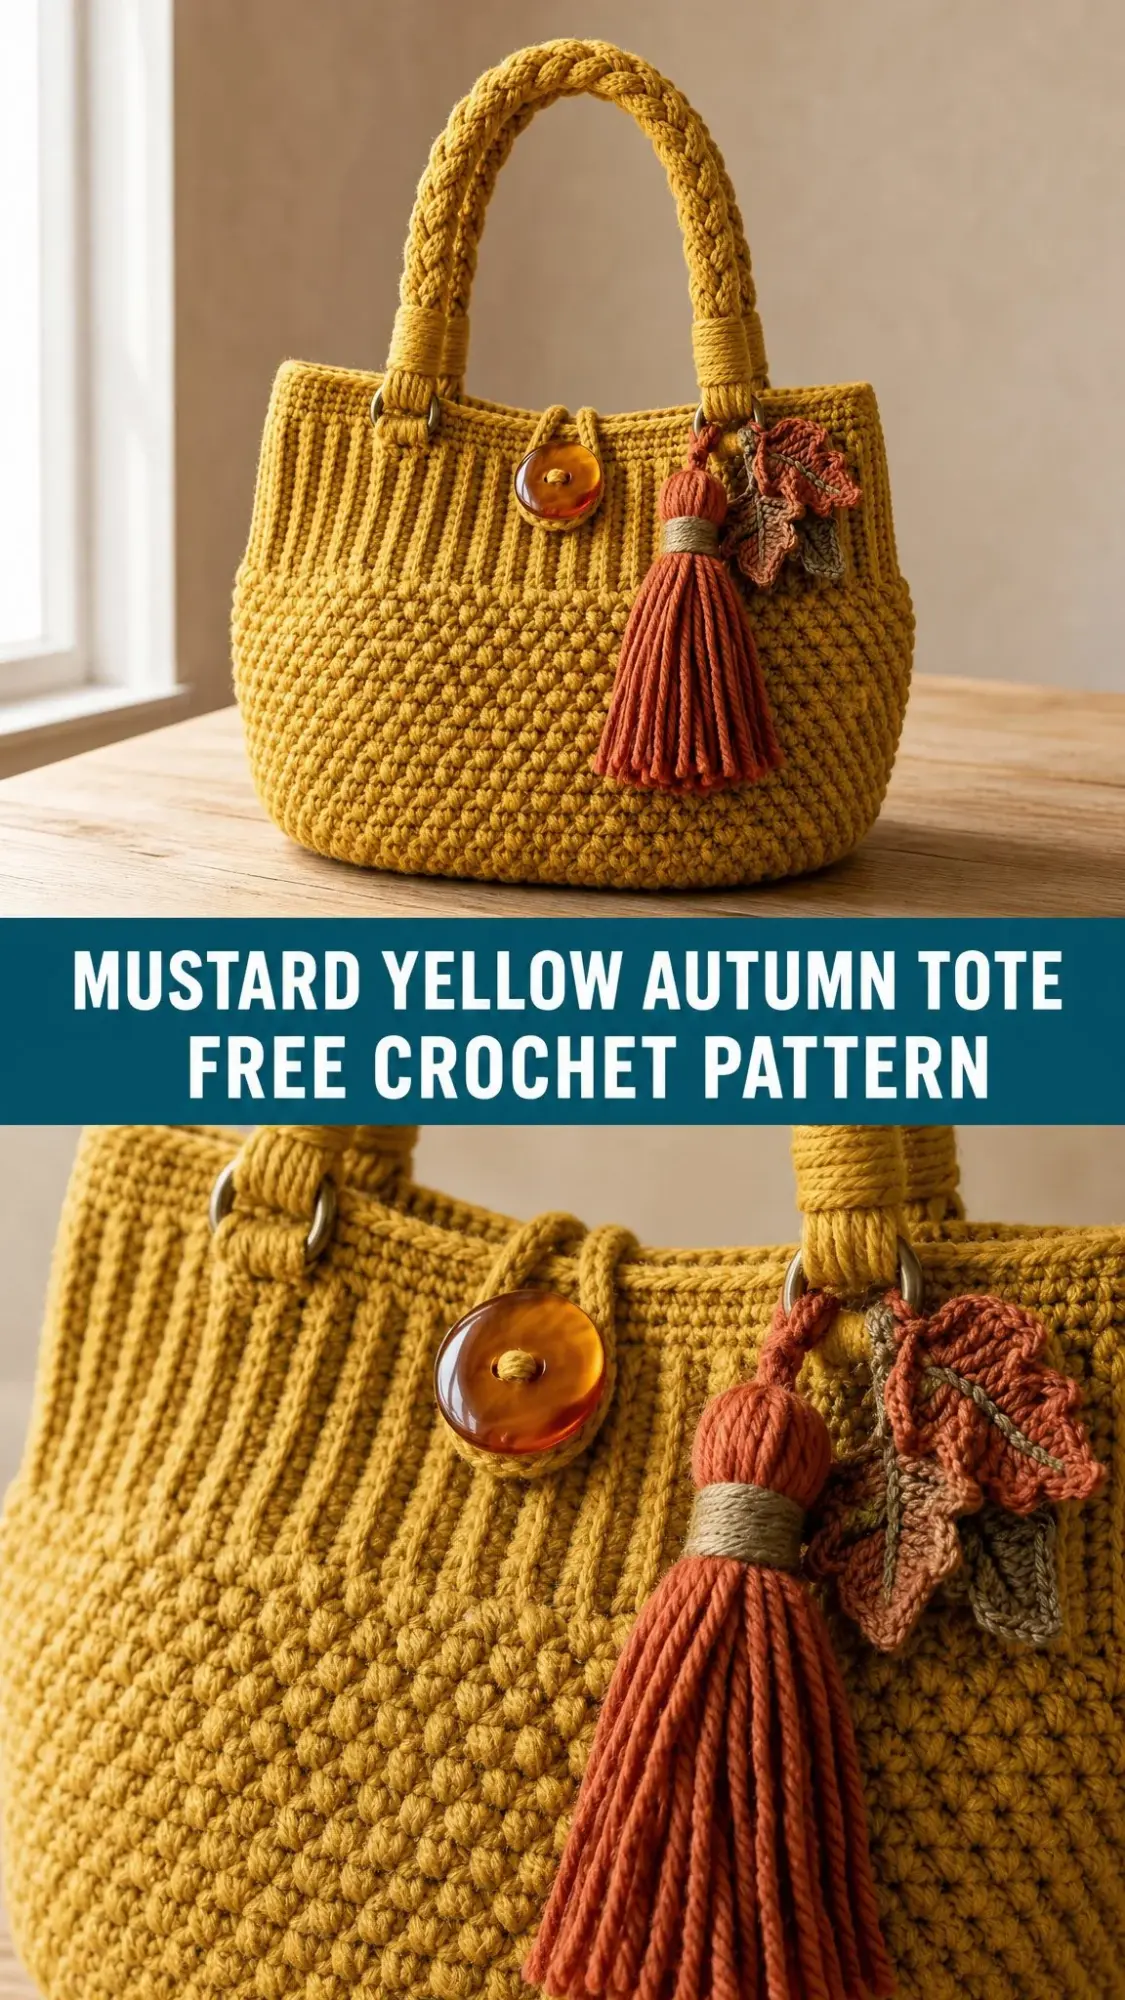
The finished tote measures 12 inches wide, 8.5 inches tall, and 5 inches deep, with a handle drop of about 6 inches. You will need approximately 500 yards of aran or worsted weight cotton yarn in mustard or goldenrod, plus small amounts of rust and warm brown for the decorative tassel and leaves. The project takes roughly 10 to 14 hours to complete, so it is a satisfying weekend project or a relaxing week of evening crocheting.
Materials You Will Need
Gather everything before you start so you can work without interruption.
Yarn:
The pattern recommends choosing a firm cotton or cotton blend for structure. Good options include Paintbox Yarns Cotton Aran in Mustard Yellow, Lion Brand 24/7 Cotton in Goldenrod, or Hobbii Friends Cotton 8/8 in Mustard.
Hooks:
Notions:
Gauge
16 single crochet stitches and 18 rounds equal 4 inches (10 cm) with a 5.0 mm hook in single crochet, worked in the round and lightly blocked.
Gauge matters for this project because it determines the finished width. Work a flat 4-inch swatch and adjust your hook size until you match the gauge. If your swatch is too small, go up a hook size. If it is too large, go down a hook size.
Stitches and Abbreviations
This pattern is written in US crochet terms. For UK crocheters: US single crochet (sc) equals UK double crochet (dc), US half double crochet (hdc) equals UK half treble (htr), and US double crochet (dc) equals UK treble (tr).
Special Stitches
MB (Bobble, 5-dc): In the same stitch, work [yarn over, insert hook, yarn over and pull up a loop, yarn over and draw through 2 loops] 5 times. You will have 6 loops on your hook. Yarn over and draw through all 6 loops, then chain 1 to close. This counts as 1 stitch and pushes to the right side of your work.
fpdc (Front Post Double Crochet): Yarn over, insert your hook from the front around the post of the stitch below (going from right to left around the post), and complete as a regular double crochet.
bpdc (Back Post Double Crochet): Yarn over, insert your hook from the back around the post of the stitch below (going from right to left around the post), and complete as a regular double crochet.
Pattern Notes Before You Begin
Read through these tips before starting. They will save you confusion later.
Step 1: The Base
You will create an oval base worked in a spiral, increasing evenly to 96 stitches.
Round 1: Chain 17. Single crochet in the 2nd chain from the hook and in each of the next 14 chains (15 sc total). Work 3 single crochet in the last chain. Rotate to work along the opposite side of the foundation chain. Single crochet in each of the next 14 chains (15 sc). Work 3 single crochet in the last chain. Do not join. Place your stitch marker. (36 sc)
Round 2: [Single crochet in the next 2 stitches, 2 single crochet in the next stitch] 12 times. (48 sc)
Round 3: [Single crochet in the next 3 stitches, 2 single crochet in the next stitch] 12 times. (60 sc)
Round 4: [Single crochet in the next 4 stitches, 2 single crochet in the next stitch] 12 times. (72 sc)
Round 5: [Single crochet in the next 5 stitches, 2 single crochet in the next stitch] 12 times. (84 sc)
Round 6: [Single crochet in the next 6 stitches, 2 single crochet in the next stitch] 12 times. (96 sc)
Round 7: Working in back loop only (BLO), single crochet in each stitch around. This creates a defined edge so the body stands up from the base. (96 sc)
Tip: If you want a larger tote, keep adding increase rounds in multiples of 12 (to 108, 120, and so on) before moving on. Just keep the final count even.
Step 2: Lower Body with Bobble Field
The staggered bobbles create that beautiful pebbled texture you see in the photos. Keep the right side facing you throughout this section.
Round 8: Single crochet in each stitch around. (96 sts)
Round 9: [Single crochet in the next stitch, make bobble (MB) in the next stitch] around. You will work 48 repeats. (96 sts)
Round 10: Single crochet in each stitch around. (96 sts)
Round 11: [Make bobble (MB) in the next stitch, single crochet in the next stitch] around. The bobbles now sit offset from Round 9, creating the staggered pattern. (96 sts)
Round 12: Single crochet in each stitch around. (96 sts)
Repeat Rounds 9 through 12 a total of 4 times (you will end on Round 24).
Round 25: Single crochet in each stitch around. (96 sts)
Your bobble field should measure about 5 inches (12.5 cm) tall at this point. If you want a deeper bag, work one or two more sets of Rounds 9 through 12 before Round 25.
Step 3: Upper Body with Ribbing and Top Edge
Now you will switch to joined rounds. The post stitches create those crisp vertical ribs that frame the top of the bag.
Round 26: Join with a slip stitch to the first stitch. Chain 2 (this does not count as a stitch). [Front post double crochet (fpdc) around the next stitch, back post double crochet (bpdc) around the next stitch] around. Join with a slip stitch to the first fpdc. (96 sts)
Rounds 27 through 33: Chain 2. [Front post double crochet around the next fpdc, back post double crochet around the next bpdc] around. Join with a slip stitch. Continue until the ribbed band measures approximately 3 inches (7.5 cm), which is about 8 rounds total. (96 sts)
Round 34: Chain 1, single crochet in each stitch around. Join. (96 sts)
Round 35: Chain 1, single crochet in each stitch around. Join. Fasten off and weave in ends. (96 sts)
Step 4: Braided Handles
Each handle is made from three crocheted cords that you braid together. This creates sturdy, comfortable handles that can support weight.
Make the Cords (6 total, 3 per handle):
Leave a long tail at the beginning. Chain 60. Single crochet in the 2nd chain from the hook and in each chain across. Fasten off, leaving a long tail. Each cord has 59 single crochet stitches. Make 6 cords total.
Braid the Handles:
Hold 3 cords together and secure one end (you can clip it to something or have a friend hold it). Braid evenly and firmly, then secure the other end. Make 2 braided handles.
Create the Collars:
Wrap matching yarn tightly around each braid end for approximately 1 inch (2.5 cm) to form a neat collar. This covers the ends and gives a polished look.
Attach the Handles:
Thread each handle end through a D-ring, fold back about 1 inch, and wrap to secure. Sew the D-rings to the inside top edge of the bag. Place the two handles about 5 inches (12.5 cm) apart on both the front and back, making sure they are aligned in height.
No hardware? Skip the D-rings and sew the wrapped braid ends directly to the inside of the ribbed band. For a longer handle drop, add approximately 4 chains per extra 1 inch (2.5 cm) to each cord.
Step 5: Button Loop and Tassel
Button Loop Closure
Loop: Join yarn at the center front top edge. Chain 12 (or enough chains to wrap comfortably around your button). Slip stitch back to the base of the chain to form a loop. Fasten off and weave in the ends. (12-ch loop)
Button: Sew the button to the center front of the bag, positioned so the loop slips over it neatly to close the bag.
Rust Tassel
1. Wrap rust yarn around a 5-inch (12.5 cm) piece of cardboard about 40 times.
2. Slide a tie strand under the top of the bundle and knot tightly. Cut the loops along the bottom.
3. Wrap a separate strand around the bundle approximately 0.75 inch (2 cm) below the top to form the head. Knot securely and bury the ends inside the tassel.
4. Trim the ends even. Set aside to attach with the leaves.
Step 6: Crochet Leaves and Final Assembly
Autumn Leaves
Leaf: Chain 10. Slip stitch in the 2nd chain from the hook, single crochet in the next chain, half double crochet in the next chain, double crochet in the next 3 chains, half double crochet in the next chain, single crochet in the next chain, 3 single crochet in the last chain. Rotate to work the opposite side: single crochet, half double crochet, double crochet in the next 3, half double crochet, single crochet, slip stitch in the last chain. Chain 5 for a stem, then slip stitch back along it. Fasten off and leave a tail. Make 2 to 3 leaves in rust and brown.
Putting It All Together
1. Weave in all remaining ends on the body.
2. Gather the tassel and leaves with a short length of jute or cord. Tie or sew the cluster to the right-hand handle base, as shown in the photos.
3. Confirm the handles sit level and the button loop closes cleanly. Adjust placement before final sewing if needed.
4. Lightly steam-block the body to even out the texture. Let dry fully. Add a fabric lining if you want extra structure for heavier items.
Care Instructions
Customizing the Size
Wider or deeper: Add base increase rounds in multiples of 12 (to 108, 120, and so on) and keep the body count even.
Taller body: Work more sets of Rounds 9 through 12 in the bobble section, or add additional rib rounds.
Longer handles: Add approximately 4 chains per extra 1 inch (2.5 cm) to each cord before you begin.
Sturdier tote: Hold two strands of yarn together throughout, or add a fabric lining.
Bigger overall: Size up the hook and yarn weight together, and make a gauge swatch first.
You Did It!
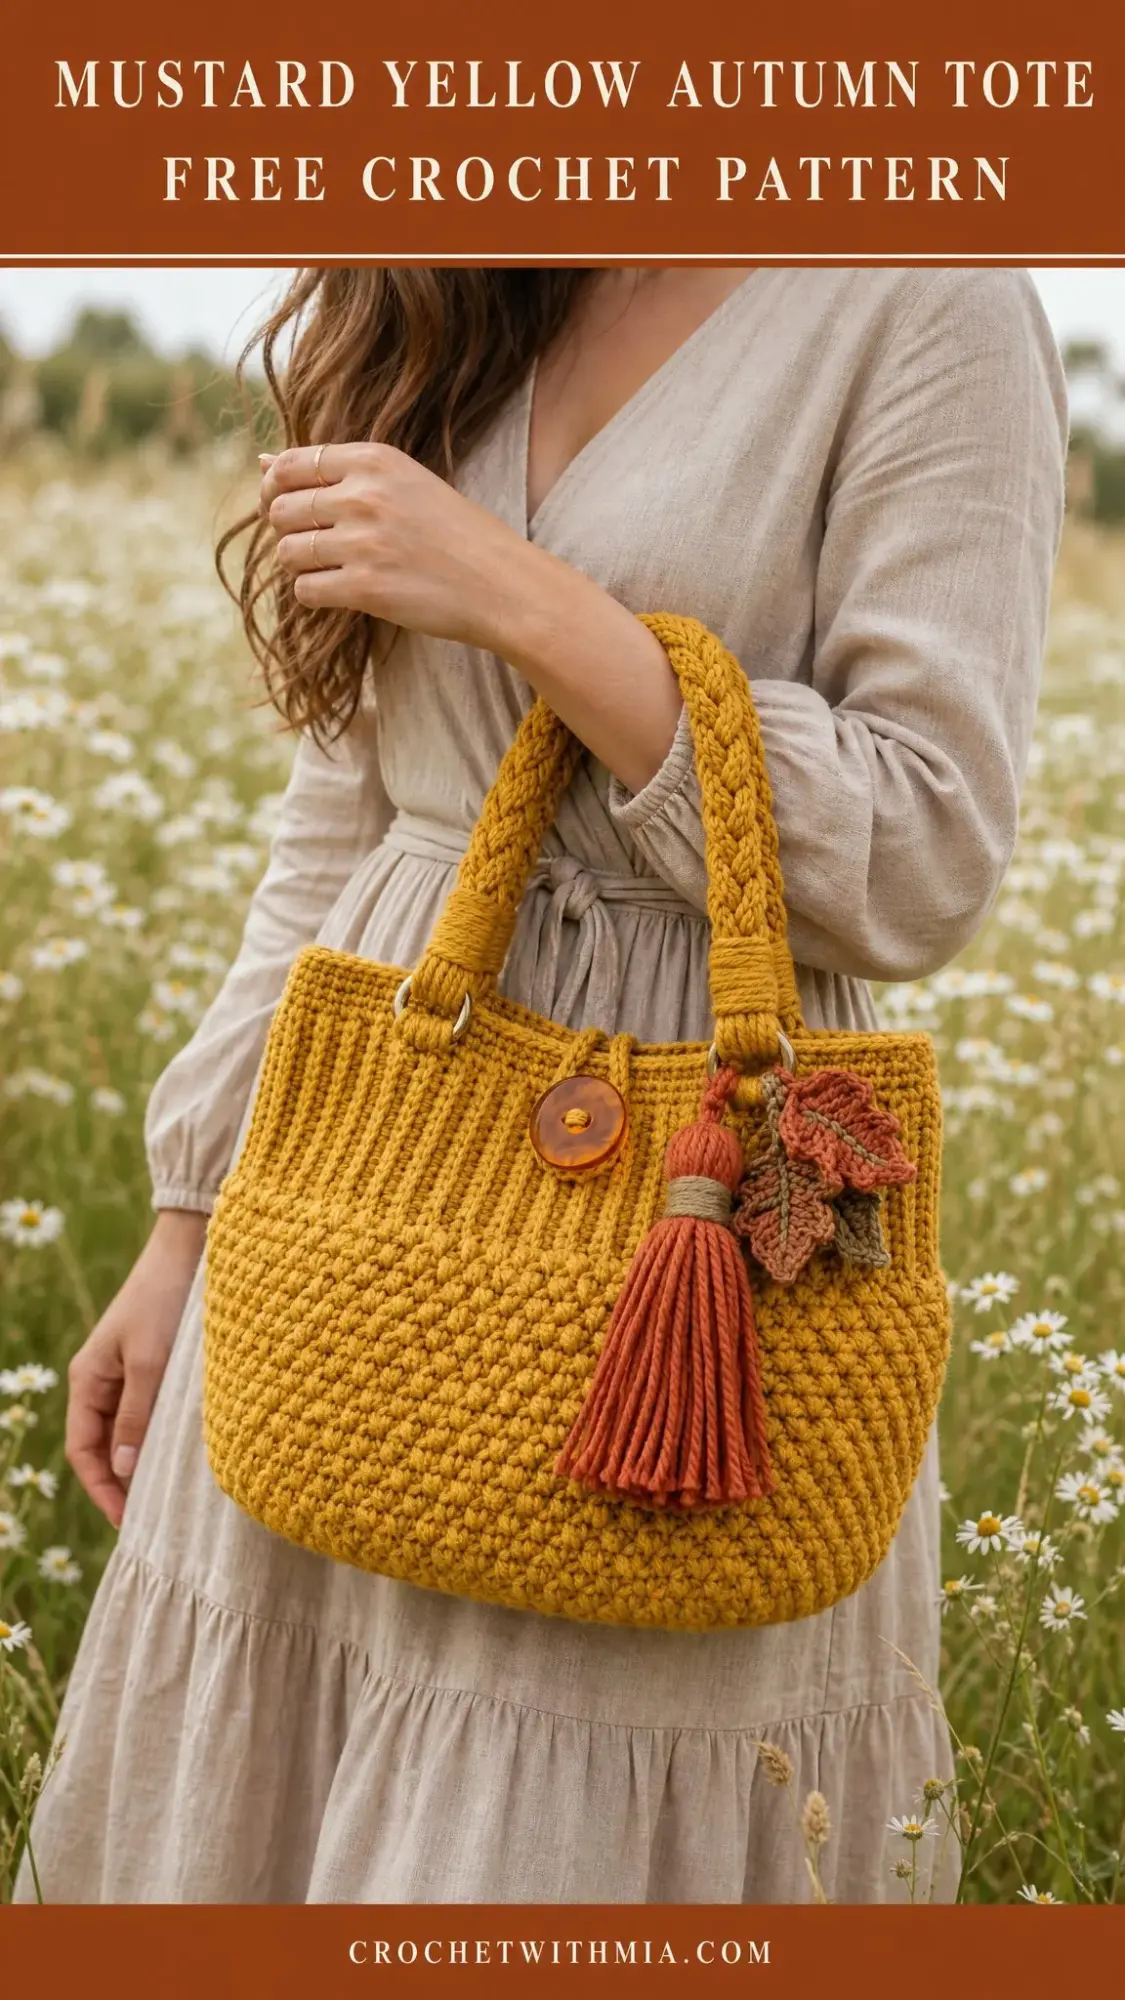
I hope you absolutely love making this Mustard Yellow Autumn Tote. It is such a satisfying project, from watching those bobbles pop into place to braiding those chunky handles. The finished bag is perfect for carrying your current crochet project, picking up produce at the market, or gifting to someone who appreciates handmade beauty.
If you make this tote, I would love to see it! Save this pattern to your Pinterest boards so you can find it easily when you are ready to start, and please leave a comment below to share how yours turned out. Happy crocheting!