
Granny squares sewn into a bag? That sounds complicated, right? I promise you, it is not nearly as intimidating as it looks.
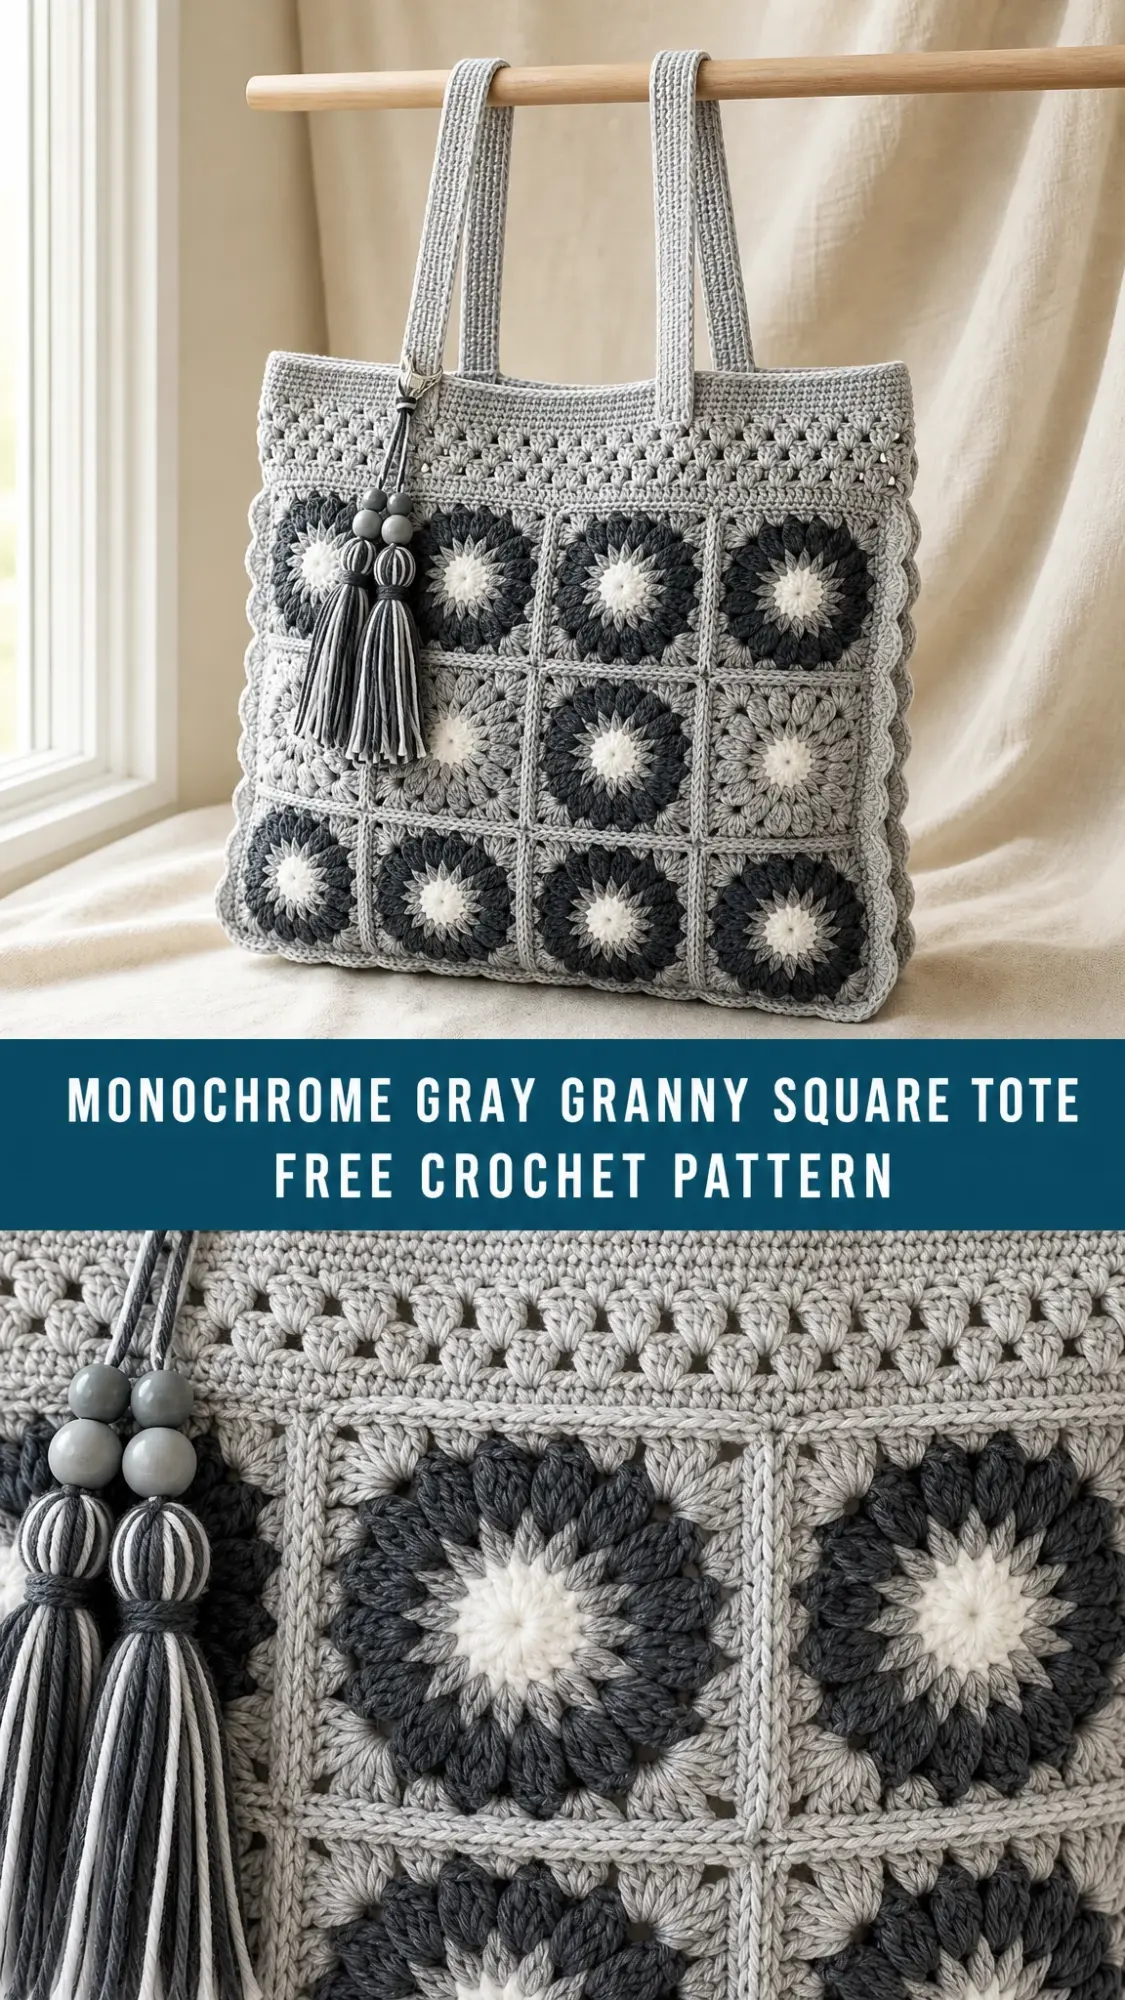
If you can crochet a basic granny square and whipstitch two pieces together, you already have every skill you need to make this stunning tote. The sunburst flower motif at the center of each square looks intricate, but it is simply single crochets and double crochets worked in a clever arrangement. Beginners who have completed a few small projects will find this totally doable, and more experienced crocheters will love how quickly the squares work up.
This Monochrome Gray Granny Square Tote breaks down into small, manageable pieces. You will make 24 individual squares, join them into two flat panels, add a pretty mesh band at the top, attach sturdy straps, and finish with a delicate scalloped edge. Each step is straightforward on its own. Stack them together, and you get a professional looking bag that people will not believe you made yourself.
Why You Will Love This Crochet Pattern
This tote bag hits the sweet spot between beautiful and practical. The sunburst flower squares create visual interest without being fussy. The monochrome gray palette keeps everything sophisticated and versatile, meaning this bag goes with everything in your closet.
The construction is smart. You work flat squares first, which is the easiest way to crochet. No awkward in the round bag shaping. No complicated decreases. Just simple squares that you seam together at the end.
It is roomy. The finished size is approximately 14 inches wide by 15 inches tall, with a 10 inch strap drop. That is big enough for books, a tablet, your lunch, a small project bag, and still have room for your wallet and keys.
Cotton yarn makes it durable. This tote can handle daily use, trips to the farmers market, library runs, and beach days. Cotton also washes beautifully and keeps its shape over time.
Materials You Will Need
Before you start, gather these supplies. Having everything ready makes the process so much smoother.
Yarn
You will need worsted weight or aran weight yarn (weight category 4) in four shades. The pattern calls for:
Suggested yarns: Paintbox Yarns Cotton Aran gives crisp stitch definition. Lion Brand 24/7 Cotton works up smooth and is perfect for totes. Scheepjes Catona held doubled creates a finer drape if you prefer something lighter.
Hook and Notions
Gauge
One square equals 3.5 inches / 9 cm when blocked, after completing all 4 rounds.
Gauge matters here because it determines your final bag size. If your squares come out larger, your tote will be bigger. If they come out smaller, it will be smaller. Make one test square first and block it before committing to all 24.
Abbreviations and Special Stitches
This pattern uses US crochet terms. If you are a UK crocheter, remember: US single crochet (sc) equals UK double crochet (dc), US double crochet (dc) equals UK treble crochet (tr), and US half double crochet (hdc) equals UK half treble crochet (htr).
Standard Abbreviations:
Special Stitches
Petal: Work (sc, 3 dc, sc) all into the same chain 2 space. This creates one raised flower petal.
Corner: Work (3 dc, ch 2, 3 dc) all in the same stitch or space.
V-stitch (Vst): Work (dc, ch 1, dc) in the same stitch or space.
Pattern Notes
Please read these before starting:
This pattern is designed to help you create a similar crochet project, but individual results may vary depending on your yarn, tension, hook size, and finishing technique. You may need to make small adjustments to achieve the closest possible result to the finished project shown.
The Sunburst Square
Make 24 squares total. Work Rounds 1 and 2 in Cream, Round 3 in Charcoal (for 12 squares) or Medium Gray (for 12 squares), and Round 4 in Light Gray.
Round 1 (Cream)
MR, ch 1, 12 sc into ring, join with sl st to first sc. (12 sc)
Round 2 (Cream)
Ch 1, sc in same st, ch 2, sc in next st, ch 2; rep from around, join to first sc. Fasten off Cream. (12 sc and 12 ch-2 spaces)
Round 3 (Charcoal or Medium Gray)
Join in any ch-2 sp, ch 1, work a Petal (sc, 3 dc, sc) in each ch-2 sp around, join to first sc. Fasten off. (12 petals)
Round 4 (Light Gray)
Join in the center dc of any petal. This becomes a corner. Ch 3, (2 dc, ch 2, 3 dc) in same st [first corner], dc in center dc of next 2 petals, (3 dc, ch 2, 3 dc) in center dc of next petal [corner]; rep from twice more, dc in center dc of last 2 petals, join to top of beg ch-3. Fasten off. (32 dc and 4 corner spaces, which equals 8 dc per side)
Tip: Weave in ends as you go. Trust me on this one. 24 squares creates a lot of tails to deal with if you save them all for the end.
Joining the Squares
Arrange your squares into two panels (front and back). Each panel is 4 squares wide by 3 squares tall, which equals 12 squares per panel. Alternate charcoal and medium gray petals like a checkerboard so no two matching colors touch.
How to Join
Hold two squares with wrong sides together. Using Light Gray and a tapestry needle, whipstitch through the back loops along one edge, matching stitch for stitch. Each edge has the same count, so they line up exactly. (8 stitches per seam)
Build rows first: Join 4 squares side by side into a row. Make 3 rows. Then join the three rows together to complete one panel. Repeat for the second panel.
Keep it square: Lay the joined panel flat and steam block lightly. Flat panels make the mesh band and side seams far easier to work evenly.
Upper Body and Mesh Band
The two panels are first seamed at the sides and bottom, then the open top is worked in continuous rounds for the airy granny mesh band.
Seaming the Panels
With wrong sides together, whipstitch the front and back panels along both side edges and across the bottom with Light Gray, leaving the top open. Turn right side out.
Set-up Round (Light Gray)
Join at a top corner, sc evenly around the entire top opening, working in continuous rounds. Adjust to a multiple of 3. Join with sl st. (120 sc)
Round 1 (Mesh)
Ch 3, 2 dc in same st, ch 1, skip 2 sc, 3 dc in next sc, ch 1; rep from around, skip last 2 sc, join to top of beg ch-3. (40 dc-groups and 40 ch-1 spaces)
Rounds 2 through 5 (Mesh)
Sl st into first ch-1 sp, ch 3, 2 dc in same sp, ch 1, 3 dc in next ch-1 sp, ch 1; rep from around, join to top of beg ch-3. (40 dc-groups each round)
Customization tip: Work more or fewer mesh rounds to make the tote taller or shorter. Each round adds roughly 0.75 inches / 2 cm.
Top Band and Handles
Top Band
Round 1 (Light Gray): Ch 1, sc evenly around the top of the mesh band, join to first sc. (120 sc)
Rounds 2 through 4: Ch 1, sc in each st around, join. (120 sc each round) Fasten off after Round 4.
Straps (Make 2)
Foundation: With Light Gray, ch 101.
Row 1: Sc in 2nd ch from hook and in each ch across, turn. (100 sc)
Rows 2 through 6: Ch 1, sc in each st across, turn. (100 sc each row) Fasten off, leaving a long tail.
For extra sturdy straps: Fold the strip in half lengthwise and whipstitch the long edge closed before attaching. This doubles the thickness and prevents stretching.
Placing the Straps
On the front top band, count in and pin the two strap ends about 4 inches / 10 cm apart, centered. Mirror the placement on the back. Stitch each end down firmly with several passes through the band. Drop should measure about 10 inches / 25 cm.
Scalloped Edge and Assembly
A delicate scallop trims the two outer side seams, echoing the curve of the petals.
Scallop Edging (Light Gray)
Join at the base of one side seam. Skip 2 sts, 5 dc in next st, skip 2 sts, sl st in next st; rep from up the side seam to the top band. Fasten off. Repeat on the opposite side seam. (one 5-dc shell per repeat)
Final Assembly
Beaded Tassel Trim
The signature flourish is a cluster of three soft tassels topped with wooden beads, hung from one strap.
Step 1: Make 3 Tassels
Wrap yarn around a 5 inch / 13 cm piece of cardboard about 30 times. Make one in Charcoal, one in Medium Gray, and one in Light Gray. Tie a strand tightly through the top loop, cut the bottom loop, then wrap and tie a neck about 0.75 inches / 2 cm down. Trim the ends even.
Step 2: Add the Beads
Thread each tassel’s top tie through a wooden bead so the bead sits above the neck. A small crochet covered bead (sc around the bead) gives the soft look shown in the photos.
Step 3: Hang the Cluster
Gather the three top ties together, knot, and loop them around the base of one strap so the tassels hang at slightly different lengths.
Care Instructions
Size Customization Tips
Want to make this tote bigger or smaller? Here are your options:
Make it yours: Swap the charcoal and medium gray petals for any two tone palette. Dusty rose and mauve, sage and olive, or navy and denim all look gorgeous with cream centers and a neutral frame.
Skill Level and Time Estimate
This crochet pattern is rated intermediate. You should be comfortable with basic stitches, working in the round, joining motifs, and following a multi step pattern.
Time estimate: 14 to 20 hours total. The squares go quickly once you get into a rhythm, and the finishing steps are straightforward.
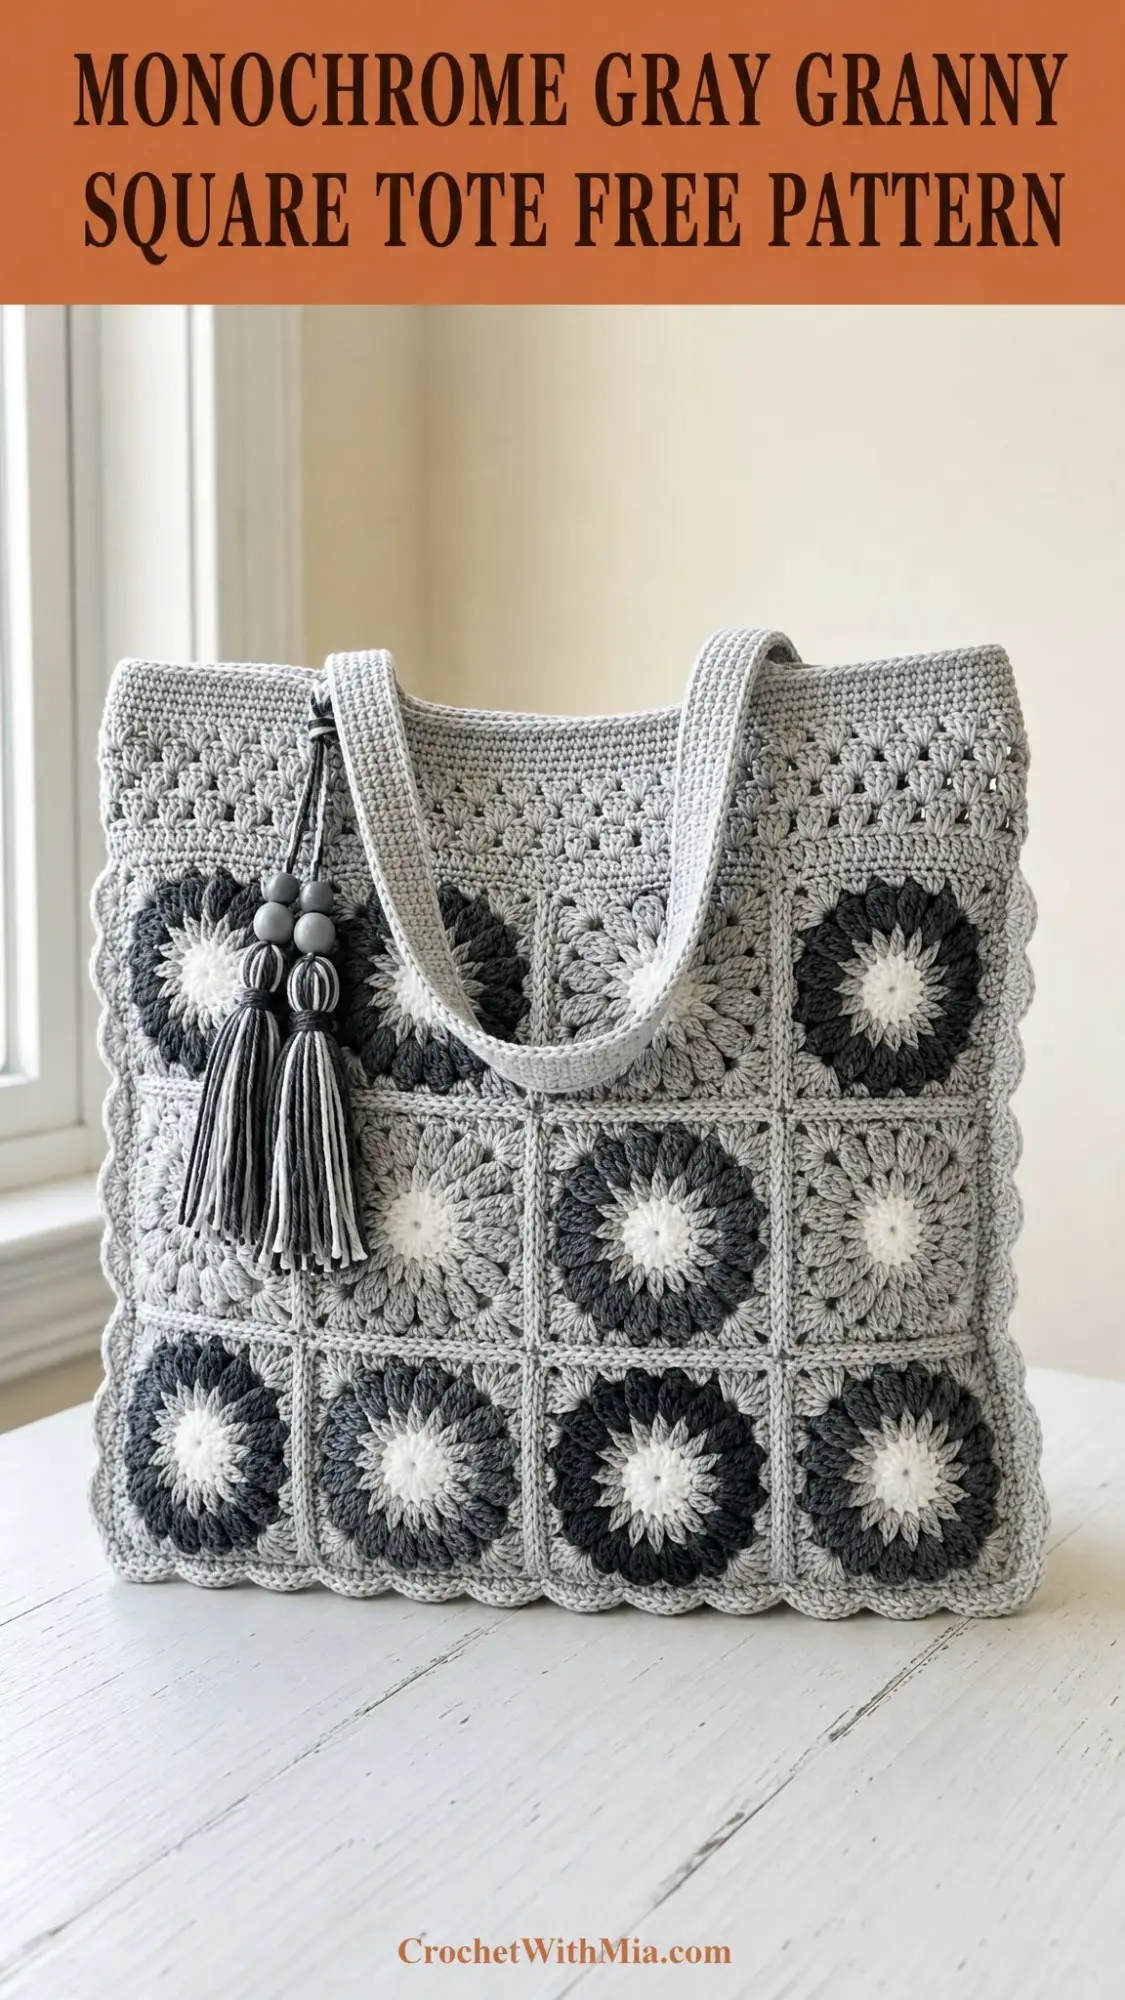
Final Thoughts on the Monochrome Gray Granny Square Tote
This granny square tote crochet pattern proves that classic techniques never go out of style. The sunburst flower motif gives each square personality, while the monochrome gray palette keeps everything cohesive and modern. It is the kind of bag you will reach for every single day.
I love that this project breaks down into small pieces. You can crochet a few squares while watching TV, join them on a weekend afternoon, and have a finished bag by the end of the week. It is satisfying without being overwhelming.
Whether you make this for yourself or as a gift, I hope you enjoy every stitch. The step by step instructions in this tutorial walk you through everything from the first magic ring to the final tassel. Take your time, trust the process, and you will end up with something beautiful.
Thank you so much for choosing this pattern! I truly appreciate you being here. If you make this tote, I would absolutely love to see it. Tag me on Instagram or share a photo on Facebook so I can cheer you on. Happy hooking!
If you love this Monochrome Gray Granny Square Tote pattern, save it to your Pinterest boards so you can find it when you are ready to start. And please drop a comment below if you make one. I read every single comment and love hearing how your projects turn out!