
My best friend called me in a panic three weeks before her baby shower. She had seen a lavender granny square cardigan on Pinterest and desperately wanted one for her little girl. "Can you make it?" she asked. "The nursery is all purples and whites." I told her I would figure it out, hung up the phone, and immediately started sketching layouts on scrap paper.
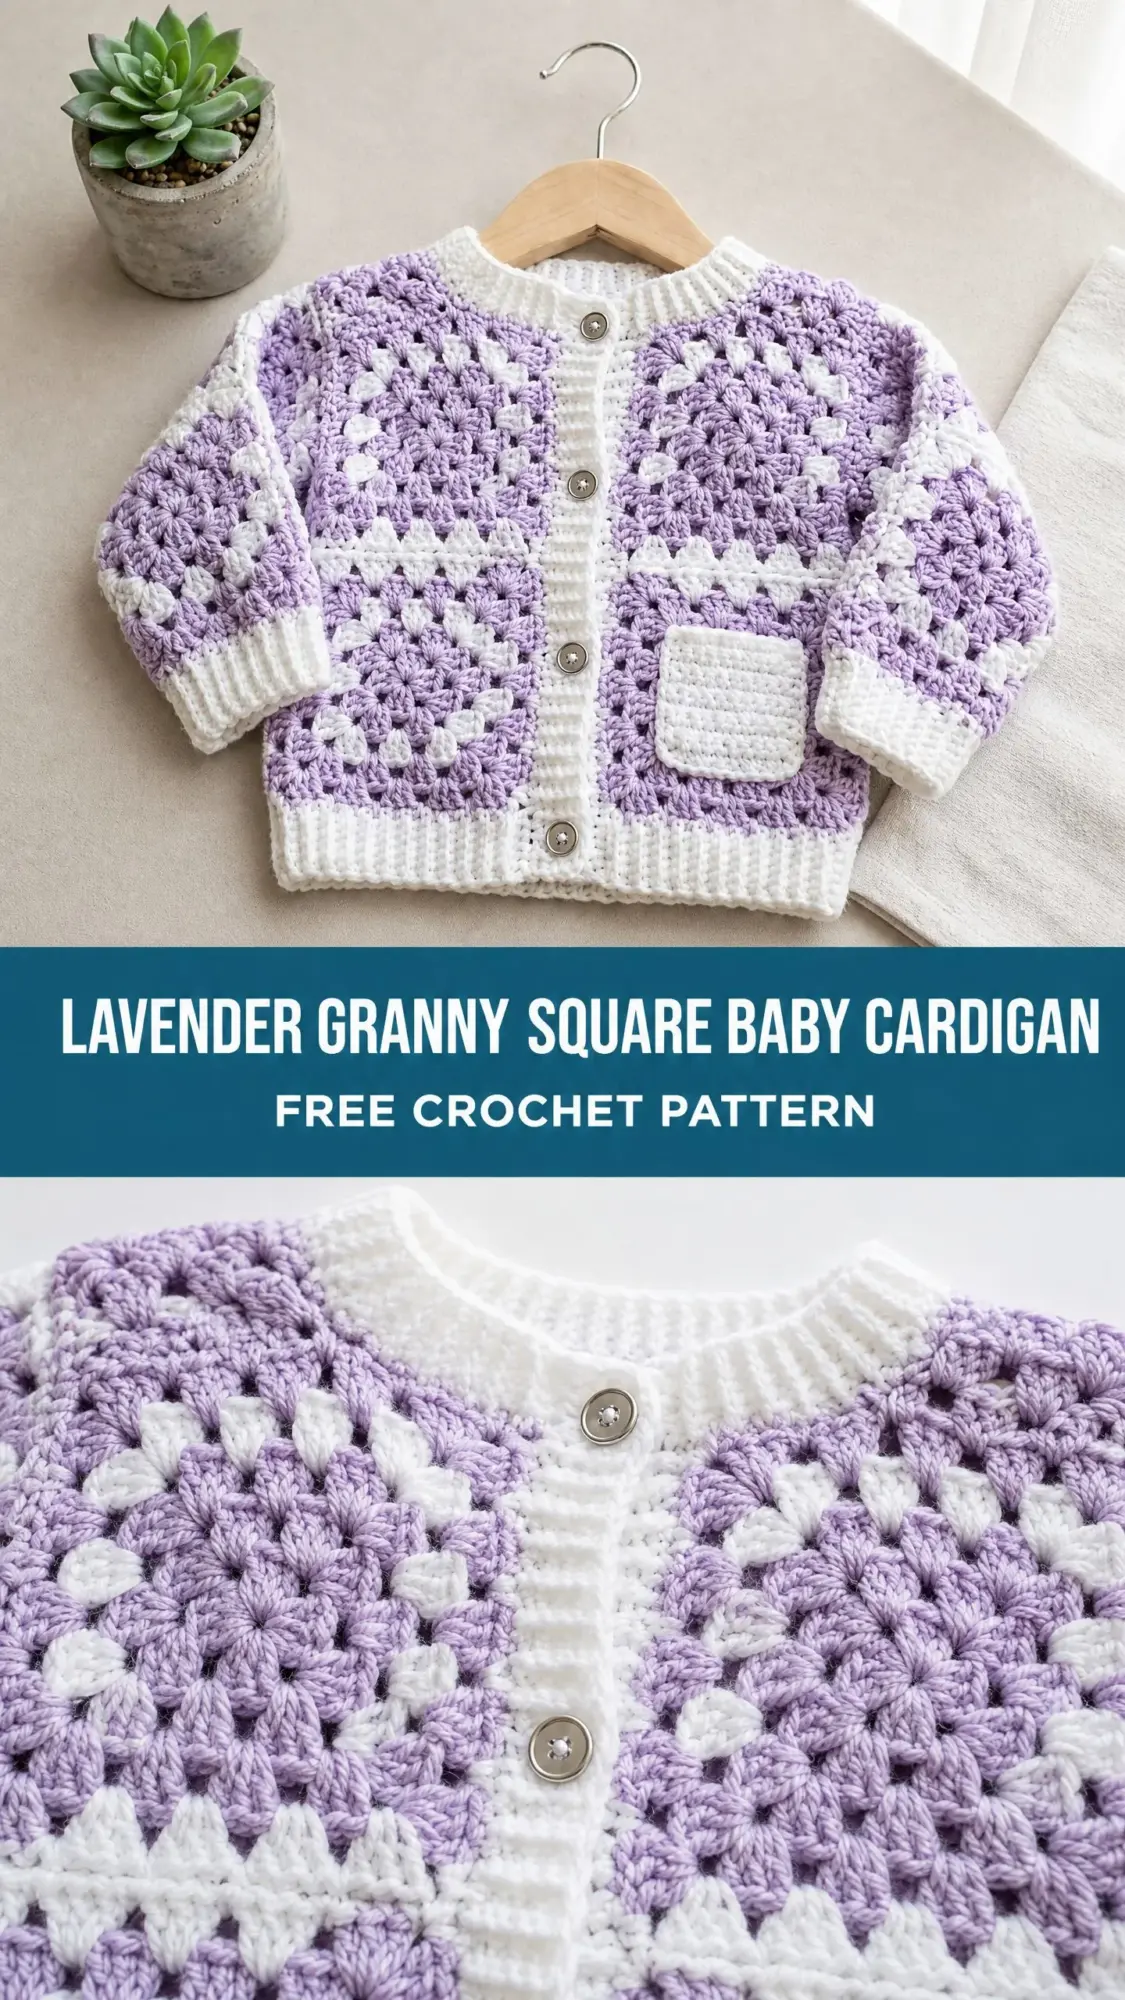
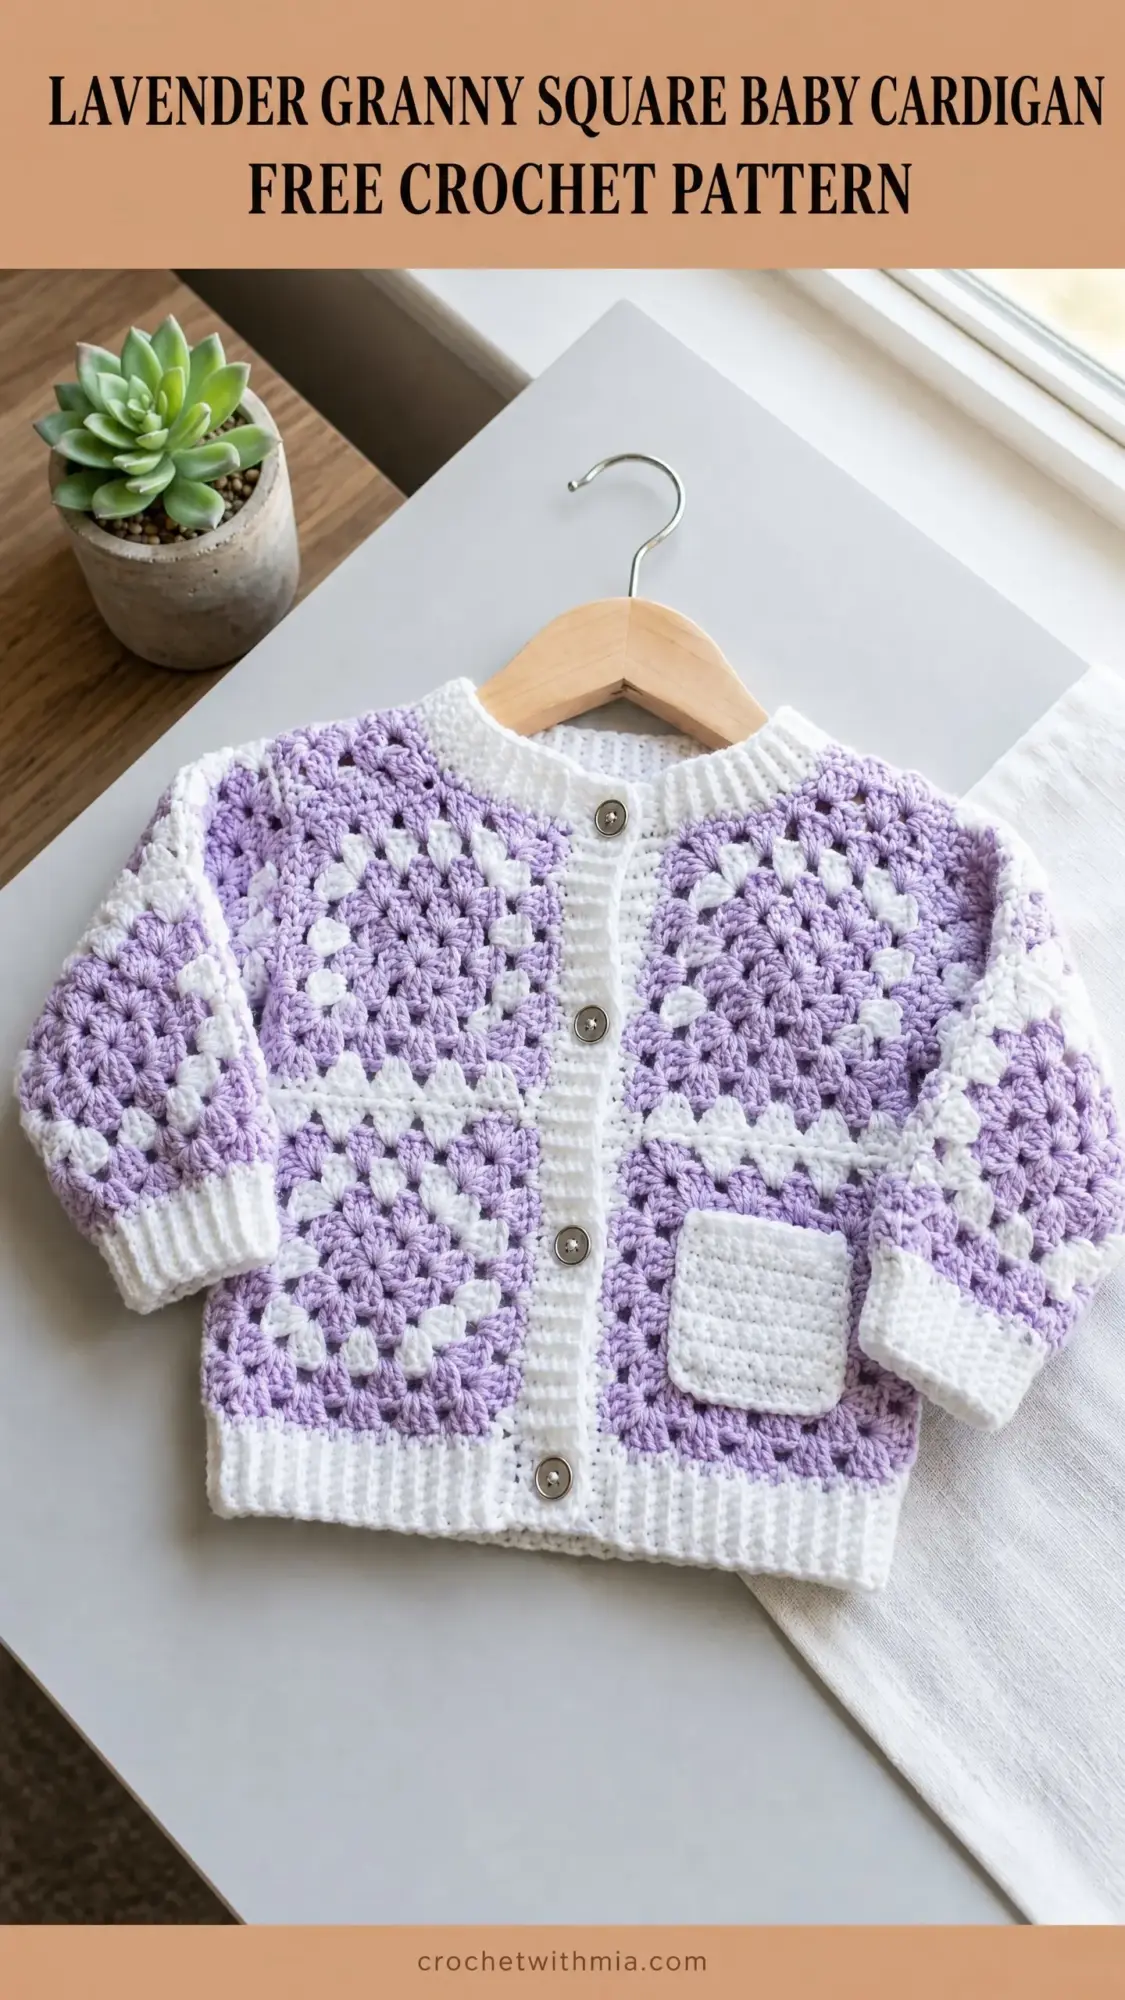
That cardigan turned out so beautifully that I wore out three pages of my notebook perfecting the construction method. The boxy little silhouette, the sweet patch pocket, the neat ribbed edges. It was everything a handmade baby sweater should be.
Now I am sharing the full pattern with you so you can make one too. Whether you are preparing for your own baby shower gift or just want a satisfying project that combines classic granny squares with modern finishing techniques, this cardigan delivers. Let me walk you through every single step.
Why This Baby Cardigan Pattern Works So Well
This crochet pattern uses classic granny squares joined together to create a relaxed, slightly oversized baby cardigan. The construction is straightforward once you understand the layout. You make 27 squares total, join them into flat panels, set in tube sleeves, then add all the polished finishing touches.
The color scheme keeps things simple and stunning. Soft lavender serves as your main color for the centers of each square, while crisp white frames everything with clean borders and ribbed edges. The result looks sophisticated without being fussy.
Skill level sits at intermediate. You need to be comfortable making granny squares, joining as you go, working ribbed borders, and picking up stitches along edges. Nothing here is complicated, but neat joining and consistent tension make all the difference in your finished piece.
Time estimate runs between 12 and 18 hours for an experienced crocheter. Spread it across several evenings and you will have a gorgeous gift ready in about two weeks.
Finished Measurements
This baby cardigan fits approximately 6 to 12 months with a relaxed fit.
Materials You Will Need
Yarn: Worsted weight (category 4)
Hooks:
Notions:
Yarn Suggestions
Lion Brand Pound of Love works beautifully here. It is 100% acrylic, machine washable, and comes in both lilac and white. Perfect for baby items.
Paintbox Yarns Simply DK held doubled creates excellent stitch definition. The color range includes a near-perfect lavender shade.
Cascade 220 Superwash offers gorgeous drape if you prefer natural fibers. It is machine washable, which matters for baby garments.
Any smooth worsted weight yarn that meets gauge will work. Avoid fuzzy or highly textured yarns since they obscure the granny square motif.
Gauge (Do Not Skip This)
For granny squares: One completed 4-round square measures 4 inches x 4 inches (10 cm x 10 cm) after blocking.
This measurement is non-negotiable. Every 0.25 inch of deviation translates to approximately 1 inch of deviation across your finished cardigan.
For ribbing: 16 single crochet (sc) x 18 rows = 4 inches x 4 inches (10 cm x 10 cm) on F-5 hook, working in back loop only.
Always make a gauge swatch before beginning. Go up a hook size if your square is too small, down if it is too large.
Abbreviations and Stitch Definitions
Special Stitches
Granny Cluster: Work 3 double crochets into the same space. This is your basic building block for every square.
Standing Double Crochet: Make a slip knot, place on hook, yarn over, insert hook into designated space, pull up a loop, yarn over and pull through 2 loops, yarn over and pull through remaining 2 loops. This starts a new round without a messy turning chain.
BLO Single Crochet Ribbing: Insert hook under only the back loop of the next stitch, yarn over, pull up a loop, yarn over, pull through both loops. Working BLO throughout creates stretchy horizontal ridges.
Pattern Notes Before You Begin
1. The cardigan body uses 4-round granny squares measuring 4 inches each. The back needs 10 squares (5 wide x 2 tall). Each front panel needs 4 squares (2 wide x 2 tall). Each sleeve needs 4 squares (2 wide x 2 tall) joined into a tube. One additional square becomes the pocket. Total: 27 squares.
2. Squares join using the join-as-you-go method on the final round. Full instructions appear in the Assembly section.
3. Color sequence for each square: Rounds 1, 2, and 3 use MC (lavender). Round 4 uses CC (white).
4. Turning chains: In ribbing sections, chain 1 at the start of each row. This chain 1 does NOT count as a stitch.
5. Weave in all ends on the wrong side of each square before assembly. Trust me, this saves headaches later.
How to Crochet the Granny Squares (Make 27)
Using MC, make a magic ring. If you prefer, chain 4 and join with a slip stitch to form a ring instead.
Round 1 (MC): Ch 3 (counts as first dc), work 2 dc into ring, ch 2, (work 3 dc into ring, ch 2) 3 times, join with sl st to top of beginning ch-3. Fasten off MC. (4 clusters, 4 ch-2 corner spaces)
Round 2 (MC): Join MC with standing dc in any ch-2 corner sp, work 2 more dc in same sp, ch 2, work 3 dc in same sp, ch 1, (work 3 dc in next ch-2 corner sp, ch 2, work 3 dc in same sp, ch 1) 3 times, join with sl st to top of first standing dc. Fasten off MC. (8 clusters, 4 ch-2 corner spaces, 4 ch-1 side spaces)
Round 3 (MC): Join MC with standing dc in any ch-2 corner sp, work 2 more dc in same sp, ch 2, work 3 dc in same sp, ch 1, work 3 dc in next ch-1 sp, ch 1, (work 3 dc in next ch-2 corner sp, ch 2, work 3 dc in same sp, ch 1, work 3 dc in next ch-1 sp, ch 1) 3 times, join with sl st to top of first standing dc. Fasten off MC. (12 clusters, 4 ch-2 corner spaces, 8 ch-1 side spaces)
Round 4 (CC, border round): Join CC with standing dc in any ch-2 corner sp, work 2 more dc in same sp, ch 2, work 3 dc in same sp, ch 1, (work 3 dc in next ch-1 sp, ch 1) twice, (work 3 dc in next ch-2 corner sp, ch 2, work 3 dc in same sp, ch 1, (work 3 dc in next ch-1 sp, ch 1) twice) 3 times, join with sl st to top of first standing dc. Fasten off CC. (16 clusters, 4 ch-2 corner spaces, 12 ch-1 side spaces)
Checkpoint: Each completed square should measure 4 inches x 4 inches after light blocking. If yours does not match, adjust your hook size and try again.
Join-As-You-Go Method
When working Round 4 of a new square that joins to an existing square, work clusters along shared sides like this:
Work the cluster normally until the last yarn-over pull-through. Drop the loop from your hook momentarily. Insert hook from front through the corresponding ch-1 or ch-2 space on the adjacent finished square. Pick up the dropped loop and pull through. Continue working normally.
For corner ch-2 spaces shared between two squares: ch 1, sl st into the corner ch-2 of the adjacent square, ch 1.
For corners shared by three or four squares: ch 1, sl st through all existing shared corner spaces, ch 1.
Pro tip: Practice this join on two spare squares before assembling your actual garment pieces.
Assembly Layout
Back Panel
Arrange 10 squares in a 5-column by 2-row grid. Join all squares using JAYG on their shared sides. The back panel measures approximately 20 inches wide x 8 inches tall.
Front Panels
Arrange 4 squares in a 2-column by 2-row grid for each front. Join using JAYG. Each front panel measures approximately 8 inches wide x 8 inches tall.
Shoulder Seams
Hold back panel and right front panel with wrong sides together. Using CC and yarn needle, whipstitch or sl st the top 8 inches (2 squares) of the right edge of the back to the top edge of the right front panel. Repeat for left side. The center 4 inches of the back top edge remains open as the back neckline.
Checkpoint: After shoulder seams, the armhole opening on each side measures approximately 8 inches in depth.
Sleeve Construction (Make 2)
Step 1: Make 4 squares. Join them into a 2×2 flat panel using JAYG.
Step 2: Fold the panel so the 2-square-tall edges meet. Using CC, sl st the short side edges together to form a tube. This seam runs along the underarm.
Step 3: Match the top open edge of the sleeve tube to the armhole opening. With wrong sides together, sl st through both layers around the full armhole using CC.
Repeat for second sleeve.
Ribbed Hem
With RS facing and F-5 hook, join CC with sl st to the bottom-right corner of the right front panel.
Row 1 (RS): Ch 1, work 1 sc into each dc and 1 sc into each ch-1 sp across the bottom edge of both fronts and back. (80 sc)
Row 2 (WS): Ch 1, turn, sc BLO in each sc across. (80 sc)
Repeat Row 2 until ribbing measures 1.5 inches (4 cm).
Final Row: Ch 1, turn, sl st in each st across. Fasten off.
Cuff Ribbing (Make 2)
With F-5 hook and CC, join to the bottom edge of one sleeve tube.
Setup Row: Ch 1, work 1 sc into each dc and 1 sc into each ch-1 sp around the bottom opening. (32 sc)
Row 1 (RS): Ch 1, sc BLO in each sc. (32 sc)
Row 2 (WS): Ch 1, turn, sc BLO in each sc. (32 sc)
Repeat Row 2 until cuff measures 1.5 inches. Seam the short edges together. Fasten off.
Neckline Ribbing
With F-5 hook and CC, RS facing, join CC at top-right corner of right front (at shoulder seam).
Setup Round: Ch 1, work sc evenly around the entire neckline opening. (48 sc)
Row 1: Ch 1, turn, sc BLO in each sc. (48 sc)
Row 2: Ch 1, turn, sc BLO in each sc. (48 sc)
Repeat Row 2 until neckline ribbing measures 1 inch. Fasten off.
Button Band (Right Front)
With F-5 hook and CC, RS facing, join CC at bottom-right corner of right front hem.
Row 1 (RS): Ch 1, work sc evenly up the entire front edge. (40 sc)
Rows 2-5: Ch 1, turn, sc BLO in each sc. (40 sc)
Fasten off.
Buttonhole Band (Left Front)
With F-5 hook and CC, RS facing, join CC at top-left corner of neckline ribbing.
Row 1 (RS): Ch 1, work sc evenly down the entire front edge. (40 sc)
Row 2 (WS): Ch 1, turn, sc BLO in each sc. (40 sc)
Row 3 (Buttonhole Row, RS): Ch 1, turn, sc BLO in first 3 sc, (ch 2, sk 2 sc, sc BLO in next 6 sc) 4 times, ch 2, sk 2 sc, sc BLO in last 3 sc. (5 buttonholes created)
Row 4 (WS): Ch 1, turn, sc BLO in each sc and 2 sc into each ch-2 buttonhole space. (40 sc)
Row 5 (RS): Ch 1, turn, sc BLO in each sc. (40 sc)
Fasten off.
Front Pocket
Make 1 additional granny square following the instructions above.
Pocket Edging: With F-5 hook and CC, work 1 row of sc around 3 sides (both sides and bottom), working 3 sc into each corner. Leave top edge unworked. Fasten off.
Top Edge: Join CC at top-right corner. Ch 1, sc BLO across the top edge (approximately 12 sc). Work 3 more rows of sc BLO to create a ribbed top. Fasten off.
Placement: Pin pocket to lower right front, centered horizontally, with the bottom approximately 0.5 inch above hem ribbing. Whipstitch sides and bottom in place, leaving the ribbed top open.
Button Attachment
Mark 5 button positions on the button band to align with buttonholes. The topmost button sits at the neckline, the bottommost just above the hem. Space remaining buttons evenly. Sew each button securely using doubled CC or matching thread.
Finishing and Blocking
Weave in all remaining ends on the wrong side, working each tail in at least two directions.
Wet blocking gives the best results: Submerge the cardigan in cool water, gently press out excess in a clean towel (do not wring), lay flat on a blocking mat, pin to finished dimensions, and allow to dry completely.
For acrylic yarns, steam blocking works well. Hold a steam iron about 1 inch above the fabric without touching it. Pin flat while cooling.
Care Instructions
Machine wash on gentle cycle in cool water if using acrylic or superwash wool. Lay flat to dry. Store flat or folded rather than on a hanger to preserve shoulder shape.
Size Customization Tips
For newborn (16 inch chest): Use 8 squares for back (4 wide x 2 tall), 4 for each front, and 4 for each sleeve. Reduce ribbing stitch counts proportionally. Total: 25 squares.
For 12-24 months (22 inch chest): Add one column to the back (6 wide x 2 tall = 12 squares). Keep fronts and sleeves the same.
For longer body: Add a third row of squares before working hem ribbing.
For longer sleeves: Add a third row to each sleeve tube before cuffs.
This lavender granny square baby cardigan crochet pattern combines nostalgic granny square charm with polished, modern finishing details. The construction teaches you valuable skills in joining, picking up stitches, and creating professional ribbed edges. Every baby deserves something handmade with love, and this cardigan delivers that in spades.
Thank you so much for choosing this pattern for your next project. I genuinely hope you love making it as much as I loved designing it. If you finish one, I would absolutely love to see your version. Tag me on Instagram or share in my Facebook group.
If this pattern inspired you, save it to your Pinterest boards so you can find it when you are ready to cast on. And please drop a comment below if you make one. I read every single one and your finished projects make my whole day brighter. Happy crocheting!