
I pulled this pattern from my collection a few weeks ago, and it instantly brought back memories of sunny afternoons spent crocheting on my porch. The Golden Honey Granny Square Bag started as a simple idea in my notebook: what if I could capture the warmth of late summer in a tote? I wanted something that looked like bottled sunshine, with those gorgeous golden puff stitches bursting out like little sunflowers against a creamy grid.
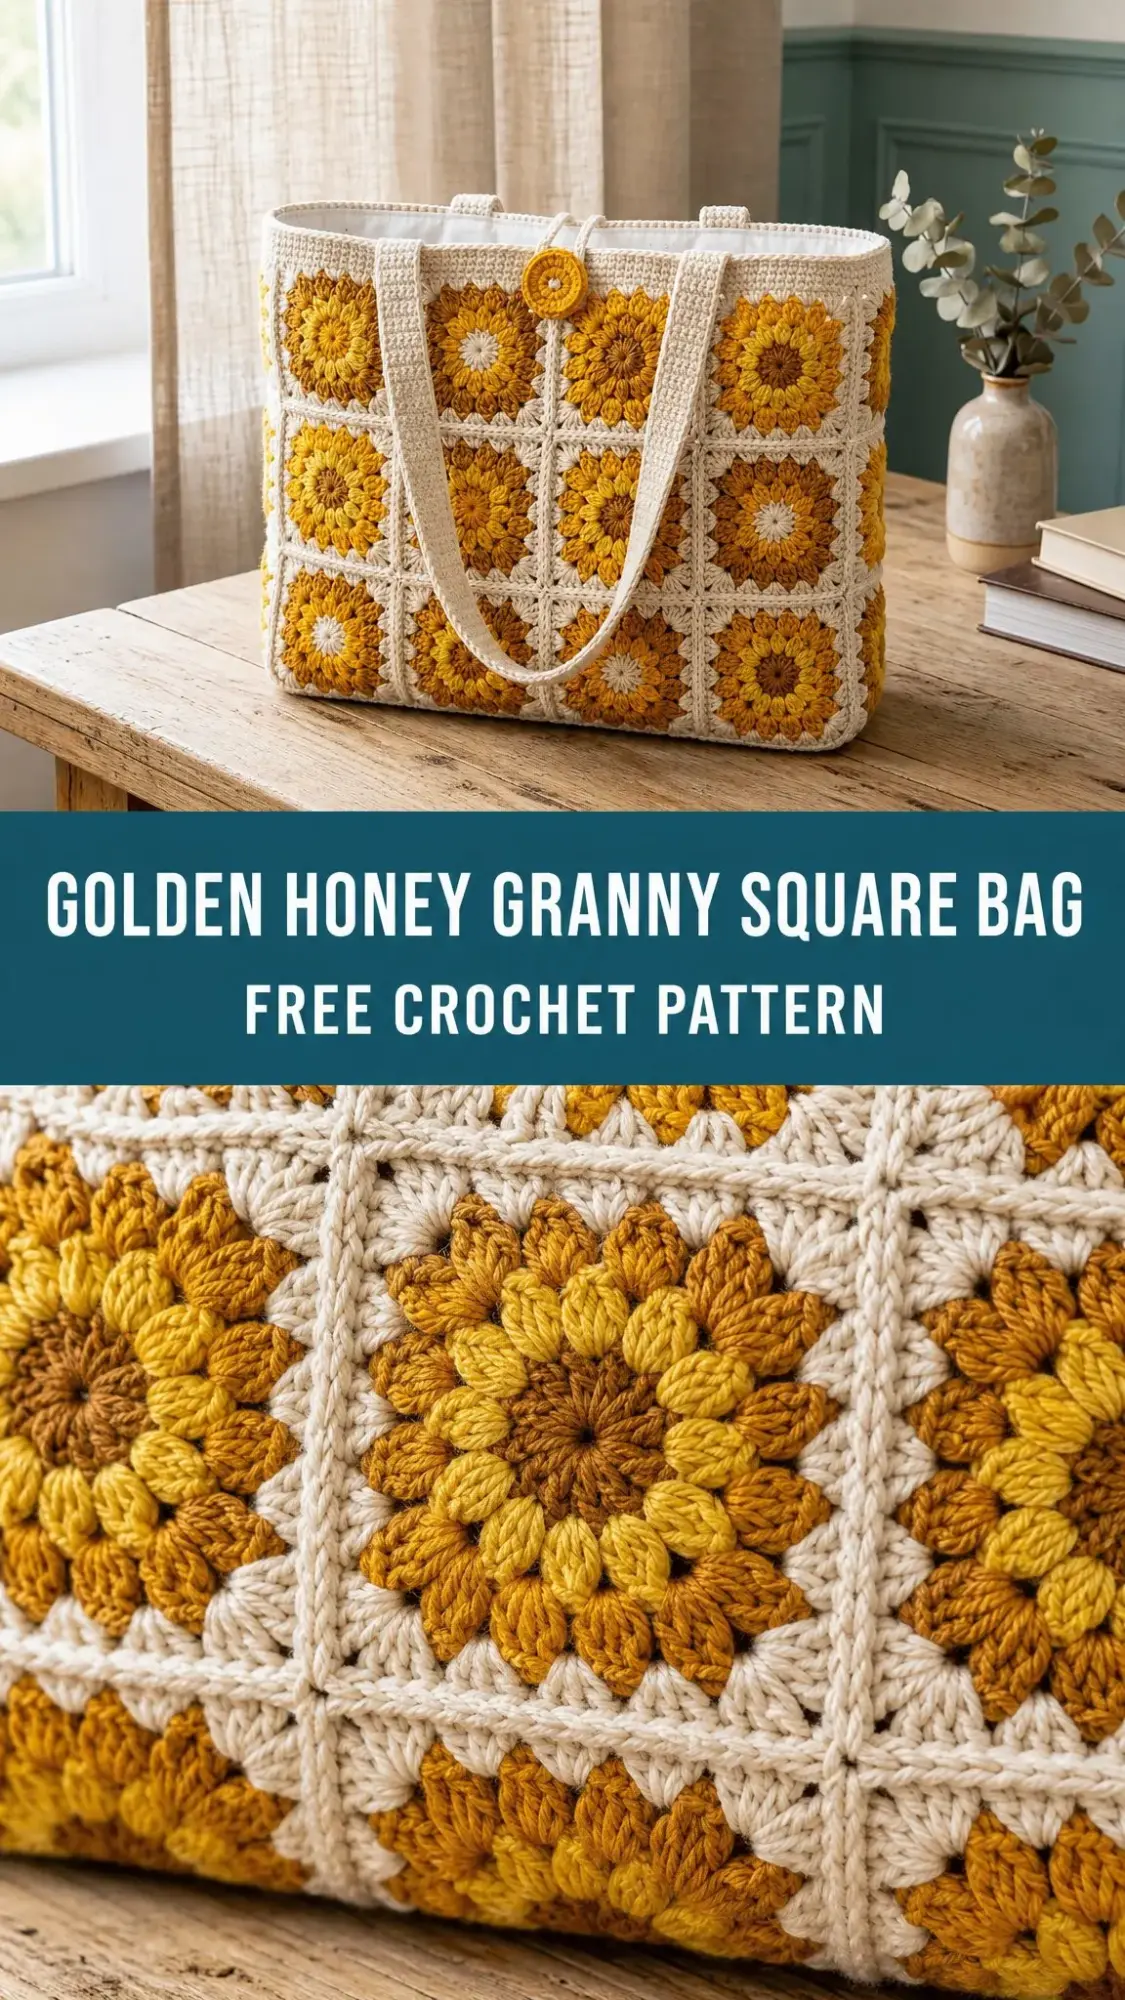
This bag has been sitting in my "someday" pile for longer than I care to admit. But when I finally sat down and stitched up the first square, I remembered exactly why I fell in love with this design. Those puffy golden petals are so satisfying to make, and watching the squares multiply into a full panel is genuinely addictive.
Whether you are looking for a roomy market tote, a statement bag for summer outings, or a handmade gift that feels extra special, this pattern delivers. It is perfect for confident beginners ready to tackle their first big project. Let me walk you through everything you need to know.
Why You Will Love This Crochet Bag Pattern
The Golden Honey Granny Square Bag is built block by block from thirty sunburst granny squares. Twelve squares form the front panel, twelve form the back, and three squares create each side gusset. The construction is straightforward once you master the individual square, and the repetitive nature makes it ideal for mindless crocheting while watching your favorite shows.
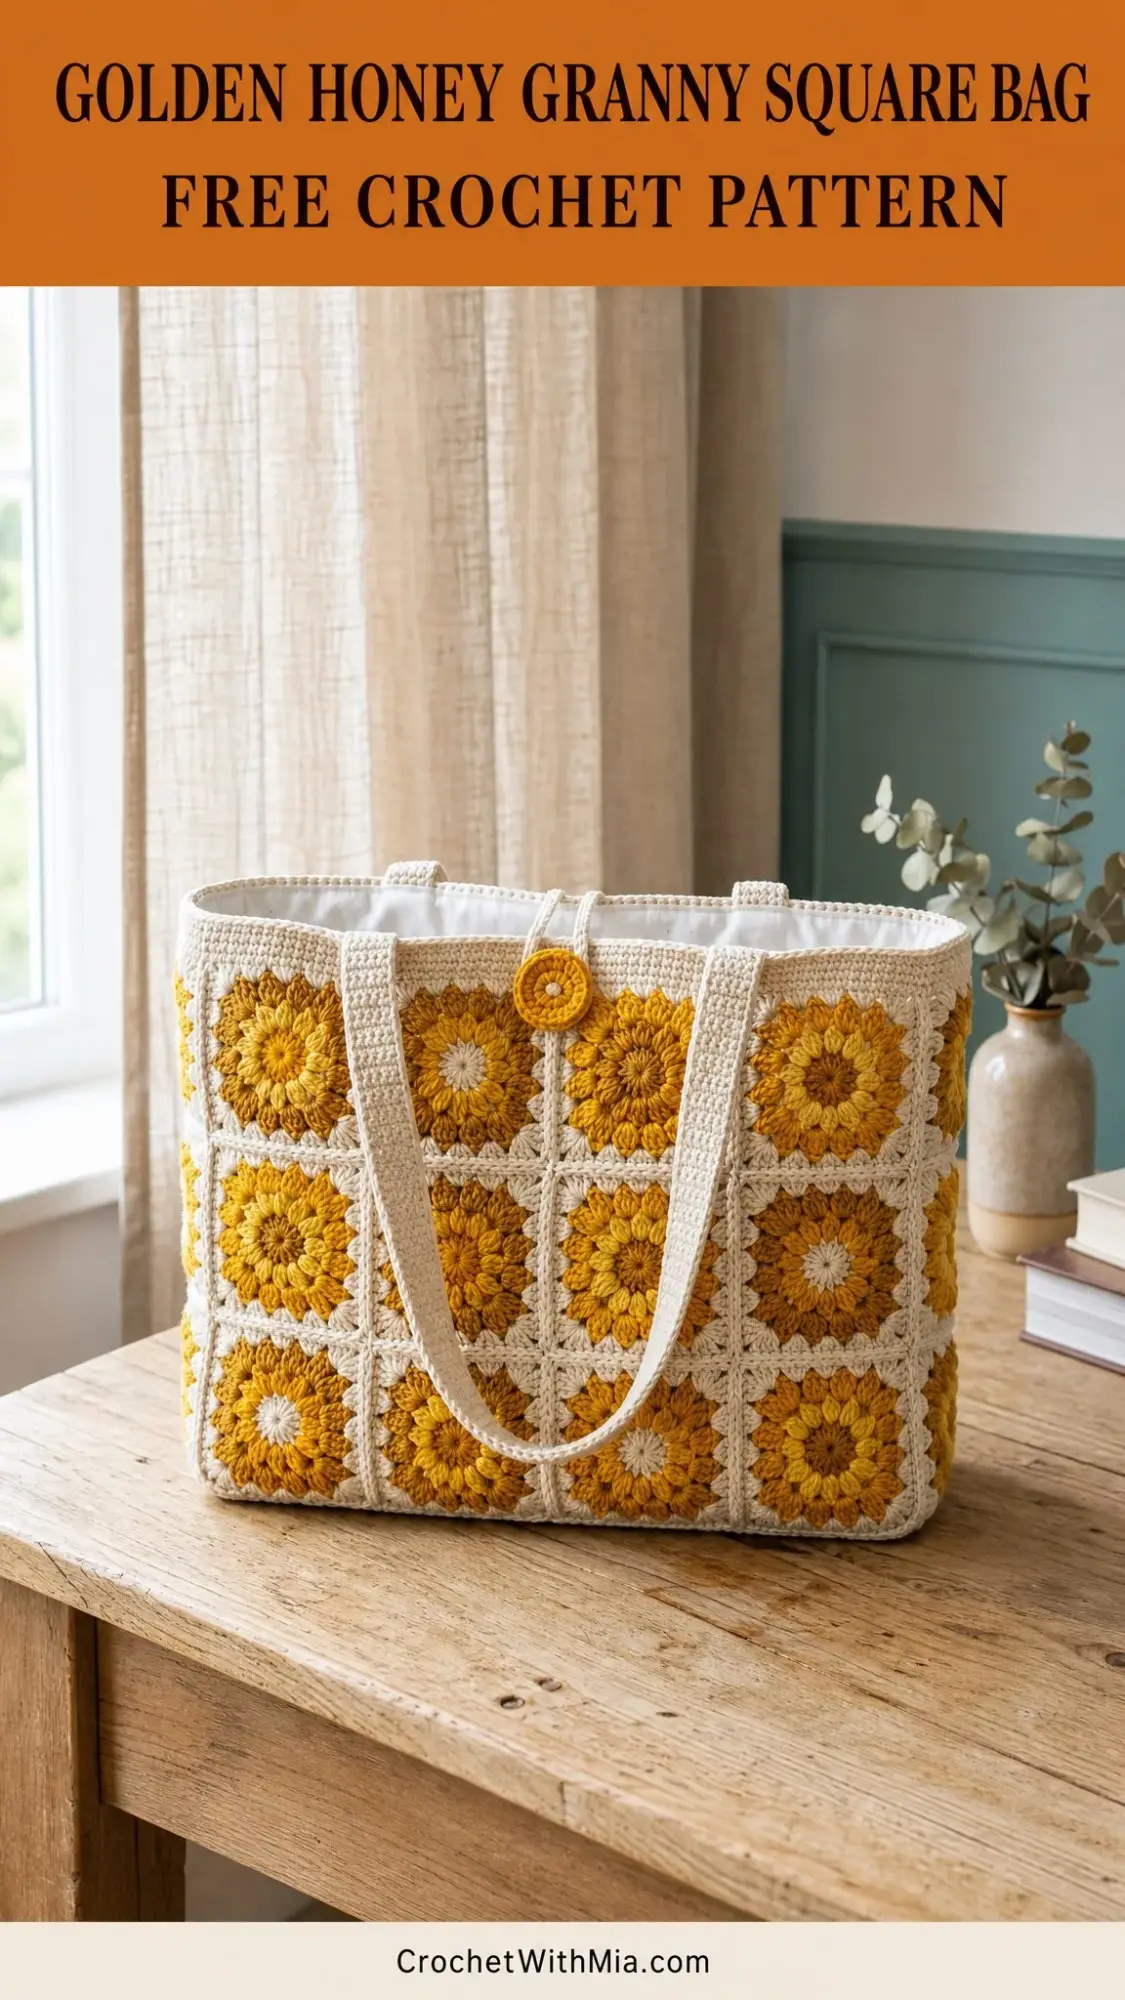
The finished bag measures 16 inches wide, 13 inches tall, and 4 inches deep. That is plenty of room for groceries, books, craft supplies, or beach essentials. The strap drop sits around 10 inches, which works perfectly for shoulder carrying.
What really sets this tote apart is the scrappy honey effect. By rotating two or three shades of gold across your thirty squares, you get that gorgeous sun-faded look without any complicated color planning. Some squares might be bright sunshine yellow, others deep amber, and a few soft mustard. The consistent cream border ties everything together into one cohesive piece.
Materials You Will Need
Before you start crocheting, gather these supplies:
Yarn:
Suggested Yarn Brands:
Use a smooth mercerized or matte cotton for crisp stitch definition. Cotton also helps the bag hold its shape better than acrylic.
Hook: 4.0 mm (US G/6)
Additional Supplies:
Gauge Information
Getting your gauge right matters more than the specific hook size for this project. If your squares come out too large or too small, the whole bag will be off.
One finished sunburst square should measure 4 inches by 4 inches (10 cm by 10 cm) after completing Round 4.
For the base panel worked in double crochet (dc), you should get 16 stitches and 9 rows equaling 4 inches (10 cm).
If your squares are larger than 4 inches, try going down a hook size. If they are smaller, go up a hook size. The entire bag scales proportionally with your gauge.
Abbreviations and Stitch Definitions
This pattern uses US crochet terminology. Here are all the abbreviations you will encounter:
For UK crocheters: US sc equals UK dc, US hdc equals UK htr, and US dc equals UK tr.
Special Stitch: The Puff Stitch
The puff stitch creates those soft golden petals that make this bag so eye-catching. Here is how to work it:
Puff Stitch (puff): Yarn over, insert hook in stitch or space, yarn over and pull up a loop to the height of a double crochet. Repeat this sequence two more times in the same place. You now have 7 loops on your hook. Yarn over and draw through all 7 loops at once. Chain 1 to close and secure the puff.
The puff stitch might feel awkward at first if you have never done it before. The trick is pulling up those loops nice and tall so they are all the same height. Do not worry if your first few look a little uneven. They will blend right in once everything is assembled.
Pattern Notes Before You Begin
A few things to keep in mind as you work through this crochet bag pattern:
How to Crochet the Sunburst Square
You will make this square thirty times total. Use cream yarn for the center (Round 1), gold yarn for the puff petals (Round 2), and cream yarn again for the outer border rounds (Rounds 3 and 4).
Round 1 (Cream)
Make a magic ring. Chain 3, which counts as your first double crochet. Work 11 more double crochets into the ring for a total of 12 dc. Pull the ring closed and join with a slip stitch to the top of the chain 3. Fasten off cream.
Stitch count: 12 dc
Round 2 (Gold)
Join your gold yarn in any stitch. Chain 2, then work a puff stitch in the same stitch. Chain 2. Work a puff stitch in the next double crochet, chain 2. Repeat from * around the entire circle. Join with a slip stitch to the top of the first puff stitch. You should have one petal for each stitch from the previous round. Fasten off gold.
Stitch count: 12 puffs, 12 ch-2 spaces
Round 3 (Cream, Shaping the Square)
Join cream yarn in any chain 2 space. This space becomes corner 1. In that same space, work: chain 3, 2 double crochets, chain 2, 3 double crochets. This is your first corner.
The next two chain 2 spaces are sides. Work 3 double crochets in each of these two spaces.
In the next chain 2 space, work (3 dc, ch 2, 3 dc) for a corner. Work 3 dc in each of the next two side spaces. Repeat from * around. Join with a slip stitch. Your corners fall in spaces 1, 4, 7, and 10.
Stitch count: 44 dc plus 4 corner spaces (11 dc per side)
Round 4 (Cream, Final Round)
Slip stitch into the first corner chain 2 space. Chain 3, then work (2 dc, ch 2, 3 dc) in the same corner space.
Double crochet in each of the next 11 stitches to reach the next corner. In the corner space, work (3 dc, ch 2, 3 dc). Repeat from * around. Double crochet in the final 11 stitches. Join with a slip stitch. Fasten off, leaving a long tail if you plan to sew your squares together.
Stitch count: 68 dc plus 4 corner spaces (17 dc per side)
Square Checklist
Before moving on, verify these details:
Making All 30 Squares
Work your squares in batches to keep assembly organized:
| Panel | Number of Squares | Layout |
|---|---|---|
| Front panel | 12 squares | 4 wide × 3 tall |
| Back panel | 12 squares | 4 wide × 3 tall |
| Right side gusset | 3 squares | 1 wide × 3 tall |
| Left side gusset | 3 squares | 1 wide × 3 tall |
| Total | 30 squares |
Creating the Scrappy Honey Effect
For that beautiful sun-faded look shown in the photos, rotate your gold shades randomly across all thirty squares. Do not overthink it. Just grab whichever gold is closest and trust the process. Some squares will be bright sunshine, some deep amber, a few soft mustard.
Keep your cream yarn consistent throughout. That uniform grid is what makes the bag read as one cohesive piece despite the varied golds.
Joining the Panels
Lay all your squares right side up in their final grid arrangement before you start joining. This lets you redistribute colors if any section looks too heavy in one shade.
Step 1: Build the Four Panels
Join the 12 front squares into a 4 by 3 grid. Repeat for the back panel. Join each side gusset into a 1 by 3 strip.
Use cream yarn for all joining. You can use either a flat whip stitch through the back loops or a single crochet join. Either method works as long as you match the 17 stitches per side.
Step 2: Attach the Gussets
Seam one side gusset to the right edge of the front panel, then to the right edge of the back panel. Repeat with the second gusset on the left edges. You now have an open tube with the sequence: front, side, back, side.
Step 3: Tidy the Seams
Keep all seams flat and even. The join lines should align with your cream borders so the grid looks continuous. Weave in all joining tails thoroughly.
Helpful tip: A single crochet join worked on the wrong side creates a subtle raised ridge that adds structure. This is ideal for a bag that should stand upright on its own.
Creating the Base
The Base Panel (Cream)
With cream yarn, chain 17.
Row 1: Double crochet in the 3rd chain from hook and in each chain across. (15 dc)
Rows 2 through 28: Chain 2 (does not count as a stitch), turn, double crochet in each stitch across. (15 dc per row)
Continue working rows until the panel measures approximately 16 inches by 4 inches, matching the bag’s footprint. Fasten off.
Attaching the Base
With right sides together (or wrong sides together if you want a visible ridge), single crochet the base panel to the bottom opening of the tube all the way around. Ease the fabric at the corners to fit smoothly. Fasten off and weave in the tails.
Adding the Top Border
Join cream yarn at a back seam.
Round 1: Single crochet evenly around the entire top opening, keeping an even, firm tension. Join with a slip stitch.
Rounds 2 through 5: Chain 1, single crochet in each stitch around. Join with a slip stitch. Keep your stitch count consistent each round.
The top border is what makes the bag stand tall and prevents the opening from flaring outward. Work these rounds a touch tighter than your squares for maximum structure. Do not skip these rounds.
Making the Straps
Make 2 straps in cream yarn.
Chain 9.
Row 1: Single crochet in the 2nd chain from hook and in each chain across. (8 sc)
Remaining rows: Chain 1, turn, single crochet across. (8 sc)
Continue until the strap measures approximately 24 inches (61 cm). Fasten off, leaving a long tail for sewing.
For extra strength: Fold the strap lengthwise and single crochet the long edges together. Alternatively, you can back it with cotton webbing from a fabric store.
Attaching the Straps
Pin each strap to the inside of the top border. Position the two ends roughly above the 2nd and 3rd squares on the front panel. Mirror this placement on the back panel.
Sew down securely using a box stitch that goes through several rounds of the border. This distributes the weight and prevents the straps from pulling loose over time.
Finished strap drop: approximately 10 inches (25 cm)
Button Tab and Covered Button
The Tab
Chain 5. Single crochet across and back for 4 to 5 rows to form a short rectangular strap. Then chain enough to create a button loop at the end. Slip stitch to form the loop and close it.
Sew the tab to the center front of the top border.
The Covered Button
Work Rounds 1 and 2 of the sunburst square pattern using gold yarn. Place this crocheted circle over your button blank and cinch the edges closed on the back. Sew the covered button to the back panel, positioned opposite the loop.
Adding a Fabric Lining
A lining is optional but highly recommended. It hides your seams, prevents stretching under weight, and lets you add an interior pocket for your phone or keys.
Steps:
1. Measure the inside of your finished bag carefully.
2. Cut two fabric panels plus seam allowance.
3. Sew the lining pieces into a matching pouch, leaving the top open.
4. Press the top edge under to create a clean fold.
5. Drop the lining inside the bag.
6. Hand stitch the lining to the base of the top border using a sewing needle and matching thread.
Final Finishing Touches
Before using your bag, complete these final steps:
Care Instructions
Cotton bags are easy to care for:
Customizing Your Bag
This crochet pattern is easy to adapt:
Bigger tote: Add a column (5 by 3) or a row (4 by 4) of squares. Keep the side gussets matched in height.
Mini bag: Drop to 3 by 2 panels and shorten the base and straps to suit.
Crossbody style: Add length to the strap rows for a longer drop.
Different color palette: Swap the golds for any tonal family. Dusty pinks, ocean blues, or autumn rust would all look stunning with that same cream grid.
Time Estimate and Skill Level
Plan for approximately 14 to 20 hours to complete this bag, depending on your speed and how much blocking time you build in. The pattern is rated for confident beginners, which means you should be comfortable with basic crochet stitches and ready to try something a bit more ambitious.
If you have never made a granny square before, I recommend practicing one or two squares first before committing to all thirty. Once you get the rhythm down, they work up quickly.
I hope this Golden Honey Granny Square Bag brings a little sunshine into your crafting time. There is something so satisfying about watching those golden puffs multiply into a finished project you will actually use every day.
If you make this bag, I would absolutely love to see it! Save this pattern to your Pinterest boards so you can find it when you are ready to cast on, and please drop a comment below to share your progress or ask any questions. Happy crocheting!