
A structured handbag keeps your essentials organized and looks polished for everyday errands or special occasions. This cream granny square bag delivers exactly that, with classic granny squares assembled into a boxy silhouette and finished with elegant bamboo handles and a zipper closure. The construction uses only basic stitches like chain (ch), single crochet (sc), and double crochet (dc), making it accessible for confident beginners ready to tackle their first assembled project.
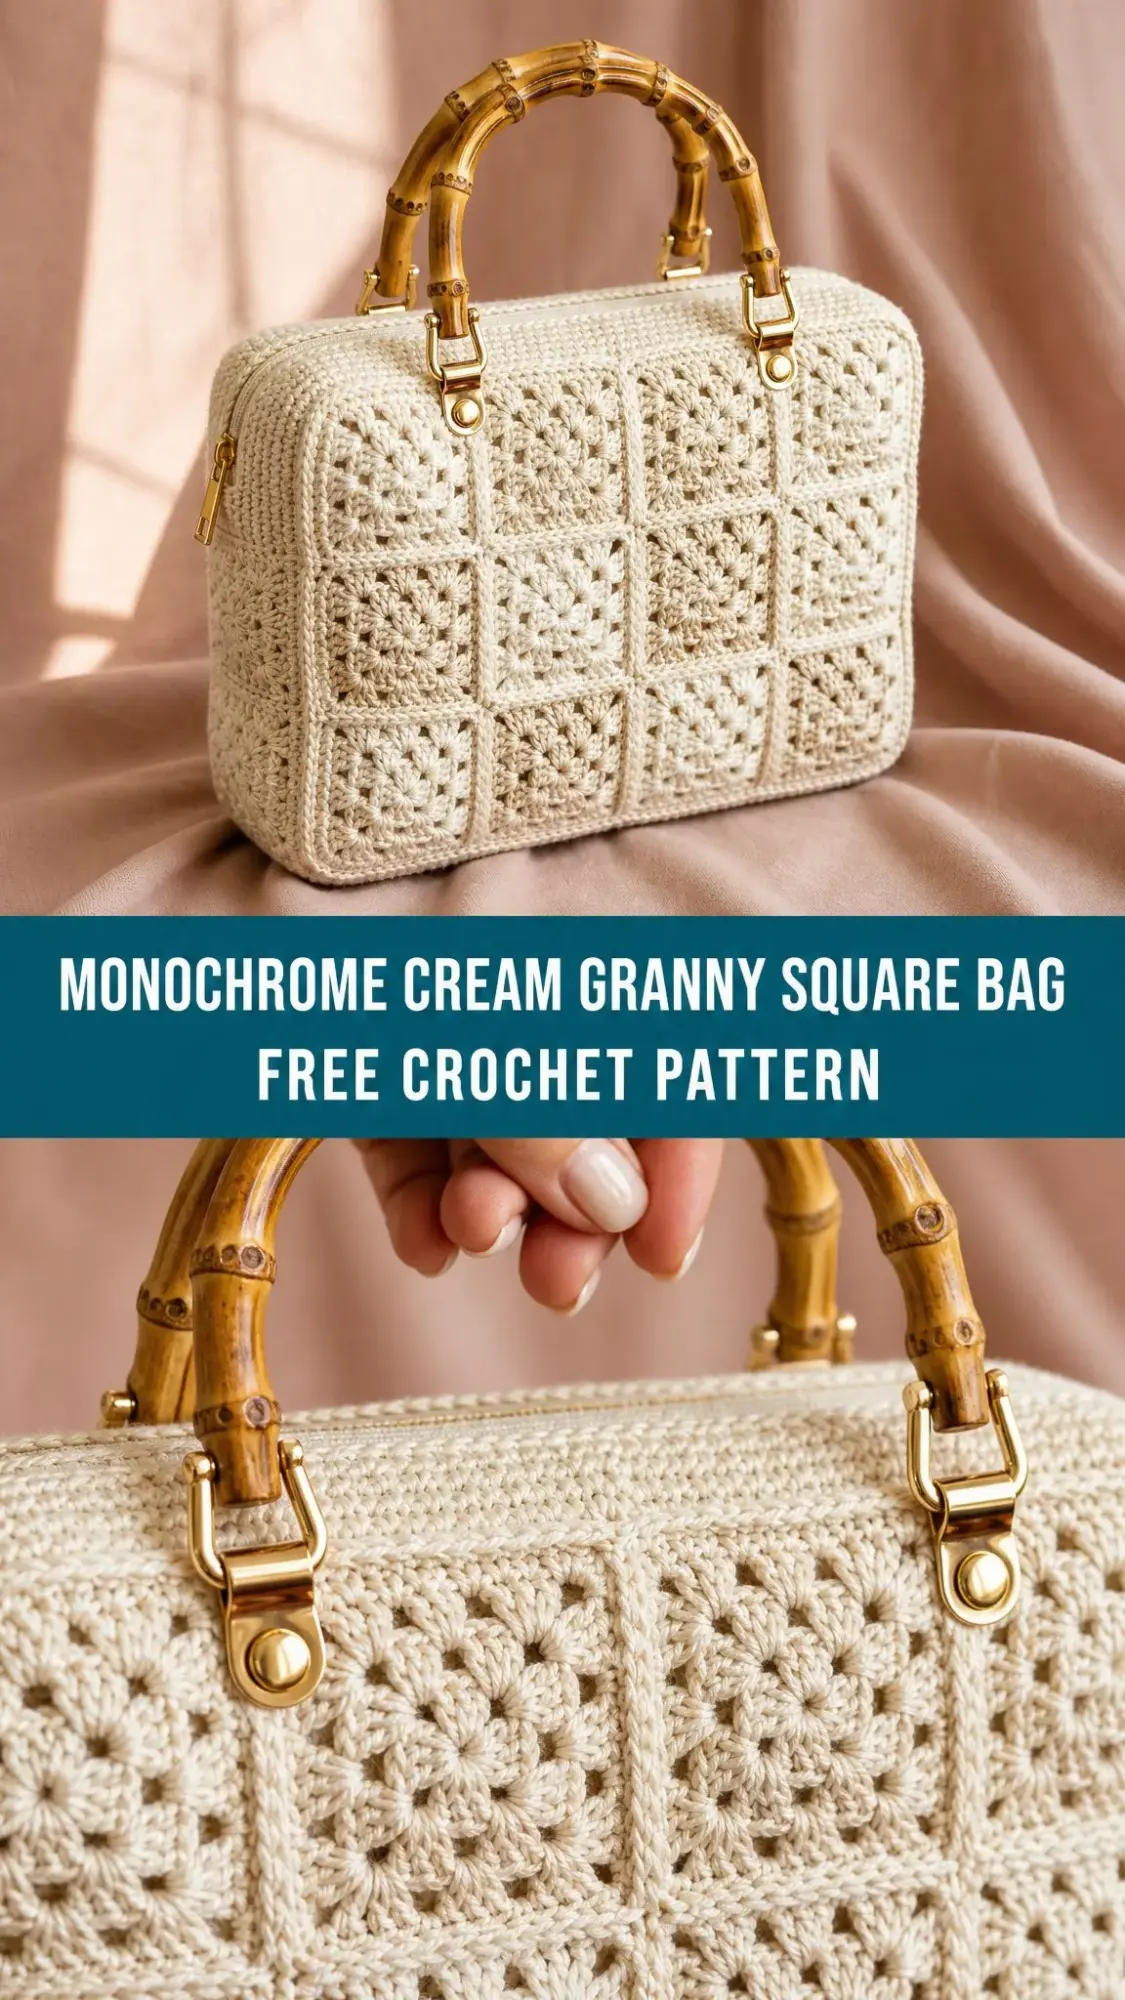
The bag works up in approximately 12 to 18 hours total, so you could finish it over a dedicated weekend or spread it across a few evenings. It makes a thoughtful handmade gift for someone who appreciates vintage-inspired accessories, or treat yourself to a bag that will hold its shape beautifully for years.
I love how this pattern breaks down into manageable pieces. You will master one simple granny square, then repeat it 34 times before seaming everything together. The rhythm becomes almost meditative once you get going.
Why This Granny Square Bag Works So Well
The secret to this bag’s structured appearance is the firm cotton yarn and tight gauge. Unlike drapey granny square blankets, this project wants dense fabric that holds the boxy shape without sagging. The bamboo handles add warmth and visual interest, while the interior lining and zipper closure keep everything secure.
Each granny square measures approximately 2.25 inches (5.7 cm) after blocking. Four squares across give you a 9-inch wide bag, and three squares tall plus the top band bring the height to about 7.5 inches. The finished dimensions are approximately 9 inches wide by 7.5 inches tall by 2.5 inches deep (23 × 19 × 6.5 cm), with the handles adding roughly 4 inches (10 cm) of height.
Materials You Will Need
Gathering your supplies before you begin makes the whole process smoother. Here is everything you need:
Yarn
You will need approximately 380 to 430 yards (350 to 395 meters) of a smooth worsted weight (#4) cotton yarn in a soft cream or ecru shade. A crisp cotton gives the squares their structure and keeps the boxy shape. Avoid anything too drapey.
Recommended yarns that work beautifully:
Hook and Notions
Designer tip: Buy your bamboo handles and clasps before you block. Their exact width tells you how far apart to place the handle tabs, so the handles hang straight and balanced.
Gauge
One finished 3-round granny square measures approximately 2.25 inches (5.7 cm) square after blocking, using worsted cotton and a 4.0 mm hook.
Your square size sets the whole bag, so make one test square, block it, and measure before committing to all 34 squares. A slightly smaller square is better than a loose one. This bag wants firm, structured fabric.
Quick size math: 4 squares across × 2.25 inches = 9 inches wide. 3 squares tall × 2.25 inches = 6.75 inches, plus the top band brings the body to about 7.5 inches tall.
Abbreviations and Special Stitches
ch = chain
sl st = slip stitch
sc = single crochet (insert hook, yarn over, pull through, yarn over, pull through both loops)
hdc = half double crochet
dc = double crochet (yarn over, insert hook, yarn over, pull through, yarn over, pull through 2 loops, yarn over, pull through remaining 2 loops)
st(s) = stitch(es)
sp = space
beg = beginning
rep = repeat
RS / WS = right side / wrong side
UK crocheters, please note: This pattern uses US terms. Convert as follows: US sc = UK dc, US hdc = UK htr, US dc = UK tr.
Special Stitches
Magic ring = an adjustable loop to start each square. It lets you cinch the center closed with no hole.
3-dc granny group = three double crochets worked into one space. This is the building block of every round.
Corner = (3 dc, ch 2, 3 dc) worked into one ch-2 space to turn a corner.
Pattern Notes Before You Begin
Construction Overview
You will make three flat pieces, then seam them into a box.
Front and Back panels (make 2): 4 squares wide × 3 squares tall = 12 squares each
Gusset strip (make 1): 10 squares joined end to end in a single long strip, one square wide. This wraps up one short side (3 squares), across the base (4 squares), and up the other short side (3 squares).
Total squares needed: 34
Step One: The Granny Square (Make 34)
Each square is three classic rounds. Fasten off with a long tail for seaming after each square.
Round 1
Into a magic ring: ch 3 (counts as first dc), 2 dc, ch 2, [3 dc, ch 2] 3 times; join with sl st to top of beg ch-3. Pull the ring closed.
(12 dc, 4 ch-2 corner spaces)
Round 2
Sl st across to the first ch-2 corner sp. In that sp work (ch 3, 2 dc, ch 2, 3 dc); ch 1; in next corner sp work (3 dc, ch 2, 3 dc), ch 1; rep from twice; join to top of beg ch-3.
(24 dc, 4 corner spaces, 4 ch-1 spaces)
Round 3
Sl st to the next ch-2 corner sp. In that sp work (ch 3, 2 dc, ch 2, 3 dc); ch 1, 3 dc in next ch-1 sp, ch 1; (3 dc, ch 2, 3 dc) in next corner sp, ch 1, 3 dc in next ch-1 sp, ch 1; rep from twice; join to top of beg ch-3.
(36 dc, 4 corner spaces, 8 ch-1 spaces)
Fasten off, leaving a long tail for seaming.
Stitch Count Check
Round 3 has twelve 3-dc groups: eight at the four corners (two per corner) and four along the sides (one per side). 12 × 3 = 36 dc. Each finished side shows three dc-groups separated by two small ch-1 spaces.
Tip for even squares: Crochet all 34 squares with the same hook in one sitting if you can. Tension drifts day to day. Block them together over a gridded mat so every square lands at the same 2.25 inches.
Step Two: Assembling the Panels
1. Lay Out the Front
Arrange 12 blocked squares into a grid 4 across and 3 down, all right sides facing up and centers aligned. Nudge them until the rows are straight.
2. Join the Front
Hold two squares wrong sides together. With a tapestry needle and matching yarn, whip stitch through the back loops only, corner to corner. Join into rows first, then join the rows. Repeat for all 12.
(1 front panel, 4 × 3 squares)
3. Make the Back
Repeat exactly to make a second identical panel.
(1 back panel, 4 × 3 squares)
4. Make the Gusset Strip
Join 10 squares end to end into a single long strip, one square wide. This wraps up one short side (3 squares), across the base (4 squares), and up the other short side (3 squares).
(1 gusset strip, 1 × 10 squares)
Step Three: Box and Band
5. Seam the Gusset to the Front
With wrong sides together, pin the gusset strip around the front panel: start at the top of one short side, work down (3 squares), across the base (4 squares), and up the other short side (3 squares). The corners of the gusset fall where the panel corners turn. Whip stitch all the way around.
(Front joined on 3 sides)
6. Seam the Back to the Gusset
Pin the back panel to the free edge of the gusset the same way and whip stitch around. You now have an open-topped box. Turn right side out.
(Bag body complete)
7. Work the Top Band
With RS facing, join yarn at the top opening.
Round 1: ch 1, sc evenly around the entire opening, working about 11 sc along each square edge and 1 sc in each seam; join.
(Approximately 110 sc)
Rounds 2 through 5: Ch 1, sc in each sc around; join. Repeat for four firm rounds total. This band stiffens the opening and gives the zipper a clean edge to attach to.
(110 sc each round)
Note: If your Round 1 lands on an odd count, add or skip a single sc at a seam to reach an even total. This makes spacing the zipper and handle tabs symmetrical.
Step Four: Lining, Zipper, and Handles
8. Make the Handle Tabs (Make 4)
Ch 7, sc in 2nd ch from hook and across.
(6 sc)
Ch 1, turn; work 3 more rows of sc.
(6 sc each row)
Fasten off, leaving a tail. Slip each tab through the ring of a swivel snap hook, fold in half, and set aside.
9. Line the Bag
Cut lining fabric to the inner dimensions plus a 0.5 inch (1.3 cm) seam allowance: one piece for front, back, and gusset, mirroring the crochet box. Sew into a matching pouch, press, and slip inside the bag wrong sides together. Fold the top raw edge under so it sits just below the band.
10. Insert the Zipper
Open the zipper and pin one tape to the inside top edge of the band, just below the last sc round. The zipper teeth should sit level with the band’s top. Hand-sew with backstitch through band and lining together, then repeat for the second tape. Tuck and stitch the zipper ends neatly inside.
11. Attach the Handles
Sew two folded tabs to the inside front band, spaced to match your bamboo handle width, and two to the back the same way. Stitch securely through band and lining. Clip the swivel hooks onto the bamboo handles.
(2 handles, 4 tabs)
Placement tip: Center the tab pairs over the second and third squares of each panel so the handles balance. Hold the bag up before you stitch the final tab. A quick dry hang shows if the handle sits straight.
Finishing and Care
Final Finishing Steps
Care Instructions
Customizing Your Bag
Want to make it your own? Here are some easy modifications:
Bigger tote: Add a column of squares (5 wide) and/or a row (4 tall). Keep front, back, and gusset counts matched. The gusset length always equals one short side + base + other short side.
Deeper bag: Widen the gusset to 2 squares. You will join two strips side by side and add squares on the short sides to match.
Crossbody option: Add D-rings at the top side seams and clip on an adjustable strap.
Gauge swap: A 5.0 mm hook and aran cotton makes a roomier bag from the same square count.
Tips for Success
Block your squares before seaming. This is the single most important step for a professional-looking finish. Pin each square to the same measurements on a blocking mat, spritz with water, and let dry completely.
Use the same hook throughout. Your tension can vary day to day, so try to work all your squares in as few sessions as possible.
Buy hardware first. The width of your bamboo handles determines how far apart your tabs need to be. Having them on hand before you attach the tabs prevents frustration.
Lining makes a difference. While optional, the lining adds structure, hides seams, and gives the zipper a stable base. Even a simple cotton fabric works beautifully.
Final Thoughts on This Granny Square Bag Pattern
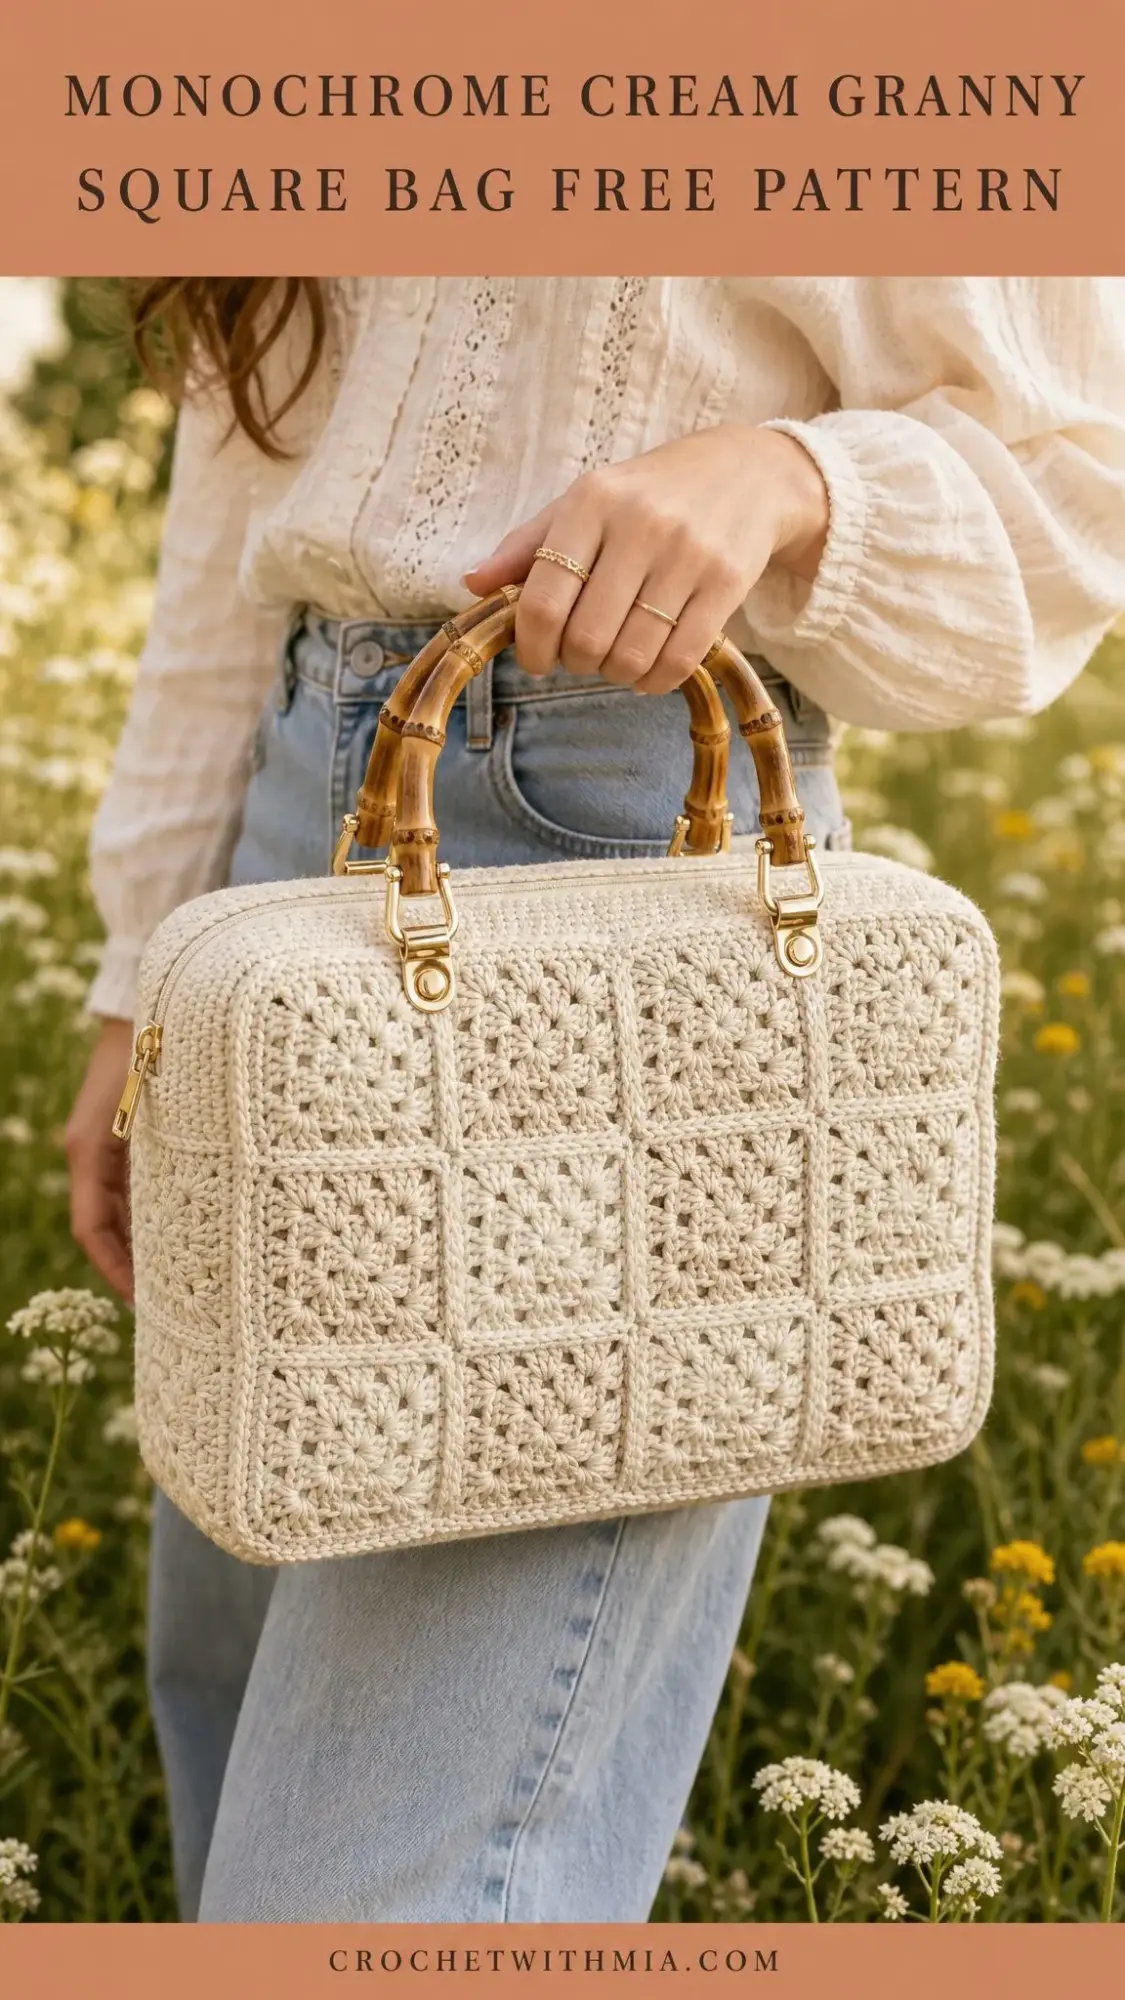
This cream granny square bamboo bag is the kind of project that looks impressive but breaks down into simple, repeatable steps. Once you have made your first square, the rest is pure rhythm. Take your time with blocking and finishing, and you will end up with a structured, heirloom-quality bag that holds its shape beautifully.
The combination of classic granny squares, warm bamboo handles, and practical details like the zipper closure creates something truly special. Whether you make it for yourself or as a gift, this bag is sure to become a favorite.
I hope you enjoy making this beautiful granny square bag as much as I enjoyed putting this pattern together for you. If you create one, I would absolutely love to see it! Tag me on Instagram or share a photo on Facebook. And if you want to come back to this pattern later, go ahead and pin it to your favorite Pinterest board so it is easy to find. Drop a comment below if you have any questions or just want to share your progress. Happy hooking!