
Granny squares on a bag? That sounds complicated. I hear this all the time, and I completely understand the hesitation. But here’s the truth: if you can double crochet and work in the round, you can absolutely make this tote.
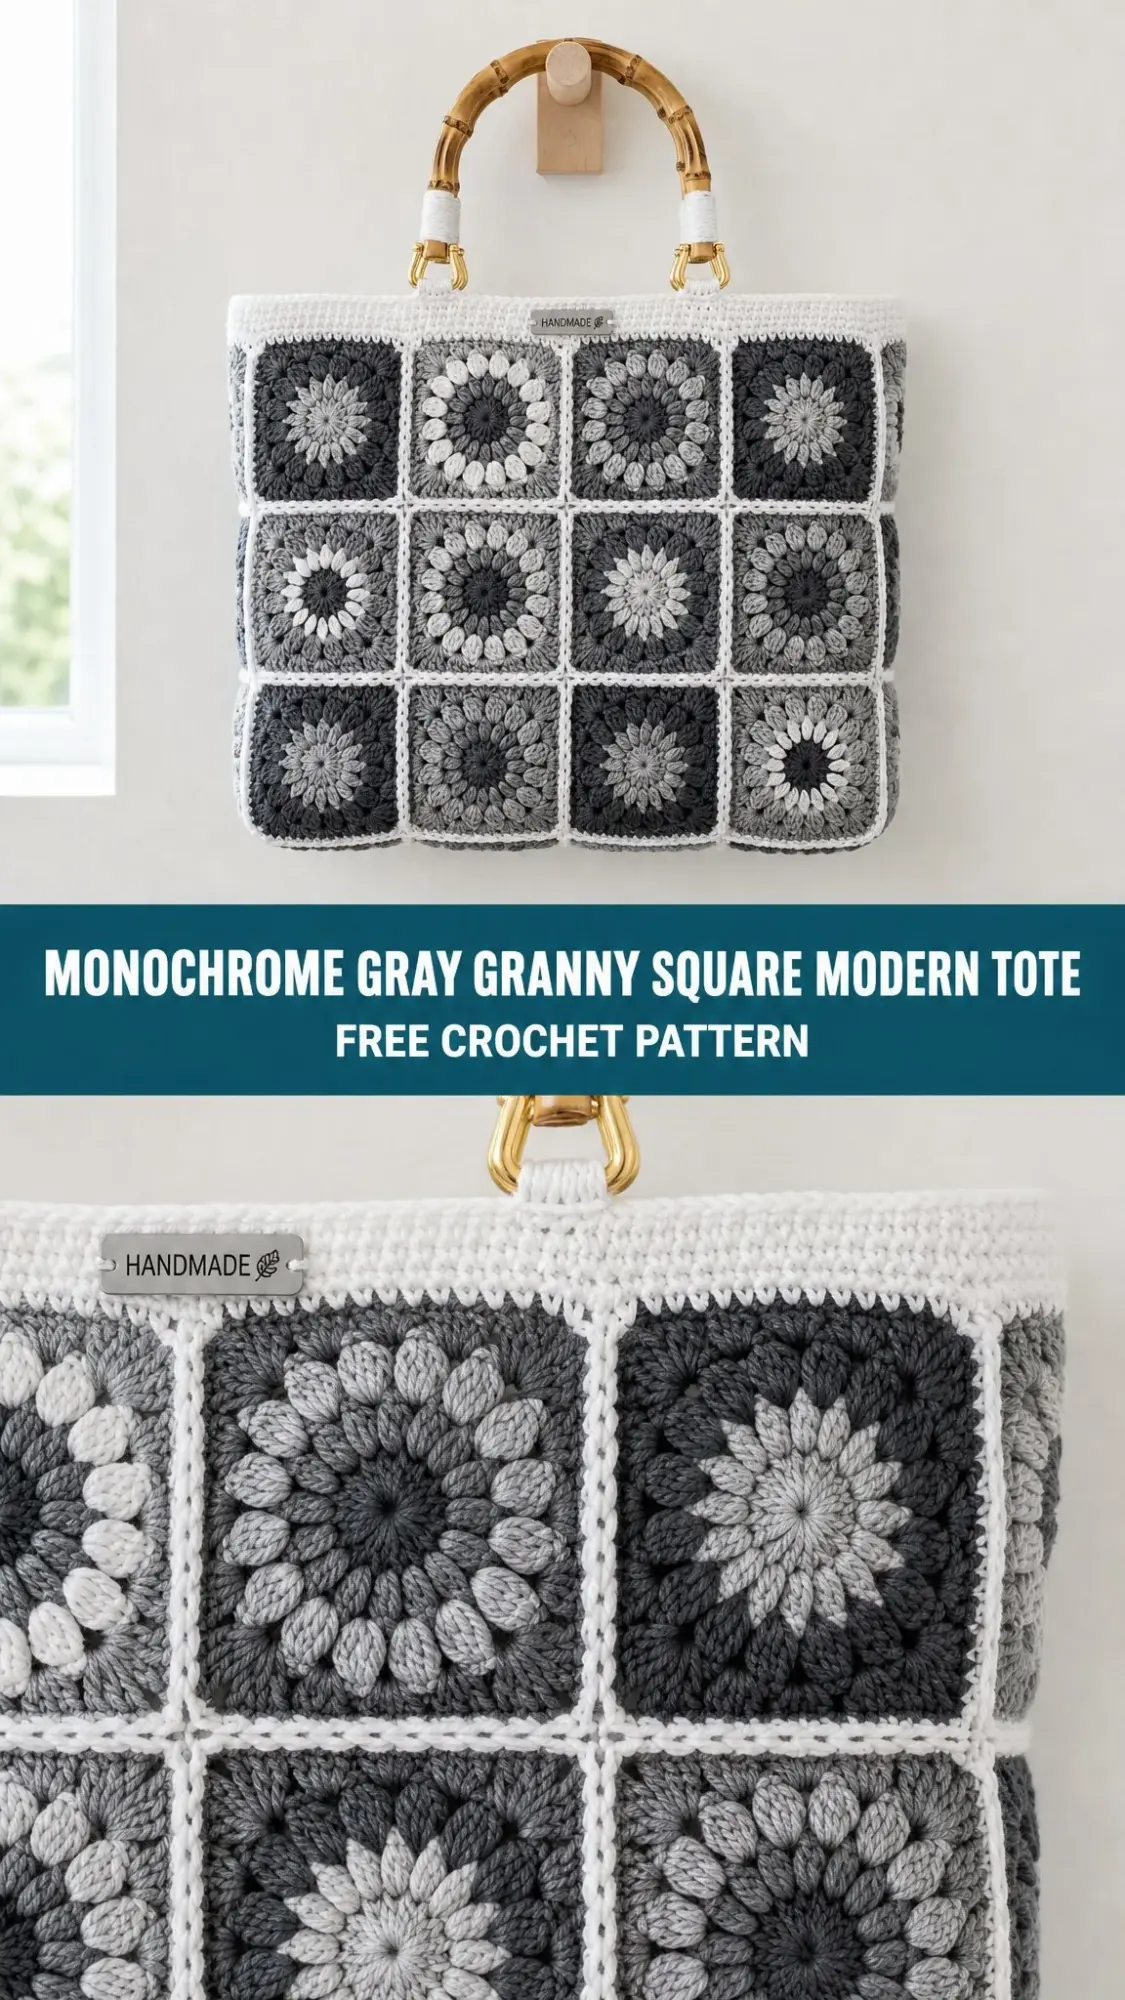
The sunburst squares look intricate, but they’re only four rounds each. The puff stitches add gorgeous texture without any fussy techniques. And because every square gets finished in white, the joining practically hides itself. You end up with clean, crisp sashing that makes the whole bag look polished and modern.
Whether you’re a confident beginner ready to level up or an experienced crocheter looking for a satisfying project, this pattern meets you where you are. Let’s break it down together.
About This Monochrome Gray Granny Square Tote
This modern tote is built from twenty-four sunburst granny squares worked in a soft gradient of grays. Each square features puffy textured petals radiating from a solid center, then gets squared off with a white border. The result is a scrappy, no-two-alike rhythm that feels intentional and artistic.
Two panels of twelve squares each form the front and back. A simple whip stitch seam joins everything together, and a clean white single crochet band finishes the top. The bamboo handles clip on with gold swivel snaps, adding warmth and polish to the monochrome palette.
The finished bag measures approximately 14 inches (36 cm) wide by 11 inches (28 cm) tall, with about 3 inches (7.5 cm) of depth once the base is shaped. The handles add roughly 5 inches (13 cm) of height. It’s the perfect size for everyday essentials, a small project, or a weekend market run.
Skill Level
This pattern is rated intermediate. You should be comfortable with basic crochet stitches, working in the round, and joining motifs. The puff stitch might be new to some crocheters, but I’ll walk you through it step by step.
Materials You’ll Need
Yarn
You’ll need worsted weight cotton yarn in five colors. A smooth cotton or cotton blend gives this tote its crisp stitch definition and a body that holds its shape.
The pattern uses four grays total, though the PDF lists three gray colors with quantities. Feel free to add a fourth mid-gray shade to increase variety in your squares.
Suggested Yarns
Tools and Notions
Gauge
One finished sunburst square measures 3.5 inches (9 cm) square after the white round. Motif size is what matters here. If your square is bigger or smaller, change your hook size until it measures 3.5 inches, and the finished tote will follow.
Abbreviations
This pattern uses US crochet terms. Here’s what each abbreviation means:
UK crocheters: US sc equals UK dc, and US dc equals UK treble (tr). The hook and method are identical. Only the names differ.
Special Stitches
Puff Stitch
The puff stitch creates those beautiful textured petals in each sunburst square. Here’s how to work it:
[Yarn over, insert hook in stitch, yarn over and pull up a tall loop] 3 times in the same stitch. You’ll have 7 loops on your hook. Yarn over and draw through all 7 loops, then chain 1 to close the puff.
The key is pulling up tall loops so your puff has nice height and texture. Don’t worry if your first few look uneven. They improve quickly with practice.
Magic Ring (MR)
The magic ring creates an adjustable loop to start each square. Work your first round of stitches into the ring, then pull the tail tight to close the center completely. This gives you a neat, hole-free center.
If you prefer, you can substitute chain 4 and slip stitch to join as an alternative starting method.
Pattern Notes
Please read these before you begin:
Important: This pattern is designed to help you create a similar crochet project, but individual results may vary depending on your yarn, tension, hook size, and finishing technique. You may need to make small adjustments to achieve the closest possible result.
The Sunburst Square Pattern
Make 24 squares total. Each square has four quick rounds. Use a center color, a petal color, and a solid color (any three of your grays), then white for the final round.
Round 1: Center
With your center color, make a magic ring.
Chain 3 (this counts as your first double crochet). Work 15 double crochets into the ring.
Pull the ring closed tightly. Join with a slip stitch to the top of the chain 3.
Stitch count: 16 dc
Round 2: Sunburst
Join your petal color in any stitch.
Work a puff stitch in the same stitch, chain 1. Then [puff in next dc, chain 1] around the entire round.
Join with a slip stitch to the top of the first puff.
Stitch count: 16 puffs, 16 chain-1 spaces
Round 3: Solid Ring
Join your solid color in any chain-1 space.
Chain 3 (counts as dc), work 1 dc in the same space. Work 2 dc in each chain-1 space around.
Join with a slip stitch to the top of the chain 3.
Stitch count: 32 dc
Round 4: Square It (White)
Join white in any double crochet.
Chain 2 (this does NOT count as a stitch). In the same stitch, work (2 dc, chain 2, 2 dc) to create your first corner.
Double crochet in the next 7 stitches, then work (2 dc, chain 2, 2 dc) in the next stitch for the corner. Repeat from twice more. Double crochet in the last 7 stitches.
Join with a slip stitch to the first double crochet (not the chain 2).
Stitch count: 44 dc, 4 corner spaces
Fasten off and weave in ends. Repeat to make 24 squares total.
Color Play: Creating the Scrappy Look
The charm of this tote is in the mix. Keep white on round 4 every time, then shuffle the three gray rounds so no two squares match exactly.
Color Recipe Ideas
Here are some combinations to get you started:
Don’t overthink it. The beauty comes from the randomness. Just make sure you’re using all your grays roughly equally across the 24 squares.
Laying Out Your Squares
Make 24 squares: 12 for the front panel and 12 for the back. Before joining, lay each set out in a 4 × 3 grid. Move squares around until the lights and darks feel balanced. You don’t want all your darkest squares clustered in one corner.
If your squares are curling, block them lightly with steam or by misting with water and pinning flat to dry.
Joining the Panels
Step 1: Lay Out Each Panel
Arrange 12 squares into a 4 wide × 3 tall grid for the front. Repeat for the back panel.
Step 2: Whip Stitch the Grid
Using white yarn and a tapestry needle, whip stitch the squares together through the back loops only.
Join row by row first, then join the rows to each other the same way. The white seams blend into each square’s white round, creating clean, continuous sashing that looks intentional.
Repeat for the second panel.
Step 3: Seam the Bag
Hold the two finished panels with wrong sides together. Using white yarn, whip stitch up the right side, across the bottom, and down the left side.
Leave the top open.
Result: 3 closed sides
Step 4: Shape a Soft Base
To give the flat tote a little depth, pinch each bottom corner into a small triangle. Tack it down with a few stitches. This opens the base so the bag can stand on its own.
Top Band and Handles
Round 1: Band Base
Join white at a top corner. Single crochet evenly around the whole opening, keeping an even number of stitches. Place a marker and work in continuous rounds (no joining at the end of each round).
Approximate stitch count: 88 sc
Rounds 2 through 7: Build the Band
Single crochet in each stitch around for 6 rounds. The band firms up the opening and gives the bag its tidy white collar.
Stitch count: approximately 88 sc each round
Round 8: Handle Loops
Mark 4 evenly spaced points across the front and back (2 per side). Set these points in from the corners to match where your handles will attach.
At each marked point, chain 8 and skip 3 single crochets to make a loop. Single crochet in each remaining stitch around.
Work one more round of single crochet to firm up the loops.
Result: 4 chain-8 loops
Attaching the Handles
Clip a gold swivel snap through each loop, then onto the bamboo handle rings. Each handle gets two loops.
Alternative method: For fixed handles, thread the band’s top edge through the handle opening and stitch it down securely.
Finishing
Weave in all remaining ends. Steam block or wet block the whole bag and let it dry flat. This evens out the squares and gives everything a polished look.
Care Instructions
Resizing Your Tote
Want a Bigger Tote?
Add a column or row of squares per panel. For example, try 5 × 3 or 4 × 4. Each additional square adds approximately 3.5 inches.
Prefer a Mini Bag?
Drop to 3 × 2 squares per panel for a sweet little grab bag.
Adjusting the Band
Add more single crochet rounds for a deeper white collar, or work fewer rounds for a lower scoop.
Crossbody Option
Crochet a long single crochet strap and clip it to the side loops instead of using bamboo handles.
Tips for Success
Tension matters. Cotton yarn doesn’t have much give, so try to keep your tension consistent throughout. If your squares are different sizes, your bag will look wonky.
Block before joining. Even a light steam makes a huge difference in how neatly your squares line up.
Count your stitches. Especially on Round 4 of the sunburst square, where you’re placing corners. Miscounting here throws off the whole square.
Use stitch markers. Mark the first stitch of each round on the band section so you don’t lose your place in the continuous rounds.
Why Cotton Yarn Works Best
Cotton gives this bag structure. Unlike acrylic or wool, cotton doesn’t stretch much under weight. Your tote will hold its shape whether it’s empty or stuffed full.
Cotton also shows off the puff stitches beautifully. The smooth, slightly shiny surface (especially if you choose mercerized cotton like Lion Brand 24/7) makes those sunburst petals really pop.
The downside? Cotton can be hard on your hands during long crocheting sessions. Take breaks, stretch your fingers, and don’t death-grip your hook.
Final Thoughts on This Crochet Tote Pattern
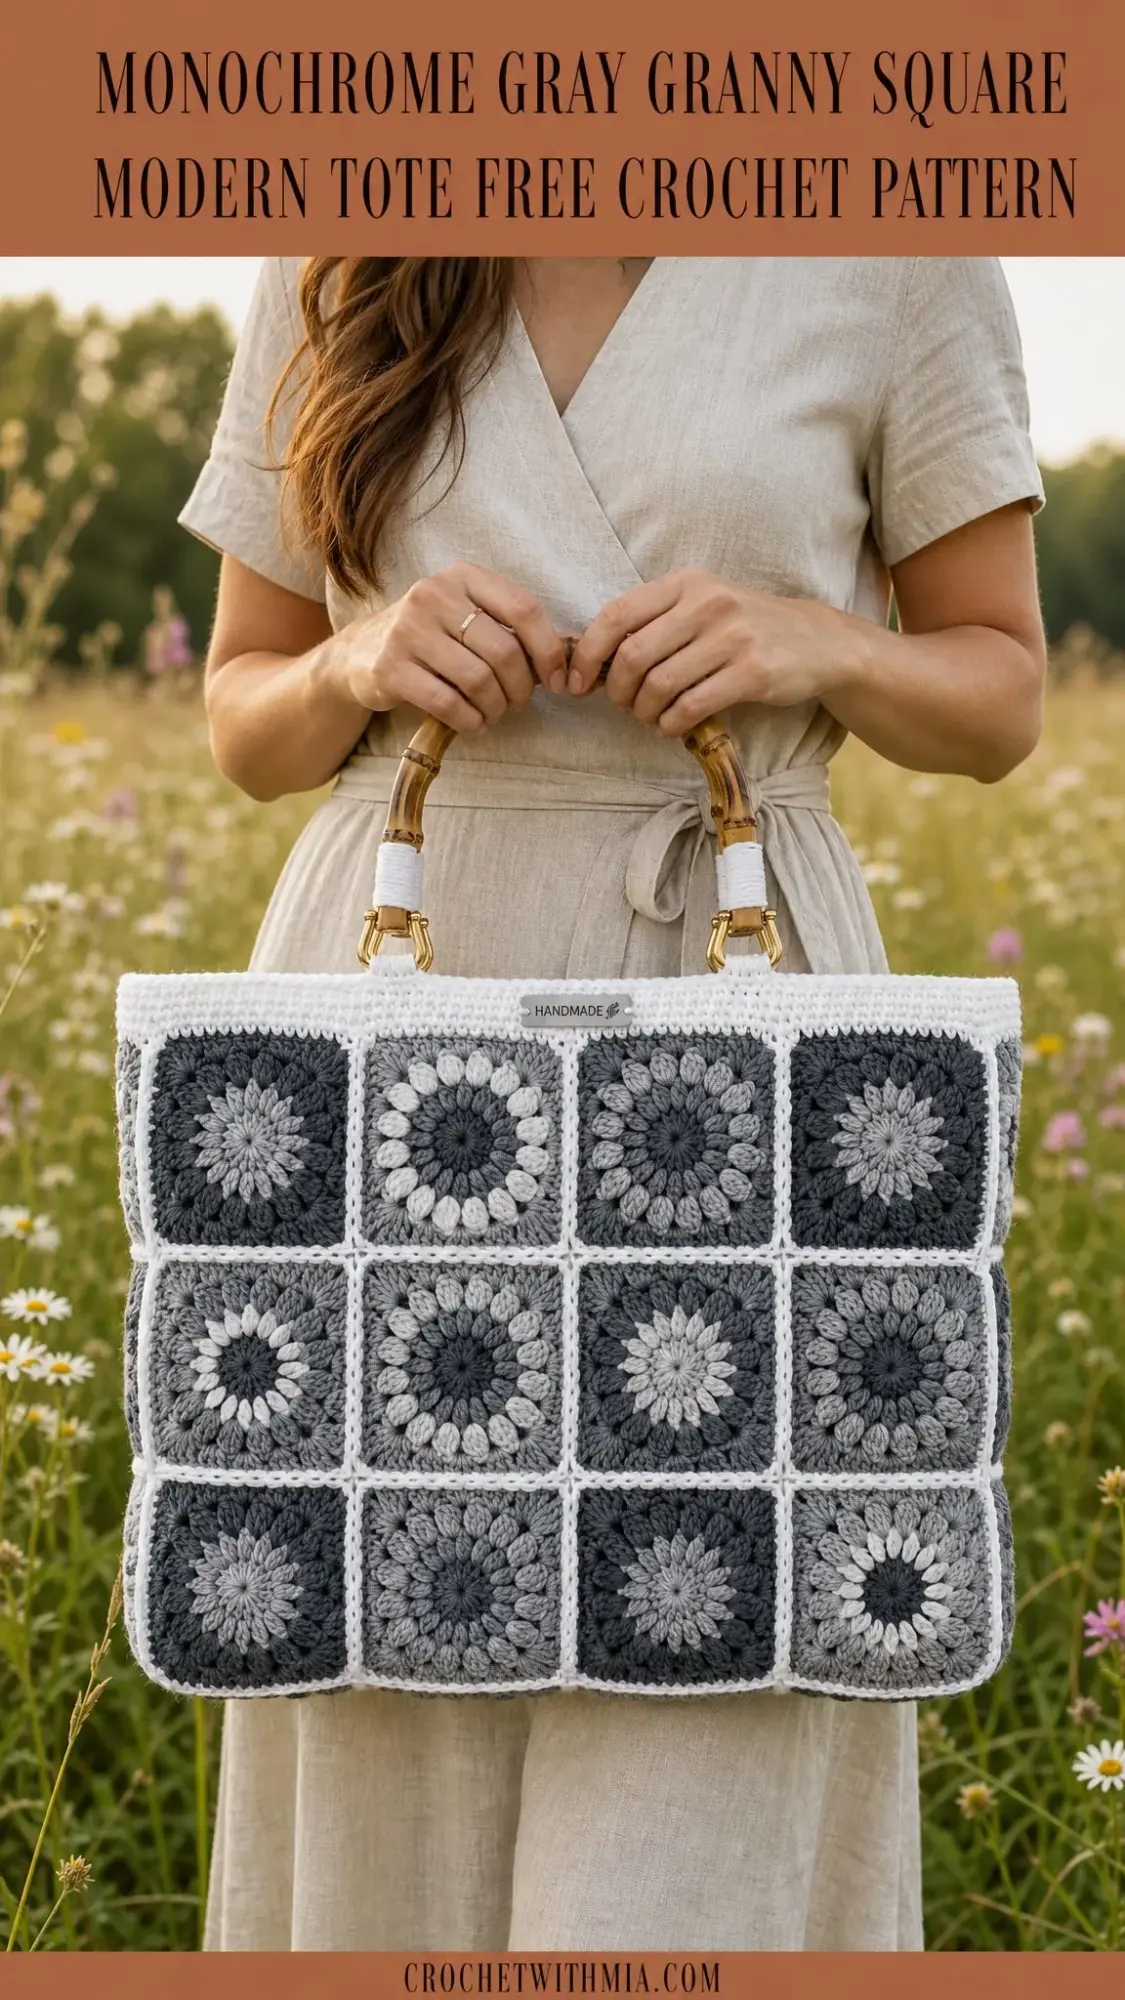
This Monochrome Gray Granny Square Modern Tote is one of those projects that looks far more impressive than it actually is to make. Twenty-four little squares, some simple seaming, and a basic single crochet band transform into something you’ll proudly carry everywhere.
The scrappy color play means no two bags will ever look exactly the same. Even if you follow my color recipes exactly, your personal tension and yarn choices will make your tote uniquely yours.
I love how the bamboo handles warm up the cool gray palette. And those gold swivel clasps? Chef’s kiss. They make the handles removable for washing and add just the right amount of sparkle.
Thank you so much for choosing this pattern. I hope you love making it as much as I loved designing it. If you post your finished tote on Instagram or Facebook, please tag me so I can see your beautiful work. Nothing makes my day like seeing these patterns come to life in your hands.
If you found this pattern helpful, I’d love it if you saved it to your Pinterest boards so you can find it again later. And please drop a comment below when you finish your tote. I’d love to hear which gray combination you chose and how it turned out!