
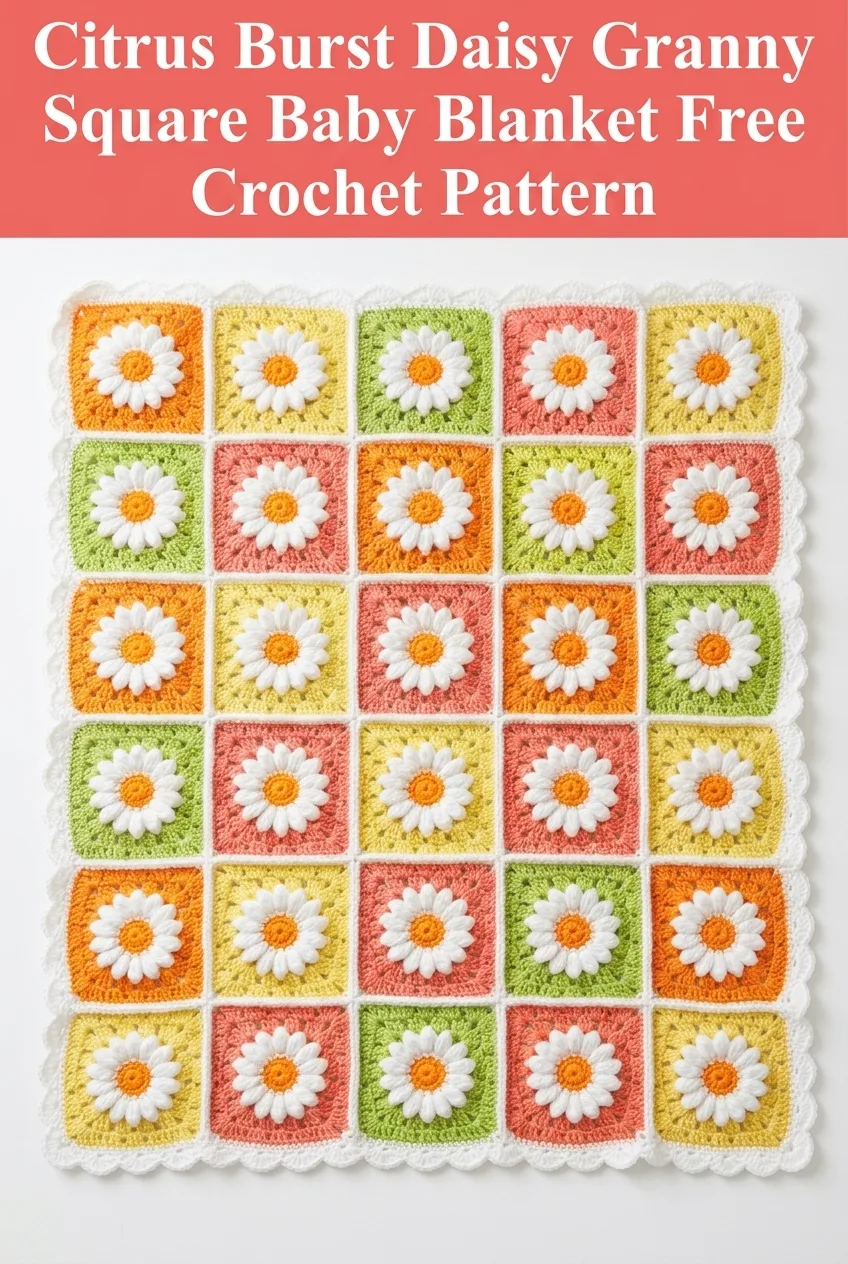
When I sat down to design this baby blanket, I had one goal in mind: create something that looks like a summer garden but works up with straightforward techniques any crocheter can handle. I wanted cheerful colors, a classic daisy motif, and that satisfying granny square construction that makes blanket-making feel like collecting little treasures. The white scalloped border was essential because it needed that finished, polished look without complicated edging techniques. I am SO pleased with how this Citrus Burst Daisy Granny Square Baby Blanket turned out! The bright oranges, corals, yellows, and greens remind me of a fruit bowl on a sunny kitchen counter, and those puffy daisy centers just make me smile every single time.
About This Daisy Granny Square Crochet Pattern
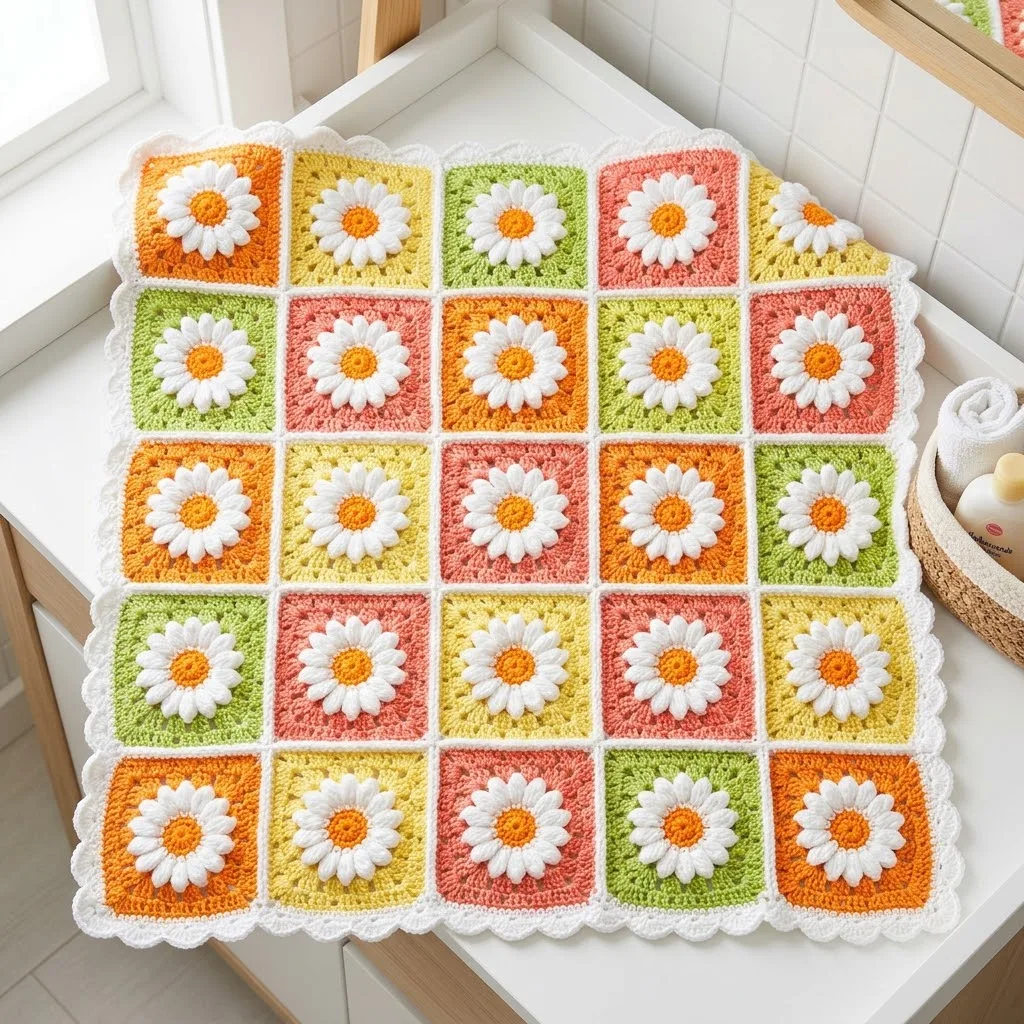
This crochet tutorial walks you through creating a stunning baby blanket made entirely of daisy-centered granny squares. You will make 25 individual squares, each featuring a raised daisy with a bright orange center and white petals, surrounded by colorful granny-style rounds in citrus shades.
The construction method is simple and portable. Work each square separately, join them together, then add a sweet scalloped border. This step by step approach means you can carry a single square in your bag and crochet anywhere.
Skill level: Confident beginner to intermediate. If you can chain, single crochet, and double crochet, you can absolutely make this blanket. The daisy center uses a puff stitch technique, which I will explain thoroughly below.
Finished Measurements
Each granny square measures approximately 5 inches by 5 inches (12.5 cm x 12.5 cm) before blocking.
Finished blanket size: approximately 25 inches by 25 inches (63.5 cm x 63.5 cm), not including border. With the scalloped border, final dimensions are roughly 28 inches by 28 inches (71 cm x 71 cm).
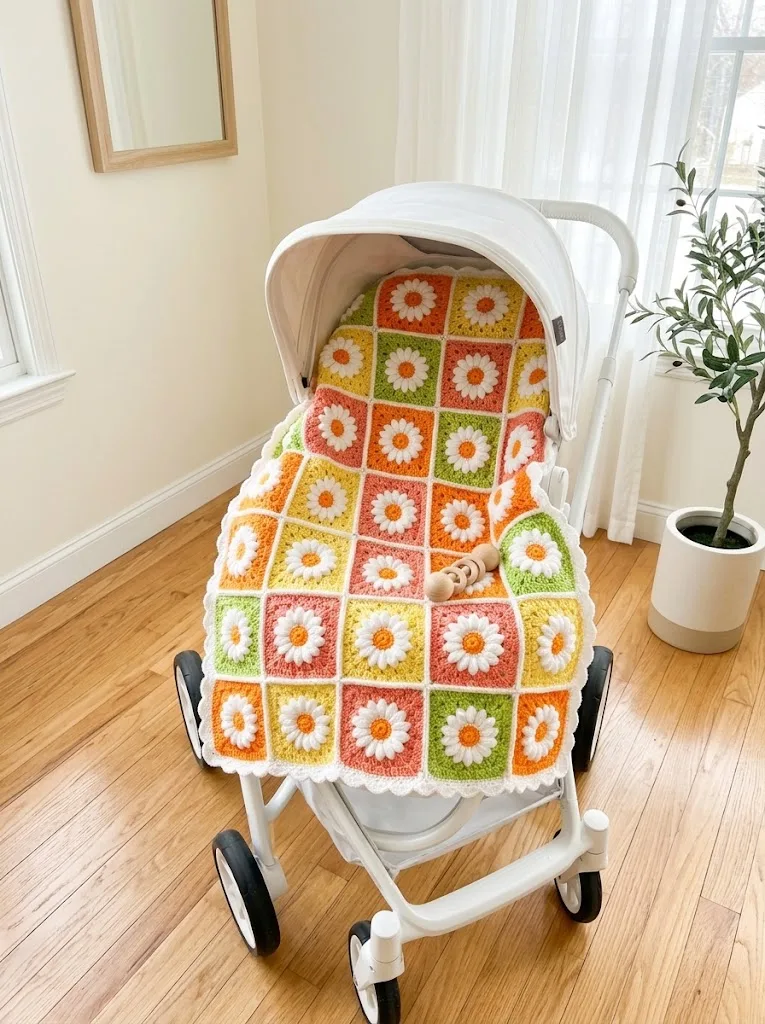
This size works beautifully as a stroller blanket, car seat cover, or tummy time mat.
Materials Needed
Yarn:
– Orange (bright citrus shade): approximately 150 yards
– Coral/Salmon: approximately 150 yards
– Yellow (sunny golden shade): approximately 150 yards
– Lime Green: approximately 150 yards
– White: approximately 300 yards (used for all daisy petals, joining, and border)
Total yarn needed: approximately 900 yards
I recommend a soft acrylic or cotton blend for easy washing. Look for yarn labeled "baby soft" or machine washable for practicality.
Hook:
Notions:
Gauge
4 double crochet clusters and 4 rows = 4 inches in granny square pattern with size H hook.
Gauge matters here because your squares need to match in size for clean joining. Make one test square first. If it measures larger than 5 inches, go down a hook size. Smaller than 5 inches? Go up a hook size.
Abbreviations and Stitch Definitions
Let me define every stitch before we begin. No surprises!
Ch = Chain: Yarn over, pull through loop on hook. This creates the foundation for your work.
Sl st = Slip stitch: Insert hook, yarn over, pull through both the stitch and the loop on your hook in one motion. Used for joining and moving across stitches invisibly.
Sc = Single crochet: Insert hook, yarn over and pull up a loop (2 loops on hook), yarn over and pull through both loops.
Dc = Double crochet: Yarn over, insert hook, yarn over and pull up a loop (3 loops on hook), yarn over and pull through 2 loops (2 loops remain), yarn over and pull through last 2 loops.
Puff stitch: (Yarn over, insert hook into stitch, yarn over and pull up a loop) 4 times in the same stitch (9 loops on hook), yarn over and pull through all 9 loops, ch 1 to secure. This creates a puffy, raised texture perfect for flower centers.
3-dc cluster = Three double crochets worked into the same space or stitch. This is the building block of granny squares.
Ch-sp = Chain space: The gap created under a chain from a previous round. You work into this space, not into the chain stitch itself.
How to Crochet the Daisy Granny Square
You will make 25 squares total. I recommend making them in batches by color to keep track easily. The squares in this blanket use orange, coral, yellow, and lime green for the outer rounds, distributed in a pleasing random pattern.
Daisy Center (Rounds 1-2)
With orange yarn:
Round 1: Create a magic ring (or ch 4 and sl st to first ch to form a ring). Ch 1, work 8 sc into the ring. Sl st to first sc to join. (8 sc)
Don’t know the magic ring? No worries! Simply chain 4 and slip stitch to the first chain to create a small loop. Works just fine.
Fasten off orange. Pull your tail to close the center tightly.
With white yarn:
Round 2 (Petals): Join white with a sl st to any sc from Round 1. In the SAME stitch: work (puff stitch, ch 2, sl st). This creates your first petal.
*Sl st to next sc. In that stitch: work (puff stitch, ch 2, sl st).*
Repeat from * to * around all 8 sc. You will have 8 petals total when finished.
Sl st to first sl st to join. Do not fasten off white.
Beginner tip: The petals naturally want to cup upward and outward. This is correct! They create that beautiful dimensional daisy look.
Granny Square Rounds (Rounds 3-4)
Now we transition from the round daisy into a square shape. This is where the granny magic happens.
Round 3 (Creating the Square Shape):
Still using white yarn, and working BEHIND the petals (yes, behind them):
Ch 3 (counts as first dc). Work 2 dc into the base of the same petal (into the sl st between petals from Round 1). Ch 2.
*Skip one petal. Work 3 dc into the base of the next petal (the sl st between petals). Ch 2.*
Repeat from * to * two more times. You should have 4 groups of 3 dc with ch-2 spaces between them. These become your four corners.
Sl st to top of beginning ch-3 to join. Fasten off white. (4 corner clusters, 4 ch-2 spaces)
Round 4 (Background Color):
Join your chosen background color (orange, coral, yellow, or lime green) with a sl st to any corner ch-2 space.
Ch 3 (counts as dc), 2 dc in same corner space, ch 2, 3 dc in same corner space. This creates your first corner.
*Ch 1. In next corner ch-2 space: work (3 dc, ch 2, 3 dc). This is your corner.*
Repeat from * to * around remaining corners.
Ch 1. Sl st to top of beginning ch-3 to join. (4 corners with ch-2 spaces, 4 sides with ch-1 spaces between corner clusters)
Do not fasten off. Continue to Round 5.
Final Square Round (Round 5)
Round 5:
Ch 3 (counts as dc), 2 dc in same space (you are starting between the last 3-dc cluster and the corner).
*Corner: In corner ch-2 space, work (3 dc, ch 2, 3 dc).*
*Side: Ch 1, 3 dc in next ch-1 space, ch 1.*
*Corner: In corner ch-2 space, work (3 dc, ch 2, 3 dc).*
Continue this pattern around: corner, side cluster, corner, side cluster, corner, side cluster, corner, side cluster.
After the last corner, ch 1, sl st to top of beginning ch-3 to join.
Fasten off. Weave in ends. (Each side now has two 3-dc clusters plus two corner clusters)
Your finished square should measure approximately 5 inches across.
Color Arrangement
Looking at the blanket, the squares are arranged in a 5 by 5 grid with colors distributed to avoid placing the same color adjacent to itself. Here is one suggested layout:
Row 1: Orange, Yellow, Lime, Coral, Orange
Row 2: Lime, Coral, Orange, Yellow, Lime
Row 3: Coral, Lime, Coral, Lime, Yellow
Row 4: Yellow, Orange, Yellow, Coral, Orange
Row 5: Orange, Yellow, Lime, Yellow, Lime
Feel free to arrange randomly! Lay out all 25 squares before joining and shuffle until the distribution feels balanced.
Joining the Squares
I recommend the flat slip stitch join for this beginner friendly blanket. It creates that clean white grid visible in the finished piece.
Step 1: Lay squares in your desired arrangement, 5 across and 5 down.
Step 2: With white yarn, hold two squares with wrong sides facing each other (right sides facing out).
Step 3: Insert hook through both corner ch-2 spaces. Join white with a sl st.
Step 4: Working through both layers, sl st through each stitch and ch-1 space along the edge until you reach the next corner.
Step 5: Sl st through both corner spaces. Fasten off or continue to next square in the row.
Step 6: Join all squares into 5 horizontal strips first. Then join the strips together vertically.
Pro tip: Check alignment frequently. The corners should line up with each other across the entire blanket.
Scalloped Border
The white scalloped border gives this daisy granny square baby blanket its finished, heirloom look.
With white yarn:
Round 1 (Foundation):
Join white to any corner ch-2 space with a sl st.
Ch 1, 3 sc in corner space.
*Sc evenly along the side, working approximately 3 sc per granny cluster and 1 sc in each ch-1 space. Work 3 sc in each corner ch-2 space.*
Continue around entire blanket. Sl st to first sc to join. Count your stitches along each side to ensure they match.
Round 2 (Scallops):
Ch 1, sc in first st.
*Skip 2 sts, 5 dc in next st (this creates the scallop), skip 2 sts, sc in next st.*
Repeat from * to * around entire blanket, adjusting at corners so a scallop peak falls at each corner point.
Sl st to first sc to join. Fasten off.
Adjustment tip: You may need to skip only 1 stitch or add an extra sc occasionally to make the scallops work out evenly. This is normal! Just keep the pattern looking consistent.
Finishing Your Blanket
Weave in ALL ends securely. For a baby blanket, I weave each tail through at least 2 inches of stitches, then back in the opposite direction. Baby fingers love to find loose ends.
Blocking (optional but recommended): Wet block your finished blanket by soaking it in lukewarm water for 15 minutes. Roll in a towel to remove excess water. Lay flat on a blocking mat or clean towels, gently stretching to square up the edges. Allow to dry completely.
Washing instructions: Machine wash cold on gentle cycle. Tumble dry low or lay flat to dry. If using cotton yarn, expect slight shrinkage on first wash.
Tips for Success
Tension consistency: Try to maintain the same tension throughout all 25 squares. If some squares are noticeably larger or smaller, they will not join neatly.
Puff stitch practice: If you have never made a puff stitch before, practice a few on scrap yarn first. The trick is pulling up loops that are slightly taller than normal so they remain loose and puffy.
Counting saves frustration: Count your stitches at the end of every round. Catching a mistake early is much easier than frogging later.
Color planning: Wind your yarn into smaller balls if working from large skeins. This keeps your project portable and prevents tangles.
Why This Crochet Pattern Works for Baby Gifts
This daisy granny square blanket makes an exceptional baby shower gift. The bright citrus colors work for any nursery theme, and the classic granny construction means it is durable enough for years of love. New parents appreciate handmade gifts that can be machine washed, and this blanket delivers on practicality without sacrificing beauty.
The 28-inch finished size is intentional. It is large enough to be useful but small enough to fold into a diaper bag. Babies grow fast, but this blanket transitions from swaddle to stroller cover to beloved "blankie" for years.
Thank you so much for spending time with me on this project! I genuinely hope you love making this Citrus Burst Daisy Granny Square Baby Blanket as much as I loved designing it. If you make one, please tag me on Instagram or share a photo in my Facebook group. Seeing your versions brings me so much joy.
If you want to come back to this crochet pattern later, go ahead and save it to your Pinterest boards so you can find it when you are ready to start. And I would absolutely love to hear from you in the comments below, whether you have questions, want to share your color choices, or just want to say hello. Happy crocheting, friend!