
My best friend called me in a panic last month. Her sister’s baby shower was in two weeks, and she wanted to gift something handmade but had no idea where to start. I told her to come over with some coral yarn and a cup of coffee. Four evenings later, she had finished the sweetest little pinafore dress, and she could not believe she made it herself. That dress is the reason I sat down to write this pattern out properly. It is the perfect mix of texture and simplicity, and I knew other crafters needed this in their project bags.
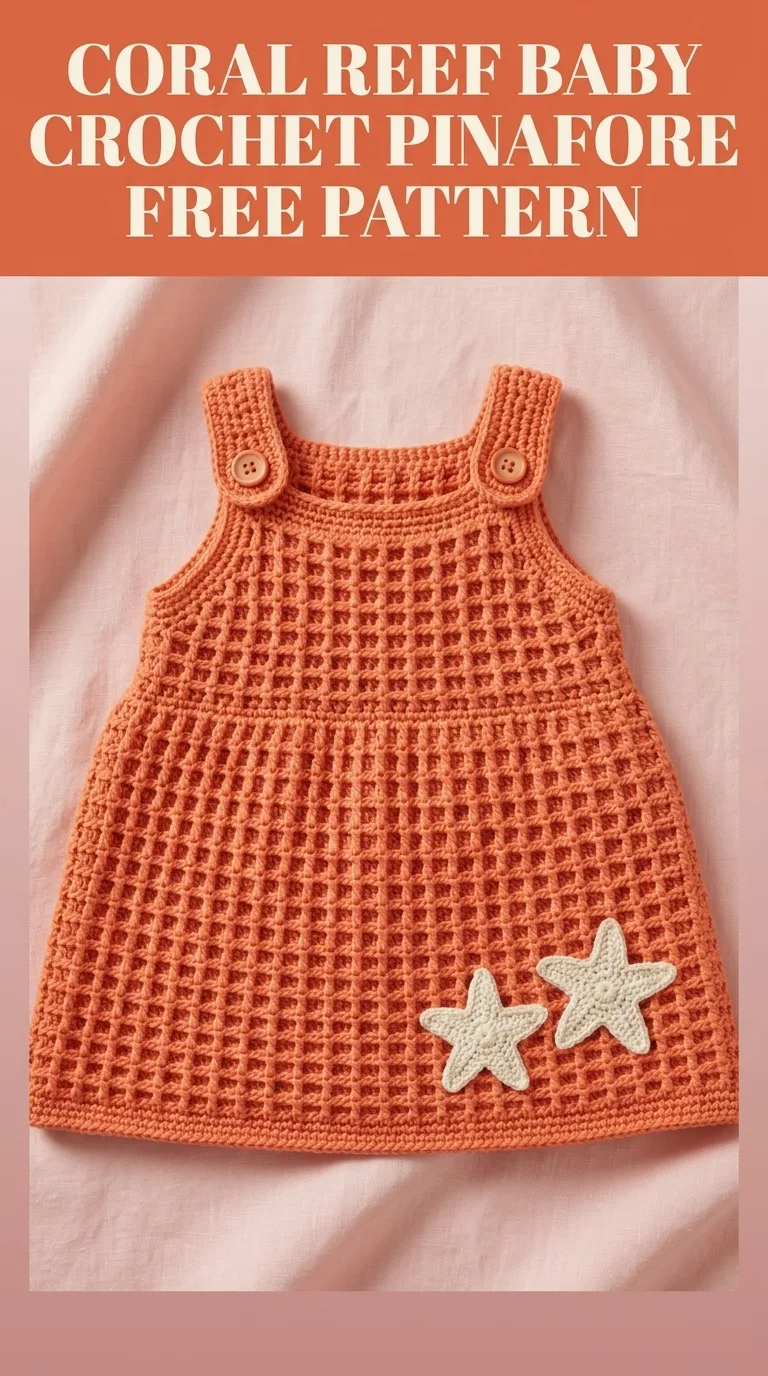
This Coral Reef Baby Crochet Pinafore features a gorgeous waffle-inspired texture that looks far more complicated than it actually is. The construction is straightforward, the stitches are beginner friendly, and the finished piece has that heirloom quality that makes handmade baby gifts so special. Whether you are making this for your own little one, a baby shower gift, or a charity donation, this crochet pattern will become one of your favorites.
Why You Will Love This Crochet Baby Pinafore Pattern
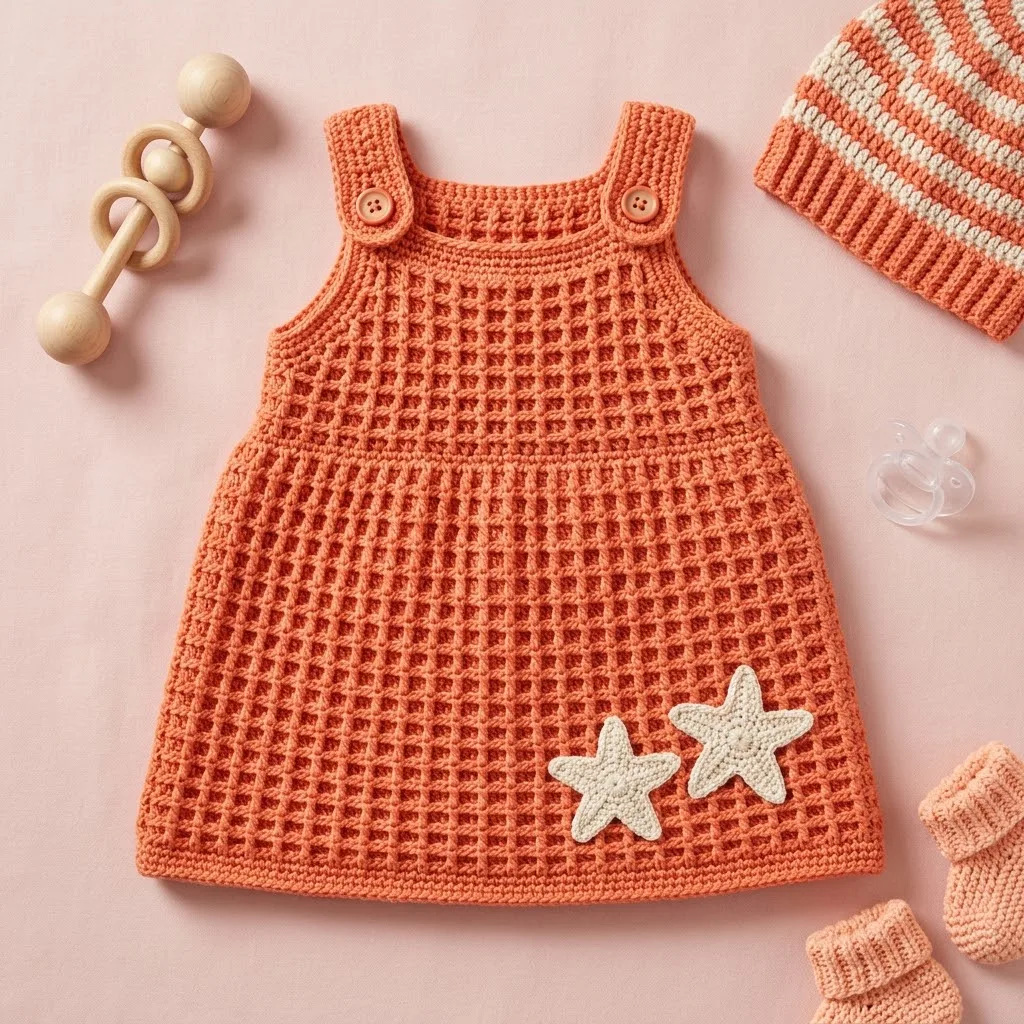
This little dress has everything going for it. The textured grid pattern creates visual interest without overwhelming the delicate shape of a baby dress. The warm coral color works beautifully for spring, summer, or fall, and you can easily swap it for any shade that matches your nursery vision.
The pinafore style means no complicated sleeve shaping. Just a sweet bodice, shoulder straps with button closures, and an A-line skirt that allows plenty of room for diaper changes and chubby baby legs. The decorative starfish appliqués add a charming coastal touch, but you can leave them off for a simpler look or swap them for flowers, hearts, or any motif you prefer.
This crochet tutorial walks you through every step, from the foundation chain to the finishing touches. Even if you have never made a baby garment before, you can absolutely do this.
Skill Level
Confident Beginner to Intermediate
If you can work basic stitches in rows and are comfortable counting your stitches, you can make this pinafore. The textured pattern uses a simple stitch combination that repeats across every row, so once you get the hang of it, the whole skirt section works up quickly.
Finished Measurements
This pattern is written for size 6 to 12 months.
Materials Needed
Gather these supplies before you begin. Having everything ready makes the process so much smoother.
Yarn
I recommend a soft cotton blend or acrylic baby yarn for this project. You want something machine washable that holds the textured stitches nicely. Look for yarn labeled as baby safe with no loose fibers.
Hook
Always check your gauge and adjust hook size if needed.
Notions
Gauge
14 stitches and 10 rows = 4 inches in the textured grid pattern using size H/8 hook.
Please take the time to check your gauge. Baby garments need to fit properly for comfort and safety. If your gauge is too tight, go up a hook size. If it is too loose, go down a hook size.
Abbreviations and Stitch Definitions
Let me walk you through every stitch abbreviation you will see in this pattern. I have included plain English definitions so nothing feels confusing.
Special Stitch: Textured Grid Pattern
The beautiful waffle-like texture on this pinafore comes from alternating front post double crochet and back post double crochet stitches in a specific pattern. Do not worry if you have never tried post stitches before. They are simply double crochets worked around the post of the stitch below instead of into the top loops.
Here is the key: where you worked a front post stitch in the previous row, you will work a back post stitch. Where you worked a back post stitch, you will work a front post stitch. This creates the raised grid effect.
If this sounds confusing right now, it will make perfect sense once you start working. Trust me on this one.
Pattern Instructions
Skirt (Worked Flat, Bottom Up)
The skirt is the largest section and uses the textured grid pattern throughout. We start at the hem and work upward toward the bodice.
Foundation Row: With coral yarn and H/8 hook, ch 79.
Row 1 (RS): Dc in 4th ch from hook and in each ch across. Turn. (77 dc, counting the turning ch as 1 dc)
Row 2: Ch 2 (does not count as a stitch throughout), dc in first st, *fpdc around next st, bpdc around next st* rep from * to last 2 sts, fpdc around next st, dc in last st. Turn. (77 sts)
Row 3: Ch 2, dc in first st, *bpdc around next fpdc, fpdc around next bpdc* rep from * to last 2 sts, bpdc around last fpdc, dc in last st. Turn. (77 sts)
Rows 4 through 28: Rep Rows 2 and 3, alternating the post stitches to maintain the grid texture. End with a Row 2 repeat. Turn. (77 sts)
Your skirt should measure approximately 11 inches in length at this point. If you need more or less length, add or remove rows in pairs to maintain the pattern.
Bodice Section
Now we will shape the bodice by working decreases and creating the armhole openings.
Row 29 (Decrease Row): Ch 2, dc in first st, *dc2tog over next 2 sts* rep from * to last 2 sts, dc in last 2 sts. Turn. (40 sts)
The dc2tog (double crochet two together) is a decrease stitch. Work it like this: yarn over, insert hook in next st, yarn over and pull up a loop, yarn over and pull through 2 loops. Stop here. Yarn over, insert hook in following st, yarn over and pull up a loop, yarn over and pull through 2 loops, yarn over and pull through all 3 loops on hook. You have turned 2 stitches into 1.
Row 30: Ch 2, dc in each st across. Turn. (40 sts)
Row 31: Ch 2, dc in each st across. Turn. (40 sts)
Divide for Armholes
Row 32 (Right Front): Ch 2, dc in first 8 sts. Turn, leaving remaining sts unworked. (8 sts)
Rows 33 through 35: Ch 2, dc in each st across. Turn. (8 sts)
Fasten off and weave in the end.
Row 32 (Back): Skip 2 sts from the right front for the armhole. Join yarn in next st with a sl st. Ch 2, dc in same st and next 19 sts. Turn, leaving remaining sts unworked. (20 sts)
Rows 33 through 35: Ch 2, dc in each st across. Turn. (20 sts)
Fasten off and weave in the end.
Row 32 (Left Front): Skip 2 sts from the back for the armhole. Join yarn in next st with a sl st. Ch 2, dc in same st and remaining 7 sts. Turn. (8 sts)
Rows 33 through 35: Ch 2, dc in each st across. Turn. (8 sts)
Fasten off and weave in the end.
Shoulder Straps (Make 2)
The straps connect the front bodice to the back and feature buttonholes for adjustable closure.
Foundation: With coral yarn and H/8 hook, ch 7.
Row 1: Sc in 2nd ch from hook and each ch across. Turn. (6 sc)
Rows 2 through 20: Ch 1, sc in each st across. Turn. (6 sc)
Row 21 (Buttonhole Row): Ch 1, sc in first 2 sts, ch 2, sk 2 sts, sc in last 2 sts. Turn. (4 sc, 2 ch)
Row 22: Ch 1, sc in first 2 sts, 2 sc in ch-2 space, sc in last 2 sts. Turn. (6 sc)
Rows 23 through 25: Ch 1, sc in each st across. Turn. (6 sc)
Fasten off, leaving a long tail for sewing.
Assembly
1. Attach straps to front bodice: Position each strap at the outer edge of each front panel. Using your yarn needle and the long tail, whip stitch the plain end of the strap securely to the top of the front bodice.
2. Sew side seams: Fold the pinafore with right sides together. Using coral yarn and your yarn needle, seam the sides of the skirt from the hem up to the armhole opening. Leave the armhole open.
3. Position buttons: Lay the straps over the back bodice and mark where the buttonholes fall. Sew buttons securely to the back bodice at those marks.
Edging (Optional)
For a polished finish, add a simple single crochet border around the armholes and neckline.
Armhole Edging: Join coral yarn at the underarm. Sc evenly around the armhole opening, working approximately 2 sc for every row end and 1 sc in each stitch. Sl st to first sc to join. Fasten off.
Neckline Edging: Join coral yarn at one shoulder. Sc evenly across the back neckline, down the front edge, across the front neckline, and up the other front edge. Fasten off.
Starfish Appliqués (Optional)
These sweet starfish add the perfect coastal charm. Make two in cream yarn.
Magic Ring: With cream yarn and G/6 hook, create a magic ring.
Round 1: Ch 1, work 5 sc into the ring. Do not join. Pull ring closed. (5 sc)
Star Points (worked in rows off each sc):
*First Point:* Ch 4, sl st in 2nd ch from hook, sc in next ch, hdc in next ch, sl st in same sc where you started the chain.
*Second through Fifth Points:* Sl st in next sc of the center ring. Rep the point instructions (ch 4, sl st in 2nd ch, sc, hdc, sl st back to the ring) for each remaining sc.
Fasten off, leaving a long tail. Gently shape the starfish points with your fingers. Sew to the lower front of the pinafore skirt using the photo as a guide.
Helpful Tips for Success
Counting stitches: I recommend placing a stitch marker at the beginning of each row until you feel confident with the pattern repeat. It helps catch mistakes early.
Post stitches: If your post stitches feel tight, try loosening your tension slightly. The hook should slide easily around the post.
Blocking: Wet block your finished pinafore for the best results. Soak it in lukewarm water, gently squeeze out excess moisture, and lay flat to dry. This evens out your stitches and helps the grid texture pop.
Adjusting size: To make this pattern smaller (3 to 6 months), start with 69 chains instead of 79 and reduce the bodice stitches proportionally. For larger sizes (12 to 18 months), start with 89 chains and adjust accordingly.
How to Care for Your Finished Pinafore
Machine wash on a gentle cycle with cold water. Lay flat to dry or tumble dry on low heat. If using cotton yarn, expect minimal shrinkage after the first wash. Avoid hanging to dry, as this can stretch the straps.
Final Thoughts on This Baby Crochet Pinafore Pattern
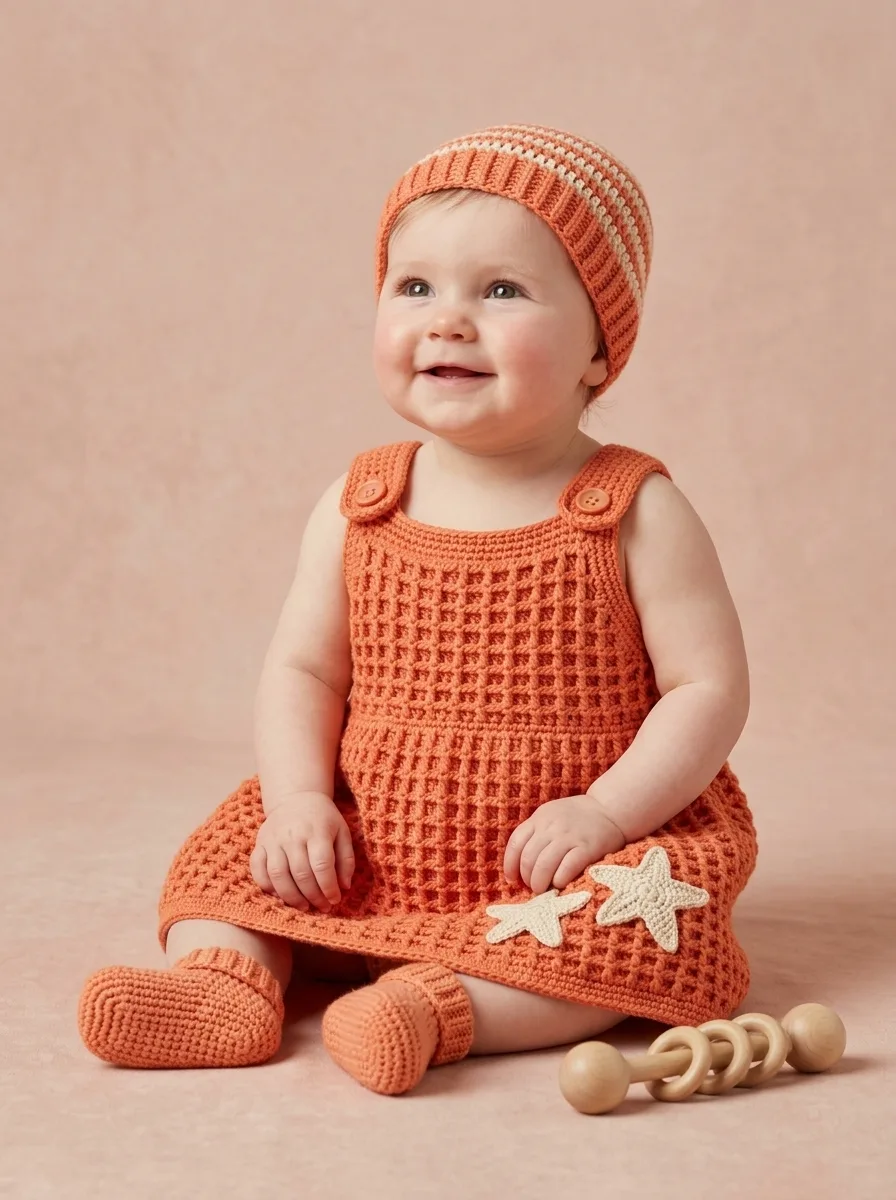
This Coral Reef Baby Crochet Pinafore combines timeless style with satisfying texture. Every time I see a little one wearing something handmade, my heart swells a bit. There is something irreplaceable about creating garments stitch by stitch, knowing exactly how much love went into every row.
I hope this step by step crochet tutorial gives you the confidence to try your first baby garment or add another beloved pattern to your collection. This pinafore works up faster than you might expect, and the finished piece looks absolutely stunning in photos.
Thank you so much for choosing this pattern. It truly means the world to me when you trust my designs for your precious handmade projects. If you make this pinafore, I would absolutely love to see it. Tag me on Instagram or share a photo in my Facebook group. Seeing your creations is the best part of my day.
If you enjoyed this pattern, go ahead and save it to your Pinterest boards so you can find it whenever you are ready to start. And please drop a comment below if you make one. I love hearing which colors you choose and who the lucky little recipient will be. Happy crocheting, friend.