
I’ve been obsessed with Highland cows for ages. Those shaggy faces, the sweet little noses, the way they always look like they’re having a good day. When I finally sat down to design my own version, I knew I wanted him chunky, cuddly, and full of personality. Meet Angus. He’s got a ginger mane, a tiny party hat, and he’s holding an acorn because apparently he’s ready for autumn forever. I am SO pleased with how this rustic Highland cow amigurumi turned out, and I cannot wait for you to make your own.
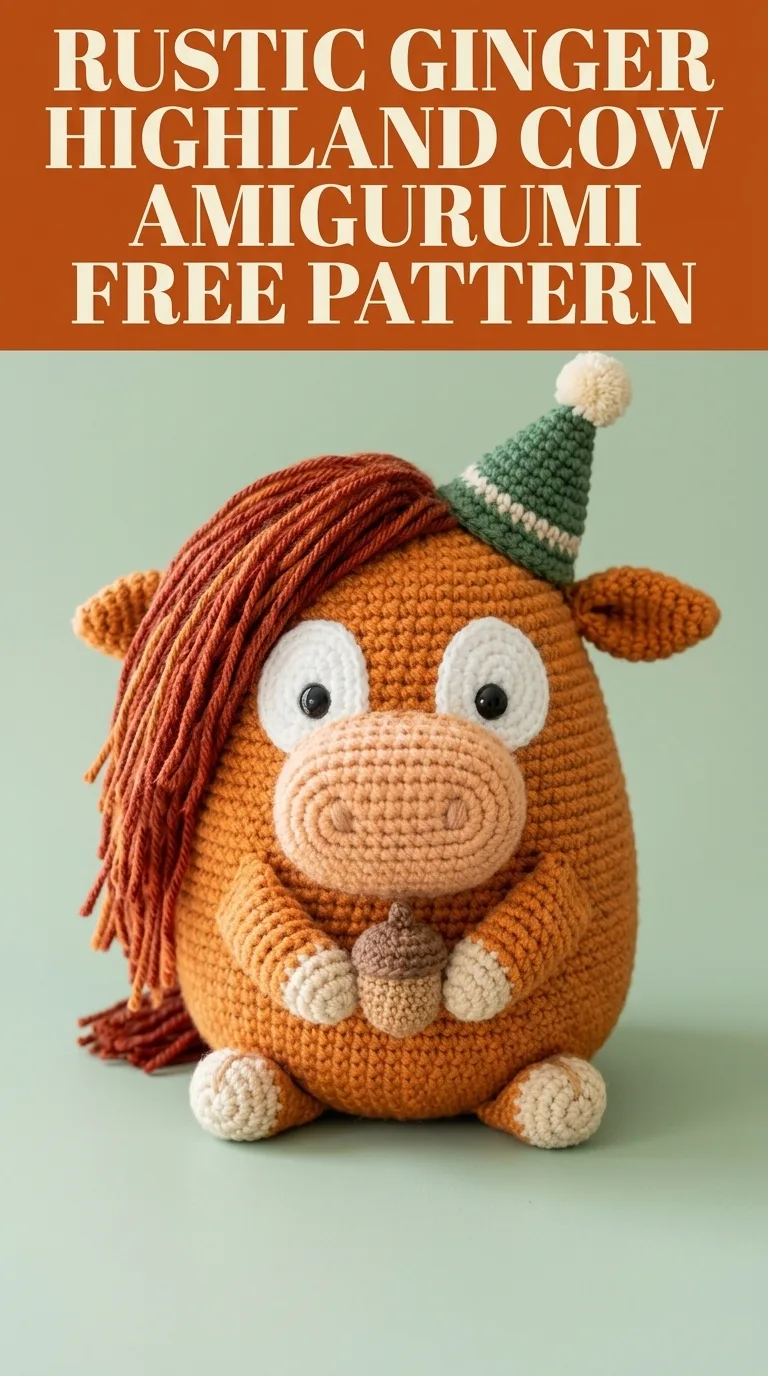
This crochet pattern creates an adorable stuffed Highland cow that stands approximately 8 inches tall when complete. The rounded body shape makes him perfectly huggable, while all those special details bring his personality to life. Don’t let the finished look intimidate you. If you can single crochet in the round and you’re willing to take it piece by piece, you absolutely can make this little guy.
Why You’ll Love This Highland Cow Crochet Pattern
This amigurumi project hits that sweet spot between impressive and achievable. The construction uses basic stitches throughout, primarily single crochet (sc), which means you’re building skills without constantly checking tutorials. The magic is in the assembly and those charming finishing touches.
The rounded egg-shaped body gives Angus his chunky silhouette. His shaggy mane uses simple yarn strands attached with a lark’s head knot. No fancy techniques required. The party hat is optional but honestly makes him about ten times cuter, and it’s a great way to practice stripes and pom poms.
What makes this pattern special:
Materials You’ll Need
Yarn (Worsted Weight, #4):
Hook:
Notions:
Gauge: Gauge is not critical for amigurumi, but your stitches should be tight enough that stuffing doesn’t peek through. If you see white fiberfill between stitches, go down a hook size.
Abbreviations and Stitch Definitions
Before we dive in, let’s make sure we’re speaking the same language.
Ch = Chain. Wrap yarn over hook, pull through loop on hook. This creates your foundation.
Sc = Single crochet. Insert hook into stitch, yarn over and pull up a loop (2 loops on hook), yarn over and pull through both loops.
Inc = Increase. Work 2 single crochets into the same stitch. This makes your piece grow wider.
Dec = Invisible decrease. Insert hook through front loops only of the next 2 stitches, yarn over and pull through both front loops, yarn over and pull through both loops on hook. This creates a cleaner decrease than the standard method.
Sl st = Slip stitch. Insert hook, yarn over, pull through stitch and loop on hook in one motion.
MR = Magic ring. An adjustable loop that closes completely, leaving no hole at the center of your work.
FO = Fasten off. Cut yarn and pull through final loop to secure.
Pattern Notes
This Highland cow amigurumi is worked in continuous rounds unless otherwise noted. Do not join rounds with a slip stitch. Use a stitch marker to track the beginning of each round and move it up as you work.
Stuff pieces firmly as you go. It’s much easier to add stuffing before the opening gets too small.
All pieces are made separately and sewn together during assembly. Take your time with placement. Pin everything before sewing to make sure you’re happy with the look.
Body
The body is worked from the bottom up in one piece using burnt orange yarn.
Rnd 1: 6 sc in MR (6 sts)
Rnd 2: Inc in each st around (12 sts)
Rnd 3: *Sc 1, inc* repeat around (18 sts)
Rnd 4: *Sc 2, inc* repeat around (24 sts)
Rnd 5: *Sc 3, inc* repeat around (30 sts)
Rnd 6: *Sc 4, inc* repeat around (36 sts)
Rnd 7: *Sc 5, inc* repeat around (42 sts)
Rnd 8: *Sc 6, inc* repeat around (48 sts)
Rnds 9-12: Sc in each st around (48 sts)
Rnd 13: *Sc 7, inc* repeat around (54 sts)
Rnds 14-22: Sc in each st around (54 sts)
Rnd 23: *Sc 7, dec* repeat around (48 sts)
Rnd 24: Sc in each st around (48 sts)
Rnd 25: *Sc 6, dec* repeat around (42 sts)
Rnd 26: Sc in each st around (42 sts)
Rnd 27: *Sc 5, dec* repeat around (36 sts)
Begin stuffing the body firmly. Continue adding stuffing as the opening narrows.
Rnd 28: *Sc 4, dec* repeat around (30 sts)
Rnd 29: *Sc 3, dec* repeat around (24 sts)
Rnd 30: *Sc 2, dec* repeat around (18 sts)
Rnd 31: *Sc 1, dec* repeat around (12 sts)
Rnd 32: Dec around (6 sts)
FO, leaving a tail. Thread through remaining stitches and pull tight to close. Weave in end.
Muzzle
The muzzle is worked in light tan yarn and creates that distinctive Highland cow snout.
Rnd 1: 6 sc in MR (6 sts)
Rnd 2: Inc in each st around (12 sts)
Rnd 3: *Sc 1, inc* repeat around (18 sts)
Rnd 4: *Sc 2, inc* repeat around (24 sts)
Rnd 5: Working in back loops only, sc in each st around (24 sts)
Rnds 6-8: Sc in each st around (24 sts)
Sl st to next st, FO leaving a long tail for sewing.
Stuff the muzzle lightly. The back loop round in Rnd 5 creates a nice ridge that defines the nose area.
Using a small amount of tan or pink yarn, embroider two small nostril indentations with straight stitches on the front of the muzzle.
Eye Patches (Make 2)
These white ovals frame the safety eyes and give Angus his sweet expression.
Using cream/white yarn:
Rnd 1: 6 sc in MR (6 sts)
Rnd 2: Inc in each st around (12 sts)
Rnd 3: *Sc 1, inc* repeat around (18 sts)
Sl st to next st, FO leaving a long tail for sewing.
These should lay flat like little circles.
Ears (Make 2)
Using burnt orange yarn:
Rnd 1: 6 sc in MR (6 sts)
Rnd 2: Inc in each st around (12 sts)
Rnds 3-4: Sc in each st around (12 sts)
Rnd 5: *Sc 1, dec* repeat around (8 sts)
Sl st to next st, FO leaving a long tail. Do not stuff. Flatten the ear and sew the opening closed.
Arms (Make 2)
Using light tan yarn:
Rnd 1: 6 sc in MR (6 sts)
Rnd 2: Inc in each st around (12 sts)
Rnds 3-4: Sc in each st around (12 sts)
Change to burnt orange:
Rnds 5-10: Sc in each st around (12 sts)
Sl st to next st, FO leaving a long tail. Stuff lightly.
Feet (Make 2)
Using light tan yarn:
Rnd 1: 6 sc in MR (6 sts)
Rnd 2: Inc in each st around (12 sts)
Rnd 3: *Sc 1, inc* repeat around (18 sts)
Rnds 4-6: Sc in each st around (18 sts)
Change to burnt orange:
Rnds 7-8: Sc in each st around (18 sts)
Sl st to next st, FO leaving a long tail. Stuff firmly.
Party Hat (Optional)
This adorable striped cone hat takes this Highland cow amigurumi to the next level.
Using green yarn:
Rnd 1: 4 sc in MR (4 sts)
Rnd 2: *Sc 1, inc* repeat around (6 sts)
Rnd 3: Sc in each st around (6 sts)
Change to cream:
Rnd 4: *Sc 2, inc* repeat around (8 sts)
Change to green:
Rnd 5: Sc in each st around (8 sts)
Rnd 6: *Sc 3, inc* repeat around (10 sts)
Change to cream:
Rnd 7: Sc in each st around (10 sts)
Change to green:
Rnd 8: *Sc 4, inc* repeat around (12 sts)
Rnd 9: Sc in each st around (12 sts)
Sl st to next st, FO leaving a long tail.
Pom Pom: Wind cream yarn around two fingers about 20 times. Tie tightly in the center, cut loops, and trim into a small ball. Attach to the top of the hat.
Acorn (Optional)
This tiny acorn gives Angus something to hold.
Acorn Cap (Brown):
Rnd 1: 6 sc in MR (6 sts)
Rnd 2: Inc in each st around (12 sts)
Rnds 3-4: Sc in each st around (12 sts)
Sl st, FO leaving a tail.
Acorn Body (Tan):
Rnd 1: 6 sc in MR (6 sts)
Rnd 2: Inc in each st around (12 sts)
Rnds 3-5: Sc in each st around (12 sts)
Rnd 6: *Sc 1, dec* repeat around (8 sts)
Rnd 7: Dec around (4 sts)
FO, stuff lightly, close opening. Sew cap to top of acorn body.
Mane
Cut approximately 30 to 40 strands of rust/ginger yarn, each about 8 inches long.
Using a lark’s head knot, attach strands along the top center of the head, starting between the ears and working down the back. To make a lark’s head knot, fold a strand in half, insert your hook under a stitch on the head, pull the folded loop through, then pull the cut ends through that loop and tighten.
Space the strands close together for that signature shaggy Highland cow look. Trim the mane to your desired length once all strands are attached. Uneven, choppy lengths look more natural.
Assembly
Take your time here. Pin everything before you commit to sewing.
1. Attach eye patches to the upper front of the body, positioned side by side with a small gap between them.
2. Insert safety eyes through the center of each eye patch and secure with washers inside the body. Place them before you close the body if possible, or carefully cut a small opening.
3. Sew the muzzle centered below and slightly overlapping the bottom edges of the eye patches.
4. Attach the ears on either side of the head, angled slightly outward. They should sit horizontally, pointing to the sides.
5. Add the mane using lark’s head knots as described above.
6. Sew the arms to the front of the body, positioned so they come together in front. If you made the acorn, tuck it between the arms before finishing.
7. Attach the feet to the bottom front of the body so Angus sits upright.
8. Sew the party hat at a jaunty angle on top of the head, tilted to one side.
Weave in all remaining ends. Give your Highland cow a gentle squeeze to distribute the stuffing evenly.
Tips for Success
Tight stitches matter. Amigurumi should be worked tightly so stuffing doesn’t show. If your stitches feel loose, try going down a hook size.
Stuff as you go. Don’t wait until the end. Add stuffing gradually, especially before the opening gets too small to reach inside.
Use a stitch marker. Continuous rounds can get confusing fast. Moving your marker every round saves so much frustration.
Pin before sewing. Placement makes or breaks the final look. Take photos of your pinned pieces to check proportions before you commit.
Embrace imperfection. Handmade means character. If one ear is slightly bigger or the mane is a little wild, that’s just personality.
Customization Ideas
This crochet pattern is incredibly adaptable. Try these variations:
Final Thoughts on This Highland Cow Amigurumi Pattern
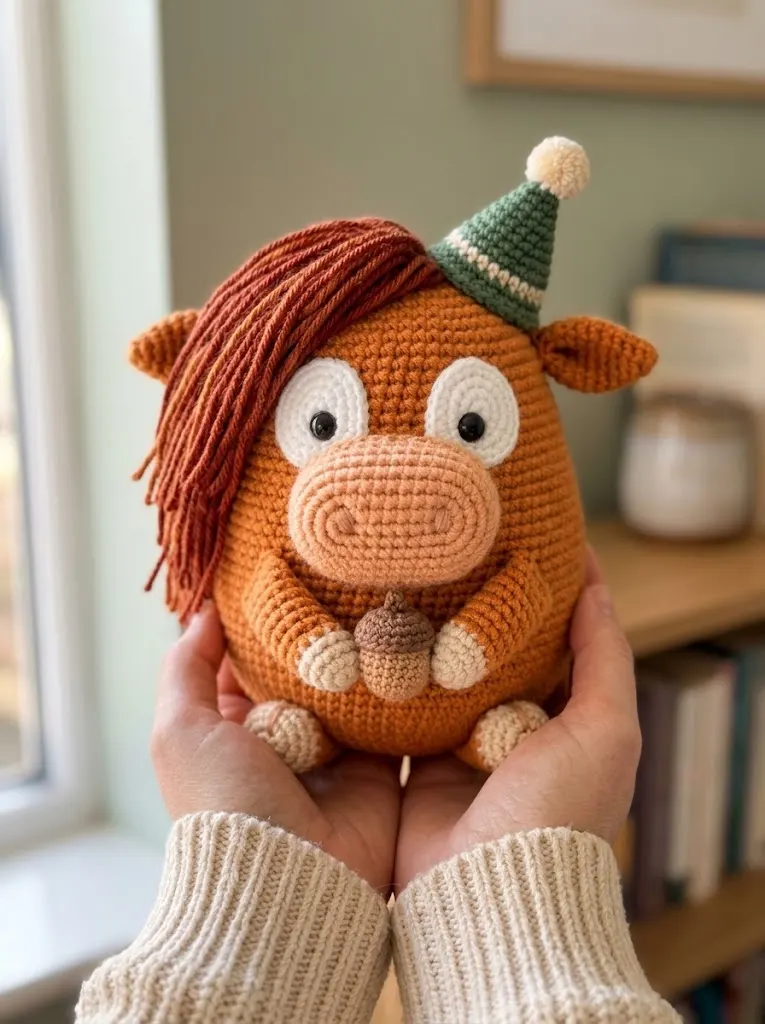
I really hope you enjoy making this rustic Highland cow amigurumi as much as I loved designing him. There’s something so satisfying about watching all those separate pieces come together into a finished friend. Angus has already become one of my favorite makes, and I think he’ll be a hit in your home too.
Whether you’re making this crochet pattern for yourself, a gift, or to sell at craft fairs, this little cow is sure to bring smiles. The step by step instructions should guide you through each piece, but don’t hesitate to make it your own.
If you loved this Highland cow crochet tutorial, I’d be so grateful if you saved it to your Pinterest boards so you can find it later and share it with fellow crocheters. And please, if you make your own Angus, drop a comment below or tag me on Instagram. Seeing your finished projects is honestly the best part of sharing patterns. Happy crocheting!