
Last spring, I was scrolling through old photos of my grandmother and found one of her wearing the cutest cropped sweater vest with little bows on it. She looked so effortlessly chic, and I immediately wanted to recreate that feminine vintage vibe for myself. I grabbed my hooks that same afternoon and started swatching. After a few attempts, some frogging, and way too much coffee, this beauty was born. I call it my ribbon vest because those little crocheted bows just make my heart happy every single time I look at it.
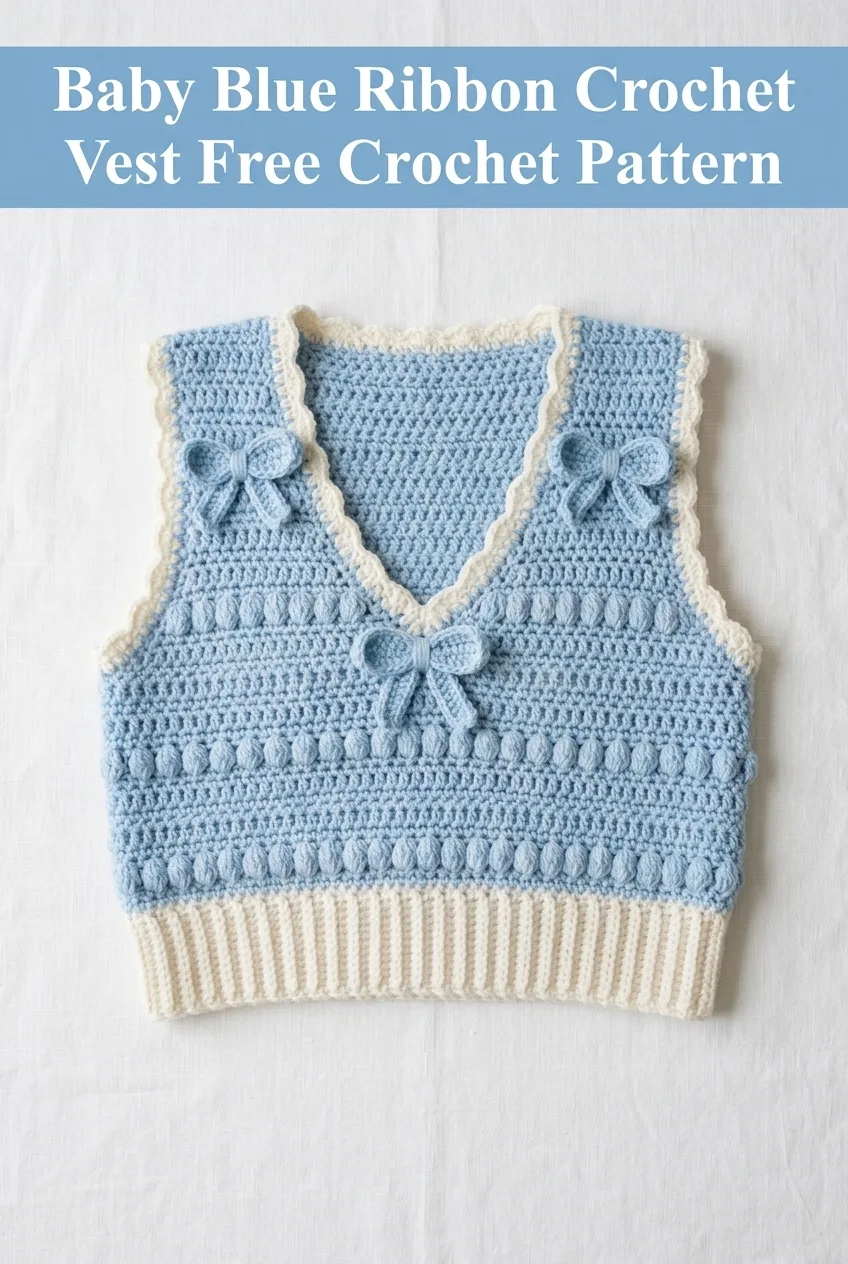
This Baby Blue Ribbon Crochet Vest Crochet Pattern combines classic construction with sweet decorative details that elevate a simple garment into something truly special. The puff stitch rows add gorgeous texture, while the contrast ribbed hem keeps everything polished and fitted. If you have been wanting to try your hand at crochet garment making, this is a wonderful project to build your confidence.
Why You Will Love This Crochet Vest Pattern
This vest hits that perfect sweet spot between beginner friendly and visually impressive. The body uses straightforward stitches you probably already know. The magic comes from combining them in a thoughtful way and adding those adorable bow embellishments at the end.
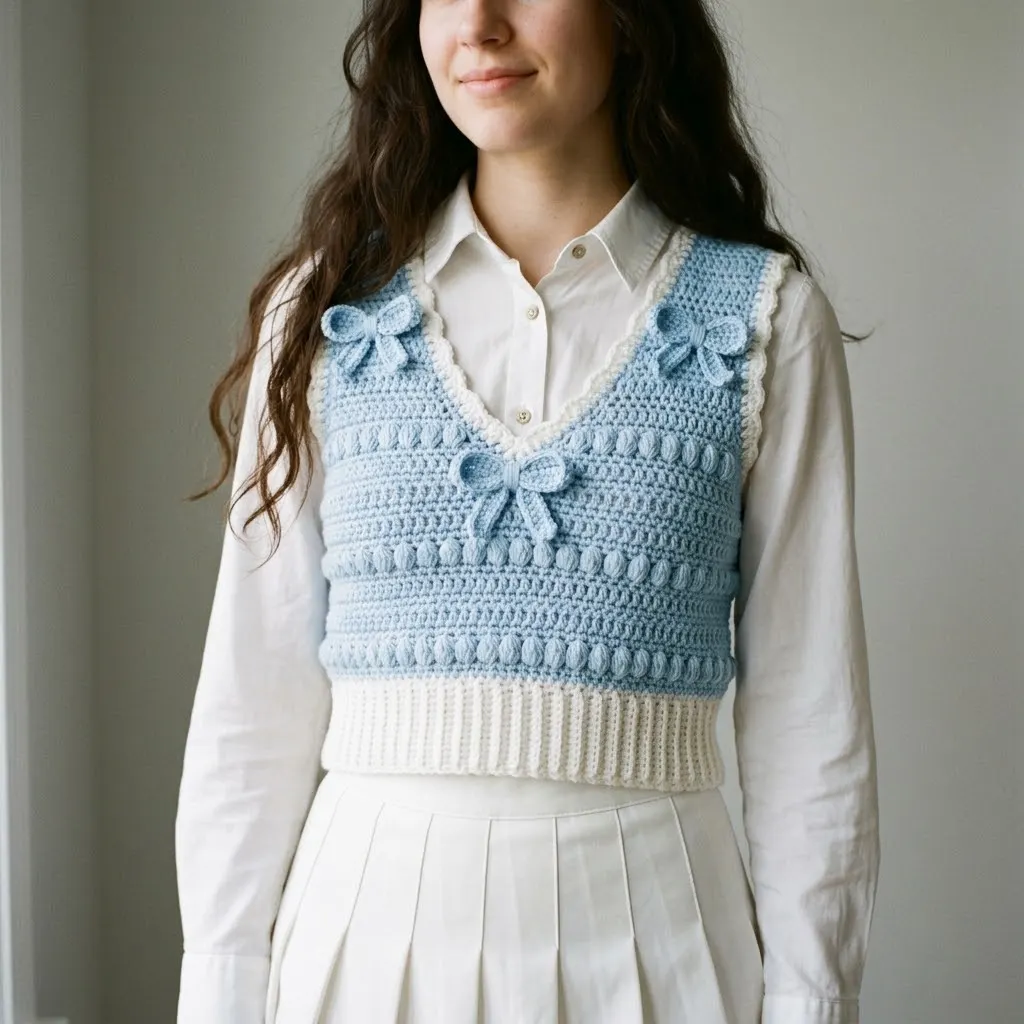
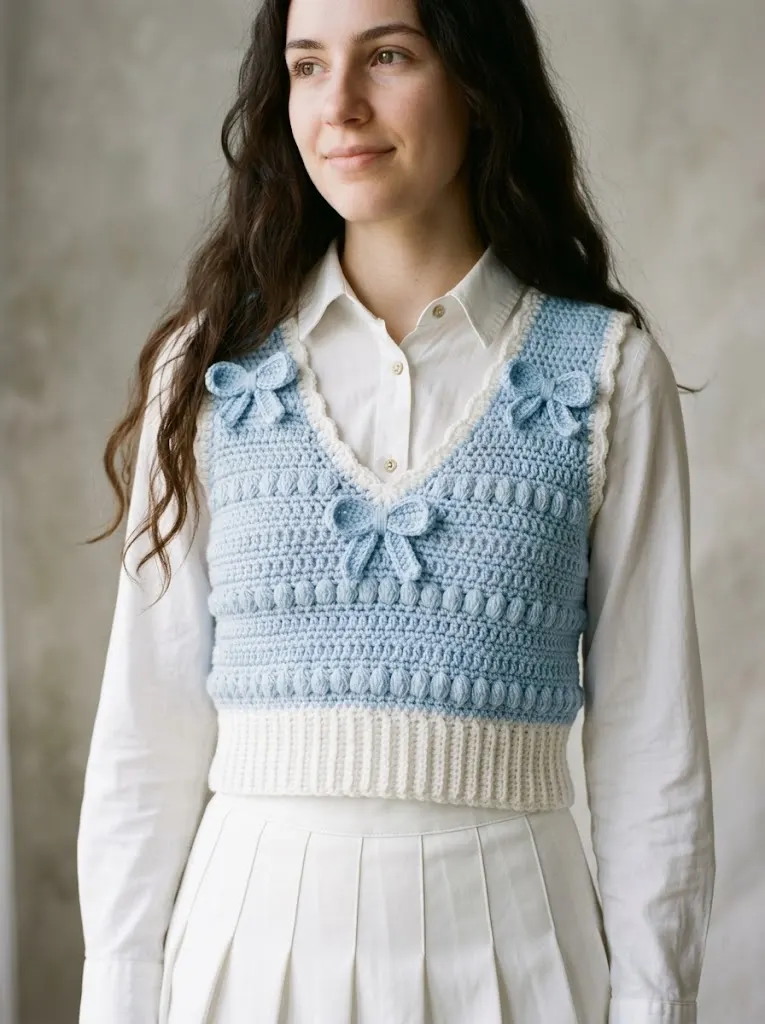
The cropped silhouette makes it incredibly versatile. Layer it over a crisp button down shirt like you see here, or wear it with a fitted turtleneck when the weather gets cooler. The V-neckline is flattering on most body types and keeps the look classic rather than trendy.
I designed this as a step by step crochet tutorial that walks you through every single row. Even if you have never made a garment before, you can absolutely do this. Promise.
Materials Needed
Before you start, gather everything so you can crochet without interruption. There is nothing worse than being in the zone and realizing you are missing something.
Yarn:
I recommend a smooth acrylic or cotton blend for this project. The puff stitches show up best in yarn that has good stitch definition. Avoid anything too fuzzy or heavily textured.
Hook:
Notions:
Gauge
Gauge matters for garments. I know checking gauge feels tedious, but please do it anyway.
16 stitches and 14 rows = 4 inches in half double crochet
If your swatch is too big, go down a hook size. Too small? Go up. Your finished vest will thank you.
Finished Measurements
This pattern is written for sizes XS/S with M/L adjustments in parentheses.
Abbreviations and Stitch Definitions
Let me walk you through every stitch you will need. If any of these are new to you, no worries. I will explain exactly how to work them.
ch = chain: Wrap yarn over hook, pull through loop on hook. This creates your foundation.
sl st = slip stitch: Insert hook, yarn over, pull through stitch AND loop on hook in one motion. Used for joining and moving along.
sc = single crochet: Insert hook, yarn over, pull up a loop (2 loops on hook), yarn over, pull through both loops.
hdc = half double crochet: Yarn over, insert hook, yarn over, pull up a loop (3 loops on hook), yarn over, pull through all 3 loops at once.
dc = double crochet: Yarn over, insert hook, yarn over, pull up a loop, yarn over, pull through 2 loops, yarn over, pull through remaining 2 loops.
puff st = puff stitch: (Yarn over, insert hook, pull up a loop) 3 times in same stitch (7 loops on hook), yarn over, pull through all 7 loops, ch 1 to close. This creates a puffy raised bump.
sk = skip: Miss the indicated stitch and work into the next one.
BLO = back loop only: Work into just the back loop of the stitch instead of both loops.
Understanding the Construction
This vest is worked in two flat pieces, a front panel and a back panel, then seamed together at the shoulders and sides. The ribbed hem is added afterward by picking up stitches along the bottom edge and working downward.
The front panel features a V-neck that is shaped by working each side separately after establishing the center point. Do not let that intimidate you. I will guide you through it row by row.
Back Panel Instructions
Foundation Row: With MC, ch 65 (73) loosely.
Row 1: Hdc in 3rd ch from hook (skipped chains count as first hdc), hdc in each ch across. Turn. 63 (71) sts
Row 2: Ch 2 (counts as hdc here and throughout), hdc in each st across. Turn. 63 (71) sts
Rows 3 through 6: Repeat Row 2.
Row 7 (Puff Row): Ch 1, sc in first st, *sk 1 st, puff st in next st, sk 1 st, sc in next st* repeat across, ending with sc in last st. Turn. 63 (71) sts
Row 8: Ch 2, hdc in each st and puff st across. Turn. 63 (71) sts
Rows 9 through 12: Ch 2, hdc in each st across. Turn.
Row 13: Repeat Row 7 (Puff Row).
Row 14: Repeat Row 8.
Rows 15 through 18: Ch 2, hdc in each st across. Turn.
Row 19: Repeat Row 7 (Puff Row).
Row 20: Repeat Row 8.
Rows 21 through 28: Ch 2, hdc in each st across. Turn.
Continue working even until back panel measures approximately 10 inches from foundation. Do not fasten off yet.
Armhole Shaping
Next Row: Sl st across first 6 sts, ch 2, hdc across until 6 sts remain, leave remaining 6 sts unworked. Turn. 51 (59) sts
Following Rows: Continue in hdc for 5 more inches, or until back measures 16 (17) inches total. Fasten off.
Front Panel Instructions
Foundation Row: With MC, ch 65 (73) loosely.
Row 1: Hdc in 3rd ch from hook, hdc in each ch across. Turn. 63 (71) sts
Rows 2 through 20: Work exactly as Back Panel Rows 2 through 20, including all puff stitch rows.
V-Neck Shaping (Right Side)
Now comes the V-neck. Take a breath. You will work one side at a time.
Row 21: Ch 2, hdc in next 30 (34) sts. Turn, leaving remaining sts unworked. 31 (35) sts
Row 22: Ch 2, sk first st (this creates the neck decrease), hdc across. Turn. 30 (34) sts
Row 23: Ch 2, hdc across until 2 sts remain, hdc2tog over last 2 sts. Turn. 29 (33) sts
Continue alternating decrease rows every other row until you have 22 (26) sts remaining.
Work even until right front measures same length as back panel. Fasten off.
V-Neck Shaping (Left Side)
Join yarn at center front where you left off.
Row 21: Ch 2, hdc across remaining 31 (35) sts. Turn.
Row 22: Ch 2, hdc across until 2 sts remain, hdc2tog. Turn. 30 (34) sts
Row 23: Ch 2, sk first st, hdc across. Turn. 29 (33) sts
Continue decreasing as established until you have 22 (26) sts remaining. Work even to match right side length. Fasten off.
Assembly
Block both pieces gently before seaming. This makes everything so much easier.
Shoulder Seams: With yarn needle and MC, whip stitch or mattress stitch shoulder seams together, matching stitch for stitch. Leave center section open for neckline.
Side Seams: Starting at bottom edge, seam sides together leaving approximately 7 to 8 inches open at top for armholes.
Weave in all ends securely before moving to the next step.
Ribbed Hem
With CC and smaller hook (optional), join yarn at one side seam along bottom edge of vest.
Row 1: Ch 9. Sc in 2nd ch from hook and each ch across. Sl st to vest edge to attach. Turn. 8 sts
Row 2: Sk sl st, working in BLO, sc across. Ch 1, turn. 8 sts
Row 3: Sc in BLO across, sl st to next st on vest body. Turn.
Repeat Rows 2 and 3 around entire bottom edge, attaching ribbing to vest as you go. When you reach starting point, sl st first and last rows of ribbing together. Fasten off.
Neckline Edging
With CC, join yarn at center back neck.
Round 1: Sc evenly around entire neckline opening, working approximately 3 sc for every 2 rows on the angled V-neck sections. Join with sl st to first sc.
Round 2: Ch 3, sk 1 st, sl st in next st, *ch 3, sk 1 st, sl st in next st* repeat around. This creates a pretty scalloped edge. Fasten off.
Armhole Edging
Repeat neckline edging around each armhole opening for a finished look.
Crocheted Bow Embellishments (Make 3)
These bows are what make this vest truly special. They work up in just minutes.
Center Piece: With MC, ch 6. Dc in 4th ch from hook, dc in next 2 ch. Turn. Work 3 more rows of 3 dc each. Fasten off leaving long tail.
Bow Loops: Ch 20. Sl st in first ch to form a loop. Ch 20 again. Sl st in same ch to form second loop. Fasten off.
Assembly: Wrap center piece around middle of both loops, cinching tightly. Use tail to secure. Stitch bows to vest at shoulder straps and center V-neckline as shown.
Finishing Touches
Give your completed vest a final gentle steam blocking. This relaxes the stitches and evens out your tension throughout the garment. Avoid pressing down on the puff stitches directly, as you want them to stay nice and dimensional.
Weave in any remaining ends. Trim carefully.
Styling Your New Crochet Vest
This beginner friendly crochet pattern creates a piece that works in so many ways. Pair it with a white button down and pleated skirt for a preppy cottagecore look. Throw it over a simple t-shirt with jeans for casual weekends. The light blue and cream color combination feels fresh for spring and summer, but you could easily make this in autumn tones for year round wear.
Try making one in solid black with black bows for something a bit more sophisticated. Or go full maximalist with contrasting bow colors. The pattern is yours to make your own.
Helpful Tips for Success
Working puff stitches can feel awkward at first. Keep your tension slightly looser than usual so you can pull through all those loops easily. If your puffs look flat, try adding one more yarn over when building the stitch.
When shaping the V-neck, use stitch markers to keep track of which decrease row you are on. There is no shame in writing it down either. I keep a little notebook next to my couch specifically for this.
For the best fit, measure yourself and compare to the finished measurements before starting. Garments are personal, and you know your body better than any pattern does.
I really hope you enjoy making this vest as much as I loved designing it. If you do give this Baby Blue Ribbon Crochet Vest Crochet Pattern a try, please tag me on Instagram or post your finished project to our Facebook group. Seeing your versions absolutely makes my day.
If this pattern made you excited to start crocheting right now, go ahead and save it to your Pinterest boards so you can find it whenever you are ready. And if you make one, drop a comment below. I would love to hear how it turned out and see which colors you chose. Happy stitching, friend.