
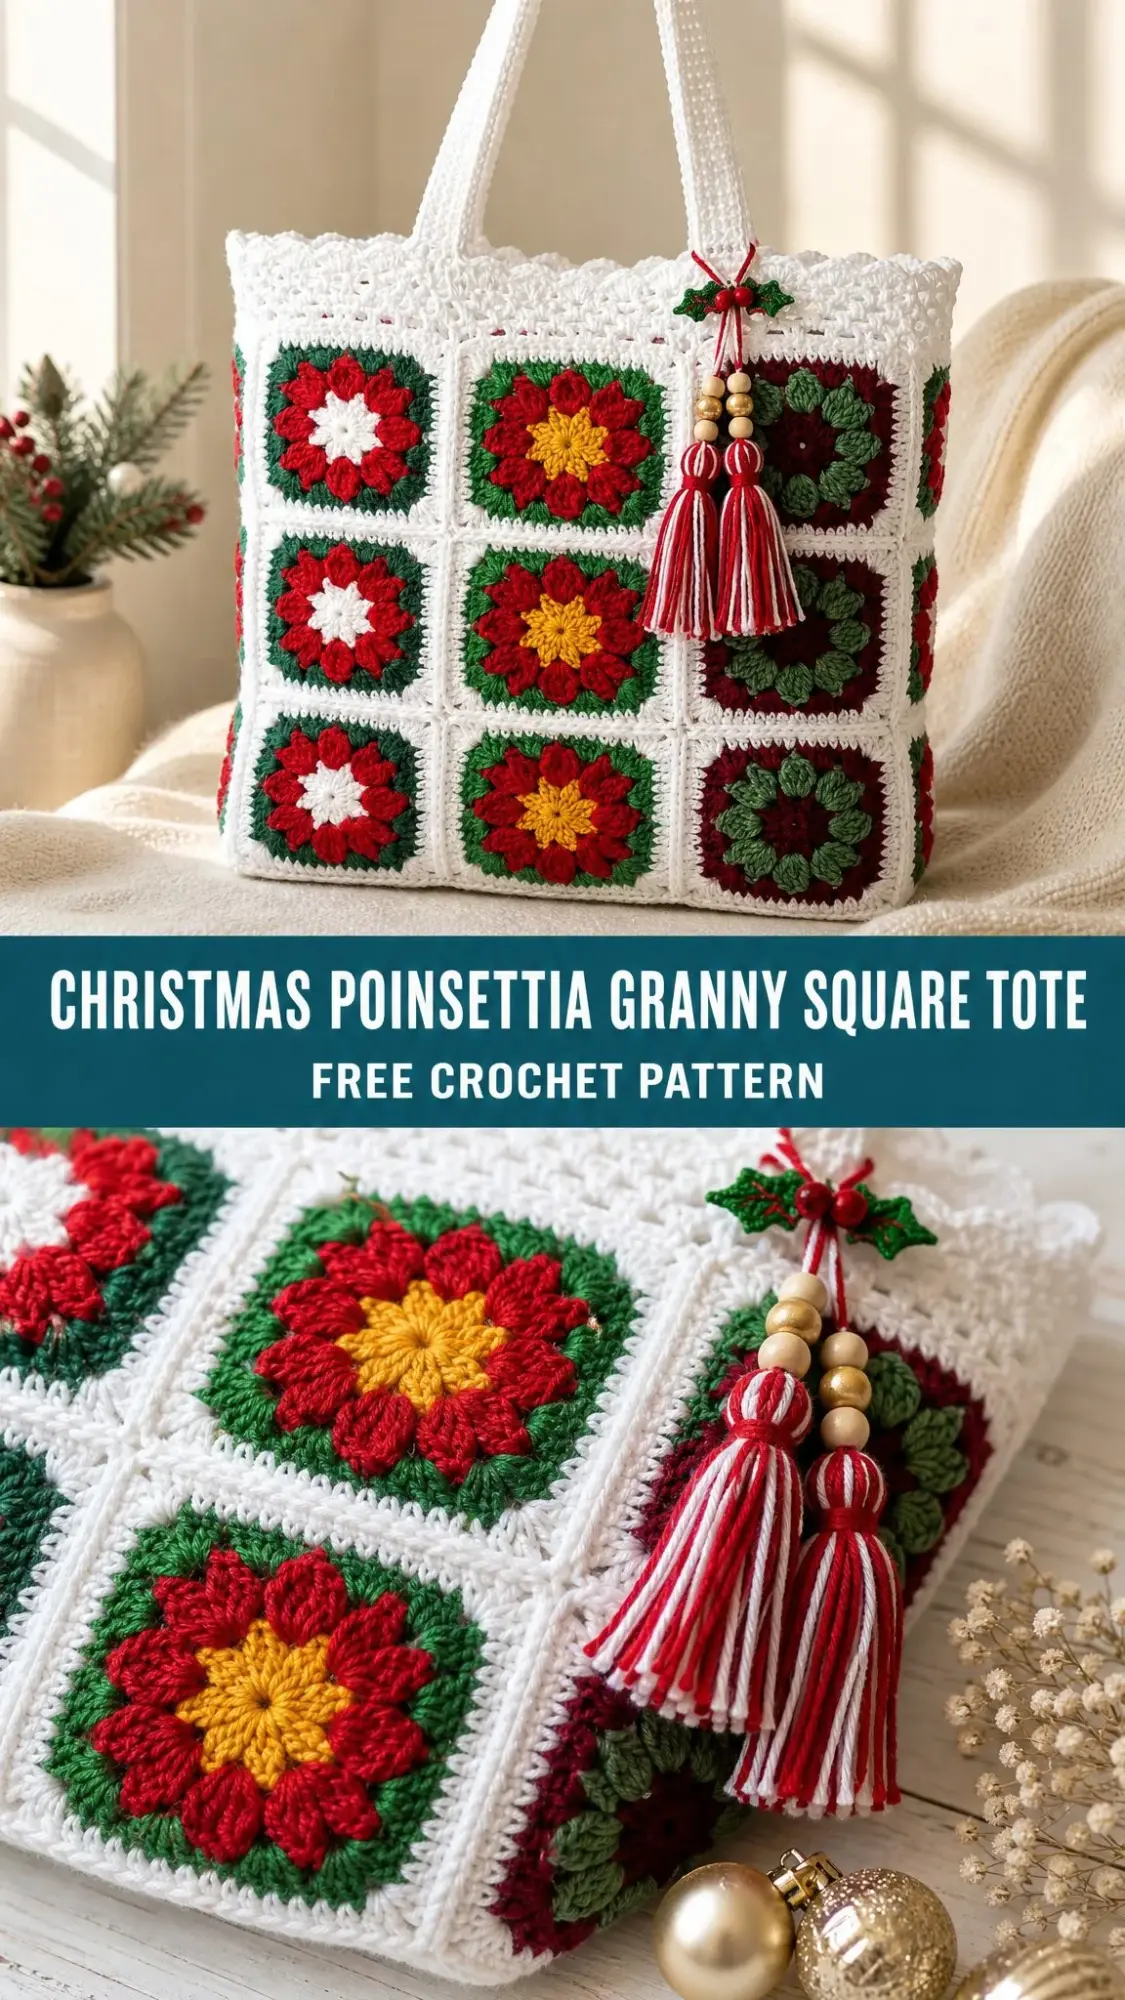
This is hands down ONE OF THE MOST impressive holiday projects you can make this season, and it comes together faster than you’d think! I’m talking about a gorgeous structured tote bag built from festive puff-flower granny squares in classic Christmas colors. Red poinsettias, deep evergreen frames, touches of gold, and crisp white lattice all combine into a showstopper bag.
If you’ve ever wanted to make something that looks like it took weeks but actually only needs 12 to 16 hours of stitching time, this is your pattern. The individual squares work up quickly once you get the rhythm, and joining them into a box-shaped tote is surprisingly straightforward.
Whether you’re planning to carry holiday goodies to parties, use it as a stunning gift bag, or just treat yourself to a festive accessory, this Christmas Poinsettia Granny Tote delivers major handmade charm. Let’s dive into everything you need to make your own!
About This Crochet Pattern
This roomy market tote is constructed from 27 puff-flower granny squares joined into a structured box shape. Each square features a small flower center, a round of puffy petals, a contrast frame round, and a final white border that creates the beautiful lattice effect you see between motifs.
The pattern uses three different colorways scattered across the bag. Snow Bloom squares have white centers with red petals and green frames. Gold Star squares feature gold centers with red petals and green frames. Holly squares show burgundy centers with green petals and red frames. All 27 squares share the same white outer round, which ties everything together beautifully.
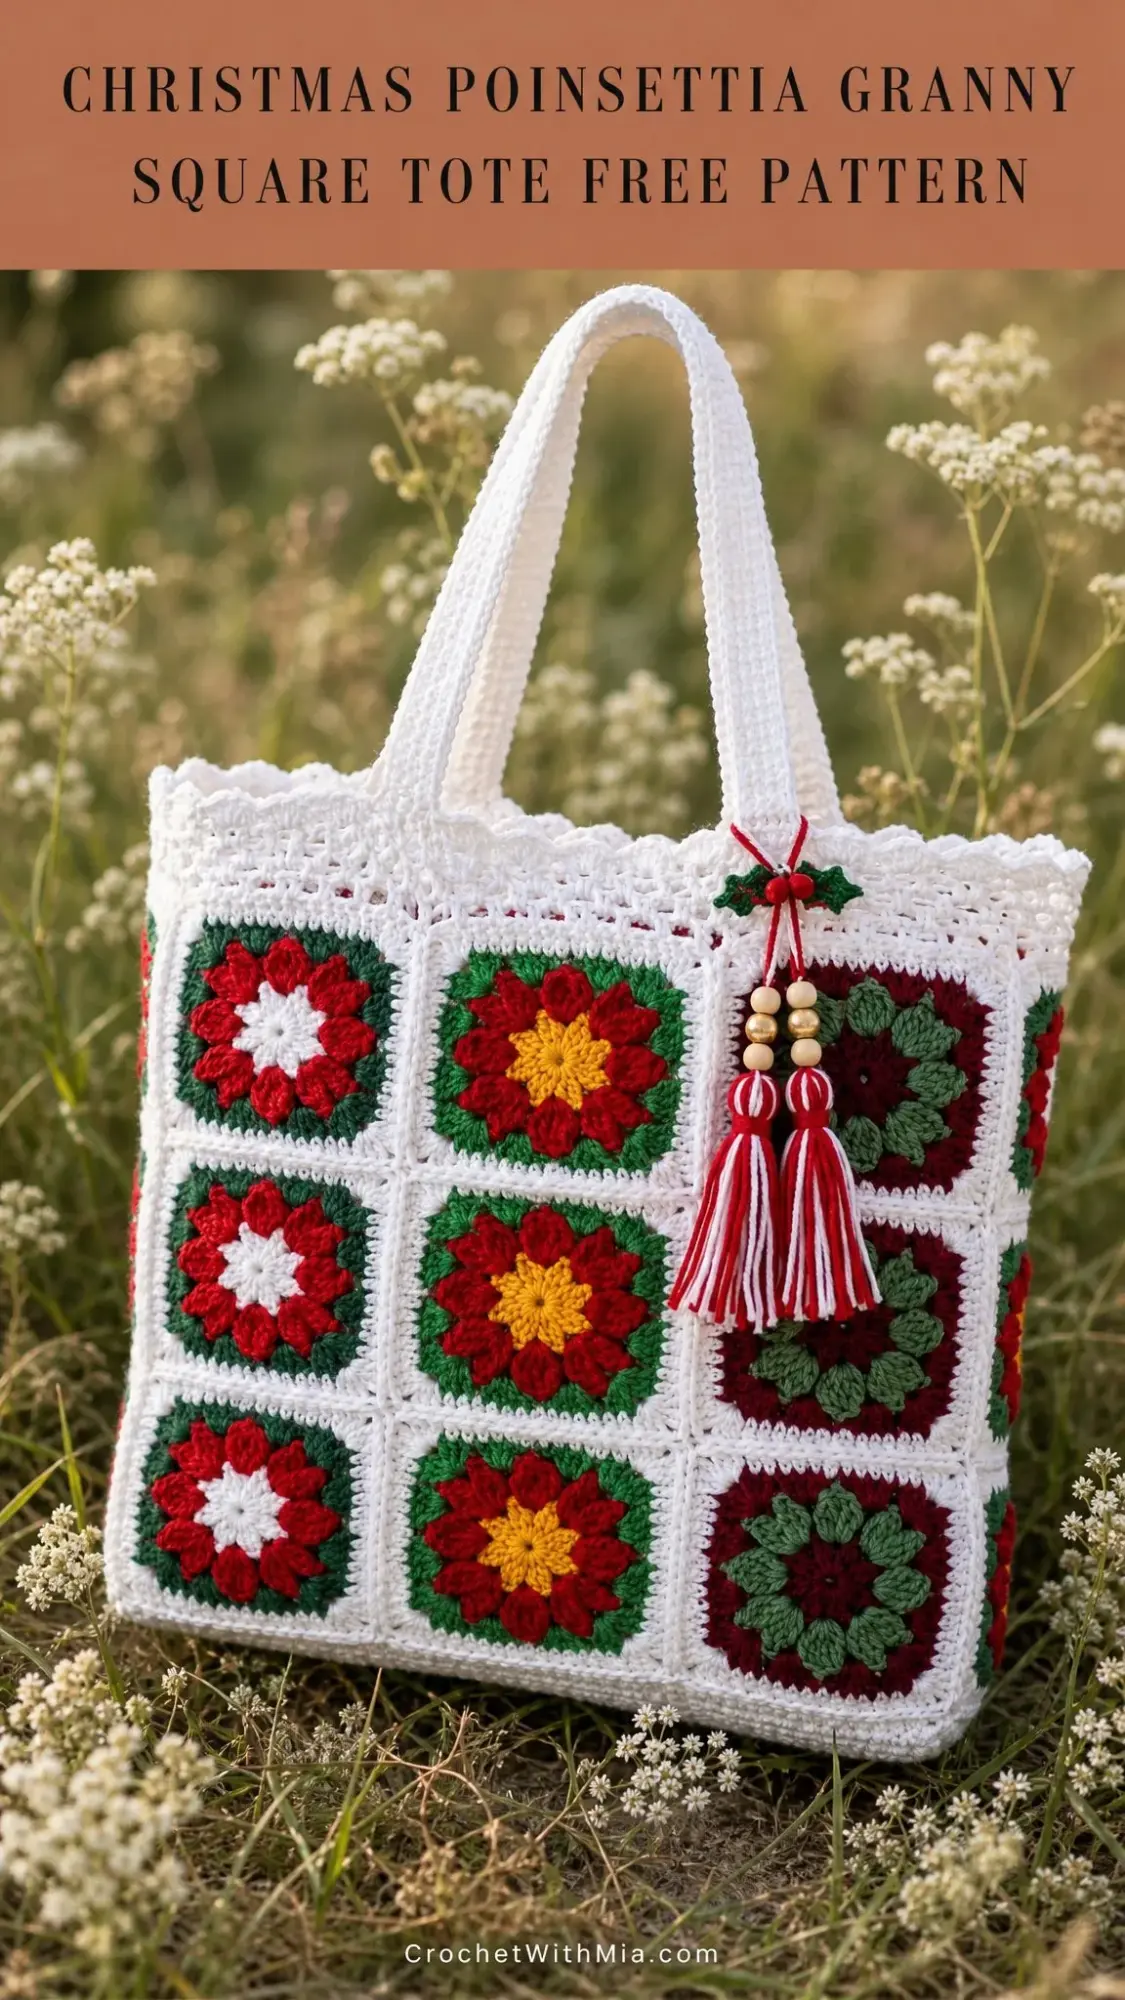
The finished tote measures approximately 12 inches wide by 14 inches tall by 4 inches deep, not including the straps. The strap drop is about 10 inches, making it comfortable to carry on your shoulder or in hand. A lacy scalloped rim, sturdy handles, and a playful beaded tassel with holly accent complete the festive look.
Skill Level
This pattern is rated intermediate. You should be comfortable with basic crochet stitches, working in the round, color changes, and joining granny squares. The puff stitch might be new to some crocheters, but I’ll walk you through it step by step.
If you’ve made granny squares before and feel confident with double crochet (dc) and single crochet (sc), you can absolutely tackle this project. The repetitive nature of making 27 squares actually helps you master the technique quickly.
Materials and Tools
Yarn
You’ll need worsted weight or aran weight yarn (#4) in cotton or cotton blend. Cotton gives the tote structure and makes it sturdy enough for carrying items.
Here’s what you’ll need:
Recommended yarns: Paintbox Yarns Cotton Aran, Lily Sugar’n Cream worsted cotton, or DROPS Paris aran cotton all work beautifully for this project.
Hook and Notions
Gauge
One completed square should measure 4 inches by 4 inches (10 by 10 cm) using a 4.5 mm hook and worsted or aran cotton yarn. Rounds 1 and 2 of the motif should measure about 2 inches (5 cm) across.
Gauge isn’t super critical for this project, but keeping your squares consistent in size makes joining much easier and keeps your panels nice and square. I recommend making one test square first and blocking it to check your measurements.
Abbreviations and Special Stitches
Before we jump into the pattern, let’s cover the abbreviations you’ll see. This pattern uses US crochet terms.
UK crocheters: US single crochet equals UK double crochet. US half double crochet equals UK half treble. US double crochet equals UK treble. Substitute throughout if you work in UK terms.
Special Stitches
Puff stitch (puff): This creates the beautiful textured petals. Here’s how to work it: yarn over, insert hook in the stitch or space, yarn over and pull up a loop to the height of a double crochet. Repeat this sequence 4 times in the same place. You’ll have 9 loops on your hook. Yarn over and draw through all 9 loops, then chain 1 to close the puff.
Don’t worry if this sounds complicated! Once you do a few, it becomes second nature. The key is pulling up each loop to the same height so your puffs look uniform.
Picot: Chain 3, then slip stitch into the first of those chains. This creates a small decorative bump.
Magic ring: An adjustable loop used to start working in the round. If you prefer, you can chain 4 and slip stitch to form a ring instead.
Pattern Notes
Read through these tips before starting. They’ll save you time and frustration!
Each square is worked in four rounds. Round 1 creates a small flower center with Color A. Round 2 adds puff petals with Color B. Round 3 squares the motif with Color C. Round 4 finishes with a white frame using Color D, which is always white.
Every square follows the same construction. Only the colors change between colorways.
Each finished edge has 13 stitches, so squares line up corner to corner perfectly with no fudging needed.
The chain 3 at the start of a round counts as the first double crochet unless noted otherwise.
Join rounds with a slip stitch to the top of the first stitch.
Pro tip: Weave in ends as you go! With 27 squares to make, leaving all those tails for the end is no fun. Trust me on this one.
Every round ends with a stitch total in parentheses. Pause and count before moving on. This is the surest way to keep all 27 squares identical.
The Puff-Flower Granny Square Pattern
Make 27 squares total. The colors for positions A, B, and C change based on colorway (see the colorway chart below). Position D is always White.
Start each square with a magic ring.
Round 1 (8 sc)
With Color A, work into a magic ring: chain 1, work 8 single crochet into the ring, slip stitch to the first single crochet to join. Pull the ring closed tightly.
Round 2 (8 puffs, 8 ch-2 spaces)
Join Color B to any single crochet. Slip stitch into the stitch, chain 2, work a puff stitch in the same stitch, chain 2. Work a puff stitch in the next single crochet, chain 2. Repeat from * around until you have 8 puffs made. Slip stitch to the top of the first puff to join.
Round 3 (28 dc, 4 corner spaces)
Join Color C to any chain 2 space. This space becomes a corner. Chain 3, work (1 dc, ch 2, 2 dc) in the same space. Work 3 dc in the next chain 2 space. Work (2 dc, ch 2, 2 dc) in the next chain 2 space. Repeat from * around, ending with 3 dc in the last space. Slip stitch to the top of the starting chain 3 to join.
You now have 4 corner spaces alternating with 4 side groups.
Round 4 (52 dc, 4 corner spaces)
Join Color D (White) to any corner chain 2 space. Chain 3, work (2 dc, ch 2, 3 dc) in the same space. Work 1 dc in each of the next 7 dc. Work (3 dc, ch 2, 3 dc) in the next corner space. Repeat from * around, ending with 1 dc in each of the last 7 dc. Slip stitch to the top of the starting chain 3 to join.
Fasten off and weave in ends. Each edge now has 13 stitches.
Blocking tip: Block each square lightly to a true 4 inch (10 cm) square before joining. Crisp corners make the lattice look intentional and professional.
Colorways and Square Count
Here’s your colorway breakdown. Remember, D is always White for every square.
| Colorway | A (Center) | B (Petals) | C (Frame) | Make |
|---|---|---|---|---|
| Snow Bloom | White | Red | Green | 10 |
| Gold Star | Gold | Red | Green | 7 |
| Holly | Burgundy | Green | Red | 10 |
Total: 27 squares
Scatter the colorways across the front, back, and sides for visual interest, or arrange them to your own taste. The white frames tie everything together no matter how you place them.
Assembling the Panels
Arrange your 27 completed and blocked squares into five panels:
Joining the Squares
Hold two squares with wrong sides together. Join through the back loops using White yarn. You can either whip stitch with a tapestry needle or work a row of single crochet along the edge.
Each edge has 13 stitches, so match stitch for stitch as you go. Join squares into the five flat panels first before building the box shape.
Building the Box
Step 1: Seam the base to the bottom edge of the front, back, and both sides. The base should sit like the bottom of a box. Each base seam connects either 3 squares (front and back) or 1 square (sides).
Step 2: Seam each side panel to the front and back along the vertical edges to close the box. You now have an open-topped tote!
Step 3: Weave in all joining ends securely.
The top opening now measures approximately 104 stitches around (39 front + 39 back + 13 each side).
The Scalloped Top Border
Work in continuous rounds around the top opening using White yarn. Join each round with a slip stitch.
Round 1 (102 sc)
Join White at a back corner. Chain 1, single crochet evenly around the opening, decreasing 2 stitches evenly so the total is a multiple of 6. Slip stitch to the first single crochet to join.
Round 2 (51 dc, 51 ch-1 spaces)
Chain 4 (counts as dc, ch 1), skip 1 stitch. Double crochet in the next stitch, chain 1, skip 1 stitch. Repeat from * around. Slip stitch to the 3rd chain of the starting chain 4 to join.
This creates the airy lattice band you see at the top of the bag.
Round 3 (102 sc)
Chain 1, single crochet in each double crochet and each chain 1 space around. Slip stitch to the first single crochet to join.
Round 4 (17 scallops)
Chain 1, single crochet in the first stitch. Skip 2 stitches, work 5 double crochet in the next stitch, skip 2 stitches, single crochet in the next stitch. Repeat from * around, ending with skip 2, 5 dc, skip 2. Slip stitch to the first single crochet to join.
Fasten off and weave in ends.
Why 102 stitches? 102 divides evenly by 6 (giving you 17 perfect scallops) and by 2 (for the lattice pattern). This means your rim closes with no awkward partial repeat. If your stitch count differs slightly, adjust Round 1 to the nearest multiple of 6.
Making the Handles
Make 2 straps in White. These are worked in back loops only, which creates a firm, ridged strap that won’t stretch under weight.
Row 1 (8 sc)
Chain 9. Single crochet in the 2nd chain from hook and in each chain across. (8 sc)
Rows 2 and Beyond (8 sc)
Chain 1, turn. Single crochet in the back loop only of each stitch across. (8 sc)
Repeat Row 2 until the strap measures 22 inches (56 cm) or your preferred length. Fasten off, leaving a long tail for sewing.
Attaching the Handles
Pin each strap end to the inside of the lattice band, centering it over a join line so the two ends sit about 4 inches (10 cm) apart.
Place the second strap symmetrically on the opposite panel.
Sew each end down firmly with several passes through the band. Reinforce with a small square of stitching for extra strength. This bag will hold weight, so secure attachment matters!
For a sturdier strap: Slip a length of cotton webbing or a folded fabric strip inside the strap before sewing. Alternatively, work the straps two stitches wider (chain 11, work 10 sc) for a chunkier look.
Making the Tassel and Holly Accent
The Beaded Tassel
Step 1: Wrap White and Red yarn together around a 5 inch (13 cm) card about 30 times.
Step 2: Thread a 12 inch (30 cm) strand under the top of the wraps, tie tightly, and slide off the card.
Step 3: Wrap a separate strand several times about 1 inch (2.5 cm) below the tie to form the tassel neck. Knot securely and hide the ends inside the tassel.
Step 4: Trim the loops open and even up the ends. Make a second tassel the same way.
Step 5: Thread wooden beads onto the tie cords, then knot both tassels to a short loop of White yarn.
Quick Crocheted Holly Leaf (Optional)
With Green yarn: Chain 8. Working along the chain, single crochet, half double crochet, picot, half double crochet, single crochet to the end. Then repeat back along the opposite side of the chain. Slip stitch to start. Make two leaves.
Tack the leaves and 3 red beads (as berries) over the tassel loop. Tie the whole charm to the rim where a strap meets the band.
Finishing Your Tote
Weave in every remaining end securely. Gently steam block the assembled tote into shape, being careful not to flatten the puff stitches.
If you’re adding a fabric lining (optional but recommended for extra structure), slip stitch it just below the lattice band. A lining also hides any bulky join seams on the inside.
Care Instructions
Customization Ideas
Want a bigger tote? Add a column or row of squares to the front and back (for example, 4 by 3). Widen the base and sides to match, and recount the top edge to the nearest multiple of 6 for the scallop border.
Prefer a smaller bag? Drop to a 2 by 2 front and back with 1 square sides for a sweet gift pouch.
Need more depth? Make the side panels 2 squares wide and widen the base to suit.
Want a shoulder bag? Lengthen the straps to 30 inches (76 cm) for a comfortable cross-body drop.
Whatever size you choose, remember that every panel edge stays a multiple of 13 stitches. Plan your layout on a flat surface before seaming so the colorways balance nicely.
Final Thoughts on This Christmas Poinsettia Granny Square Tote Pattern
This festive tote is such a satisfying project from start to finish. The puff-flower squares are meditative to make once you get into the rhythm, and watching the colorful poinsettia motifs pile up is incredibly motivating. When you finally join everything together and add that scalloped border, you’ll have a bag that looks like it belongs in a holiday craft show.
I love that this pattern lets you customize the colorway placement to make your tote truly unique. And the beaded tassel with holly? It’s the perfect finishing touch that takes this from "nice handmade bag" to "wow, you MADE that?!"
Whether you’re stitching this for yourself or as a heartfelt gift, I hope you enjoy every moment of making it. The completed tote is perfect for carrying holiday treats to gatherings, holding wrapped presents, or just adding some festive flair to your winter wardrobe.
I’d absolutely love to see your finished Christmas Poinsettia Granny Tote! Save this pattern to your Pinterest boards so you can find it when you’re ready to start, and please leave a comment below if you make one. Happy crocheting, and happy holidays! 🎄