
I’ve been on the hunt for the perfect tote bag pattern for months now, and I finally found one that ticks every box. This Monochrome Granny Circle Tote is my new favorite weekend project, and I rounded up all the details you need to make your own.
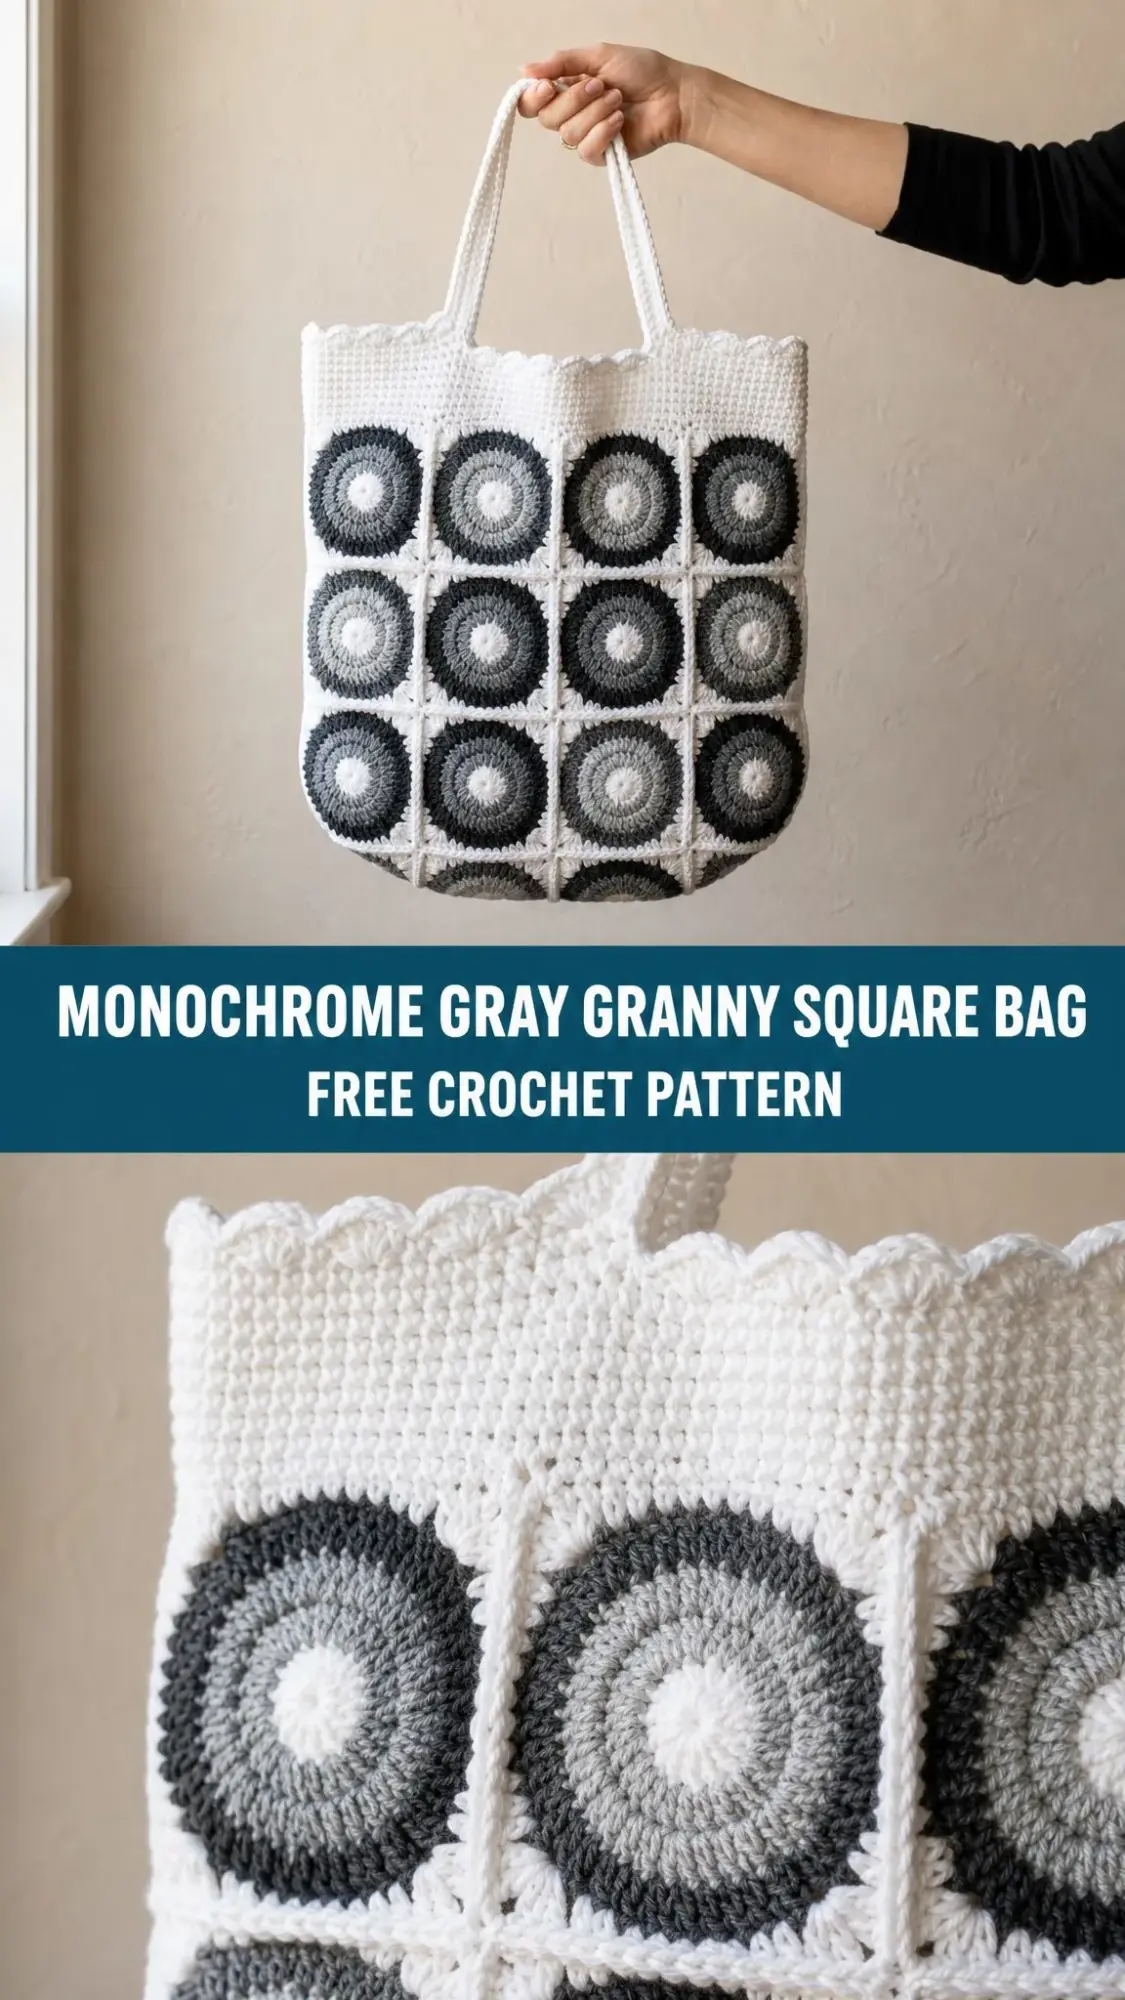
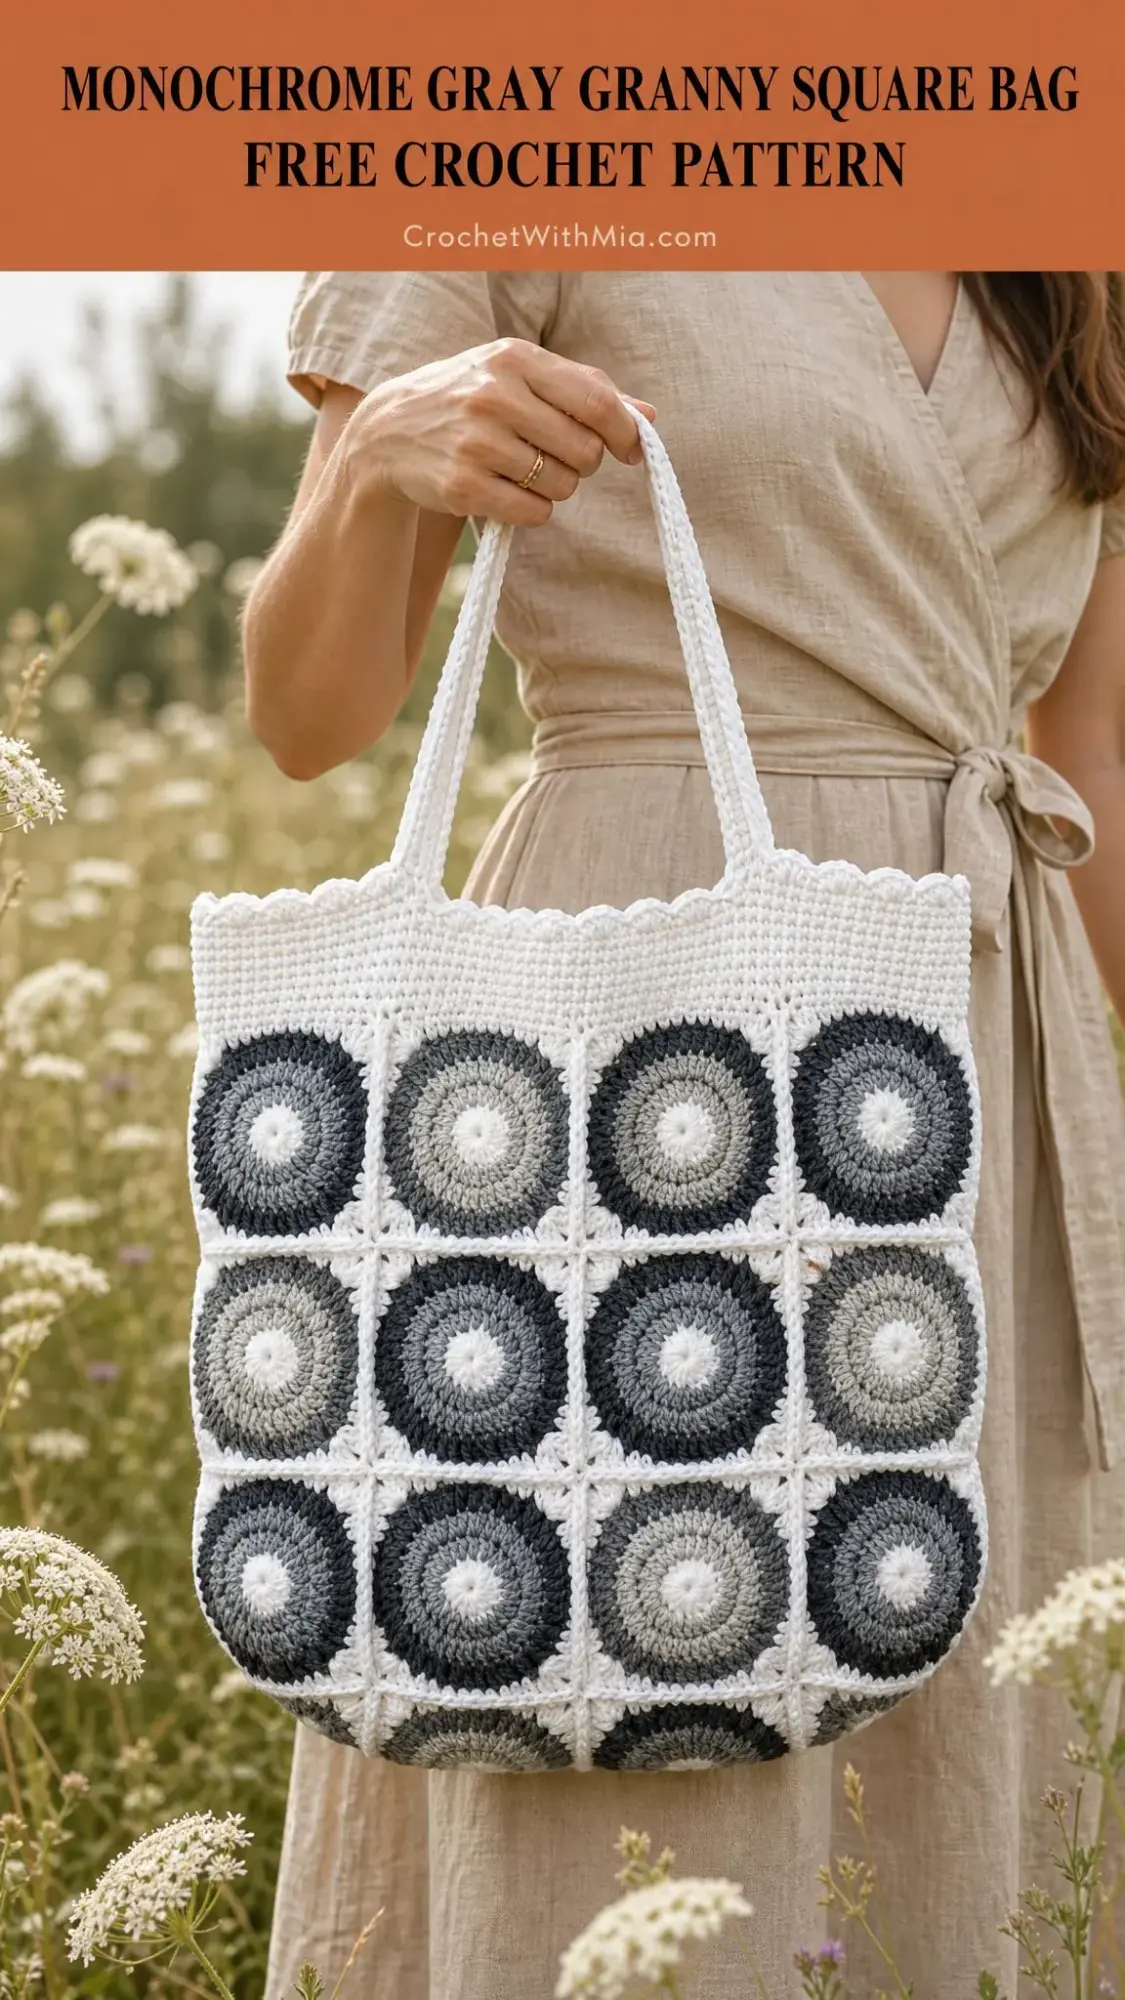
The design is elegant without being fussy. You get that classic granny square construction, but with a modern twist. The gradient circles fading from light to charcoal create this scattered ombré effect that looks incredibly sophisticated.
What really sold me is how structured this bag is. It stands up on its own, has a flat bottom, and those scalloped edges add just the right amount of charm. Whether you’re heading to the farmer’s market or need a stylish everyday carry, this tote delivers.
Why You’ll Love This Pattern
This bag is built from 34 individual circle-in-square motifs. That might sound like a lot, but here’s the thing. Each motif is small, portable, and works up quickly. Perfect for keeping in your purse for waiting rooms or car rides.
The gradient yarn does all the heavy lifting when it comes to color. You don’t need to worry about complicated color changes or planning out a scheme. Just start each motif at a different point along your gradient cake, and you’ll get that beautiful scattered effect automatically.
The finished tote measures 14 inches wide by 14 inches tall with a 3.5 inch depth. That’s roomy enough for books, groceries, or a small project bag. The slim shoulder straps are comfortable and the whole thing has a structured, professional look.
Skill Level and Time Commitment
This pattern is rated intermediate, but don’t let that scare you off if you’re a confident beginner. If you can work in the round, make a magic ring, and follow a stitch pattern, you’ve got this.
The estimated time is 10 to 14 hours, making it a true weekend project. You could easily spread it out over a week of evening crocheting if that suits your schedule better.
The repetitive nature of making 34 motifs is actually quite relaxing. You’ll have the pattern memorized after the first few, and then it becomes meditative rather than challenging.
Materials You’ll Need
Yarn:
Both yarns should be DK weight or light worsted (CYC 3) cotton or a cotton blend. Cotton gives the bag structure and stitch definition so it holds its shape nicely.
Hook:
US E/4 (3.5 mm), or whatever size you need to achieve gauge. A slightly smaller hook than usual keeps the fabric firm, which is exactly what you want for a tote bag.
Additional Tools:
Yarn Suggestions
If you’re wondering what specific yarns work well, here are some tested combinations:
Lion Brand Mandala (gradient) plus 24/7 Cotton in White gives you an easy gradient cake for the circles with crisp cotton for the framework.
Scheepjes Whirl (grey gradient) plus Catona in White offers a long, smooth fade with a silky cotton-rich finish.
Hobbii Twister (mono gradient) plus Rainbow Cotton 8/8 in White is a budget-friendly pairing with great structure.
No Gradient Cake? No Problem
If you can’t find a gradient yarn or prefer to use what’s in your stash, substitute three solid greys. Use light grey, medium grey, and charcoal. Work motif Rounds 1 and 2 in light, Round 3 in medium, and Round 4 in charcoal. Vary which grey you start with across different motifs for that same scattered ombré look.
Gauge
One finished motif should measure 3.5 inches (9 cm) square using a 3.5 mm hook. The circle portion through Round 4 should sit flat at about 2.75 inches (7 cm) across before you add the squaring round.
Gauge matters here because the motif size determines the entire bag’s dimensions. Take time to make a test motif and adjust your hook size if needed.
Abbreviations and Stitches
Before diving in, let’s go over the stitches you’ll be using:
| Abbreviation | Stitch |
|---|---|
| ch | chain |
| sl st | slip stitch |
| sc | single crochet (insert hook, yarn over, pull through, yarn over, pull through both loops) |
| hdc | half double crochet (yarn over, insert hook, yarn over, pull through, yarn over, pull through all three loops) |
| dc | double crochet (yarn over, insert hook, yarn over, pull through, yarn over, pull through two loops, yarn over, pull through remaining two loops) |
| st(s) | stitch(es) |
| sp | space |
| rep | repeat |
UK Crocheters: US single crochet equals UK double crochet. US half double equals UK half treble. US double crochet equals UK treble. Hook and yarn weights are the same in both systems.
Special Stitches
Magic Ring: An adjustable loop to start each circle. Pull the tail tight to close the center completely.
Corner Cluster: Work (2 dc, ch 2, 2 dc) all into one stitch to transform a circle into a square.
Scallop Shell: 5 dc worked into one stitch, framed by skipped stitches and a single crochet.
Pattern Notes
Read through these tips before starting. They’ll save you time and confusion later.
The motif is worked in joined rounds. Close each round with a slip stitch to the top of the first stitch, then begin the next round with the stated starting chain.
The starting ch-3 counts as the first dc throughout the circle rounds. This is standard practice, but worth noting so your stitch counts come out right.
Each motif uses two colors: the gradient (CC) for the circle and white (MC) for the squaring round. Fasten off CC before joining MC on Round 5.
For that scattered ombré effect, simply begin each motif at a different point along the gradient. No need to plan it precisely. Random is beautiful here.
Stitch counts appear in parentheses at the end of every round, like this: (48 dc).
Weave in ends as you go. With 34 motifs, those ends add up fast. Joining is much easier when the backs are tidy.
Block each motif to a 3.5 inch square before assembly. This makes the grid crisp and even. I highly recommend taking the time to do this.
The Circle-in-Square Motif
Make 34 total. Work Rounds 1 through 4 in gradient yarn (CC) and Round 5 in white (MC).
Round 1 (12 dc)
With CC, make a magic ring. Ch 3 (counts as first dc), work 11 dc into the ring. Pull the tail to close the center. Join with sl st to top of ch-3. (12 dc)
Round 2 (24 dc)
Ch 3, dc in same st, 2 dc in each st around. Join. (24 dc)
Round 3 (36 dc)
Ch 3, dc in same st, dc in next st. 2 dc in next st, dc in next st, rep from * around. Join. (36 dc)
Round 4 (48 dc)
Ch 3, dc in same st, dc in next 2 sts. 2 dc in next st, dc in next 2 sts, rep from * around. Join. Fasten off CC. (48 dc)
Round 5: Square It (60 sts, 4 corners)
Join MC in any st. Working each side over 12 sts, repeat 4 times: sc in next 2, hdc in next 2, dc in next 3, hdc in next 2, sc in next 2, then (2 dc, ch 2, 2 dc) in next st for the corner. Join with sl st to first sc. Fasten off, leaving a tail for joining. (60 sts and 4 ch-2 corner spaces, which equals 15 sts per side)
Quick Tip: Each side runs from corner space to corner space with 11 stitches between the corner clusters. That even count is what lets the motifs line up perfectly when you join them.
Assembling the Tote
Lay your 34 blocked motifs out as a box with a front, back, two sides, and a base. Join everything with MC (white).
Layout:
Step 1: Join the Body
Join the body motifs into a ring in this order: front (4 motifs wide), side (1 motif wide), back (4 motifs wide), side (1 motif wide). The body is three rows tall.
Hold pairs with right sides together and whipstitch through the back loops. Alternatively, you can sc them together with MC, matching corner to corner. You’ll have 10 motifs around times 3 rows.
Step 2: Attach the Base
Attach the 4 base motifs in a row along the bottom front edge. Then stitch the base up the two sides and across the back to close the bottom into a box shape.
Step 3: Finish
Weave in all joining ends. Turn right side out and gently shape the corners so they’re nice and crisp.
Top Band and Scallop Edge
This section is worked in continuous rounds around the top opening with MC (white). The opening spans 10 motif edges: 4 front, 1 side, 4 back, 1 side.
Round 1: Set-up (130 sc)
Join MC at a back corner. Sc evenly around the top opening, working about 13 sc per motif edge and 1 sc in each corner space. Join. (130 sc)
Rounds 2 through 6: Band (130 sc)
Ch 1, sc in each st around. Join. Repeat for 5 rounds total, building a firm 1.5 inch (4 cm) band. (130 sc each round)
Round 7: Scallop (26 shells)
Ch 1. Skip 1 st, 5 dc in next st, skip 1 st, sc in next 2 sts, rep from * around. Join with sl st and fasten off. (26 scallop shells)
Count Check: The 130-stitch band divides evenly into 26 five-stitch repeats, so the scallops land symmetrically with no awkward gap at the join. If your band came out slightly different, adjust to keep it a multiple of 5.
Handles
Make 2 handles in MC (white).
Row 1 (88 sc)
Ch 89. Sc in 2nd ch from hook and in each ch across. (88 sc)
Rows 2 through 6 (88 sc)
Ch 1, turn, sc in each st across. Repeat for 6 rows total. (88 sc each row)
Finish the Strap
Fold the strip in thirds lengthwise (or in half) and whipstitch the long edge closed to form a firm tube about 22 inches (56 cm) long. For extra strength, slip a fabric strip inside before closing. Make the second handle the same way.
Attaching the Handles
1. On the front band, mark handle ends above the gaps between columns 1 and 2, and between columns 3 and 4. They should be about 4.5 inches (11 cm) apart and centered.
2. Securely whipstitch each end to the inside of the band. Stitch through several rounds so the weight is well supported.
3. Mirror the placement on the back.
4. Give the finished tote a final light steam block and let it dry standing upright to set its shape.
Strength Tip: Reinforce handle joins with a second pass of stitching in a square or cross pattern. This spreads the load and keeps the band from stretching over time.
Care Instructions
Washing: Hand wash cool with mild detergent. Cotton holds shape best when not agitated.
Drying: Press out water in a towel, reshape, and dry flat or stuffed upright. Avoid hanging while wet.
Blocking: Steam block to refresh the grid and scallops. Keep the iron off the fabric.
Everyday Care: Spot clean marks promptly. Empty fully so the base keeps its flat shape.
Customization Ideas
Want a bigger tote? Add a column of motifs to the front and back (5 wide) and one base motif. Every motif adds 3.5 inches in that direction.
Want a deeper bag? Work the side panels 2 motifs wide and widen the base to match for a roomier gusset.
Adjusting handle length? Reduce the starting chain by approximately 4 stitches per inch you want to remove. Lengthen the same way.
Adding a lining? Cut fabric to the finished box dimensions plus seam allowance and hand stitch it inside the band for a polished, sturdy finish.
Playing with color? Swap the gradient for warm neutrals or a single bold accent against the white frame. The design is versatile enough to work with almost any palette.
Final Thoughts on This Monochrome Granny Circle Tote Pattern
This bag is one of those satisfying projects where you can see your progress with every motif you complete. The construction is clever, the finished product is genuinely useful, and the gradient effect means you get stunning results without complicated colorwork.
Whether you’re making this for yourself or as a gift, you’ll end up with something beautiful and practical. The structured shape and scalloped edge give it a boutique quality that people will definitely ask about.
I hope you enjoy making this tote as much as I did putting together this pattern walkthrough for you. Thank you so much for choosing this project!
If you make one, I would absolutely love to see it. Tag me on Instagram or share a photo in my Facebook group. Seeing your finished projects genuinely makes my day.
Don’t forget to save this pattern to your Pinterest boards so you can find it easily when you’re ready to start. And if you do make this beautiful tote, please drop a comment below. I’d love to hear how it turns out for you!