
I don’t know about you, but I’ve always wanted a pair of gorgeous knee-high crochet boots that actually look like something you’d see on a runway. All the cozy vibes of slippers with all the drama of statement footwear. These buttercream beauties are exactly what I was dreaming of, and now you can make your own pair.
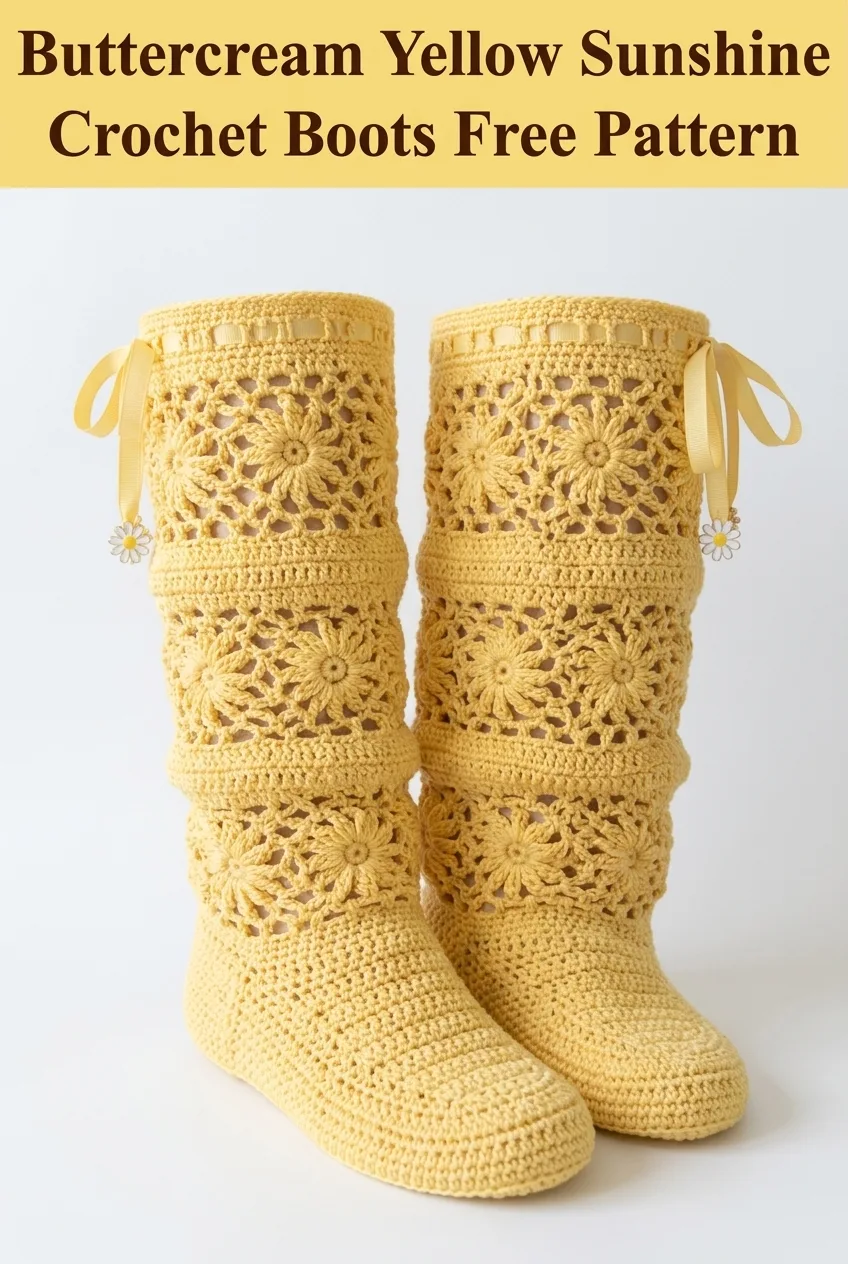
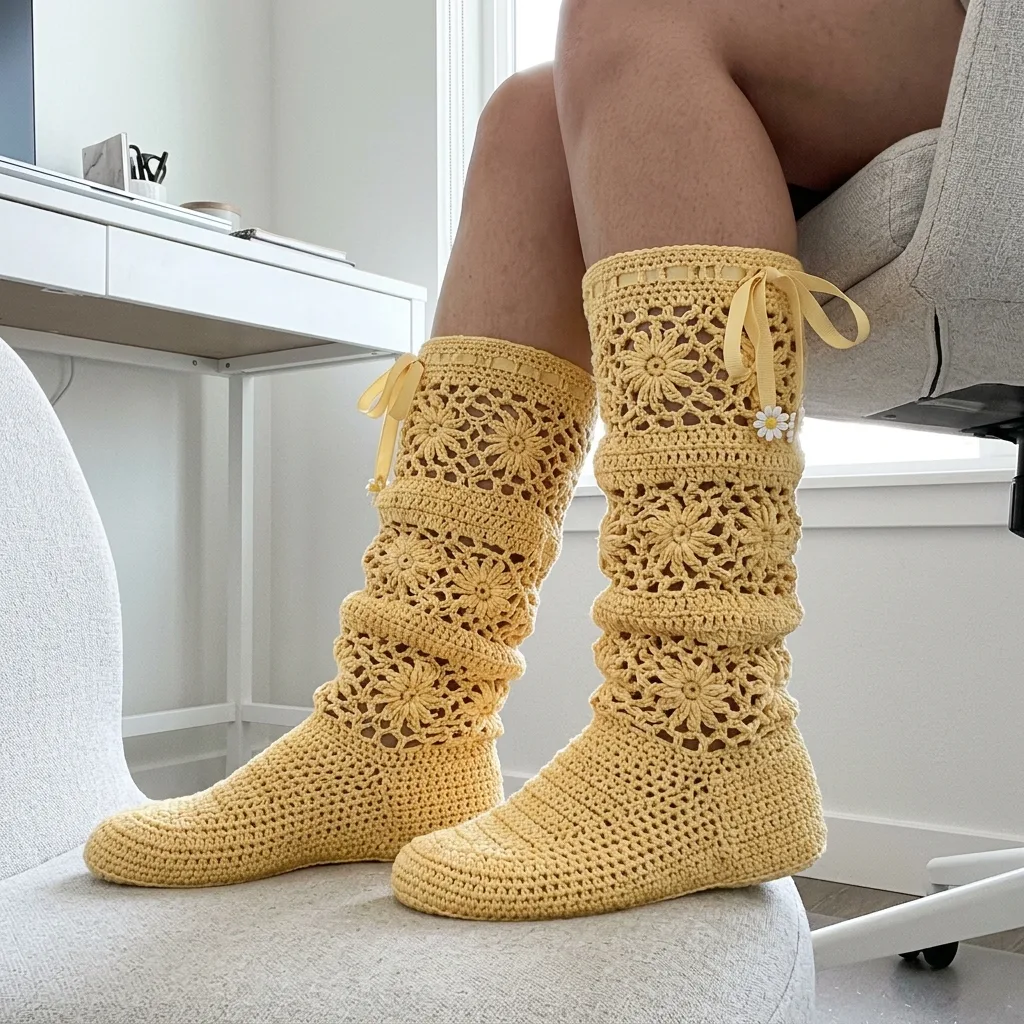
These sunshine yellow crochet boots combine a solid, comfortable foot section with an absolutely stunning lacy floral leg portion. The daisy-centered granny squares climbing up the leg create an open, breathable texture that’s perfect for lounging at home or showing off at your next craft night. And that sweet ribbon tie at the top? Chef’s kiss.
Whether you’re looking for the ultimate cozy house boots or a showstopping handmade gift, this crochet pattern delivers. Let’s dive in and get those hooks moving.
Why You’ll Love This Crochet Boots Pattern
This crochet boot pattern is a beautiful blend of techniques that keeps things interesting from start to finish. You’ll work a structured sock-style foot using basic stitches, then transition into decorative floral granny squares for the leg portion. The result is a project that teaches you multiple skills while creating something genuinely wearable and impressive.
What makes these boots special:
This is an intermediate level crochet pattern. If you’ve made granny squares before and feel comfortable with basic sock or slipper construction, you’re ready for this project. I’ll walk you through every step.
Materials Needed
Before you start, gather everything you’ll need. Having your materials ready makes the whole process smoother.
Yarn:
Hook:
Notions:
Gauge:
Stitch Abbreviations and Definitions
Let me break down every stitch you’ll use in this pattern. If you’re newer to crochet, read through these carefully before starting.
ch = chain: Wrap yarn over hook, pull through loop on hook. This creates the foundation for your work.
sl st = slip stitch: Insert hook into stitch, yarn over, pull through both the stitch and the loop on your hook in one motion. Used for joining and moving across stitches without adding height.
sc = single crochet: Insert hook into stitch, yarn over and pull up a loop (2 loops on hook), yarn over and pull through both loops. A short, dense stitch.
hdc = half double crochet: Yarn over, insert hook into stitch, yarn over and pull up a loop (3 loops on hook), yarn over and pull through all 3 loops. Slightly taller than single crochet.
dc = double crochet: Yarn over, insert hook into stitch, yarn over and pull up a loop (3 loops on hook), yarn over and pull through 2 loops (2 loops remain), yarn over and pull through remaining 2 loops. A taller stitch that creates an open fabric.
tr = treble crochet: Yarn over twice, insert hook into stitch, yarn over and pull up a loop (4 loops on hook), [yarn over, pull through 2 loops] three times. A very tall stitch used in the floral centers.
ch-sp = chain space: The gap created by chain stitches in the previous row. You’ll work into these spaces, not into the chains themselves.
sk = skip: Miss the indicated number of stitches.
inc = increase: Work 2 stitches into the same stitch to add width.
dec = decrease: Work 2 stitches together as one to reduce width. For sc2tog (single crochet decrease), insert hook in first stitch, pull up loop, insert hook in next stitch, pull up loop, yarn over and pull through all 3 loops.
Pattern Notes Before You Begin
Sizing: This pattern is written for a women’s size medium (US 7-8). The foot length measures approximately 9.5 inches, and the boot height from sole to top edge is approximately 14 inches.
To adjust sizing: Add or subtract rounds in the foot section and rows in the toe area. For the leg, add or remove one horizontal band of granny squares.
Construction overview: You’ll make each boot in sections.
1. Toe and foot (worked flat, then seamed)
2. Heel shaping (worked in rounds)
3. Ankle ribbing (worked in rows, joined)
4. Floral granny squares (made separately)
5. Assembly and finishing
6. Ribbon drawstring
Important: Make both boots at the same time if possible, completing each section for both before moving on. This keeps your tension consistent and ensures matching boots.
The Pattern: Buttercream Yellow Sunshine Crochet Boots
Part 1: Toe Section
The toe is worked flat in rows, creating a shaped piece that wraps around your toes comfortably.
Foundation: Ch 13.
Row 1: Sc in 2nd ch from hook and in each ch across. (12 sc)
Row 2: Ch 1, turn. 2 sc in first st (increase made), sc in each st across to last st, 2 sc in last st. (14 sc)
Row 3: Ch 1, turn. Sc in each st across. (14 sc)
Rows 4-5: Repeat Row 2, then Row 3. (16 sc after Row 4)
Rows 6-7: Repeat Row 2, then Row 3. (18 sc after Row 6)
Rows 8-17: Ch 1, turn. Sc in each st across. (18 sc)
You should now have a rounded toe piece measuring about 3.5 inches long.
Part 2: Foot Section
Continue working from the toe piece to create the top of the foot.
Rows 18-35: Ch 1, turn. Sc in each st across. (18 sc)
This section should measure approximately 4.5 inches. Adjust row count to fit your foot length.
Do not fasten off. You’ll now work the sole.
Part 3: Sole
The sole is worked separately and attached later. This gives you a comfortable, slightly cushioned bottom.
Foundation: Ch 37.
Row 1: Sc in 2nd ch from hook and in each ch across. (36 sc)
Row 2: Ch 1, turn. 2 sc in first st, sc to last st, 2 sc in last st. (38 sc)
Rows 3-4: Ch 1, turn. Sc in each st across. (38 sc)
Row 5: Ch 1, turn. 2 sc in first st, sc to last st, 2 sc in last st. (40 sc)
Rows 6-8: Ch 1, turn. Sc in each st across. (40 sc)
*Heel shaping:*
Row 9: Ch 1, turn. Sc2tog, sc to last 2 sts, sc2tog. (38 sc)
Row 10: Ch 1, turn. Sc in each st across. (38 sc)
Rows 11-14: Repeat Rows 9-10 twice more. (34 sc after Row 13)
Row 15: Ch 1, turn. Sc2tog, sc to last 2 sts, sc2tog. (32 sc)
Fasten off, leaving a long tail for seaming.
Part 4: Assembling the Foot
Now comes the satisfying part. You’ll join your pieces to create the actual boot foot.
1. Place the sole flat with the right side facing up.
2. Position the toe/foot section on top, matching the shaped toe edge to the rounded end of the sole.
3. Using your tapestry needle and matching yarn, whip stitch around the entire perimeter, easing the foot section around the sole edges.
4. Take your time with the toe area. The curves need gentle manipulation to lay flat.
Don’t panic if it looks a little wonky at first. The stitches will settle once you try it on and wear it a bit.
Turn right side out. You now have a complete foot/slipper base!
Part 5: Ankle Ribbing
The ribbed section creates a snug fit around the ankle and provides the transition to the lacy leg.
With right side facing, join yarn at center back of the foot opening.
Round 1: Ch 1, sc evenly around the entire ankle opening, working approximately 48-52 sc total. Sl st to first sc to join. Place marker.
Round 2: Ch 1, sc in each st around. Sl st to join. (48-52 sc)
Rounds 3-8: Repeat Round 2.
Eyelet Round (Round 9): Ch 1, *sc in next st, ch 1, sk 1 st* around. Sl st to join. This creates holes for your ribbon drawstring.
Rounds 10-12: Ch 1, sc in each st and ch-sp around. Sl st to join.
Fasten off. You now have a ribbed ankle cuff with an eyelet row for the ribbon.
Part 6: Floral Granny Squares (Make 8 per boot)
These gorgeous daisy-centered squares are the stars of the show. Each one features a dimensional flower center surrounded by an open lacy border.
The Flower Center:
Magic ring: Create a magic ring (or ch 4 and sl st to first ch to form a ring).
Round 1: Ch 3 (counts as first dc), 11 dc into ring. Sl st to top of ch-3 to join. Pull ring closed. (12 dc)
Round 2: Ch 1, sc in same st, *ch 4, tr in same st, ch 4, sc in same st, sc in next st* around, ending last repeat without the final sc. Sl st to first sc. (6 petals made)
This creates those beautiful elongated daisy petals you see in the photo.
The Square Border:
Round 3: Working behind the petals, sl st into the back of any sc from Round 1. Ch 5, *dc in back of next sc, ch 2* around. Sl st to 3rd ch of beginning ch-5. (6 ch-2 spaces)
Round 4: Sl st into first ch-sp, ch 3, 2 dc in same sp, ch 1, *3 dc in next ch-sp, ch 1* around. Sl st to top of ch-3.
Round 5 (Corner Round): Sl st to center dc of first 3-dc group. Ch 3, 2 dc in same st, ch 1, 3 dc in next dc (corner made), *ch 1, 3 dc in center dc of next group, ch 1, 3 dc in same dc (corner), ch 1, 3 dc in center dc of next group* around. Sl st to join. (4 corners, 4 sides)
Round 6: Ch 3, dc in each dc and ch-sp around, working (2 dc, ch 2, 2 dc) in each corner ch-1 space. Sl st to join.
Fasten off, leaving a long tail for joining.
Each completed square should measure approximately 4 inches. Make 8 squares per boot (16 total for the pair).
Part 7: Assembling the Leg
This is where everything comes together. You’ll create a tube of floral squares that attaches to your ankle cuff.
Layout: Arrange 8 squares in 4 horizontal rows of 2 squares each. The leg wraps around, so the 2 squares in each row will be joined side to side, then the rows stack vertically.
Joining Squares:
Using a simple whip stitch or sl st join, attach squares as follows:
1. Join 2 squares side by side for each row (creates 4 double-wide strips)
2. Stack and join the strips vertically
3. Join the side edges to form a tube
Pro tip: Lay your squares flat and plan the arrangement before sewing anything. Make sure all the flower centers face the same direction.
Attaching Leg to Ankle:
Position the completed leg tube over the ribbed ankle section. The bottom edge of your lowest granny square row should overlap the top of the ankle ribbing by about half an inch.
Using matching yarn, whip stitch the leg tube to the ankle, working through both layers securely.
Part 8: Top Edging and Ribbon
Top Border:
Join yarn at any corner of the top edge.
Round 1: Ch 1, sc evenly around the top edge, working 3 sc in each corner ch-sp. Sl st to join.
Round 2 (Eyelet Round): Ch 1, *sc, ch 1, sk 1* around. Sl st to join.
Round 3: Ch 1, sc in each st and ch-sp around. Sl st to join.
Fasten off and weave in ends.
Adding the Ribbon:
Cut a piece of satin ribbon approximately 18 inches long. Using a tapestry needle or safety pin, weave the ribbon through the eyelet round at the top of the boot. Tie in a bow at the front or side.
Repeat for the ankle eyelet row if desired, using a shorter piece of ribbon.
Finishing Touches
Weave in all ends using your tapestry needle. Work ends back through several stitches, then reverse direction for security. Trim close to the work.
Blocking (optional but recommended): Wet the completed boots and reshape gently. Stuff with plastic bags or towels to hold shape while drying. This really helps the granny squares lay flat and even.
Optional embellishments: The boots in the photo feature small daisy charms attached near the ribbon ties. You can find similar charms at any craft store or online.
Care Instructions
These crochet boots are delicate, so treat them gently.
Customization Ideas
Change the color: These boots would look stunning in white, lavender, sage green, or a soft coral. You could also make the flower centers in a contrasting color for extra pop.
Add a sole: For extra durability, consider adding a thin leather or suede sole. You can purchase pre-cut slipper soles online and sew them to the bottom.
Adjust the height: Want knee-high instead of calf-high? Simply add another row or two of granny squares. Want ankle boots? Use just 2 rows of squares.
Skip the ribbon: If bows aren’t your style, the boots work perfectly well without the drawstring. The elastic nature of crochet keeps them in place.
Troubleshooting Common Issues
My squares are different sizes: Check your tension. If you crochet tightly when stressed and loosely when relaxed, your squares will vary. Try to work all squares in one or two sessions.
The foot is too tight/loose: Adjust your starting chain and row counts. Add or remove stitches in increments of 2 to maintain shaping.
The leg is too snug: Add a third square to each horizontal row (making rows of 3 instead of 2). This increases the circumference significantly.
The flower centers curl: This usually resolves with blocking. If not, try using a slightly larger hook for the center rounds only.
Your Crochet Boots Journey
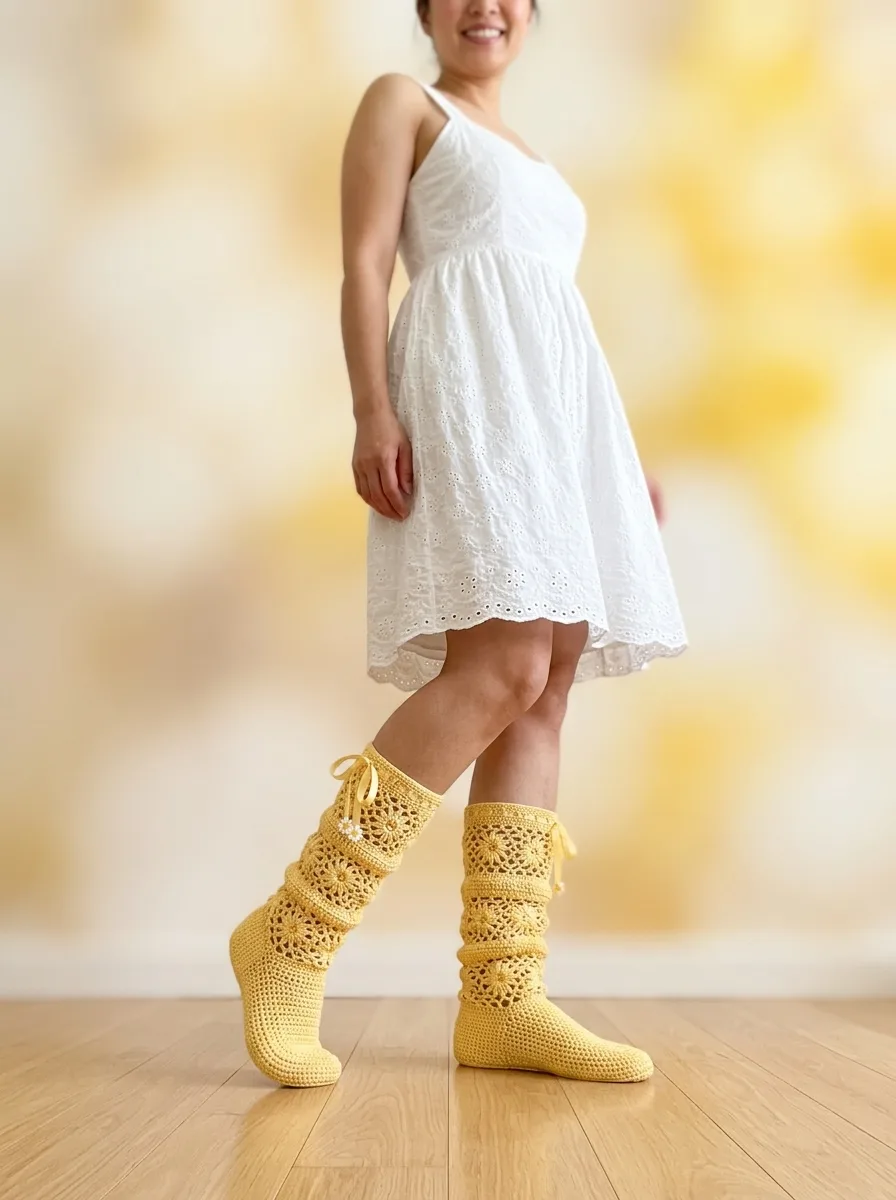
Making these buttercream yellow sunshine crochet boots is truly a rewarding project. Yes, it takes time. Yes, you’ll be weaving in quite a few ends. But when you slip them on and see those gorgeous floral squares climbing up your leg? Absolutely worth every stitch.
This crochet tutorial has walked you through every step you need to create your own stunning pair of handmade boots. From the cozy fitted foot to the lacy granny square leg, you now have the complete roadmap.
Take your time with this project. Enjoy the process. And please, show off your finished boots proudly.
Thank you so much for choosing this pattern and trusting me to guide you through it. I genuinely hope you love making these boots as much as I loved designing them. If you share your finished pair on Instagram or Facebook, please tag me. I would absolutely love to see your color choices and personal touches.
If this pattern made your crafting heart happy, I’d so appreciate it if you saved it to your Pinterest boards so you can find it again later and share it with fellow crochet lovers. And please drop a comment below when you finish your boots. Tell me all about your yarn choice, how they fit, and whether you added any fun embellishments. I read every single comment and can’t wait to hear from you!