
Oh my goodness, THIS pattern. If you have been searching for the cutest summer baby project that will make everyone at the baby shower gasp, you just found it. This watermelon baby romper works up faster than you might think, and the finished piece looks like it belongs in a boutique window.
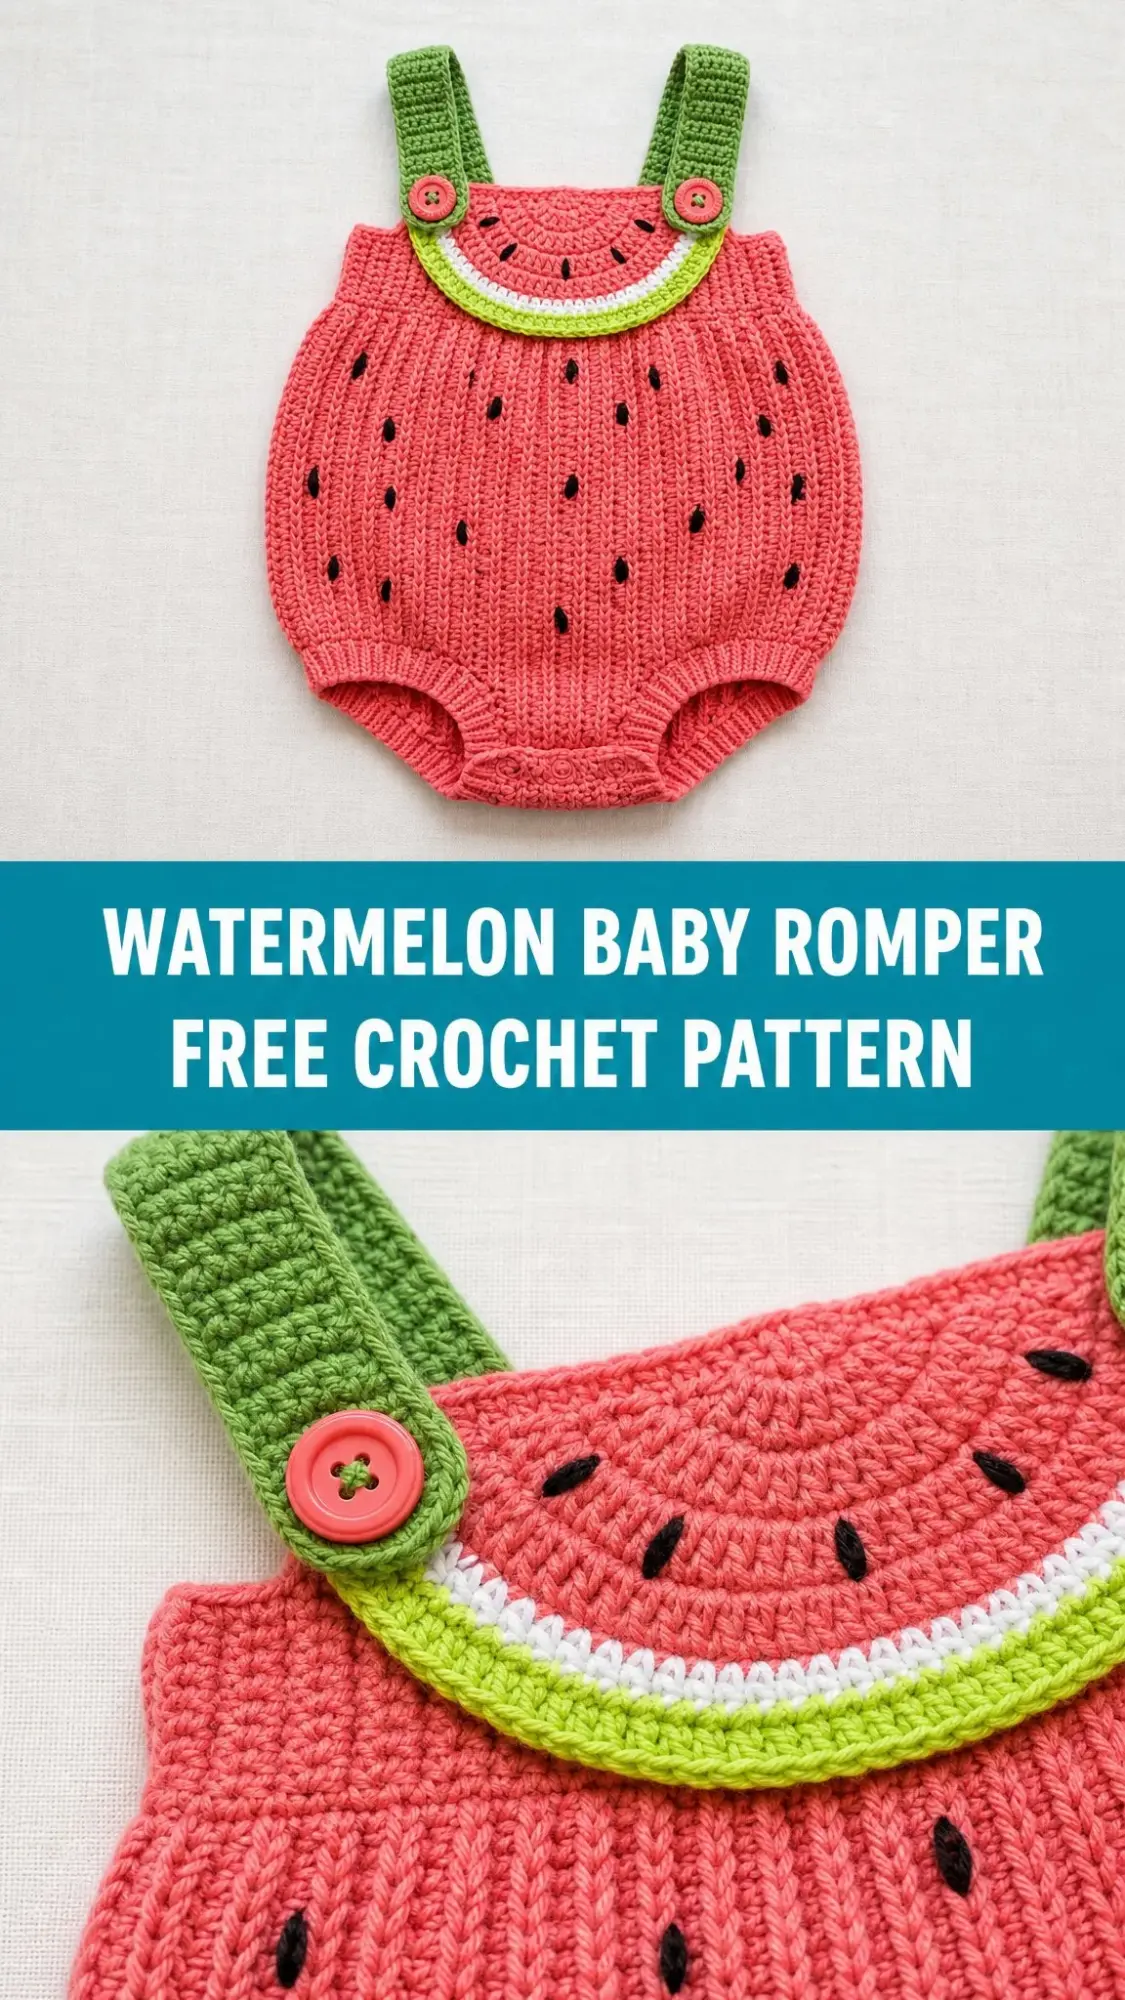
I am talking about a project that combines simple stitches with clever construction to create something absolutely stunning. The ribbed texture gives it that professional knit look, the watermelon slice bib is pure summer joy, and those little embroidered seeds take it from adorable to showstopper.
Whether you are making this for your own little one, a gift, or just because you cannot resist tiny clothes, grab your hook and let us dive in. This intermediate crochet pattern will keep you engaged without overwhelming you, and the result is one hundred percent worth every stitch.
Why This Watermelon Baby Romper Pattern is a Summer Must-Make
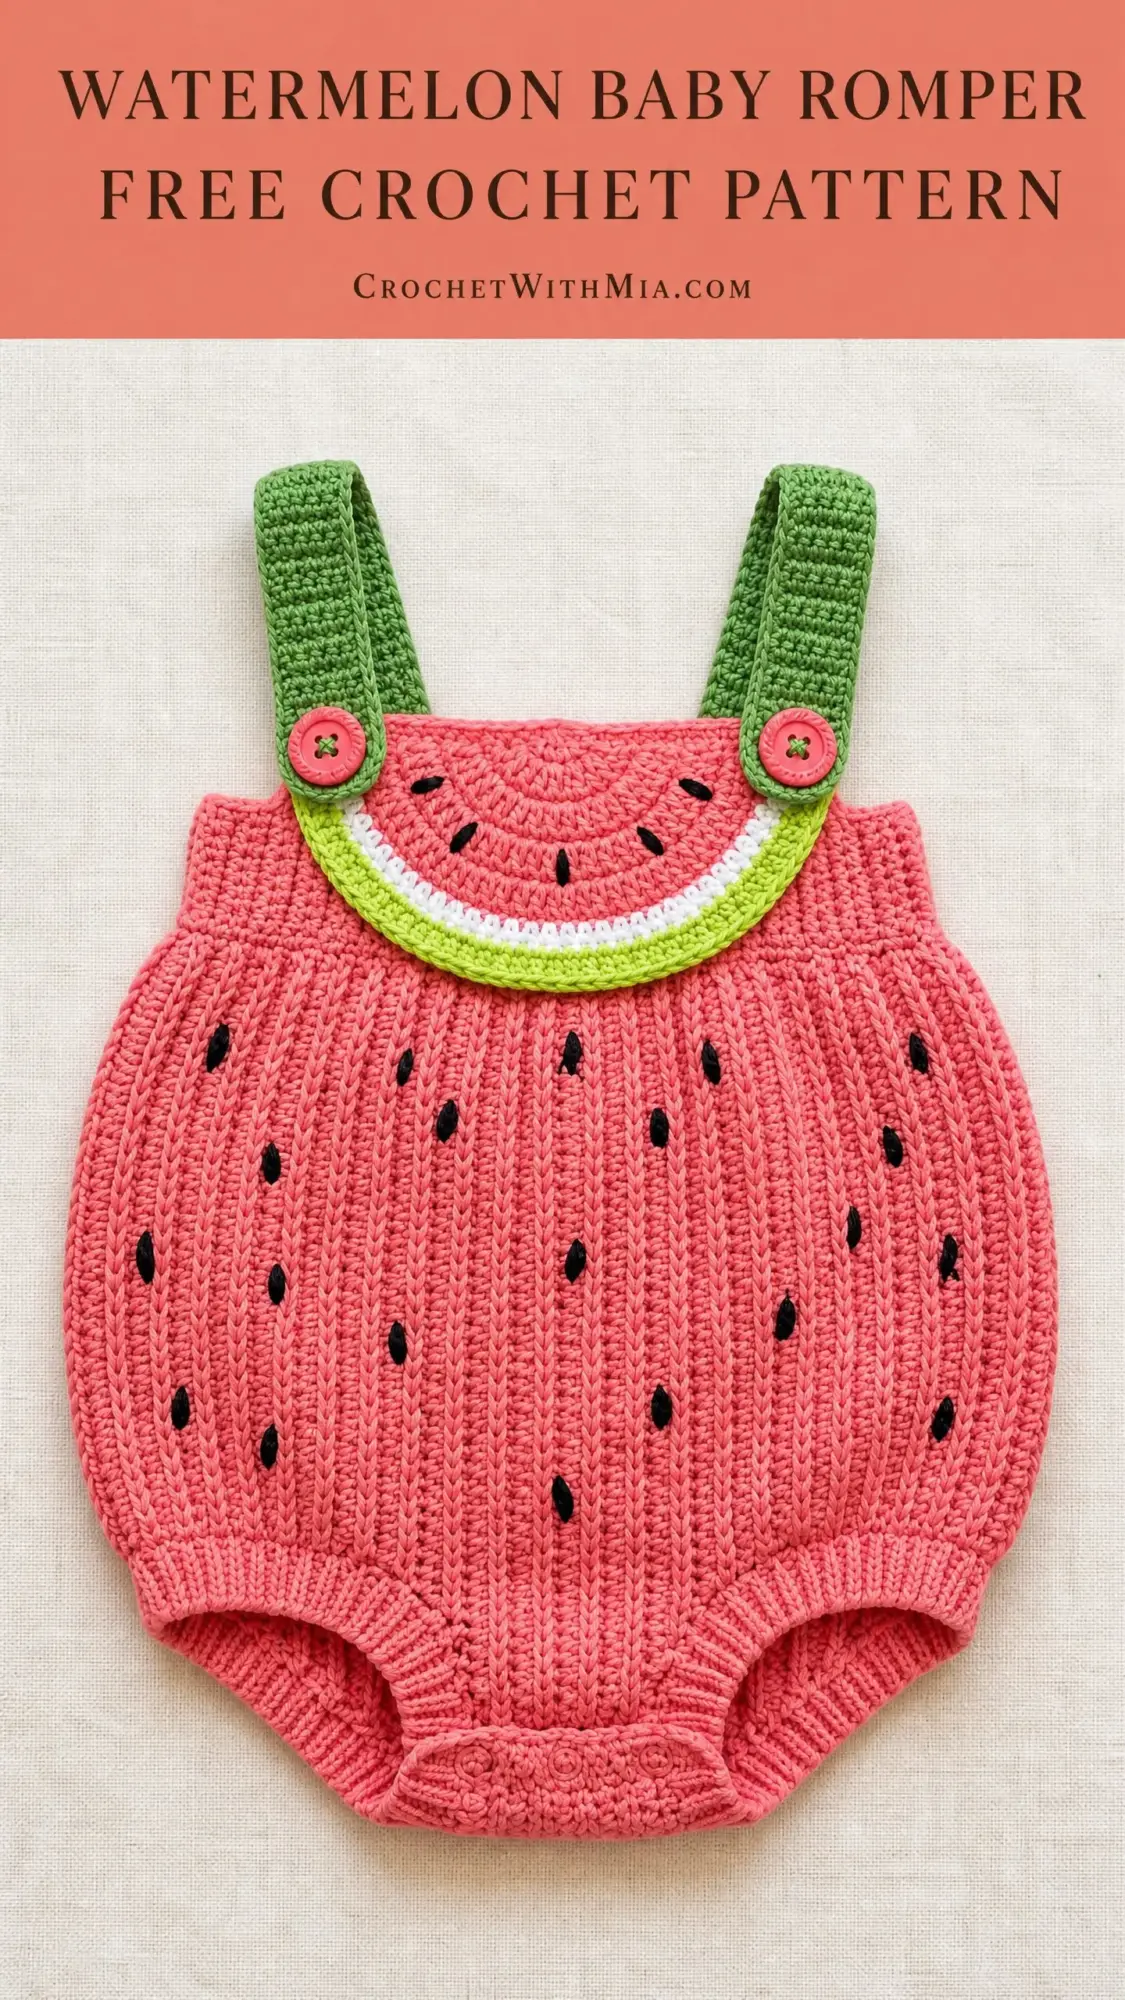
This romper captures everything I love about seasonal baby crochet projects. The design mimics the look of a fresh watermelon slice right down to the layered rind in green, lime, white, and black. The pink body features scattered embroidered seeds that give it authentic watermelon charm.
The construction is clever but not complicated. You work the shoulder straps first as simple flat strips. Then you create the semicircular bib, followed by a rectangular back panel. After seaming these pieces together, you work the body downward in joined rounds, creating that adorable bloomer silhouette that photographs beautifully.
Best of all, the main body uses ribbed single crochet worked through the back loop only. This creates vertical ridges that look remarkably like knit ribbing. If you have ever wanted that knit look without picking up needles, this technique delivers.
Skill Level and Time Commitment
I would rate this pattern as intermediate. You should feel comfortable working in the round, flat shaping, color changes, seaming, and surface embroidery. Nothing here is extremely advanced, but the multi-section construction requires patience and careful attention to stitch counts.
For an experienced intermediate crocheter, expect approximately 10 to 15 hours of work for the 3 to 6 month size. That breaks down nicely into manageable sessions. You might knock out the straps and bib in one sitting, the body in another, and the finishing touches in a third.
Finished Measurements
This crochet pattern is written for size 3 to 6 months with the following finished dimensions:
I have included size customization tips at the end of the pattern for newborn through 12 months.
Materials Needed for the Watermelon Romper Crochet Pattern
Yarn
You will need DK weight cotton or cotton-blend yarn in five colors:
Yarn Suggestions
Lion Brand 24/7 Cotton DK works beautifully here. It is smooth, mercerized, has excellent stitch definition, and is machine washable. The Pink colorway is perfect for Yarn A and Lime for Yarn C.
Paintbox Yarns Simply DK is an affordable option with a full color range. It is 100 percent cotton with consistent twist, and you can easily find all five colors needed.
Scheepjes Catona held double creates a firm, tidy fabric when worked on this hook size. The color palette is exceptional if you want exact shade matching.
Any DK weight cotton that achieves gauge will work. Avoid heavily textured or fuzzy yarns since these obscure the embroidered seed details.
Tools and Notions
Gauge
22 single crochet stitches and 24 rows equals 4 inches or 10 cm, worked flat in single crochet with a US size D-3 or 3.25 mm hook, blocked.
Gauge matters for fitted garments like this romper. Please work a swatch at least 6 by 6 inches, wash it, block it, then measure. Go up a hook size if your swatch is too small, down if too large.
Abbreviations and Stitch Definitions
Let me define every abbreviation before we begin. Understanding these will make the pattern instructions crystal clear.
Special Stitches Explained
Ribbed Single Crochet (Rib-sc)
This creates the vertical ridge texture that makes the romper look knitted. Instead of inserting your hook under both loops of the stitch, you only go under the back loop.
How to work it: Insert hook under the back loop only, yarn over, pull up a loop, yarn over, draw through both loops on hook. Work this way for every stitch on every row or round where indicated.
Single Crochet Two Together (sc2tog)
This is how you decrease. You are essentially combining two stitches into one.
How to work it: Insert hook into next stitch, yarn over, pull up a loop. You now have 2 loops on your hook. Insert hook into the following stitch, yarn over, pull up a loop. You now have 3 loops on your hook. Yarn over and draw through all 3 loops at once. One decrease completed.
Surface Slip Stitch Embroidery (for seeds)
You will add the black seeds after crocheting is complete using a yarn needle and Yarn E.
How to work it: Thread your yarn needle with black yarn. Working on the right side of the fabric, insert needle from back to front at the base of where you want the seed. Bring needle to front, then insert from front to back at the top of the seed shape, approximately 3 to 4 stitches tall and 1 stitch wide. This creates a narrow oval. Work 2 to 3 straight stitches side by side to fill the shape. Weave in end securely on wrong side.
Pattern Notes Before You Begin
1. Construction order: Work two shoulder straps first, then the front bib, then the back bodice panel. Seam front to back at sides, then work the body downward in joined rounds from that seamed piece.
2. Turning chains: All turning chains of 1 count as a turning chain only and do NOT count as a stitch.
3. Stitch counts: Numbers in parentheses at the end of each row or round represent the total working stitches.
4. Color changes: Complete the last yarn over of the final stitch in the old color with the new color. Cut old color and weave in, or carry loosely if reused within 2 rows.
5. Right side: When working in the round, the right side always faces you. When working flat, odd-numbered rows are right side rows and even-numbered rows are wrong side rows unless otherwise stated.
Step by Step Crochet Pattern Instructions
Section 1: Shoulder Straps (make 2)
With Yarn B (green) and hook D-3, chain 8.
Row 1 (RS): Single crochet in 2nd chain from hook and in each chain across. (7 sc)
Row 2: Chain 1, turn, single crochet in each stitch across. (7 sc)
Repeat Row 2 until strap measures 9 inches or 23 cm from beginning. Adjust length as desired for different ages.
Last row: Chain 1, turn, single crochet in each stitch across. Fasten off, leaving a 10-inch tail for seaming.
Make second strap identical to the first. Set both straps aside.
Section 2: Front Bib
The front bib is a filled semicircle worked flat. You begin at the top center and work outward, adding stitches at each end to create the curved shape.
With Yarn A (pink) and hook D-3:
Foundation: Chain 3.
Row 1 (RS): 3 single crochet in 2nd chain from hook. (3 sc)
Row 2 (WS): Chain 1, turn, 2 single crochet in first stitch, single crochet in next stitch, 2 single crochet in last stitch. (5 sc)
Row 3: Chain 1, turn, 2 single crochet in first stitch, single crochet in each stitch to last stitch, 2 single crochet in last stitch. (7 sc)
Row 4: Chain 1, turn, 2 single crochet in first stitch, single crochet in each stitch to last stitch, 2 single crochet in last stitch. (9 sc)
Row 5: Chain 1, turn, 2 single crochet in first stitch, single crochet in each stitch to last stitch, 2 single crochet in last stitch. (11 sc)
Row 6: Chain 1, turn, 2 single crochet in first stitch, single crochet in each stitch to last stitch, 2 single crochet in last stitch. (13 sc)
Row 7: Chain 1, turn, 2 single crochet in first stitch, single crochet in each stitch to last stitch, 2 single crochet in last stitch. (15 sc)
Row 8: Chain 1, turn, 2 single crochet in first stitch, single crochet in each stitch to last stitch, 2 single crochet in last stitch. (17 sc)
Row 9: Chain 1, turn, 2 single crochet in first stitch, single crochet in each stitch to last stitch, 2 single crochet in last stitch. (19 sc)
Row 10: Chain 1, turn, 2 single crochet in first stitch, single crochet in each stitch to last stitch, 2 single crochet in last stitch. (21 sc)
Row 11: Chain 1, turn, 2 single crochet in first stitch, single crochet in each stitch to last stitch, 2 single crochet in last stitch. (23 sc)
Row 12: Chain 1, turn, 2 single crochet in first stitch, single crochet in each stitch to last stitch, 2 single crochet in last stitch. (25 sc)
Row 13: Chain 1, turn, 2 single crochet in first stitch, single crochet in each stitch to last stitch, 2 single crochet in last stitch. (27 sc)
Row 14: Chain 1, turn, 2 single crochet in first stitch, single crochet in each stitch to last stitch, 2 single crochet in last stitch. (29 sc)
Row 15: Chain 1, turn, 2 single crochet in first stitch, single crochet in each stitch to last stitch, 2 single crochet in last stitch. (31 sc)
Do not fasten off. The straight top edge faces upward toward the neckline. The curved bottom edge faces downward.
Checkpoint: The bib should measure approximately 3 inches or 7.5 cm from top center to the bottom curved edge, and approximately 6 inches or 15 cm wide at the widest row.
Bib Rind Border
Now work along the curved bottom edge only, adding the rind color bands. Do not work along the straight top edge yet.
With right side facing and curved edge at the bottom, join Yarn E (black) to the bottom right corner of the bib.
Rind Round 1 (Black outline): Chain 1, single crochet evenly along the curved edge of the semicircle. Place approximately 2 single crochet per row end along the sides and 1 single crochet per stitch across the bottom row. Aim for approximately 46 single crochet total. Adjust as needed to keep the edge flat without puckering. (46 sc)
Fasten off Yarn E.
Rind Round 2 (White rind inner band): Join Yarn D (white) to the first stitch of Rind Round 1 at the right side. Chain 1, single crochet in each stitch across, placing 2 single crochet in each corner stitch at the bottom center to keep the curve flat. (48 sc)
Fasten off Yarn D.
Rind Round 3 (Lime green outer rind): Join Yarn C (lime green) to the first stitch of Rind Round 2 at the right side. Chain 1, single crochet in each stitch across, placing 2 single crochet in each of the 2 corner stitches at the bottom center. (50 sc)
Fasten off Yarn C.
Rind Round 4 (Green outer skin): Join Yarn B (green) to the first stitch of Rind Round 3 at the right side. Chain 1, single crochet in each stitch across, placing 2 single crochet in each of the 2 corner stitches at the bottom center. (52 sc)
Fasten off Yarn B.
The rind border is complete. Your bib should look like a watermelon slice with stacked color bands along the curved edge. Set bib aside.
Section 3: Back Bodice Panel
The back panel is a simple rectangle worked flat in Yarn A.
With Yarn A and hook D-3, chain 34.
Row 1 (RS): Single crochet in 2nd chain from hook and in each chain across. (33 sc)
Row 2 (WS): Chain 1, turn, single crochet in each stitch across. (33 sc)
Repeat Row 2 until the back panel measures 4 inches or 10 cm from the foundation chain. This is approximately 24 rows total.
Do not fasten off. Cut yarn leaving a 12-inch tail for seaming.
The back panel should measure 6 inches or 15 cm wide and 4 inches or 10 cm tall.
Section 4: Attaching Straps to Bib
Position the front bib with the straight top edge facing up. Place one shoulder strap at the top-right corner of the bib and one at the top-left corner. Overlap each strap end by about 0.5 inch or 1.25 cm onto the right side of the bib at each top corner. The straps hang upward from the bib.
Using matching Yarn B, sew each strap end securely to the right side of the bib using a yarn needle and whip stitch or mattress stitch.
Sew a pink button through the strap and bib layers at each corner to secure and add the decorative button detail. The button should sit centered on the junction of the strap and the bib.
Repeat for the second strap at the second corner.
Section 5: Seaming Front Bib to Back Bodice
Lay the back panel flat. Lay the front bib on top of the back panel, wrong sides together, aligning the lower straight edges. The lower edge of the front bib (the bottom of Row 15, before the rind border) aligns with the bottom of the back panel.
The bib measures 31 stitches wide. The back panel measures 33 stitches wide. Center the bib on the back panel with approximately 1 stitch of back panel showing on each side, or ease the bib to fit.
Using Yarn A and mattress stitch or slip stitch seam worked on the wrong side, seam the right side edges together and the left side edges together. Seam from the lower edges upward approximately 4 inches or 10 cm (the full height of the back panel), leaving the top of the back panel open for armholes. The lower edges should be open to begin working the body.
Checkpoint: After seaming, you have a tube-like bodice open at the top (neckline and armholes) and open at the bottom (for the body). The front bib with rind border and straps forms the front. The smooth rectangle forms the back. The piece should measure approximately 4 inches tall at the sides and 6 inches wide.
Section 6: Body (worked in joined rounds downward from the bodice)
With right side facing, join Yarn A at the right side seam at the bottom edge of the bodice. Place stitch markers at each side seam position.
Setup Round: Chain 1, single crochet in each stitch along the bottom of the front bib (31 sc), then single crochet in each stitch along the bottom of the back panel (33 sc), slip stitch to join to first single crochet. (64 sc)
Place stitch marker at the join point (right side seam).
Rounds 1 to 3: Chain 1, single crochet in back loop only of each stitch around, slip stitch to join. (64 sc each round)
Round 4 (increase round): Chain 1, (single crochet in next 7 stitches, 2 single crochet in next stitch) 8 times, slip stitch to join. (72 sc)
Rounds 5 to 8: Chain 1, single crochet in back loop only of each stitch around, slip stitch to join. (72 sc each round)
Round 9 (increase round): Chain 1, (single crochet in next 8 stitches, 2 single crochet in next stitch) 8 times, slip stitch to join. (80 sc)
Rounds 10 to 14: Chain 1, single crochet in back loop only of each stitch around, slip stitch to join. (80 sc each round)
Round 15 (increase round): Chain 1, (single crochet in next 9 stitches, 2 single crochet in next stitch) 8 times, slip stitch to join. (88 sc)
Rounds 16 to 20: Chain 1, single crochet in back loop only of each stitch around, slip stitch to join. (88 sc each round)
Round 21 (increase round): Chain 1, (single crochet in next 10 stitches, 2 single crochet in next stitch) 8 times, slip stitch to join. (96 sc)
Rounds 22 to 26: Chain 1, single crochet in back loop only of each stitch around, slip stitch to join. (96 sc each round)
Checkpoint: After Round 26, the body below the bodice should measure approximately 5 to 5.5 inches long. The body circumference is approximately 17.5 inches. The silhouette should be bloomer-shaped.
Round 27 (begin shaping for crotch gusset divider): Chain 1, single crochet in next 48 stitches, slip stitch to join. Do not complete the round. This marks the front half.
You will now divide the work for the two leg openings and the crotch.
Section 7: Crotch Shaping and Leg Openings
Front Crotch Shaping
You have 48 stitches on the front half and 48 stitches on the back half.
Work the front half flat:
Row 1 (RS): Chain 1, single crochet in each of 48 stitches across the front. Turn. (48 sc)
Row 2 (WS): Chain 1, sc2tog, single crochet in each stitch to last 2 stitches, sc2tog. Turn. (46 sc)
Row 3: Chain 1, sc2tog, single crochet in each stitch to last 2 stitches, sc2tog. Turn. (44 sc)
Row 4: Chain 1, sc2tog, single crochet in each stitch to last 2 stitches, sc2tog. Turn. (42 sc)
Row 5: Chain 1, sc2tog, single crochet in each stitch to last 2 stitches, sc2tog. Turn. (40 sc)
Row 6: Chain 1, single crochet in each stitch across. Fasten off. (40 sc)
Back Crotch Shaping
Rejoin Yarn A at the right side of the back 48 stitches.
Row 1 (RS): Chain 1, single crochet in each of 48 stitches across the back. Turn. (48 sc)
Row 2 (WS): Chain 1, sc2tog, single crochet in each stitch to last 2 stitches, sc2tog. Turn. (46 sc)
Row 3: Chain 1, sc2tog, single crochet in each stitch to last 2 stitches, sc2tog. Turn. (44 sc)
Row 4: Chain 1, sc2tog, single crochet in each stitch to last 2 stitches, sc2tog. Turn. (42 sc)
Row 5: Chain 1, sc2tog, single crochet in each stitch to last 2 stitches, sc2tog. Turn. (40 sc)
Row 6: Chain 1, single crochet in each stitch across. Fasten off. (40 sc)
Crotch Join
With right sides together, align the 40 front stitches with the 40 back stitches. Using Yarn A, slip stitch or whip stitch the two panels together across the 40 stitches, creating the crotch seam. Fasten off.
Leg openings are formed by the gap on each side between the front and back crotch shaping rows and the sides of the body.
Section 8: Leg Opening Edging (work each leg opening)
With right side facing, join Yarn A at the inside of one leg opening at the crotch seam corner.
Round 1: Chain 1, single crochet evenly around the leg opening, placing approximately 1 single crochet per stitch along the straight crotch rows and 1 single crochet per row end along the shaped sides. Aim for an even multiple of 2, approximately 42 single crochet. Adjust to keep the opening flat. Slip stitch to join. (42 sc)
Round 2: Chain 1, single crochet in back loop only of each stitch around, slip stitch to join. (42 sc)
Round 3: Chain 1, single crochet in back loop only of each stitch around, slip stitch to join. (42 sc)
Fasten off and weave in ends.
Repeat for second leg opening.
Checkpoint: The finished crotch depth should be approximately 1.5 to 2 inches. The leg openings should comfortably fit a baby’s thigh with ease.
Attach snaps to the crotch seam edges on the inside for diaper access, spacing them evenly.
Section 9: Back Strap Attachment
The loose ends of the shoulder straps hang over the baby’s shoulders from the front bib and attach to the back panel.
Determine the correct length by measuring the distance from where the strap exits the front bib over the shoulder to the top of the back panel. The straps overlap the top edge of the back panel by approximately 0.5 inch.
Fold each strap end over to the wrong side of the back panel top edge and sew securely with Yarn B and yarn needle. Alternatively, sew a button to the inside of each strap end and make a chain loop on the back panel for length adjustment as the baby grows.
Section 10: Armhole Edging (optional)
If the armhole opening looks uneven, work one round of single crochet edging.
With Yarn A and right side facing, join yarn at the underarm side seam. Single crochet evenly around the armhole opening. Slip stitch to join. Fasten off and weave in ends.
Section 11: Embroidery (seeds)
Using Yarn E (black) threaded on a yarn needle, embroider seeds across the front of the bib and the body in a scattered, random pattern.
Each seed is a narrow oval shape, approximately 3 to 4 fabric stitches tall and 1 stitch wide. Work 2 to 3 straight stitches side by side to fill the oval.
For the bib, place seeds approximately 1 to 1.5 inches apart, scattered across the semicircle.
For the body, place seeds every 1 to 2 inches in a random arrangement, mimicking watermelon seeds. Approximately 25 to 35 seeds total across the full romper works well.
Weave in all embroidery ends securely on the wrong side.
Section 12: Final Finishing
Weave in all remaining ends.
Blocking: Soak the finished romper in cool water for 20 minutes. Press out excess water gently in a towel. Pin flat to a blocking mat with the bib smooth and the rind border lying flat. Allow to dry completely before removing pins.
Sew remaining buttons to the bib front at the strap attachment points if not already done. Sew crotch snaps on the inside.
Size Customization Tips
For newborn (0 to 3 months): Reduce the back panel to 29 stitches wide. Reduce bib to 13 rows (27 stitches at widest). Work body increase rounds every 6 rounds instead of every 5. Reduce overall body length by approximately 1 inch.
For 6 to 12 months: Increase back panel to 37 stitches. Increase bib to 17 rows (35 stitches at widest). Add one additional increase round in the body, working to 104 single crochet before beginning crotch shaping. Add 1 to 2 extra rounds at each leg edging. Increase strap length to 11 inches.
General rule: Every 4 additional stitches in width adds approximately 3/4 inch to the chest circumference. Every 6 additional rounds in body length adds approximately 1 inch to the length.
Blocking and Care Instructions
Block by wet blocking as described above. Do not wring or twist. Cotton yarns benefit greatly from blocking since it evens out the stitch texture.
For ongoing care: Hand wash in cool water with gentle detergent, or machine wash on a delicate cycle in a mesh laundry bag. Lay flat to dry. Do not tumble dry or hang since this can distort the shape. Do not iron directly on embroidered seeds. Press lightly from the wrong side if needed with a cool iron.
Tips for Success with This Crochet Tutorial
Count your stitches. Especially in the body increase rounds, a missed or extra stitch will throw off your repeat pattern. Use stitch markers at each increase point if that helps you stay on track.
Try on a baby (or a teddy bear). Before finishing the straps, hold the romper up to check proportions. You can easily adjust strap length before sewing them down permanently.
Do not skip blocking. Cotton yarn relaxes beautifully when blocked, and the ribbed texture will even out. Your finished piece will look so much more polished.
Embroider last. Adding seeds before blocking could distort their shape. Wait until everything is assembled and blocked, then add those adorable little details.
Thank you so much for choosing this watermelon baby romper crochet pattern. I absolutely love how this design brings summer vibes to baby’s wardrobe, and I hope you enjoy making it as much as I enjoyed designing it. If you have questions along the way, do not hesitate to reach out.
If you make this sweet little romper, I would love to see it! Share your photos on Instagram or in our Facebook group and tag your work so we can celebrate together. Happy crocheting, friend.
Do not forget to pin this pattern to your Pinterest boards so you can find it when you are ready to start stitching. And if you make one, please drop a comment below. I love seeing your finished projects and hearing how the pattern worked for you!