
Last summer, I found myself standing in front of my closet with absolutely nothing to wear to a beach bonfire. Everything was either too casual or too dressy, and I kept thinking about those gorgeous crocheted sets I’d been seeing everywhere. You know the ones. Effortlessly cool, a little boho, completely unforgettable. So I grabbed my hooks and my favorite neutral yarns, and this two-piece set was born out of that frustrating "nothing to wear" moment.
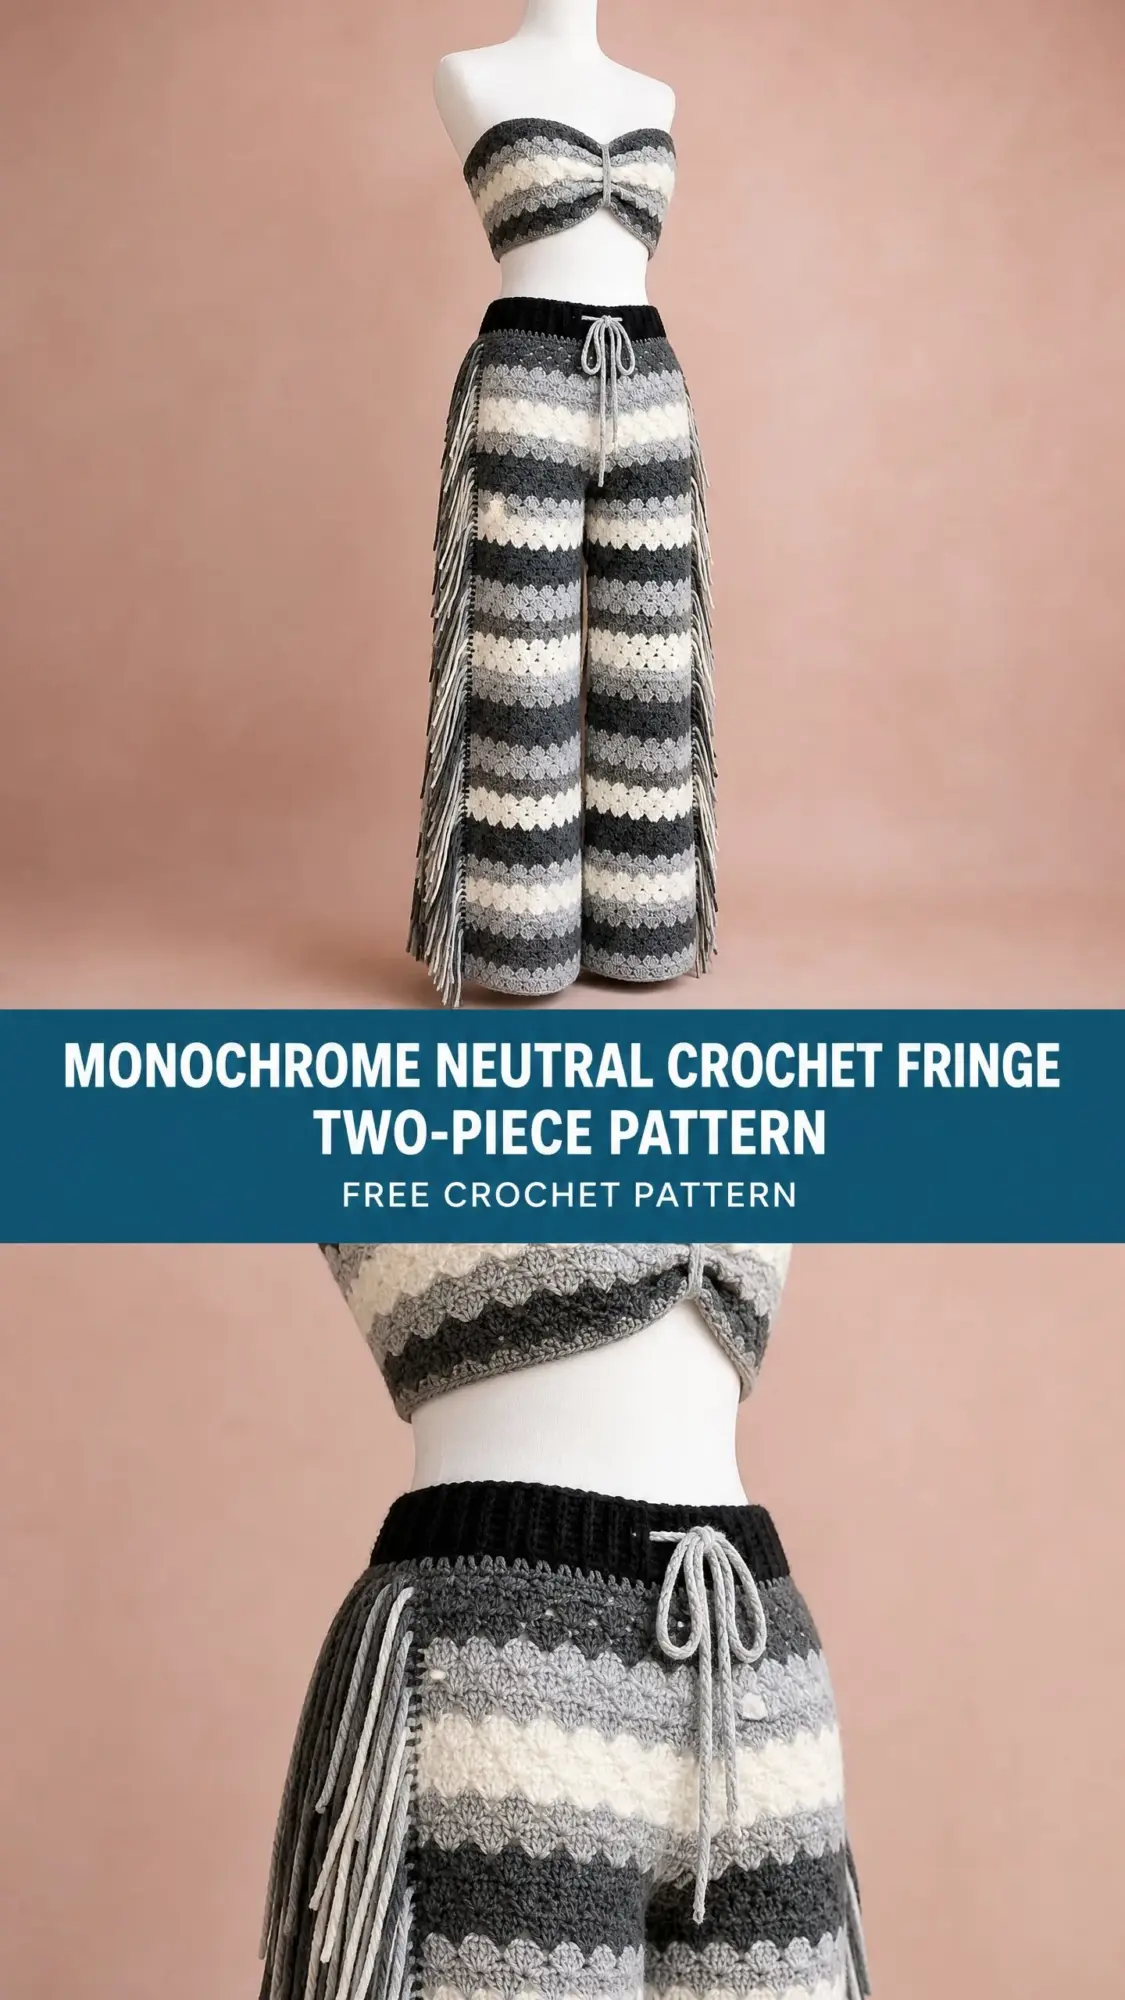
What started as a personal project quickly became one of my favorite makes ever. The combination of that shell stitch texture, the dramatic fringe cascading down the legs, and those perfect gradient stripes in charcoal, gray, and cream came together better than I could have imagined. It’s the kind of outfit that looks incredibly impressive but is built on surprisingly straightforward techniques.
If you’ve been wanting to try your hand at crocheted clothing, this coordinating bandeau top and wide-leg pants set is a fantastic project to push your skills. Yes, it takes some time. Yes, there are multiple colors to manage. But I promise the end result is absolutely worth every stitch. Let me walk you through everything you need to know.
What You’re Making
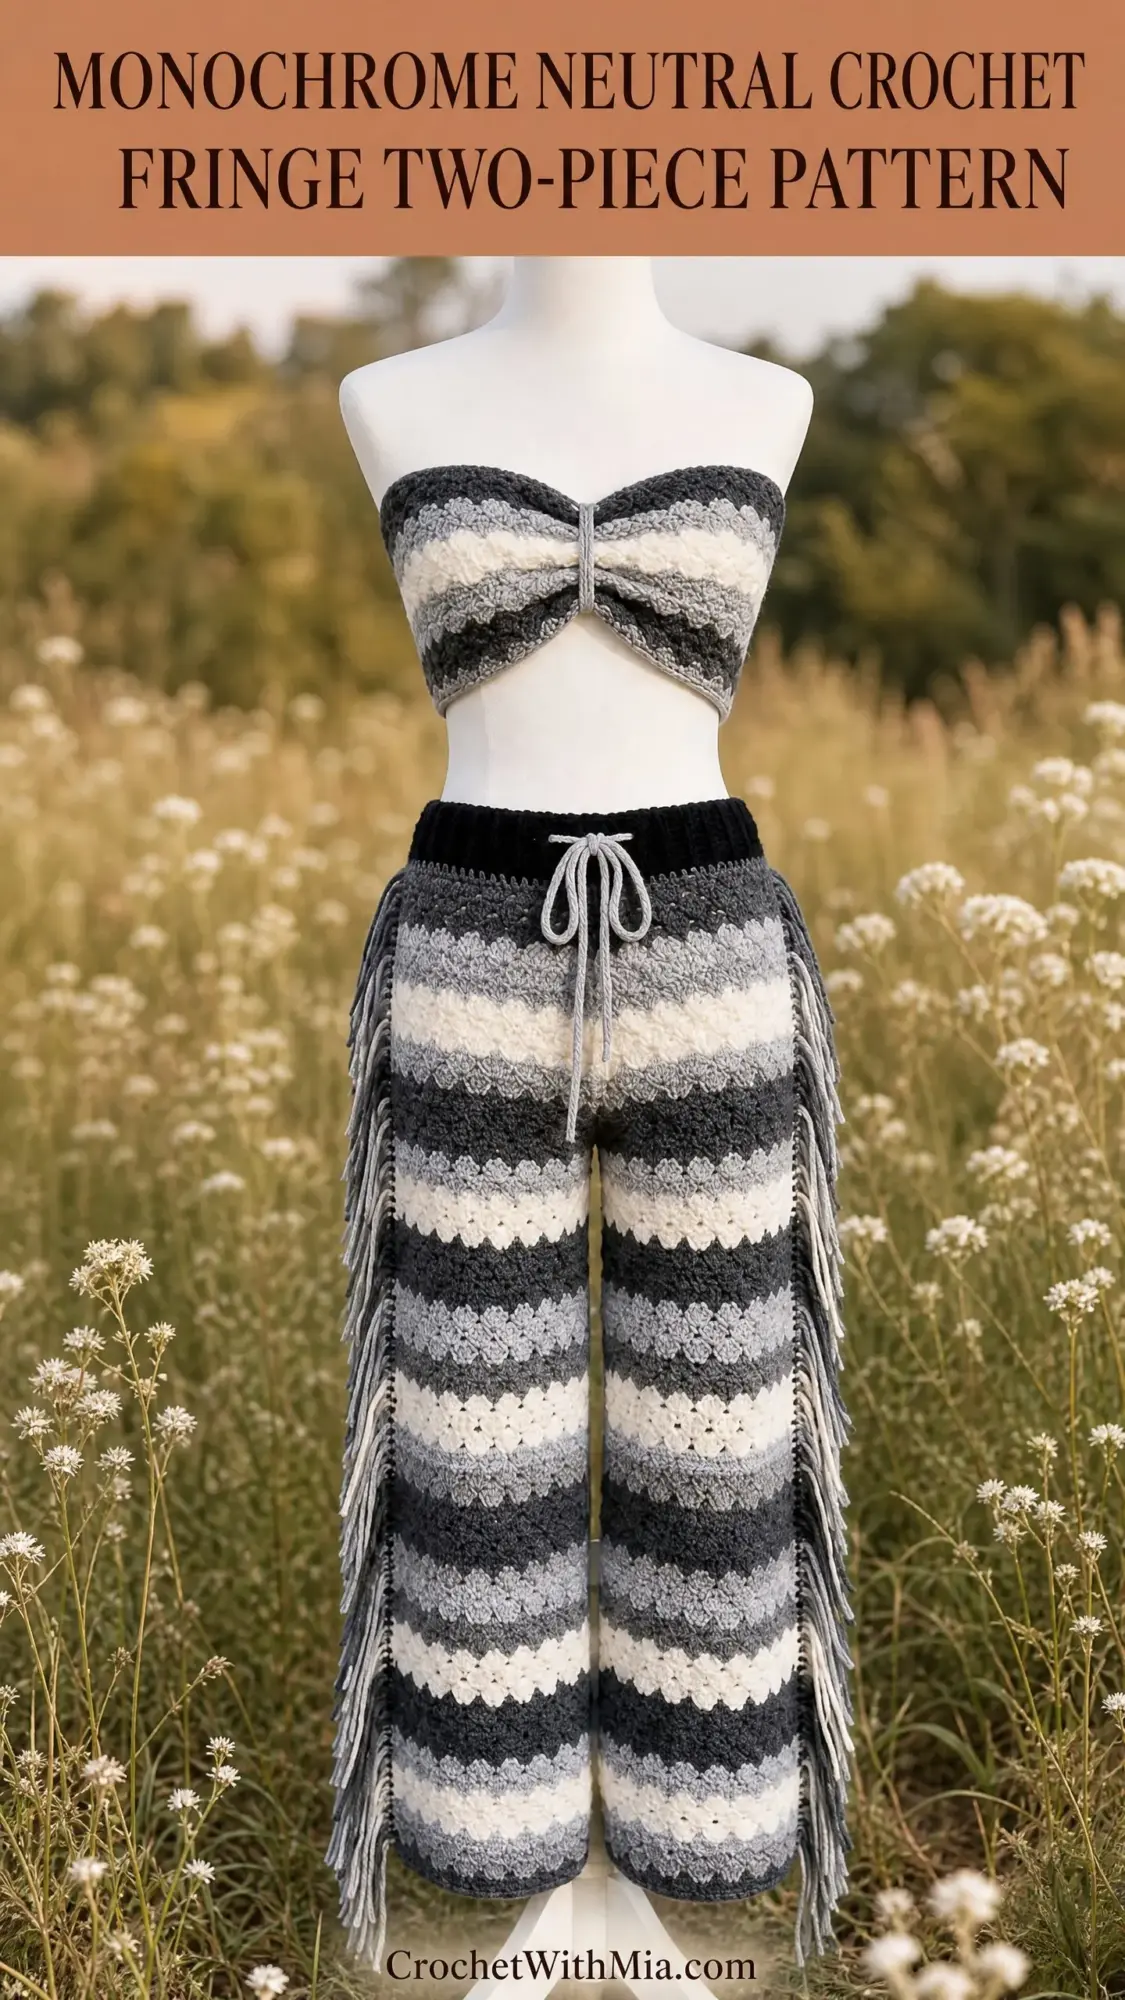
This pattern creates a matching two-piece set consisting of a strapless bandeau top with a sweet ruched center-front detail and a pair of wide-leg palazzo pants featuring full-length side fringe. Both pieces use the same four-color stripe sequence worked in a shell stitch pattern, creating that beautiful scalloped texture you can see in the finished garment.
The bandeau is worked flat as a rectangle, then seamed at the back. A simple gathering technique at the center front creates that lovely bow-like ruched detail. The pants are worked in the round from a ribbed waistband down through the hips, then split at the crotch into two separate leg tubes. The showstopping fringe gets attached along the outer side seams of both legs after construction.
The overall vibe is bohemian, beachy, and undeniably stylish. Think festival fashion, vacation wear, or a statement piece for summer nights.
Skill Level
I’d call this pattern advanced beginner to intermediate. The shell stitch itself is repetitive and easy to memorize once you get going. If you’ve completed at least one garment project before, you can absolutely handle this.
The complexity comes from managing four yarn colors, working in the round for the pants, creating the crotch gusset to split into separate legs, and attaching all that gorgeous fringe. None of these techniques are difficult on their own, but layering them together requires some focus and patience.
If you’re comfortable with basic garment assembly and color changes, you’ve got this.
Time Estimate
Let me be honest with you about timing, because I think that’s important when committing to a larger project.
Bandeau top: 8 to 12 hours
Pants: 20 to 28 hours
Fringe preparation and attachment: 3 to 5 hours
Total estimated time: 31 to 45 hours
This isn’t a weekend project. It’s more of a "cozy up with your favorite show and crochet for a few weeks" kind of project. But that shell stitch is so satisfying and rhythmic that the hours fly by.
Finished Measurements
This pattern is written for a size Small/Medium. I’ve included customization tips at the end for adjusting to other sizes.
Bandeau Top
Pants
Materials You’ll Need
Yarn
You’ll need bulky weight yarn (CYCA 5) in five colors. Here are the yardage requirements:
Purchase extra if you’re sizing up or want a longer inseam.
Yarn Suggestions
Lion Brand Wool-Ease Thick and Quick works beautifully for this project. The acrylic-wool blend has excellent stitch definition and comes in coordinating neutral shades. It’s also machine washable on gentle, which is practical for a garment you’ll actually wear.
Paintbox Yarns Simply Super Chunky is another great option if you prefer 100 percent acrylic. Smooth texture, affordable price, shows the shell stitch beautifully.
Cascade Yarns Pacific Chunky offers a wool-acrylic blend with a slight halo for added softness. Recommended if you don’t mind hand washing.
Avoid very fuzzy or halo-heavy yarns, as they can obscure the shell stitch texture.
Hook
Size K-10.5 / 6.5 mm crochet hook
Adjust as needed to meet gauge.
Notions
Gauge
Getting gauge right is essential for a properly fitting garment. Please don’t skip this step.
Shell stitch gauge:
1 shell repeat (shell stitch over 6 stitches) = 2 inches (5 cm) wide
2 rows of shell stitch = 1.5 inches (3.8 cm) tall
Single crochet gauge (for waistband):
12 sc x 14 rows = 4 inches x 4 inches (10 cm x 10 cm)
Work a gauge swatch at least 6 inches (15 cm) square. Wash and dry it the same way you’ll care for the finished garment. Adjust your hook size up or down as needed.
Abbreviations
Here are all the abbreviations used in this crochet pattern, with definitions:
Special Stitches Explained
Shell Stitch
This is the main stitch pattern for both pieces. It creates that gorgeous scalloped texture you see in the finished garment.
To work a shell stitch over a base of 6 stitches:
1. Skip 2 stitches.
2. Work 5 double crochet into the next stitch.
3. Skip 2 stitches.
4. Work 1 single crochet into the next stitch.
That’s one complete shell repeat. The shells sit between each single crochet anchor, creating waves of texture across your fabric.
Return Shell Row
On alternating rows, the shell placement staggers to nest into the previous row’s shells. This creates the interlocking wave effect. I’ll explain this fully in the row-by-row instructions.
Shell Increase (inc-shell)
Work 7 double crochet into one stitch instead of 5. This widens the fabric gradually and is used for waist-to-hip shaping.
Fringe Knot
Cut yarn strands to the specified length. Fold the group in half. Insert your crochet hook from back to front through the designated stitch or row edge. Draw the folded loop through. Pull the cut ends through the loop and tighten firmly. Trim all fringe ends to an even length after attachment.
Important Pattern Notes
Before you begin, read through these notes. They’ll save you confusion later.
1. Stripe sequence for both pieces: 2 rows/rounds Color A, 2 rows/rounds Color B, 2 rows/rounds Color C, 2 rows/rounds Color D. Repeat this sequence throughout unless otherwise noted. Always change color on the last yarn over of the last stitch of the current color row.
2. Don’t cut yarn at every color change. Carry unused colors loosely up the side edge when working flat, or up the inside when working in the round. After more than 4 rows of inactivity, cut and rejoin to avoid pulling.
3. Blocking helps. The shell stitch creates a naturally stretchy, open fabric. Blocking the finished pieces will help even out the shells and open the texture slightly.
4. The waistband uses ribbed single crochet (sc in blo throughout) to create stretch. The elastic gets threaded through after the waistband is complete and folded.
5. Stitch counts in parentheses at the end of each row or round refer to the total number of working stitches or shell repeats.
6. When counting shells, count each shell (5 dc group) plus its anchor sc as one shell repeat (6 stitch equivalent).
7. Turning chains: Chain 3 counts as first dc throughout. Chain 1 at start of sc rows does not count as a stitch.
Bandeau Top Instructions
Foundation
With Color A and a K-10.5 / 6.5 mm hook, chain 86.
The foundation chain of 86 yields 84 working stitches plus 2 for turning. 84 divided by 6 equals 14 shell repeats.
Row 1 (WS, setup row)
Sc in 2nd ch from hook and in each ch across. Turn. (84 sc)
Row 2 (RS, shell row, Color A)
Ch 3 (counts as dc), sk next 2 sts, sc in next st, [sk 2 sts, 5 dc in next st, sk 2 sts, sc in next st] rep across to last 3 sts, sk 2 sts, 3 dc in last st. Turn. (13 full shells, 2 half shells at edges)
The half-shell at each edge (3 dc instead of 5 dc) keeps the edge tidy for seaming. This is intentional throughout.
Row 3 (WS, return shell row, Color A)
Ch 1, sc in first dc, [sk 2 dc, 5 dc in next sc, sk 2 dc, sc in next sc] rep across, ending sc in top of t-ch. Turn. (13 full shells, 1 sc at each edge)
Rows 4-17 (Continuing the Stripe Pattern)
Checkpoint: After Row 17, your piece should measure approximately 6 inches (15 cm) tall and 28 inches (71 cm) wide when laid flat. You have completed 4 full color stripe repeats.
Edging Row (top edge, RS)
With Color A, ch 1, sc evenly across the top long edge of the piece. Work approximately 1 sc per dc and 1 sc per sc post, aiming for a multiple of 6 sts. For 84 stitches, work 84 sc across. Turn. (84 sc)
Do not fasten off.
Creating the Ruching Tie
This is the detail that creates that beautiful gathered bow effect at the center front.
Cut a length of Color A approximately 40 inches (102 cm). Thread onto yarn needle. At the center front of the piece (the RS of the front), weave the yarn needle in and out through the top edging row, gathering slightly as you go.
Pull both ends to gather the center front by approximately 1.5 inches (3.8 cm) to create the ruched effect. Tie the ends in a bow or knot at the center front. The tails become the decorative tie visible in the finished piece.
Finishing the Bandeau
Fold the piece with RS facing inward. Seam the two short side edges together using a whipstitch or slip stitch seam with Color A. This creates the back center seam. Turn RS out.
Work one round of sc around the bottom long edge to finish: join Color A, sc evenly across, sl st to first sc to join. Fasten off and weave ends.
Your bandeau top is complete!
Pants Instructions
Waistband
With Color E (Black) and K-10.5 / 6.5 mm hook, chain 79. Join with sl st to first ch to form a ring, being careful not to twist.
You now have 78 working stitches in the round. The waistband works in blo single crochet for 6 rounds to create ribbed stretch fabric that folds over to form a double-layer casing for the elastic.
Round 1: Ch 1 (does not count as st), sc in blo of each ch around. Join with sl st to first sc. (78 sc)
Rounds 2-6: Ch 1, sc in blo of each st around. Join. (78 sc)
Checkpoint: After Round 6, the waistband tube measures approximately 2.5 inches (6.4 cm) tall. This will fold in half to create a 1.25 inch (3.2 cm) casing visible on the outside.
Do not fasten off Color E.
Creating the Drawstring
Before folding the waistband, thread a 40 inch (102 cm) length of Color C or Color D yarn through the front of the waistband at its midpoint (round 3) using a yarn needle. Pull through from one side seam position to the other, leaving long tails at center front. These tails form the drawstring visible in the finished garment.
Fold the waistband in half with WS together so the cast-on edge aligns with Round 6. Using a yarn needle and Color E, whipstitch the cast-on edge to the WS of Round 6 from the inside, forming the closed casing. Leave a small opening at the back center to insert elastic later. Insert the elastic, adjust to fit, stitch the opening closed.
Pants Body
Join Color A at any point in the waistband base.
Setup Round (waist to hip transition, Color A): Ch 1, working into the bottom of the waistband, work sc evenly around, increasing evenly to reach 96 stitches. To go from 78 to 96 stitches, increase 18 times evenly spaced: work [sc, 2 sc in next st] 18 times, sc in each rem st. Join. (96 sc)
96 divided by 6 equals 16 shell repeats. This is your working stitch count for the pants body.
Round 1 (RS, Color A, shell round): Ch 3 (counts as dc), sk 2 sts, sc in next st, [sk 2 sts, 5 dc in next st, sk 2 sts, sc in next st] 15 times, sk 2 sts, 2 dc in joining st. Join with sl st to top of ch-3. (16 shell repeats)
Round 2 (Color A): Ch 3, sk 2 dc, sc in next sc, [sk 2 dc, 5 dc in next sc, sk 2 dc, sc in next sc] 15 times, sk 2 dc, 2 dc in sl st join. Join. (16 shell repeats)
Rounds 3-4 (Color B): Change to Color B. Rep Round 2 for each round. (16 shell repeats)
Rounds 5-6 (Color C): Change to Color C. Rep Round 2 for each round. (16 shell repeats)
Rounds 7-8 (Color D): Change to Color D. Rep Round 2 for each round. (16 shell repeats)
Checkpoint: After Round 8, your pants body should measure approximately 4 inches (10 cm) from the base of the waistband. You have completed one full 4-color stripe sequence.
Continue the stripe sequence (2 rounds each of A, B, C, D) until the body from waistband base measures approximately 11 inches (28 cm) total. This is the rise. You will complete approximately 5 full stripe repeats (20 rounds of shell pattern).
At the end of your last body round, do not join. Place a stitch marker at the midpoint of the round (after the 8th shell repeat, at stitch 48) to denote front center. Place a second marker at stitch 96 (back center). These split the round into front and back halves for crotch division.
Crotch Gusset and Leg Division
At the end of your last body round, join yarn at the right-side seam position. Chain 4. Skip the 4 shells closest to the center front on the front panel (24 stitches skipped). Join with sl st to the stitch after the last skipped stitch on the other side of the front opening. This chain bridge creates the front crotch seam allowance. Fasten off.
Repeat for the back: join at back center, chain 4, skip 4 shells (24 sts), join on the other side of the back opening.
You now have two leg openings. Adjust each leg to 54 stitches for clean shell division. 54 divided by 6 equals 9 shell repeats.
At the crotch bridge, pick up 3 sc across each chain-4 bridge as you join for the first leg round.
Leg Instructions (Work the Same for Both Legs)
Join Color A (continuing the stripe sequence from where the body left off) at the inseam of one leg opening.
Leg Round 1 (Color A): Ch 3, sk 2 sts, sc in next st, [sk 2 sts, 5 dc in next st, sk 2 sts, sc in next st] 8 times, sk 2 sts, 2 dc in join st. Join with sl st. (9 shell repeats = 54 sts)
Leg Round 2 (Color A): Rep Leg Round 1. (9 shell repeats)
Continue working in the shell stitch stripe sequence (2 rounds each of A, B, C, D cycling continuously) for the full inseam length of 28 inches (71 cm). At your gauge, this requires approximately 37 to 38 rounds of leg pattern, or 9 to 10 full stripe repeats.
No shaping is required in the leg. The pants are wide-leg (palazzo style) with consistent circumference throughout.
After reaching 28 inches of leg length, work one final round of sc around the hem edge for a clean finish. Fasten off.
Repeat all leg instructions for the second leg.
Checkpoint: Each leg should measure 28 inches (71 cm) from the crotch join to the hem edge. Total garment length from waistband top to hem: approximately 39 inches (99 cm).
Fringe Instructions
This is where the magic happens! The fringe transforms these pants from pretty to absolutely stunning.
Fringe Placement
Mark the outer side seam position on each leg with a stitch marker. This is the point on each round that falls at the outermost point of each leg. Fringe attaches along the entire length of both legs and continues up the side of the pants body.
Fringe Preparation
Cut yarn strands in all four colors (A, B, C, D) in lengths of 16 inches (41 cm). When folded in half before attaching, this creates a finished fringe length of approximately 8 inches (20 cm).
Use 4 strands per fringe knot for a full, dense appearance.
Fringe Color Matching
Match each fringe knot’s yarn color to the stripe color of the row it attaches to. Color A fringe on Color A rounds, Color B fringe on Color B rounds, and so on. This creates the neat color-blocked fringe effect.
Fringe Attachment
At each row/round change along the outer side seam position, attach one fringe knot using the Fringe Knot method described earlier.
Total fringe knots: approximately 57 to 58 per side, totaling 114 to 116 fringe knots for both legs combined.
After attaching all fringe, lay the pants flat and trim all fringe ends to an even 8 inch (20 cm) length using sharp scissors and a ruler.
Size Customization Tips
To size up the bandeau: Add chain stitches in multiples of 6 to the foundation chain. Each 6-stitch addition adds approximately 2 inches (5 cm) to the circumference. For a 36 inch (91 cm) bust, add 12 chains: chain 98.
To size down the bandeau: Subtract in multiples of 6. For a 24 inch (61 cm) bust, subtract 12 chains: chain 74.
To size up the pants waist: Add stitches in multiples of 6 to the waistband chain, and adjust setup round increases proportionally.
To size up the pants hip: In the Setup Round, increase to more than 96 stitches. For every additional 6 stitches, hip circumference increases by approximately 2 inches (5 cm).
To adjust pant length: Add or subtract leg rounds. Every 2 rounds adds or removes approximately 1.5 inches (3.8 cm).
To adjust rise: Add or subtract body rounds before the crotch division.
Finishing and Blocking
Wet blocking is recommended for both pieces. Submerge each piece in cool water and press out excess water gently without wringing. Lay flat on a blocking mat and pin to desired measurements. Allow to dry fully before moving.
For the fringe, trim to final length after the pants are blocked and dry. Do not block fringe under tension as it may stretch.
Weave in all yarn ends securely using a yarn needle, working through at least 1 inch (2.5 cm) of fabric in two directions.
Care Instructions
If using fully acrylic yarn with machine-wash labeling, the piece may be machine washed on gentle/delicate cycle in a mesh laundry bag with cold water.
You Did It!
Making a complete coordinating crochet outfit is such an accomplishment, and this monochrome neutral crochet fringe two-piece is going to turn heads wherever you wear it. The combination of those beautiful shell stitch stripes, the flattering bandeau silhouette, the dramatic wide-leg pants, and all that gorgeous swaying fringe creates something truly special.
Thank you so much for choosing this crochet pattern for your next project. I hope the step by step instructions made this approachable, even with all those color changes and that fringe attachment. You’re going to look amazing.
I would absolutely love to see your finished set! Tag me on Instagram or share in my Facebook group so I can cheer you on. Seeing your makes is genuinely the best part of designing patterns.
If this pattern caught your eye, save it to your Pinterest boards so you can find it when you’re ready to start. And if you make this gorgeous two-piece set, please drop a comment below. I’d love to hear which colors you chose and how it turned out!