
Crocheted clothing intimidates a lot of makers. I hear it all the time. "I could never make that." "Garments are too advanced for me." "What if it doesn’t fit?" Here’s the truth: if you can crochet a granny square and work single crochet in the round, you already have the skills to make this romper.
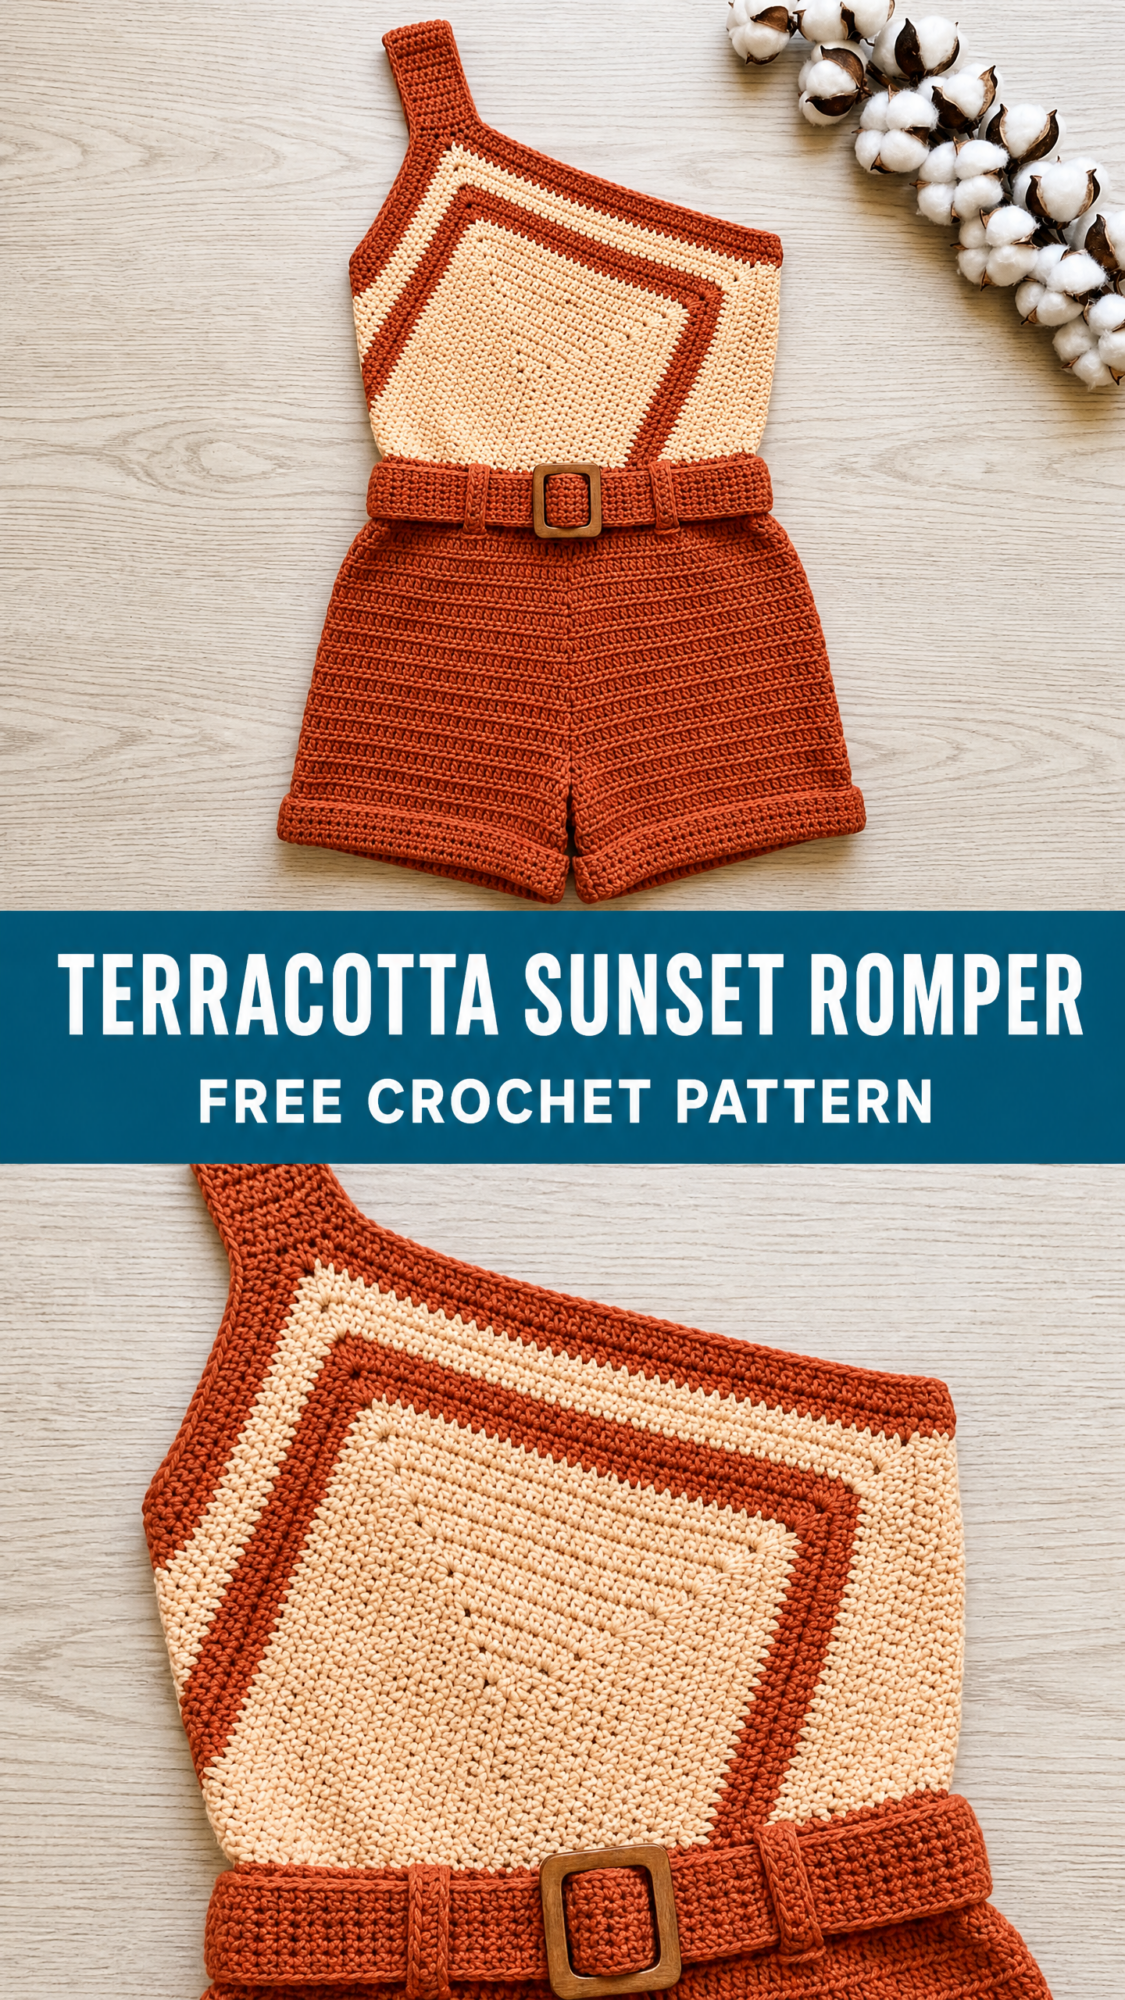
The Terracotta Sunset Romper looks incredibly sophisticated with its diagonal colorblock panel and fitted silhouette, but the construction breaks down into simple, manageable pieces. You are essentially making a granny square, two rectangular panels, and a tube with leg openings. That’s it. No complicated shaping algorithms. No intimidating bust darts.
I designed this pattern to be approachable for intermediate crocheters who want to level up to garment making. If you have been eyeing crocheted clothing but felt unsure, this is your entry point. Let me walk you through every single step.
About This Crochet Pattern
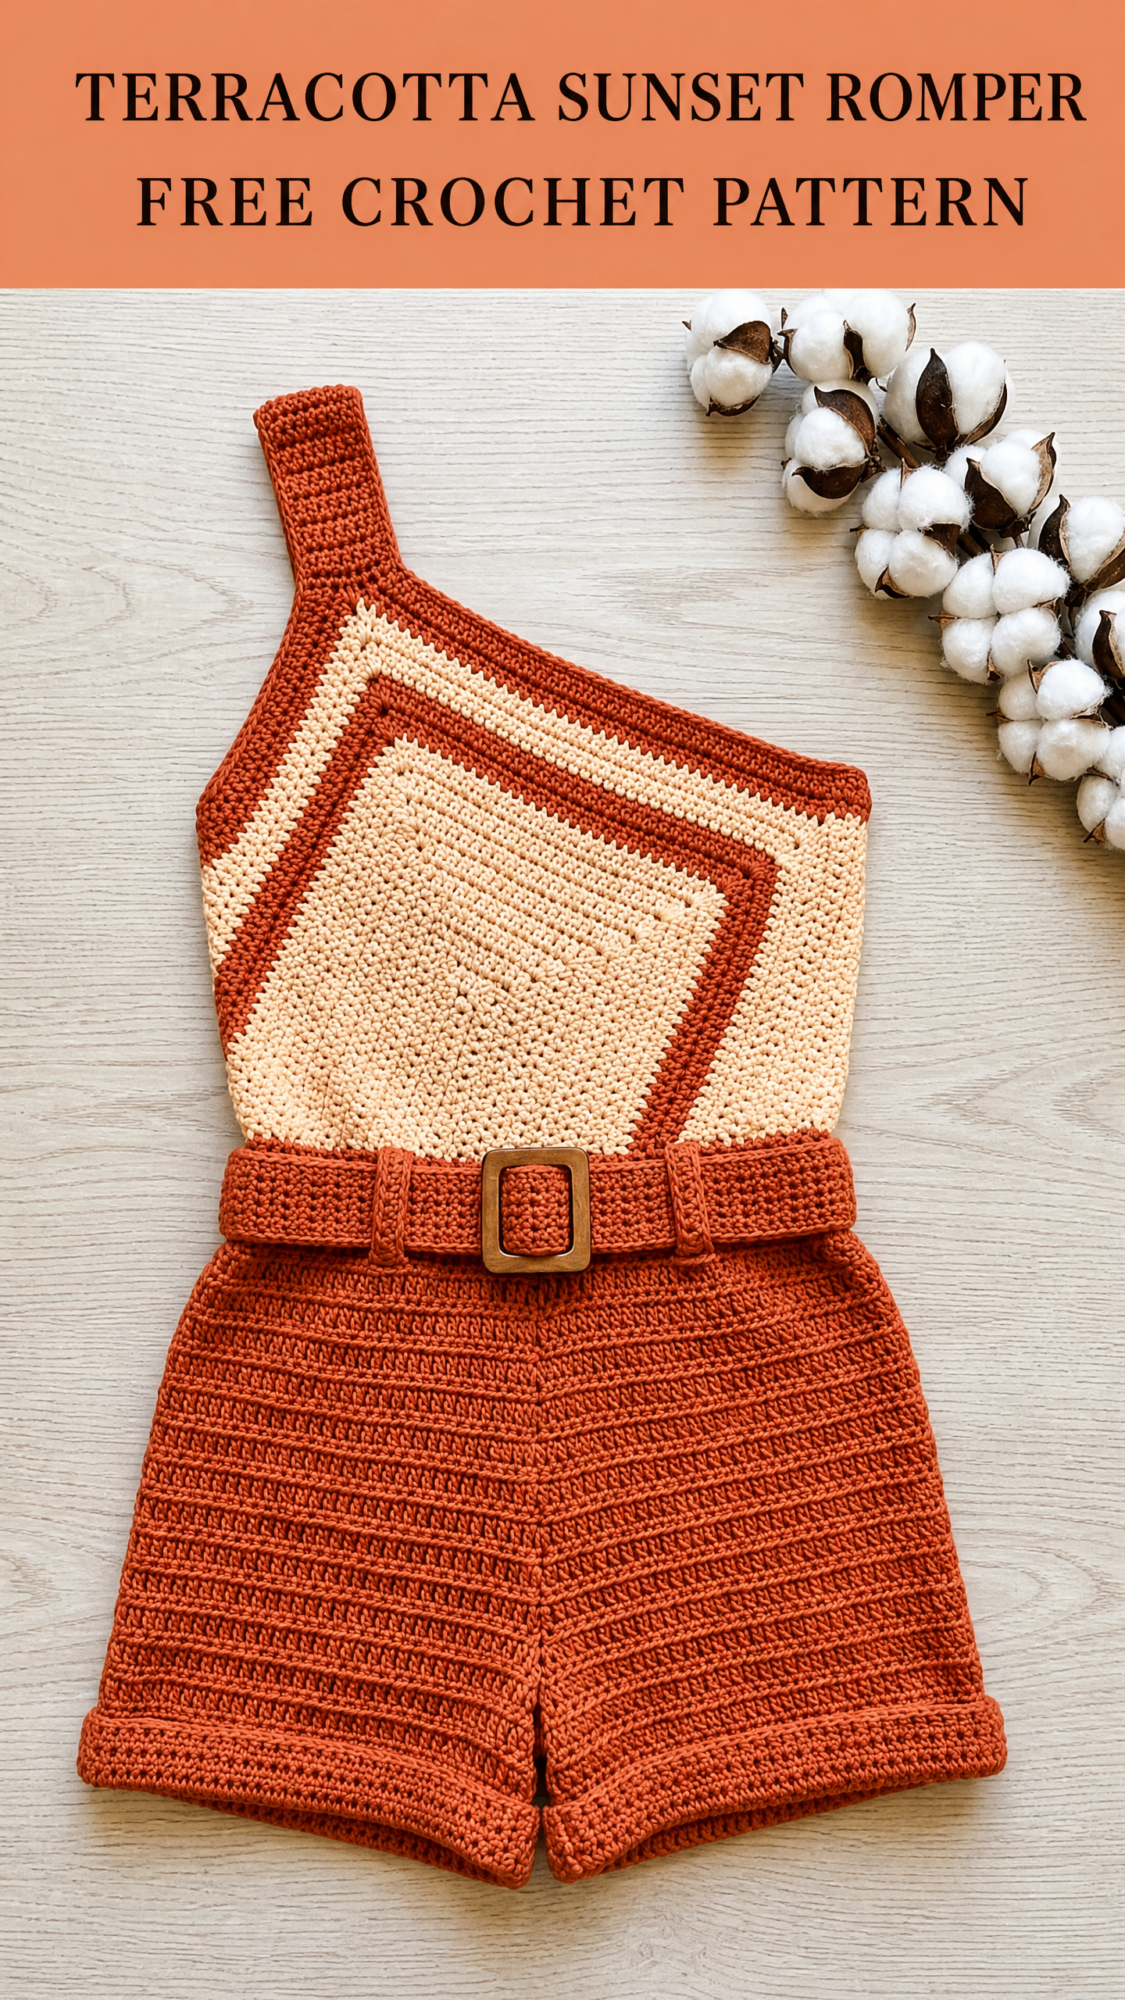
This one-shoulder romper combines a crop top bodice with high-waisted shorts in one seamless garment. The standout feature is the granny square panel set on a diagonal, creating that eye-catching diamond shape on the front. The terracotta and cream color combination gives it a warm, earthy aesthetic that works beautifully for summer festivals, beach days, or casual outings.
Skill Level: Intermediate. You should be comfortable with granny squares, joining pieces, working in the round, and basic seaming.
Finished Measurements: Fits bust 32 to 34 inches, waist 26 to 28 inches, hip 34 to 36 inches. Total length from shoulder to hem is approximately 18 inches.
Time Estimate: Approximately 20 to 28 hours depending on your pace.
Materials You Will Need
Gather these supplies before you begin:
Yarn:
Hook: US size G-6 (4.0 mm)
Notions:
Yarn Suggestions
Option 1: Lion Brand 24/7 Cotton in Terracotta and Ecru. This 100% mercerized cotton holds shape beautifully and gives the romper a structured drape. You will need approximately 4 skeins Terracotta and 2 skeins Ecru.
Option 2: Paintbox Yarns Simply DK in Terracotta and Champagne White. This budget-friendly 100% acrylic option produces a smooth, even fabric. You will need approximately 5 skeins Terracotta and 3 skeins Champagne White.
Option 3: Scheepjes Catona held double in Ginger Gold and Old Lace. The excellent stitch definition showcases the granny motif perfectly. You will need approximately 10 balls Ginger Gold and 5 balls Old Lace.
Substitution Note: Choose any DK weight yarn with low stretch and good stitch definition. Avoid chenille, high-stretch blends, or heavily textured yarns. These will obscure the geometric motif and alter the drape.
Gauge
18 single crochet stitches x 20 rows = 4 inches x 4 inches worked in single crochet with a 4.0 mm hook after blocking.
Granny square panel: One completed square through Round 8 measures approximately 8 inches x 8 inches after blocking.
Gauge matters enormously for this garment. Even one stitch difference per 4 inches will significantly alter the fit across the bodice and shorts circumference. Please swatch and adjust your hook size if needed.
Abbreviations and Stitch Definitions
Let me explain every abbreviation before we dive in:
Special Stitches
Granny Cluster: Yarn over once. Insert hook into the designated chain space. Yarn over and pull up a loop (3 loops on hook). Yarn over and draw through 2 loops (2 loops on hook). Repeat these steps two more times into the same chain space (4 loops on hook). Yarn over and draw through all 4 loops. One granny cluster complete.
Ridge Single Crochet: Work every stitch through the back loop only. This creates a horizontal ridge on the right side and is the primary texture stitch for the shorts.
Pattern Instructions
Part One: Granny Square Front Panel
This square is worked in joined rounds from the center outward. The color changes create the colorblock effect.
Color Sequence:
Foundation Ring: With Yarn B, ch 4. Join with sl st to form a ring.
Round 1 (RS, Yarn B): Ch 3 (counts as first dc here and throughout granny square). Work 2 dc into ring. Ch 2. (3 dc into ring, ch 2) 3 times. Join with sl st to top of beg ch-3. (4 groups of 3 dc, 4 corner ch-2 sps)
Round 2 (Yarn B): Sl st into next 2 dc and into corner ch-2 sp. Ch 3. Work 2 dc into same sp. Ch 1. (3 dc, ch 2, 3 dc) into next corner ch-2 sp. Ch 1. Rep from ( ) around, working (3 dc, ch 2, 3 dc) into each corner sp and ch 1 between each group. Join with sl st to top of beg ch-3. (8 groups of 3 dc, 4 corner ch-2 sps, 4 ch-1 sps on sides)
Round 3 (Yarn B): Sl st into next 2 dc and into corner ch-2 sp. Ch 3. Work 2 dc into same sp. Ch 2. Work 3 dc into same sp. Ch 1. Work 3 dc into next ch-1 sp. Ch 1. (3 dc, ch 2, 3 dc) into corner ch-2 sp. Ch 1. 3 dc into ch-1 sp. Ch 1. Rep from ( ) around. Join with sl st to top of beg ch-3. Fasten off Yarn B. (12 groups of 3 dc, 4 corner ch-2 sps, 8 ch-1 sps)
Round 4 (Yarn A): Join Yarn A into any corner ch-2 sp. Ch 3. Work 2 dc into same sp. Ch 2. Work 3 dc into same sp. (Ch 1. Work 3 dc into next ch-1 sp) twice. Ch 1. Rep (3 dc, ch 2, 3 dc) into each corner, with (ch 1, 3 dc) into each ch-1 sp on each side. Join. Fasten off Yarn A. (16 groups of 3 dc, 4 corner ch-2 sps, 12 ch-1 sps)
Round 5 (Yarn A): Join Yarn A into any corner ch-2 sp. Work same as Round 4, adding one additional (ch 1, 3 dc) group per side. Join. Fasten off Yarn A. (20 groups of 3 dc, 4 corner ch-2 sps, 16 ch-1 sps)
Round 6 (Yarn B): Join Yarn B and work same pattern, adding one additional (ch 1, 3 dc) group per side. Join. Fasten off Yarn B. (24 groups of 3 dc, 4 corner ch-2 sps, 20 ch-1 sps)
Round 7 (Yarn B): Repeat Round 6 structure, adding one additional group per side. Join. Fasten off Yarn B. (28 groups of 3 dc, 4 corner ch-2 sps, 24 ch-1 sps)
Round 8 (Yarn A): Join Yarn A and work same pattern, adding one additional group per side. Join. Fasten off Yarn A. (32 groups of 3 dc, 4 corner ch-2 sps, 28 ch-1 sps)
Block the granny square to approximately 8 inches x 8 inches. Set aside.
Part Two: Bodice Front Panel Frame
This creates the structure that holds your granny square.
Foundation Chain (Yarn A): Ch 37.
Row 1 (RS): Sc into 2nd ch from hook and each ch across. Ch 1, turn. (36 sc)
Rows 2 through 10: Sc across. Ch 1, turn. (36 sc each row)
Row 11 (right shoulder edge shaping, RS): Sc across first 24 sts. Leave remaining 12 sts unworked. Ch 1, turn. (24 sc)
Row 12: Sc across. Ch 1, turn. (24 sc)
Row 13: Sc2tog at beg of row. Sc across. Ch 1, turn. (23 sc)
Row 14: Sc across. Ch 1, turn. (23 sc)
Row 15: Sc2tog at beg of row. Sc across. Ch 1, turn. (22 sc)
Row 16: Sc across. Ch 1, turn. (22 sc)
Row 17: Sc2tog at beg of row. Sc across. Ch 1, turn. (21 sc)
Row 18: Sc across. Ch 1, turn. (21 sc)
Row 19: Sc2tog at beg of row. Sc across. Ch 1, turn. (20 sc)
Rows 20 through 38: Sc across. Ch 1, turn. (20 sc each row)
Fasten off at end of Row 38.
Strap Construction
With Yarn A, rejoin at the left edge at the height of Row 10, working upward from the top of the panel.
Row 1 (Strap Row 1, RS): Sc across 6 sts at the top left corner. Ch 1, turn. (6 sc)
Rows 2 through 30: Sc across. Ch 1, turn. (6 sc each row)
Fasten off, leaving a 12 inch tail for seaming to back panel.
Part Three: Bodice Back Panel
Foundation Chain (Yarn A): Ch 37.
Row 1 (RS): Sc into 2nd ch from hook and each ch across. Ch 1, turn. (36 sc)
Rows 2 through 38: Sc across. Ch 1, turn. (36 sc each row)
Fasten off.
Bodice Assembly
Step 1: Center the blocked granny square onto the front bodice frame. Align the corners of the square with the horizontal and vertical midpoints of the frame so the square sits as a diamond. Pin in place.
Step 2: Using Yarn A and a yarn needle, whipstitch the granny square to the bodice frame along all four edges.
Step 3: Seam the front panel to the back panel along both side edges using mattress stitch, matching row for row from the waist up to the underarm point (Row 10 on the front).
Step 4: Seam the strap to the top back left corner by whipstitching securely.
Part Four: Shorts
Waistband
Foundation Round: With Yarn A, ch 126. Join with sl st to form a ring, being careful not to twist.
Round 1: Ch 1. Sc into each ch around. Join with sl st to first sc. (126 sc)
Rounds 2 through 4: Ch 1. Sc into each st around. Join with sl st to first sc. (126 sc each round)
Shorts Body
Round 5: Ch 1. Sc BLO into each st around. Join with sl st to first sc. (126 sc)
Rounds 6 through 24: Ch 1. Sc BLO into each st around. Join with sl st to first sc. (126 sc each round)
Crotch Shaping and Leg Separation
Round 25: Ch 1. Sc BLO across first 63 sts. Ch 6 (crotch bridge). Sk next 63 sts. Join with sl st to first sc. (63 sc + 6 ch bridge)
Right Leg
Round 1: Ch 1. Sc into each of the 63 sts of the front half. Sc into each of 6 ch of crotch bridge. Join with sl st to first sc. (69 sc)
Rounds 2 through 4: Ch 1. Sc BLO into each st around. Join with sl st to first sc. (69 sc each round)
Round 5 (Cuff Round 1): Ch 1. Sc into FLO of each st around. Join with sl st to first sc. (69 sc)
Rounds 6 through 8: Ch 1. Sc into each st around. Join with sl st to first sc. (69 sc each round)
Fasten off.
Left Leg
Rejoin Yarn A to the 63 skipped sts at Round 24 at the back crotch edge.
Round 1: Ch 1. Sc into each of the 63 skipped sts. Sc into the underside of each of the 6 crotch bridge ch. Join with sl st to first sc. (69 sc)
Rounds 2 through 8: Work same as Right Leg.
Fasten off.
Joining Bodice to Shorts
With RS facing, align the base of the bodice with the top of the shorts waistband. Distribute the 36 front bodice base stitches evenly across the 63 front waistband stitches by working a slip stitch join through both layers. Ease the extra waistband fabric at the sides to create a slight gather. Repeat for the back. Seam with Yarn A using whipstitch.
Part Five: Belt
Foundation Chain: Ch 8.
Row 1: Sc into 2nd ch from hook and each ch across. Ch 1, turn. (7 sc)
Rows 2 through 110: Sc across. Ch 1, turn. (7 sc each row)
Fasten off. Attach the buckle by folding one short end over the center bar and stitching securely.
Finishing
Weave in all yarn ends. Block the completed romper by hand washing in cool water, pressing out excess water in a towel, and laying flat to dry. Fold each leg cuff to the right side (approximately 0.8 inches) and tack with a single stitch at the side seam. Thread the belt around the waist and through the buckle.
Care Instructions
Hand wash in cool water using gentle detergent. Do not wring or machine dry. Lay flat to dry away from direct sunlight. Store folded rather than hung to preserve the garment’s structure.
Thank you so much for choosing this crochet pattern for your next project! I absolutely love seeing your finished makes, so please share your Terracotta Sunset Romper photos on Instagram or Facebook and tag me. Your versions always inspire me and the whole maker community.
If you want to come back to this crochet tutorial later, save it to your Pinterest boards now so you never lose it. And if you make this romper, drop a comment below! I would love to hear how it turned out and see your color combinations.