
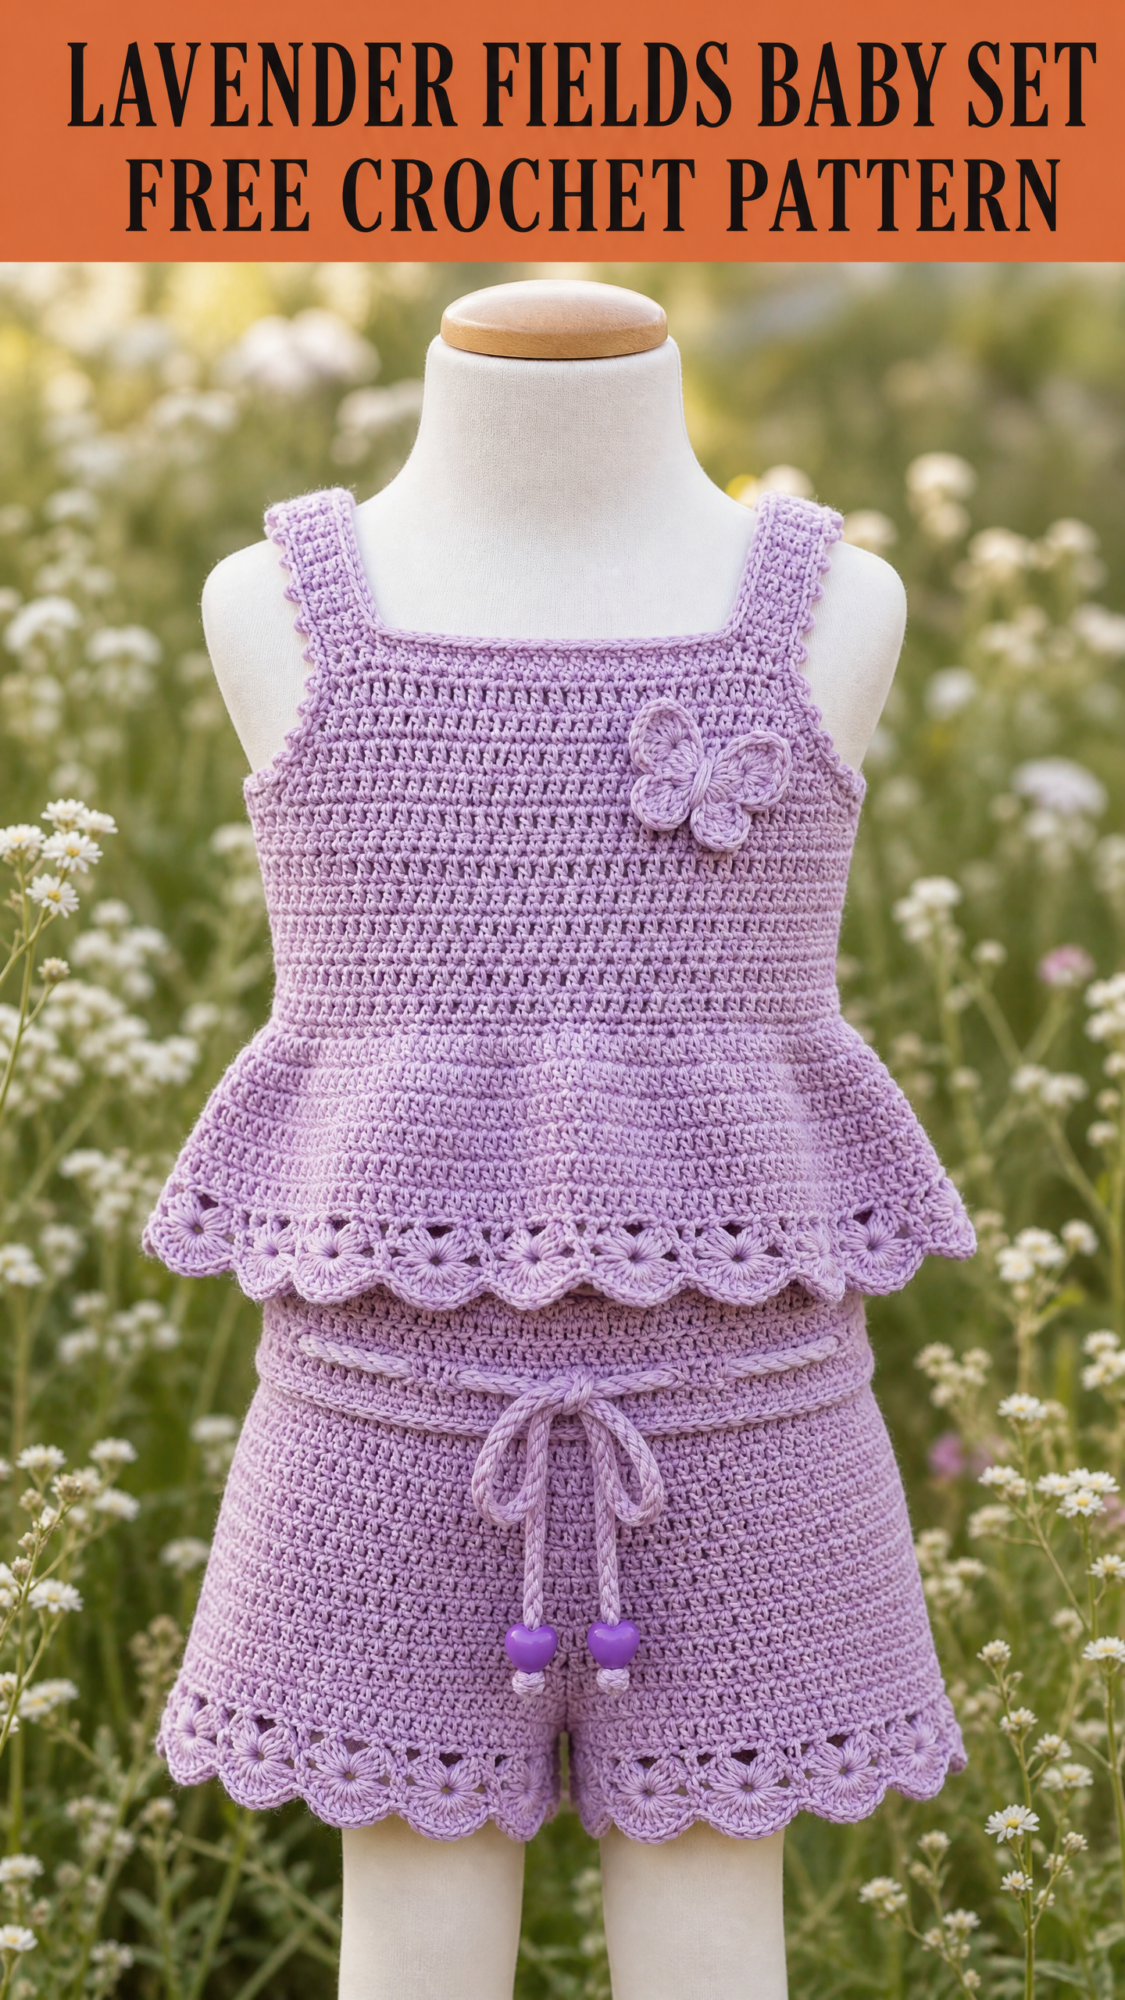
This is a two-piece baby outfit consisting of a sleeveless peplum tank top and matching pull-on shorts. Both pieces use half double crochet as the main stitch with a pretty shell scallop border at each hem. The set is sized for 12 to 18 months and works up in about 6 to 10 hours total.
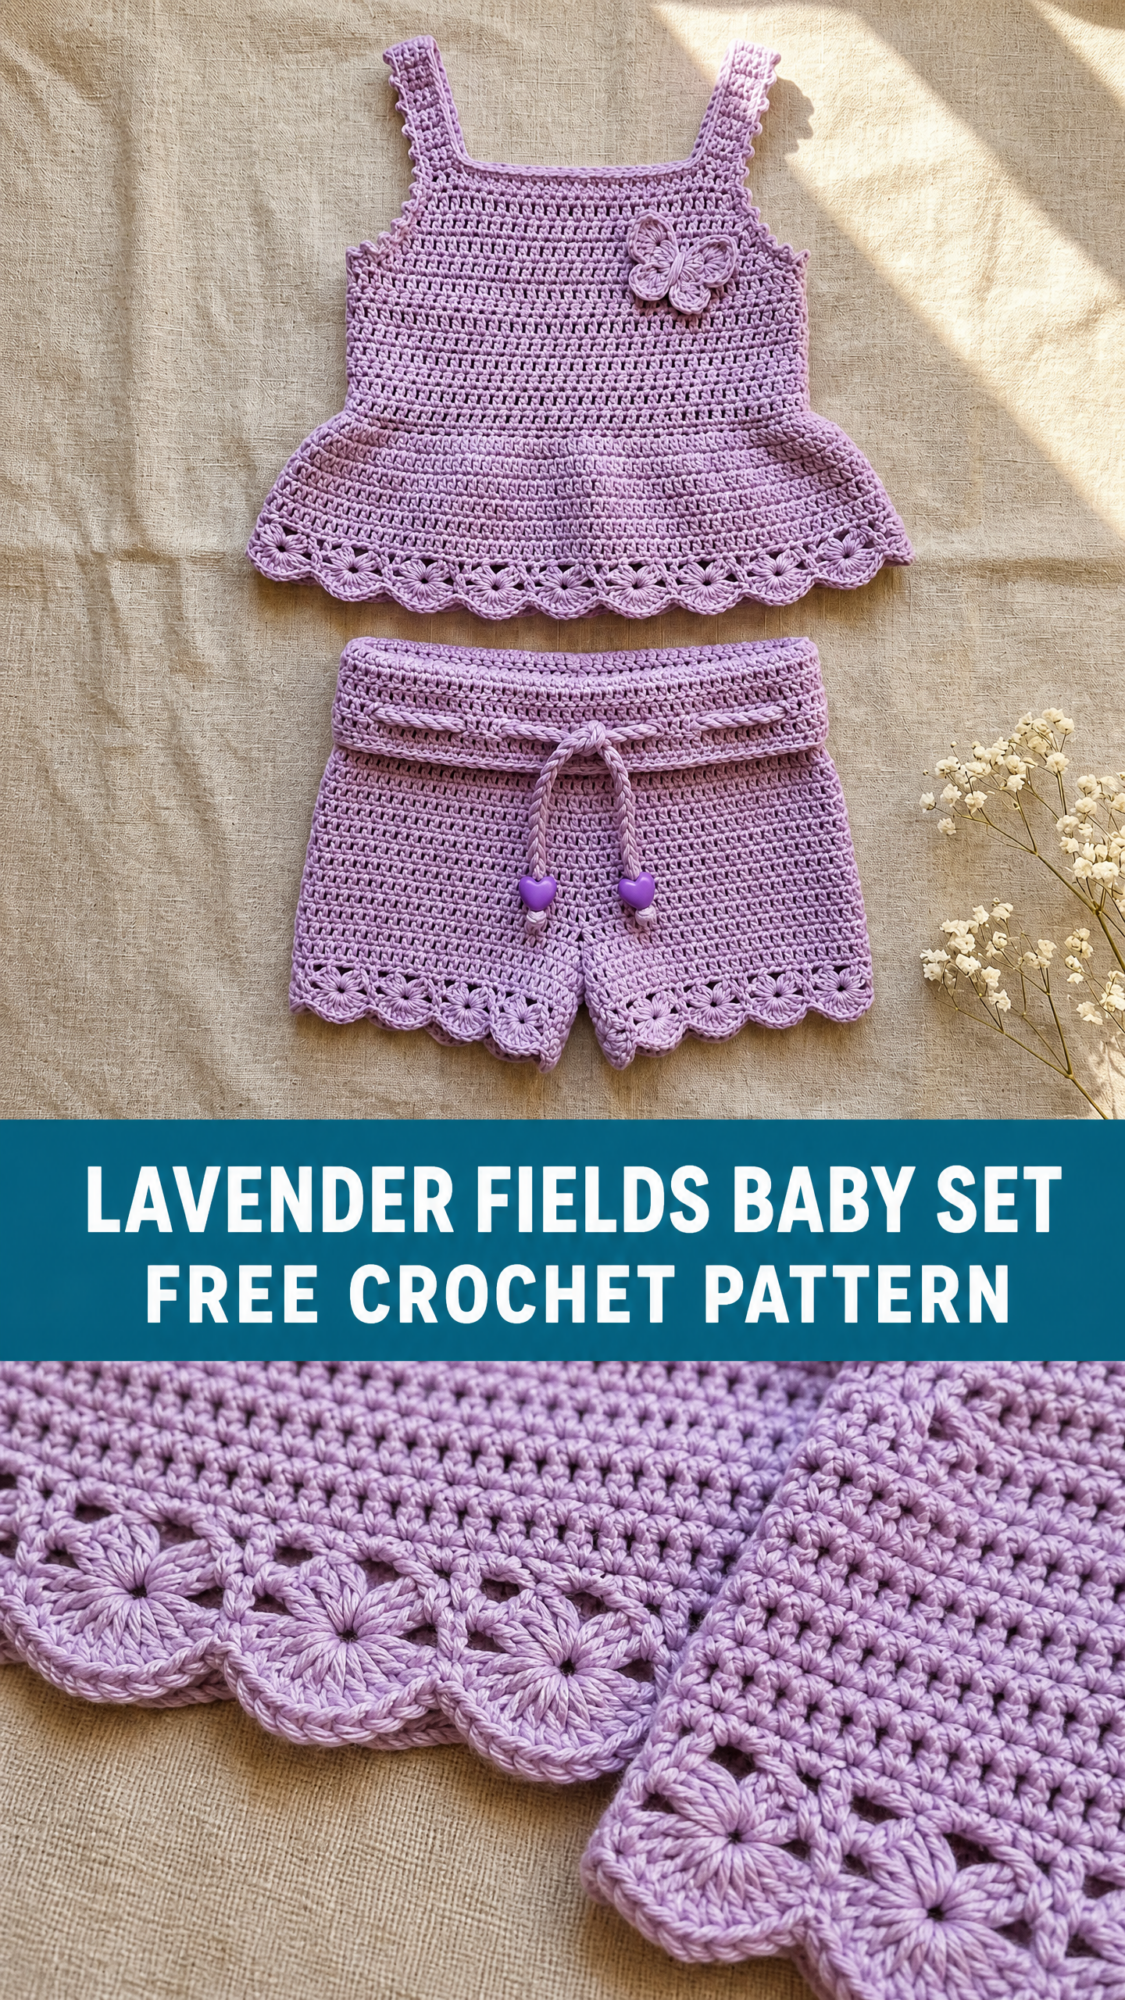
I love how the butterfly applique adds a sweet finishing touch to the tank top without being fussy. The drawstring on the shorts with those little heart beads? Absolutely adorable. This is one of those projects that looks impressive but relies on straightforward stitches throughout.
If you have been wanting to try garment construction for little ones, this is a wonderful place to start. The pieces are small enough to finish quickly, and the shaping is gentle and forgiving.
Why You Will Love This Baby Set Crochet Pattern
This coordinated outfit hits all the right notes for a handmade baby gift. The soft lavender color works beautifully for any season, and the shell border gives both pieces a polished, boutique-worthy finish. The tank top features wide shoulder straps that stay put on wiggly babies, and the slightly flared peplum adds movement without bulk.
The shorts are equally practical. You can choose between an elasticized waistband or the decorative twisted cord drawstring shown in the photos. Either option keeps the shorts secure while making diaper changes easy.
Construction is beginner-friendly despite the intermediate skill rating. The tank top panels are worked flat and seamed together, then the peplum is picked up directly from the lower edge. No sewing pieces on separately. The shorts are worked in the round from the waist down, which means minimal finishing work.
Materials You Will Need
Gather these supplies before you begin:
Yarn: Approximately 200 yards of DK weight yarn (CYCA 3 Light) in lavender
Hook: US size E-4 / 3.5 mm crochet hook
Notions:
Yarn Suggestions
Lion Brand Yarn Pound of Love in Pastel Purple is machine washable and holds its shape beautifully for baby garments.
Paintbox Yarns Simply DK in Lilac Wine shows stitch definition clearly, which is perfect for the shell border details.
Drops Safran in color 13 Lavender offers a cotton blend option with slightly more structure, ideal for summer wear.
Choose any DK weight yarn that achieves gauge. For baby clothes, stick with machine washable fibers. Avoid fuzzy or loosely plied yarns since you want the shell border and butterfly to show up crisp and clear.
Gauge
18 hdc x 13 rows = 4 inches / 10 cm, worked flat with US E-4 / 3.5 mm hook, blocked.
Gauge matters a lot here. On a tiny baby garment, even one stitch per inch difference can throw off the fit significantly. Make a swatch, measure it honestly, and adjust your hook size up or down as needed before starting the actual project.
Finished Measurements
This pattern is written for size 12 to 18 months.
Size customization tips are included at the end of this pattern.
Abbreviations and Stitch Definitions
All terms use US crochet terminology.
Special Stitches
Shell Stitch
Work 5 dc all into the same stitch or chain space. This creates a fan shape that forms one unit of the scallop border.
Shell Border Row
This sequence creates the scalloped hem on both pieces:
1. With RS facing, work 1 sc into the first stitch
2. Skip 2 stitches
3. Work 5 dc (shell) into the next stitch
4. Skip 2 stitches
5. Work 1 sc into the next stitch
6. Repeat steps 2 through 5 across
The stitch count must be divisible by 6 plus 1 for this border to work correctly. The pattern handles this math for you.
Butterfly Applique
Upper wings (make 1 pair):
1. Ch 4, sl st to first ch to form a ring
2. Ch 3 (counts as first dc), work 4 dc into ring, ch 2, sl st into ring (first upper wing complete)
3. Ch 2, work 5 dc into ring, ch 2, sl st into ring (second upper wing complete)
Lower wings (make 1 pair, slightly smaller):
1. Ch 4, sl st to first ch to form a ring
2. Ch 2 (counts as first hdc), work 3 hdc into ring, ch 1, sl st into ring (first lower wing complete)
3. Ch 1, work 4 hdc into ring, ch 1, sl st into ring (second lower wing complete)
Assembly:
Hold upper and lower wing pairs together with right sides facing up. Using yarn and needle, wrap yarn tightly around the center junction 3 to 4 times to cinch wings together, forming the butterfly body. Tie off securely. Optional: make 2 small chains of 3 stitches each from the center to form antennae.
Twisted Cord (Drawstring)
Cut 3 strands of yarn, each 36 inches long. Hold together and fold in half. Anchor the folded end. Twist all strands clockwise until tightly twisted. Fold twisted length in half and allow to twist back on itself. Knot both ends. Finished cord measures approximately 8 inches.
Pattern Notes Before You Begin
1. Turning chain: Ch 2 at the beginning of each hdc row does NOT count as a stitch. Always work the first hdc into the first stitch at the base of the ch-2.
2. Right side identification: The RS is where the hdc "bump" falls to the back and the V of each stitch faces forward. Mark it with a stitch marker right away.
3. Tank top construction: Front and back panels are worked flat, then seamed at sides. Straps are extensions of the shoulder edges. The peplum is picked up directly from the lower edge, not sewn on.
4. Shorts construction: Worked in the round from waist down to crotch, then each leg is finished separately.
5. Shell border math: Do not add or skip stitches in the last hdc row before any border, as this will break the shell repeat. The pattern engineering handles the correct counts.
Tank Top Instructions
Front Panel
Foundation: Ch 42.
Row 1 (WS): Starting in 3rd ch from hook (skipped ch-2 does not count as st), hdc across. (40 hdc)
Row 2 (RS): Ch 2, turn, hdc in each st across. (40 hdc)
Rows 3 through 14: Ch 2, turn, hdc in each st across. (40 hdc per row)
You now have 14 rows of solid hdc. The piece should measure approximately 4.25 inches tall. This completes the lower body section.
Armhole Shaping
Row 15 (RS): Ch 2, turn, sl st across first 4 sts, ch 2, hdc in next 32 sts, leave last 4 sts unworked. (32 hdc)
Row 16: Ch 2, turn, hdc2tog, hdc across to last 2 sts, hdc2tog. (30 hdc)
Row 17: Ch 2, turn, hdc2tog, hdc across to last 2 sts, hdc2tog. (28 hdc)
Rows 18 through 22: Ch 2, turn, hdc in each st across. (28 hdc per row)
Checkpoint: After Row 22, front panel should measure approximately 6.75 inches from foundation with 28 stitches across.
Strap and Neckline Shaping
Divide the 28 sts into three sections: 8 sts for left strap, 12 sts for neck opening, 8 sts for right strap.
Right strap:
Row 23: Ch 2, turn, hdc in first 8 sts only, leave rem sts unworked. (8 hdc)
Rows 24 through 28: Ch 2, turn, hdc in each st across. (8 hdc per row)
Fasten off. Leave a 12 inch tail for seaming.
Left strap:
With RS facing, skip center 12 sts for neck opening, attach yarn in 21st st of Row 22.
Row 23: Ch 2, hdc in same st as join and in next 7 sts. (8 hdc)
Rows 24 through 28: Ch 2, turn, hdc in each st across. (8 hdc per row)
Fasten off. Leave a 12 inch tail for seaming.
Back Panel
Work exactly as Front Panel from foundation through Row 28, including all armhole and strap shaping. The back is identical to the front.
Joining the Panels
Place Front and Back panels with right sides together.
Side seams: Using mattress stitch or slip stitch seam, join side edges from Row 1 through Row 14. Leave Rows 15 through 22 open as armhole openings.
Shoulder seams: Match left strap of Front to left strap of Back with right sides together. Seam the 8 sts of each strap using whip stitch or slip stitch. Repeat for right strap.
Turn the joined body right side out.
Checkpoint: Joined body should measure 18 inches around chest and approximately 6.75 inches from lower edge to shoulder.
Peplum
The peplum attaches directly to the lower edge of the joined body.
Setup: With RS facing, attach yarn at one side seam at the lower edge.
Rnd 1 (increase round): Ch 2, hdc in same st, work 1 hdc in each st around entire lower edge, placing 2 hdc into each corner stitch at side seams. Also work 2 hdc into 1 additional stitch at center front and center back to bring count to 85 hdc total. Join with sl st to top of first hdc. (85 hdc)
This count gives 14 complete shell repeats plus a final sc for the border.
Rnd 2: Ch 2, hdc in each st around. Join. (85 hdc)
Rnd 3: Ch 2, hdc in each st around. Join. (85 hdc)
Peplum Shell Border:
With RS facing, do not turn after Rnd 3.
Sl st into first st. Work 1 sc in first st. Sk next 2 sts, work 5 dc (shell) into next st, sk next 2 sts, work 1 sc in next st. Repeat from to around until 1 st remains. Work final sc in last st. Sl st to first sc. Fasten off. (14 shells, 15 sc)
Armhole Edging
With RS facing, attach yarn at underarm seam.
Rnd 1: Sc evenly around armhole opening, approximately 1 sc per row end. (approximately 24 sc)
Rnd 2: Sl st in each sc around. Join. Fasten off.
Repeat for second armhole.
Neckline Edging
With RS facing, attach yarn at one shoulder seam.
Rnd 1: Sc evenly around neckline, approximately 1 sc per stitch across bound-off neck stitches and 1 sc per row end up each strap side. (approximately 40 sc)
Rnd 2: Sl st in each sc around. Join. Fasten off.
Butterfly Attachment
Work the butterfly applique as described in Special Stitches. Sew butterfly centered on upper front panel, approximately 0.75 inch below neckline and centered between left strap and center front.
Final checkpoint: Tank top should measure 18 inches around chest and 9.5 inches from shoulder to peplum hem.
Shorts Instructions
Waistband
Foundation: Ch 73, sl st to first ch to form a ring. Be careful not to twist.
Rnd 1: Ch 2 (does not count as st), hdc in each ch around. Join with sl st to first hdc. (72 hdc)
Rnd 2 (Eyelet round): Ch 1, sc in first st, (ch 2, sk 2 sts, sc in next 6 sts) repeat around, ending last repeat with sc in last 5 sts. Join with sl st to first sc. (8 eyelets created)
Rnd 3: Ch 2, hdc in each st and 2 hdc in each ch-2 sp around. Join. (72 hdc)
Rnd 4: Ch 2, hdc in each st around. Join. (72 hdc)
Body of Shorts
Rnds 5 through 10: Ch 2, hdc in each st around. Join. (72 hdc per round)
Checkpoint: After Rnd 10, shorts body should measure approximately 3.5 inches from top of waistband.
Crotch Division
At Rnd 11, divide the shorts into two leg openings. Mark two points 36 sts apart as the inner leg points.
Rnd 11: Hdc in next 36 sts. Ch 1. Skip next 36 sts. Sl st to first hdc to join. (37 sts in ring: 36 hdc plus 1 ch)
Right Leg
Rnd 12: Ch 2, hdc in each of the 36 leg sts, 1 hdc in the ch-1 crotch. Join. (37 hdc)
Rnds 13 and 14: Ch 2, hdc in each st around. Join. (37 hdc)
Leg shell border: Work 1 sc in first st. (Sk 2, work 5 dc shell in next st, sk 2, sc in next st) 6 times. End 1 sc in last st. Join. Fasten off. (6 shells, 7 sc)
Left Leg
With RS facing, attach yarn at the skipped section (36 remaining sts plus ch-1 sp).
Rnd 12: Ch 2, hdc in each of the 36 remaining sts, 1 hdc in the crotch ch-1 sp. Join. (37 hdc)
Rnds 13 and 14: Ch 2, hdc in each st around. Join. (37 hdc)
Leg shell border: Same as right leg. Fasten off.
Shorts Finishing
Weave in all ends. Thread the twisted cord through the 8 waistband eyelets. Thread one heart or round bead onto each end of the cord and knot to secure. Trim ends to approximately 0.5 inch below each bead.
Alternative elastic waistband: If using elastic instead, omit the eyelet round and replace with a plain hdc round. Fold the top 2 rounds to the inside and whip stitch down, leaving a small opening. Insert elastic, overlap ends by 0.5 inch, and stitch securely. Sew the opening closed.
Final checkpoint: Shorts should measure 16 inches around waist and 5.5 inches from waist to leg hem.
Size Customization Tips
For smaller size (6 to 12 months): Reduce tank top foundation to ch 38 (36 hdc per row). Reduce shorts foundation to ch 64 for approximately 14 inch waist. Verify shell border divisibility before proceeding.
For larger size (18 to 24 months): Increase tank top foundation to ch 46 (44 hdc per row). Increase shorts foundation to ch 82 for approximately 18 inch waist.
To adjust length: Each row or round in hdc equals approximately 0.3 inch. Add or remove body rows in even numbers.
Blocking and Finishing
Weave in all ends securely, burying tails through at least 1 inch of stitches in two directions.
For cotton or cotton blend yarns: Wet block by soaking pieces in cool water for 10 minutes. Press out excess water in a clean towel. Pin to finished measurements and allow to dry completely.
For acrylic yarns: Steam block by holding a steam iron approximately 1 inch above the pinned fabric. Do not press directly onto the surface. Allow to cool completely before unpinning.
After blocking, attach the butterfly applique.
Care Instructions
Hand wash in cool water with gentle soap, or machine wash on delicate cycle in a mesh bag. Do not wring. Lay flat to dry. Do not iron directly or dry clean. Store folded to avoid stretching the straps.
I hope you love making this sweet little set as much as I enjoyed designing it. The coordinated pieces look so professional together, and babies look absolutely precious wearing handmade clothes. This makes a beautiful baby shower gift or a special outfit for photos.
If you make this Lavender Fields Baby Set crochet pattern, I would absolutely love to see your finished project. Tag me on Instagram or share in my Facebook group. Seeing your color choices and finished pieces genuinely makes my day.
Save this pattern to your Pinterest boards so you can find it when you are ready to start stitching. And if you make this adorable set, please drop a comment below. I always love hearing which yarn colors you chose and who the lucky little one will be.