
Last summer, my best friend called me in a panic. She had been invited to an outdoor black-tie wedding with exactly three weeks notice, and every dress she tried on felt wrong. Too stiff. Too boring. Too much like everyone else. I told her to come over, and we spent the evening sketching what she actually wanted to wear.
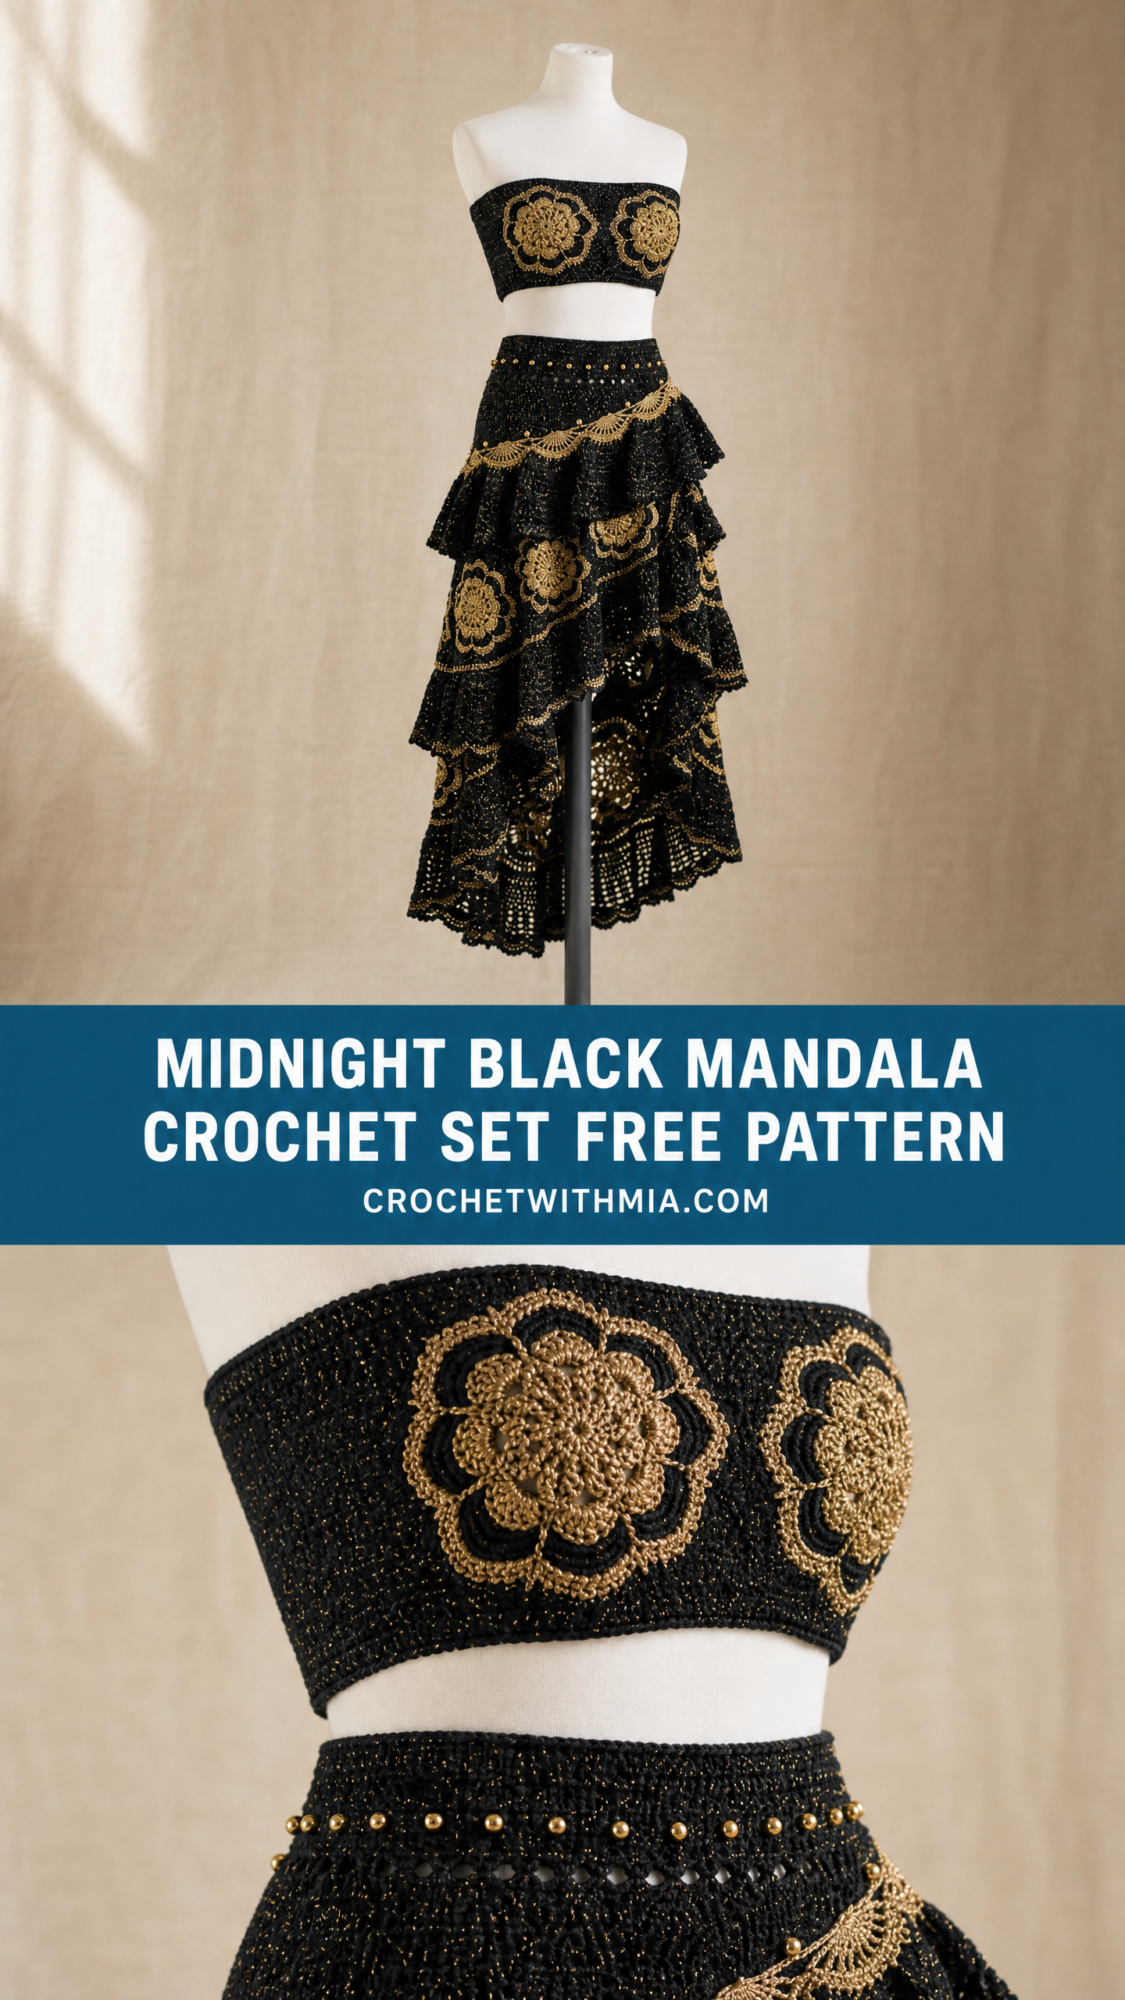
What emerged from that conversation was this design. A dramatic two-piece set in black and gold that would move beautifully, catch the light, and make her feel like an absolute queen. I stayed up way too many late nights finishing it, but watching her walk into that venue? Worth every single hour.
This pattern is for anyone who wants to make a statement. Whether you are heading to a festival, a formal event, or just want to prove to yourself that you can create something truly spectacular with a hook and yarn, this is the project. It looks intimidating, but I promise you, it is completely achievable if you take it one step at a time.
What Makes This Crochet Pattern Special
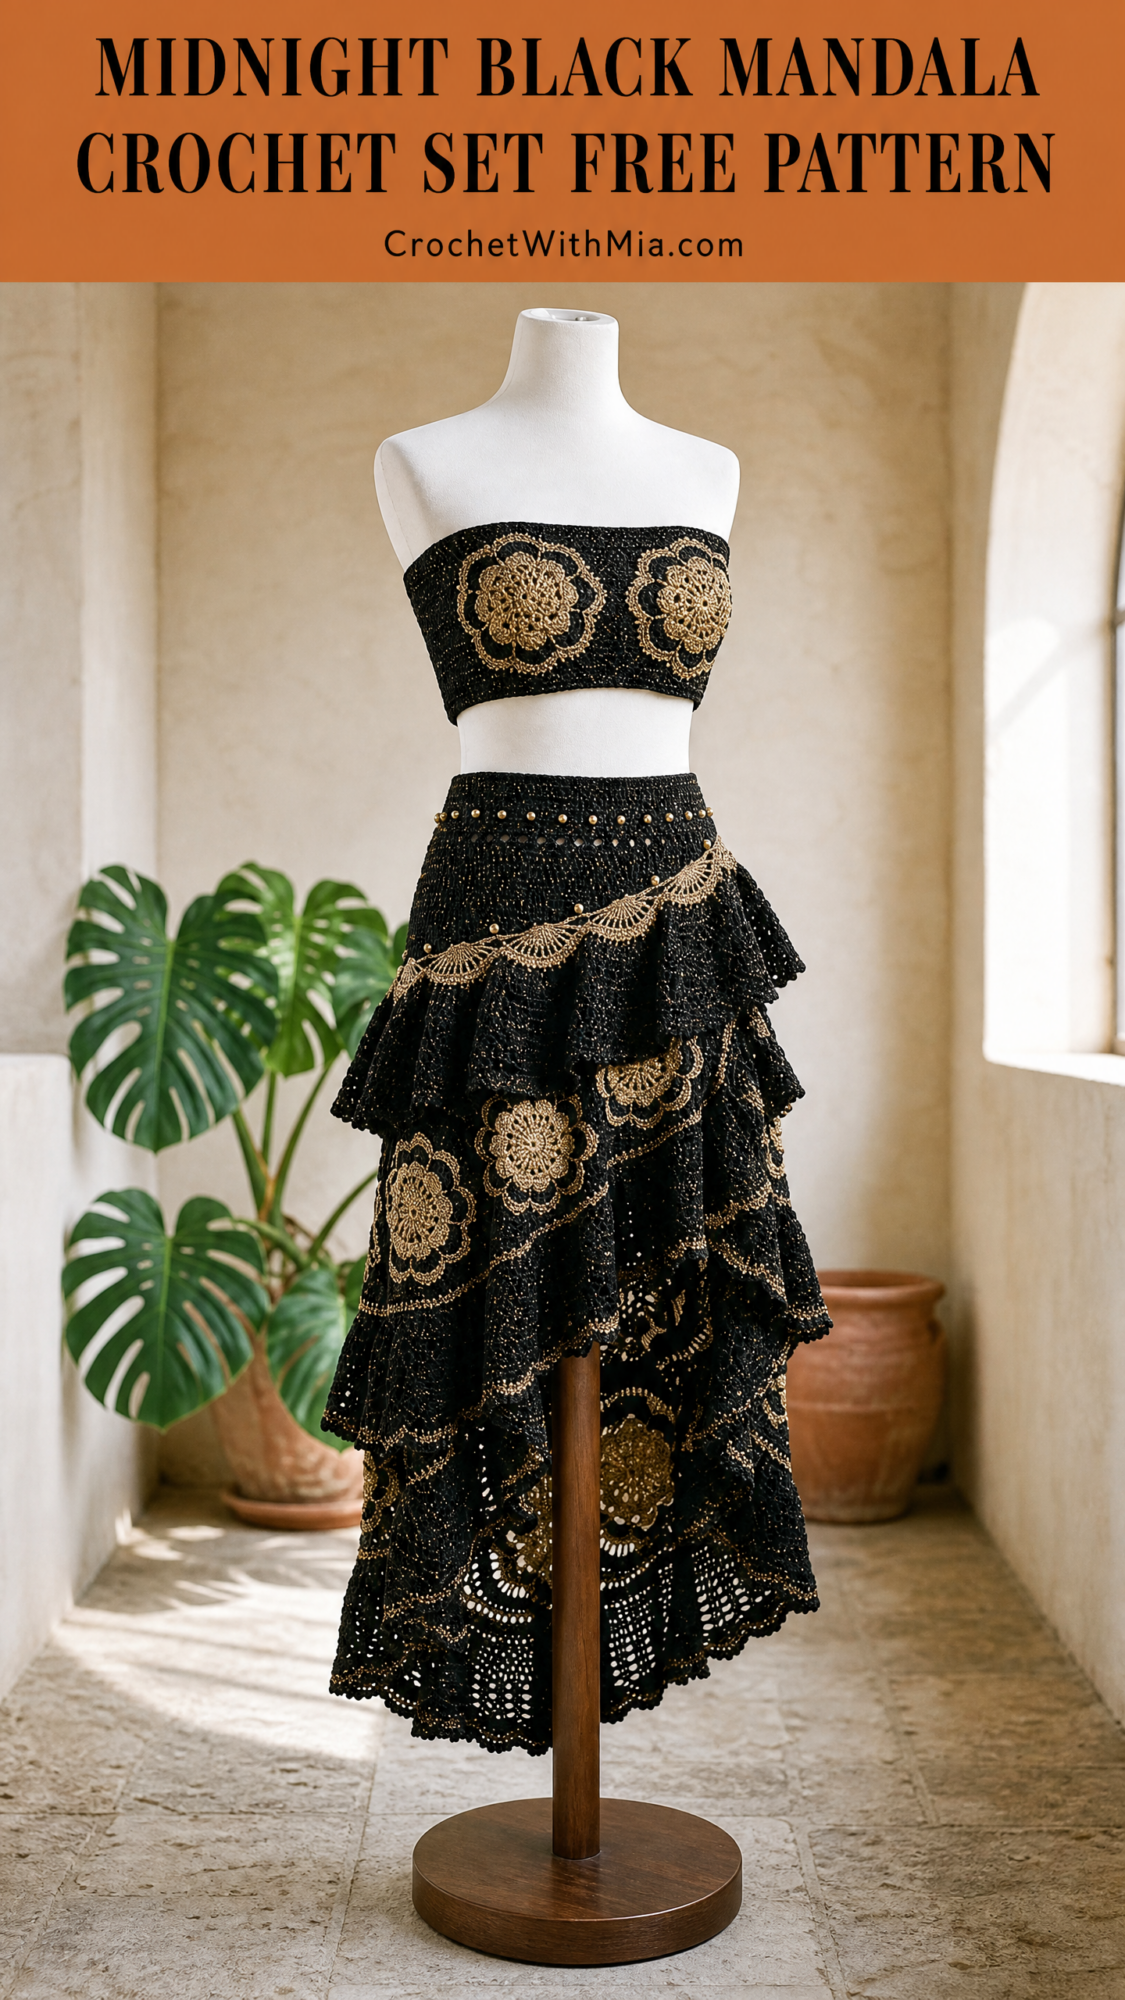
This Midnight Black Mandala Crochet Set consists of two coordinating pieces. A strapless bandeau top and a dramatic tiered high-low ruffle skirt. Both pieces are worked in black yarn with gold metallic thread held together throughout, creating that subtle shimmer you see in the photos.
The large mandala-style floral motifs are crocheted separately and sewn on as embellishments. This means you can place them exactly where you want them, and you do not have to worry about complicated colorwork while building the main fabric.
The skirt features three asymmetrical tiers of ruffles, a gorgeous scalloped lace hem on the longest tier, and a diagonal drape trim across the front hip worked in gold-only yarn. The high-low silhouette gives you that dramatic floor-length back while keeping the front at a comfortable knee length.
Skill Level
I am going to be honest with you. This is an advanced intermediate project. But here is the thing. Every single technique used in this pattern is accessible on its own. You will be working in the round, seaming pieces together, creating multiple stitch textures including filet lace, crocheting flat medallions, joining motifs, picking up stitches along edges, working ruffle increases, and finishing with elastic casings.
If you have never done one of these techniques before, that is okay. I will walk you through each one. The construction has many components, but you can absolutely tackle them one at a time. There is no complex colorwork happening mid-row because the gold thread is carried throughout or worked in completely separate pieces.
Time Estimate
Let me give you realistic expectations here:
Yes, this is a commitment. But think of it as several smaller projects that come together into one showstopper piece. You could easily spread this across several weeks or even a couple of months.
Finished Measurements
This pattern is written for size Small/Medium (US sizes 2 to 8).
Bandeau Top:
Skirt:
Materials You Will Need
Yarn A (Main Color): Black with subtle sparkle, or black held together with a fine gold metallic thread. You will need approximately 1,800 yards / 1,645 meters of DK weight (light worsted, CYCA 3) black yarn total for both pieces.
Yarn B (Gold Metallic): 100 percent metallic or high-sheen gold yarn or thread at fingering/lace weight (CYCA 1). Approximately 800 yards / 732 meters total. This yarn is held together with Yarn A throughout all main fabric sections. It is also used alone for medallions and the diagonal drape strip.
Hooks:
Notions:
Yarn Suggestions
Option 1: Lion Brand Yarn Pound of Love (black, CYCA 4 worsted) held with Kreinik 1/8 inch Ribbon in Gold 002. This combination creates a firm, structured fabric ideal for the top. Reduce to hook US G-6 / 4.0 mm to achieve gauge.
Option 2: Paintbox Yarns Simply DK in Pure Black held with DMC Petra No. 3 Metallic in Gold. True DK weight gives excellent stitch definition for the lace tier. Use H-8 / 5.0 mm hook as written.
Option 3: Drops Safran in Black (DK, cotton-blend, good drape) held with Anchor Artiste Metallic Fine in Gold. Cotton blend adds weight that helps the ruffles hang beautifully.
Substitution Note: You want a black yarn at DK to light worsted weight that produces a slightly firm, structured fabric when held with the gold metallic. Avoid soft, drapey yarns like bamboo or rayon blends for the skirt body as the tiers will not hold their shape. The gold yarn should be as fine as possible so it does not bulk the fabric but shows as a consistent shimmer.
Gauge (Please Do Not Skip This)
Main Fabric (Yarn A + Yarn B held together, H-8 / 5.0 mm hook):
Medallion (Yarn B alone, E-4 / 3.5 mm hook):
Gauge is mandatory for this project. The skirt waist circumference and top bust circumference are entirely dependent on getting gauge right. Please swatch before beginning. Wash and block your swatch before measuring.
Abbreviations (US Terms)
Here are all the abbreviations used in this crochet tutorial:
Special Stitches
Picot: ch 3, sl st into the first ch made. This creates a small decorative loop. Used along the lace hem.
Shell: (dc, ch 1, dc, ch 1, dc) all in the same stitch or space. Creates a fan-shaped group of 3 dc with chain-1 spaces between.
V-stitch (V-st): (dc, ch 2, dc) all in the same stitch or space.
Scallop: 5 dc all in the same stitch or space. Creates a rounded petal shape used for the diagonal drape strip.
Filet Block: 2 dc in the same space (filling a filet square). Used in the lace hem tier.
Filet Space: (ch 2, sk 2 sts, dc). Creates an open square in the filet grid.
Puff Stitch (puff): (yo, insert hook, pull up a loop) 4 times in the same stitch (9 loops on hook), yo and pull through all 9 loops, ch 1 to close. Used in medallion center rounds.
Reverse Single Crochet (rev sc): Working from left to right (opposite of normal direction), insert hook into next stitch to the right, yo, pull up a loop (2 loops on hook), yo and pull through both loops. Used for finished edge on top if desired.
Important Pattern Notes
1. Yarn A and Yarn B are held together as one strand throughout all main fabric sections unless the pattern explicitly states to use Yarn B alone.
2. The bandeau top is worked flat as a rectangle, then seamed at center back. After seaming, top and bottom edges are folded over and slip-stitched to form casings for elastic.
3. The skirt is worked in joined rounds from the waist down. The waistband is worked first, then the body is worked downward.
4. All turning chains count as the first stitch in this pattern unless stated otherwise.
5. Stitch counts given at the end of each row or round reflect the total working stitches, with the turning chain that counts as a stitch included in those counts.
6. The six large mandala medallions (2 for top, 3 for front skirt tiers, 1 for skirt back center) are crocheted separately and sewn on after blocking.
7. All rounds on the skirt are joined rounds unless stated otherwise. After joining, ch 2 (counts as first hdc) to begin next round.
8. The high-low effect is achieved by having the front tiers shorter than the back tiers.
Bandeau Top Instructions
Bandeau Top Body
The top is a simple rectangle. Finished rectangle before seaming: 36 in / 91 cm wide by 8.5 in / 21.5 cm tall. After casing fold-overs top and bottom, working height is 6 in / 15 cm.
Using Yarn A + Yarn B held together and H-8 / 5.0 mm hook, ch 145.
Row 1 (WS): hdc in 3rd ch from hook (tch counts as first hdc), hdc in each ch across. Turn. (144 hdc)
Row 2 (RS): ch 2 (counts as hdc), hdc in each st across. Turn. (144 hdc)
Rows 3 through 25: Rep Row 2. Turn after each row. (144 hdc)
After Row 25, do NOT fasten off.
Edge Row for Bottom Casing (turning fold): ch 1, sc in each st across. Fasten off. (144 sc)
Rejoin at the top edge (the original foundation chain edge). Working into the bottom of the foundation chain sts:
Top Casing Edge Row: ch 1, sc in each st across the foundation chain edge. Fasten off. (144 sc)
CHECKPOINT: After completing the rectangle, the piece should measure 36 in / 91 cm wide and 8.5 in / 21.5 cm tall before folding casings.
Seaming the Top
Fold the rectangle with RS together. Align the short edges (left and right ends). Whip stitch or sl st seam along the 8.5 in / 21.5 cm short edge. Turn RS out. This creates a tube 36 in / 91 cm in circumference.
Casing Fold-Over Bottom
Fold the bottom sc row edge to the inside by 1.25 in / 3 cm. Pin in place. From the inside, use a yarn needle and Yarn A to whip stitch loosely along the fold, leaving a 1 in / 2.5 cm opening at the seam for elastic insertion. Cut elastic to fit underbust comfortably plus 1 in for overlap (approx 28 to 32 in / 71 to 81 cm). Thread elastic through casing. Overlap ends by 1 in, sew together securely. Close the casing opening.
Casing Fold-Over Top
Repeat the same process at the top edge. Cut elastic to fit upper bust comfortably (approx 28 to 32 in / 71 to 81 cm).
CHECKPOINT: Finished top should measure 6 in / 15 cm tall between the two elastic casings and should stretch to fit a 28 to 34 in bust.
Tiered High-Low Ruffle Skirt Instructions
Skirt Waistband
Using Yarn A + Yarn B held together and H-8 / 5.0 mm hook, ch 121. Join with sl st to form a ring, being careful not to twist.
Rnd 1: ch 2 (counts as hdc), hdc in each ch around. Join with sl st to top of tch. (120 hdc)
Rnds 2 through 6: ch 2, hdc in each st around. Join with sl st to top of tch. (120 hdc)
After Rnd 6, the waistband is 2 in / 5 cm tall.
Waistband Casing
After Rnd 6 is complete, fold the entire waistband in half to the inside (Rnd 1 folds up toward Rnd 6). Align Rnd 1 foundation chain edge to the inside of Rnd 6. Using Yarn A and a yarn needle, whip stitch the foundation chain edge to the WS of Rnd 6 working sts loosely and evenly, leaving a 2 in opening at one side for elastic. Thread elastic cut to waist measurement plus 1 in overlap (approx 26 to 30 in / 66 to 76 cm). Sew elastic ends together. Close opening.
CHECKPOINT: Waistband should form a neat double-thickness tube 1 in / 2.5 cm tall after folding, sitting flat, and stretching to fit a 26 to 30 in waist.
Skirt Body Tier 1 (Upper Skirt)
The body is worked downward from the waistband outer round (Rnd 6).
Setup Rnd: Join Yarn A + Yarn B to any st of Rnd 6 of waistband. ch 2 (counts as hdc), hdc in each st around. Join. (120 hdc)
Rnds 1 through 8: ch 2, hdc in each st around. Join. (120 hdc)
Ruffle Increase Round for Tier 1 (Rnd 9): ch 2, hdc in same st (inc made), hdc in next st, rep (inc in next st, hdc in next st) around. Join. (180 hdc)
Pattern is (inc, hdc) repeated 60 times. 60 increases plus 60 plain hdc equals 180.
Rnds 10 through 16: ch 2, hdc in each st around. Join. (180 hdc)
Ruffle Increase Round for Tier 1 lower edge (Rnd 17): ch 2, hdc in same st (inc), hdc in next st, hdc in next st, rep (inc in next st, hdc in next 2 sts) around. Join. (240 hdc)
Pattern is (inc, hdc, hdc) repeated 60 times. 60 increases add 60 sts to 180 for 240 total.
Rnds 18 through 22: ch 2, hdc in each st around. Join. (240 hdc)
CHECKPOINT: After Rnd 22 of the skirt body, your piece should measure approximately 10 in / 25.5 cm from the base of the waistband (not counting the folded waistband itself).
Tier A Ruffle (First Ruffle Layer)
This ruffle is worked directly into Rnd 22 stitches using front loops only.
Join Yarn A + Yarn B to any st of Rnd 22 of the body. You will be working into the front loops only of Rnd 22 to leave the back loops free for the body continuation.
Ruffle Foundation Rnd: Working in FLO of Rnd 22, ch 3 (counts as dc), dc in same st (inc, 2 dc in first st), dc in each of next 2 sts, rep (2 dc in next st, dc in next 2 sts) around. Join. (320 dc)
Repeat is (inc, dc, dc) equals 3 input sts, 4 output sts. 240 divided by 3 equals 80 repeats. 80 times 4 equals 320.
Ruffle Rnd 2: ch 3 (counts as dc), dc in each st around. Join. (320 dc)
Ruffle Increase Rnd 3: ch 3, dc in same st (inc), dc in each of next 3 sts, rep (2 dc in next st, dc in next 3 sts) around. Join. (400 dc)
Repeat (inc, dc, dc, dc) equals 4 input sts, 5 output sts. 320 divided by 4 equals 80 repeats. 80 times 5 equals 400.
Ruffle Rnds 4 through 7: ch 3, dc in each st around. Join. (400 dc)
Ruffle Rnd 8 (Final plain): ch 3, dc in each st around. Join. (400 dc)
Edge of Tier A: ch 1, sc in each st around, working a picot (ch 3, sl st in first ch of the ch-3) every 5 sts for a simple decorative edge. Join with sl st to first sc. Fasten off.
CHECKPOINT: Tier A Ruffle should measure approximately 4 in / 10 cm deep and approximately 100 in / 254 cm in circumference at the widest point.
Skirt Body Continuation
After Tier A is complete, rejoin Yarn A + Yarn B to the back loops of Rnd 22 (the loops left free when you worked Tier A in FLO).
Cont Body Rnd 23: Working in BLO of Rnd 22, ch 2, hdc in each st around. Join. (240 hdc)
Rnds 24 through 28: ch 2, hdc in each st around. Join. (240 hdc)
Body Increase Rnd 29: ch 2, hdc in same st (inc), hdc in next 3 sts, rep (inc in next st, hdc in next 3 sts) around. Join. (300 hdc)
Repeat (inc, hdc, hdc, hdc) equals 4 input sts, 5 output. 240 divided by 4 equals 60 repeats. 60 times 5 equals 300.
Rnds 30 through 35: ch 2, hdc in each st around. Join. (300 hdc)
Tier B Ruffle (Second Ruffle Layer with Diagonal Attachment)
The diagonal high-low effect is achieved by attaching Tier B at different vertical positions. At center front, Tier B attaches at Rnd 28. At center back, Tier B attaches at Rnd 35. This creates the sweeping diagonal across the garment.
Place stitch markers along the body to define the diagonal attachment edge:
Join Yarn A + Yarn B at CF (Rnd 28 at front center st).
Tier B Foundation: ch 3 (counts as dc), 2 dc in same st (3 dc total in first st), ch 1, sk next body st, rep (3 dc in next body st, ch 1, sk next body st) moving diagonally around according to stitch markers. For every 10 sts you travel horizontally, rise 1 round on the body by working a sl st into the next round up before continuing shell placements.
When the full diagonal perimeter is connected (all 300 sts incorporated): Join.
Tier B Rnd 1: ch 3, dc in each dc and in each ch-1 sp around the entire Tier B foundation edge. Join. (approx 400 dc)
Tier B Rnds 2 through 6: ch 3, dc in each st around. Join. (400 dc)
Tier B Increase Rnd 7: ch 3, dc in same st (inc), dc in next 4 sts, rep (inc in next st, dc in next 4 sts) around. Join. (480 dc)
Repeat (inc, 4 dc) equals 5 input, 6 output. 400 divided by 5 equals 80 repeats. 80 times 6 equals 480.
Tier B Rnds 8 through 12: ch 3, dc in each st around. Join. (480 dc)
Tier B Edge: ch 1, sc in each st around, picot every 8 sts. Join. Fasten off.
CHECKPOINT: Tier B Ruffle should measure approximately 5 in / 12.7 cm deep at the back and approximately 3 in / 7.6 cm at the front.
Tier C Ruffle (Longest Lace Tier)
This tier creates the dramatic floor-length back and knee-length front.
Join Yarn A + Yarn B to any st of Rnd 35 of the body in FLO.
Tier C Foundation Rnd: ch 3 (counts as dc), dc in same st (inc, 2 dc in first st), dc in each of next 2 sts, rep (2 dc in next st, dc in next 2 sts) around. Join. (400 dc)
Repeat (inc, dc, dc) equals 3 input sts, 4 output sts. 300 divided by 3 equals 100 repeats. 100 times 4 equals 400.
Tier C Rnds 2 through 5: ch 3, dc in each st around. Join. (400 dc)
Tier C Increase Rnd 6: ch 3, dc in same st (inc), dc in next 4 sts, rep (inc in next st, dc in next 4 sts) around. Join. (480 dc)
Tier C Rnds 7 through 12: ch 3, dc in each st around. Join. (480 dc)
Tier C Increase Rnd 13: ch 3, dc in same st (inc), dc in next 9 sts, rep (inc in next st, dc in next 9 sts) around. Join. (528 dc)
480 divided by 10 equals 48 repeats. 48 times 11 equals 528. This count is divisible by 3 for the filet lace section.
Tier C Rnds 14 through 18: ch 3, dc in each st around. Join. (528 dc)
Tier C Filet Lace Section
Tier C Rnd 19 (Begin Filet): ch 5 (counts as dc + ch 2), sk next 2 sts, dc in next st, rep (ch 2, sk 2 sts, dc in next st) around. Join with sl st to 3rd ch of beg ch-5.
Continue in filet pattern for 5 more rounds, then finish with a picot edge as established in Tier A.
Medallion Construction
Create 6 mandala medallions using Yarn B alone and the E-4 / 3.5 mm hook. These are sewn onto the finished pieces after blocking. Place 2 medallions on the bandeau top front, 3 across the front skirt tiers, and 1 at the skirt back center.
Work each medallion in the round from the center outward using puff stitches, double crochets, and chain spaces to create the floral mandala effect. Each completed medallion should measure 5 in / 12.7 cm in diameter.
Final Assembly and Finishing
Block all pieces before assembly. Pin the medallions in place and whip stitch them securely using Yarn B. If adding bead embellishments to the waistband, sew them on now using a beading needle and thread.
For the diagonal drape strip across the front hip, work a strip of scallops (5 dc in same st, sk 2 sts) using Yarn B alone until the strip reaches approximately 24 in / 61 cm long. Sew diagonally across the front of the skirt from the right hip to the left front, following the natural line of Tier B.
Weave in all ends. Give the finished set a final light steam block to set the shape.
This Midnight Black Mandala Crochet Set is absolutely a labor of love, but I hope you can see from these step by step instructions that it is completely doable. Take your time with each component, celebrate the small victories along the way, and trust the process.
Thank you so much for choosing this pattern for your next big project. I cannot wait to see what you create. If you make this set, please share your photos on Instagram or Facebook and tag me. I would be absolutely thrilled to see your version come to life.
If this pattern caught your eye, go ahead and save it to your Pinterest boards so you can find it when you are ready to start. And if you do make it, please drop a comment below. I would love to hear how it goes and see your finished piece!