
My niece announced her pregnancy last spring, and I immediately started sketching. Not nursery layouts or shower decorations. Cardigans. I wanted to make something that would actually get worn, not just photographed once and tucked into a drawer. Something soft enough for sensitive baby skin but structured enough to survive the washing machine. Something that looked like it took forever but could actually be finished before the baby arrived.
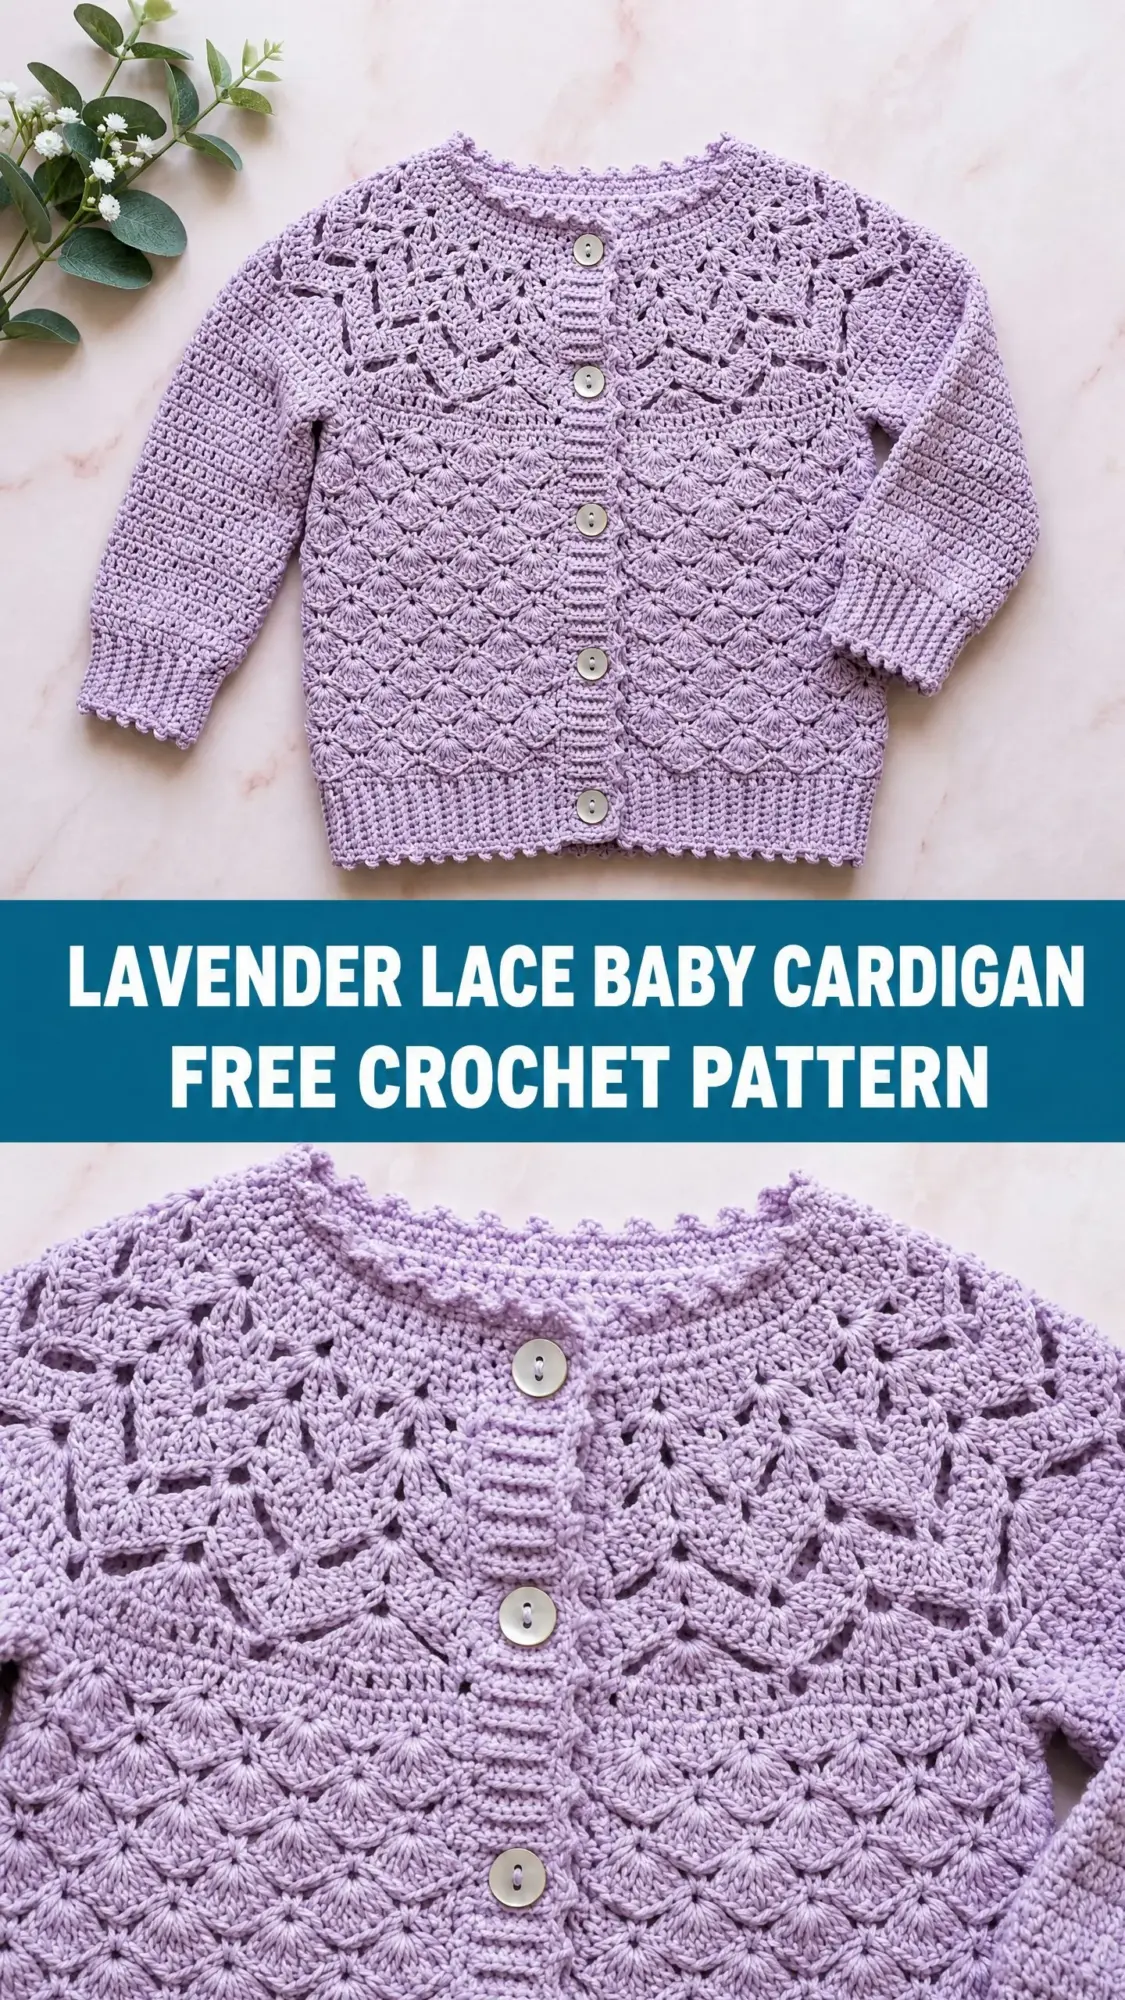
This lavender lace baby cardigan is what came out of all that sketching. It has the delicate lace details that make people stop and ask if you bought it at a boutique, but the construction is surprisingly straightforward once you understand the flow. Top down, no seams to dread, and a satisfying mix of texture that keeps the work interesting from start to finish.
I finished it three weeks before my great-niece was born. She wore it home from the hospital. And now I am sharing the pattern with you because every baby deserves something handmade with this much love built into every stitch.
Pattern Overview and Skill Level
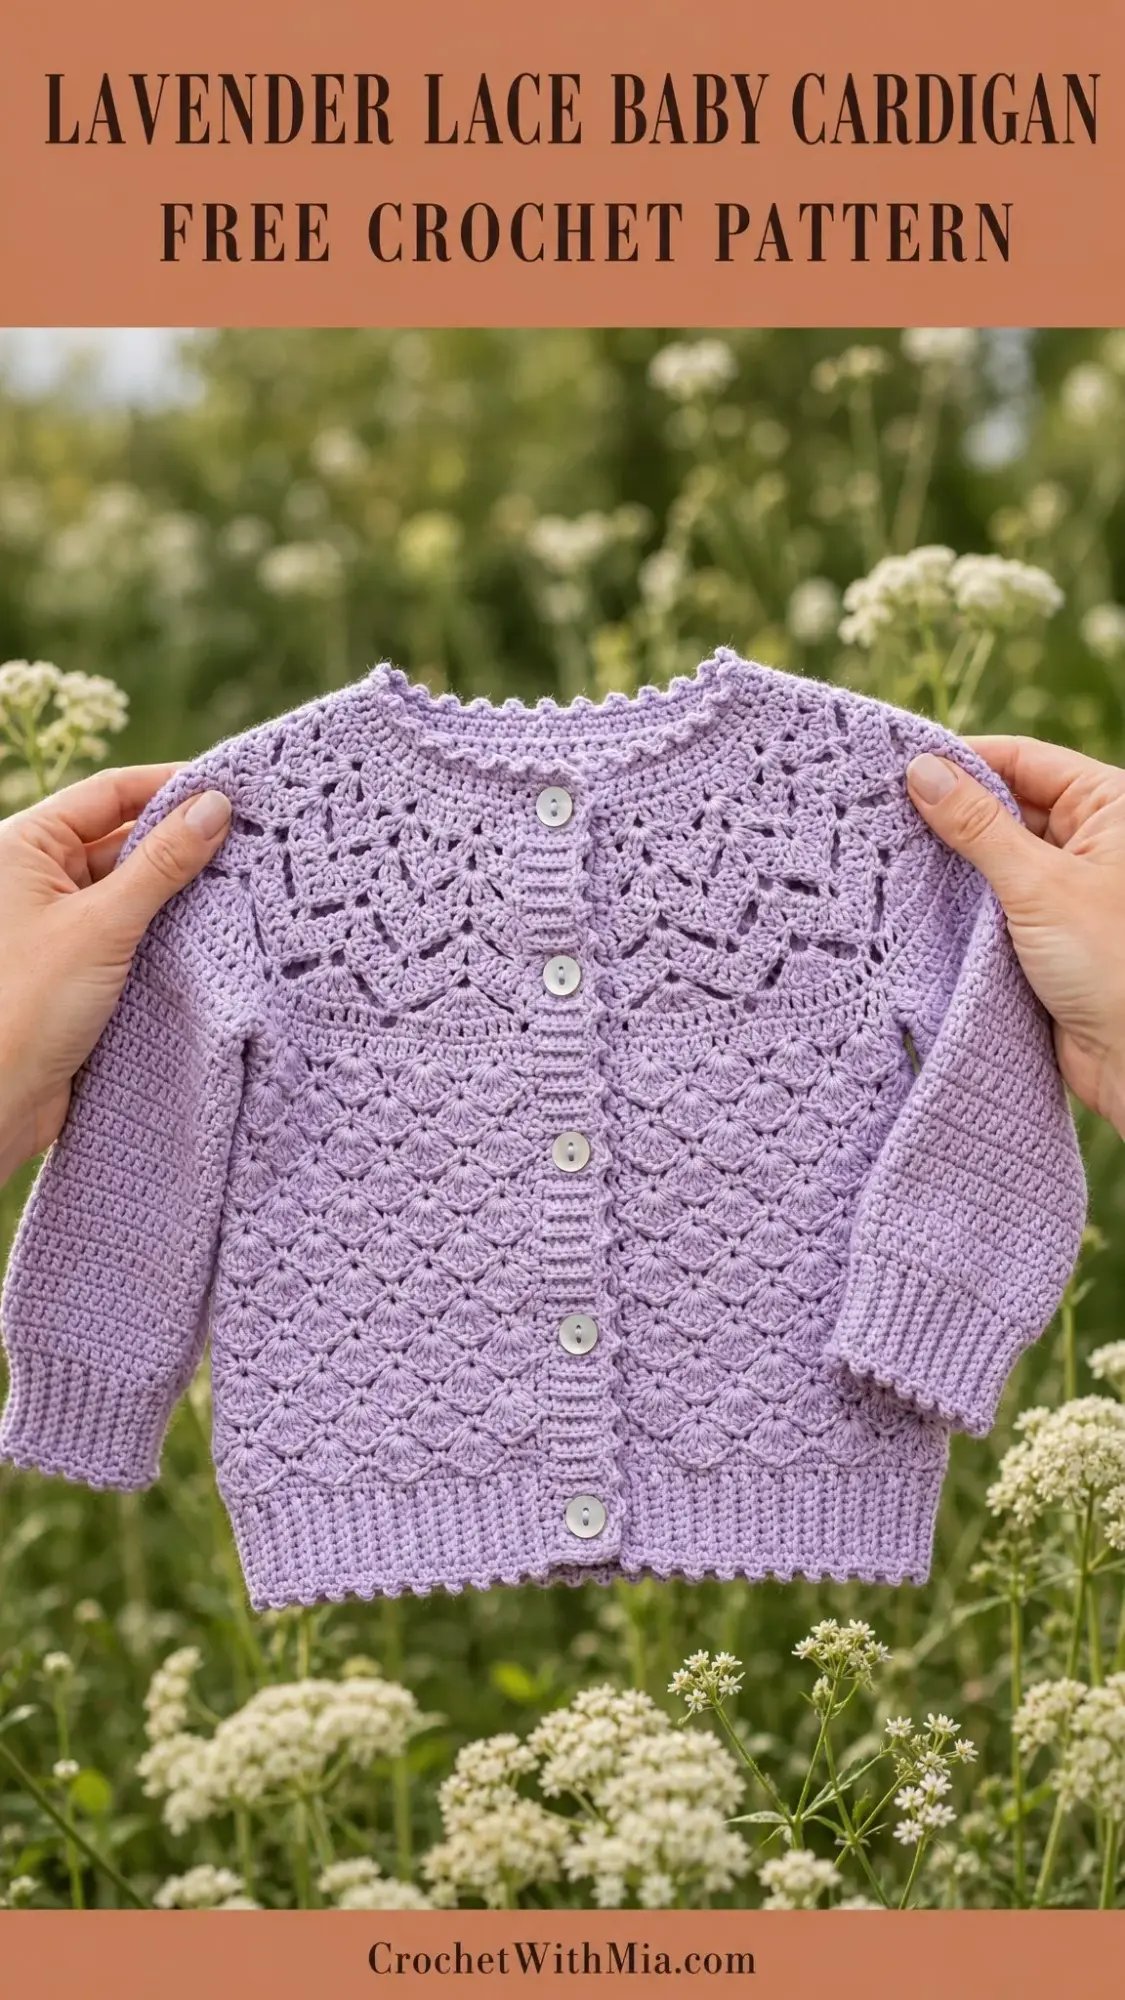
This crochet pattern creates a seamless raglan yoke cardigan worked from the neck down. The yoke features an open lace fan motif that radiates outward from the neckline, transitioning into a shell stitch pattern for the body and sleeves. Ribbed cuffs, a ribbed hem, and button bands provide clean finishing. Five mother-of-pearl buttons close the front.
Skill level: Intermediate. You should feel comfortable working in both rounds and flat rows, reading stitch pattern repeats, and managing increases within a lace context. If you have completed at least one basic top-down garment before, you will find this accessible with careful attention to stitch counts.
Time estimate: Approximately 10 to 14 hours for an experienced intermediate crocheter working at a relaxed pace.
Finished Measurements
This cardigan fits infants aged 12 to 18 months.
Materials Needed
Yarn: 1 skein (approximately 380 to 420 yards / 347 to 384 meters) DK weight yarn, CYCA 3, in soft lavender
Hook: US size G-6 / 4.0 mm crochet hook (adjust to meet gauge)
Notions:
Yarn Suggestions
Option 1: Paintbox Yarns Simply DK (100% acrylic, 276 yards per 100 g skein) in Dusty Lilac. Machine washable, holds stitch definition beautifully, budget-friendly.
Option 2: Drops Safran (100% cotton, 175 yards per 50 g skein, 2 skeins needed) in Powder Purple. Cotton gives excellent stitch definition and a crisp drape ideal for lace.
Option 3: Lion Brand Comfy Cotton Blend (52% cotton, 48% modal, 362 yards per 100 g skein) in Orchid. Soft against baby skin, lightweight, washes beautifully.
Substitution note: Choose any smooth DK weight yarn that allows stitch definition. Avoid fuzzy or bouclé fibers as the lace openwork will be obscured. If substituting cotton for acrylic or vice versa, re-swatch carefully as gauge can shift by half a stitch per inch between fiber types.
Gauge
18 stitches x 10 rows = 4 inches / 10 cm in shell stitch pattern (blocked)
20 single crochet x 22 rows = 4 inches / 10 cm in single crochet (for ribbing reference)
Gauge is mandatory for this garment. A hook that is one size too large will produce a cardigan up to 2 inches wider than intended, which will affect fit significantly on a small infant. Swatch in the round if possible. Block your swatch before measuring.
Abbreviations
Here is every abbreviation you will encounter in this crochet tutorial, with plain-English definitions:
Special Stitches
These special stitches give the cardigan its signature texture. Take a moment to practice them on a small swatch before starting if any feel unfamiliar.
Shell Stitch (shell)
Work 5 double crochet all into the same stitch or space. This creates a fan-shaped cluster. When used in the body pattern, a shell is always worked into a ch-2 sp of the previous row unless otherwise noted.
V-Stitch (V-st)
Work (dc, ch 2, dc) all into the same stitch or space. This creates the foundation arch that the next shell will sit into.
Lace Fan Unit (used in yoke)
Step 1: Skip 2 stitches.
Step 2: Work 7 double crochet into the next stitch (this is the fan center).
Step 3: Skip 2 stitches.
Step 4: Work 1 sc into the next stitch to close the fan.
The fan unit spans 6 stitches plus 1 anchor sc, consuming 7 worked stitches total from the base row.
Picot
Ch 3, sl st into the first ch made. This creates a small decorative nub used along neckline and hem edges.
Ribbing (worked flat in rows)
All ribbing in this pattern is worked in BLO sc turned after each row, creating vertical columns that mimic knit ribbing.
Pattern Notes Before You Begin
The cardigan is worked from the top down in one continuous piece. The yoke is worked flat in rows to create the front opening, and then the body is worked flat as well, maintaining the front opening for button bands.
Turning chains: For rows of double crochet, ch 3 at the beginning of the row counts as the first dc. For rows of single crochet, ch 1 at the beginning does not count as a stitch.
Stitch markers are essential in the yoke to identify the four raglan increase points. Move markers up every round.
Right and left are given from the wearer’s perspective.
Button loops are worked into the right front band (for a girl’s garment). If preferred for a boy, work button loops into the left front band instead.
Read all instructions in a section before beginning that section.
Step by Step Instructions
Section 1: Neckline Foundation
Foundation chain: Ch 64.
Row 1 (RS): Sc in 2nd ch from hook and in each ch across. Turn. (63 sc)
Row 2 (WS): Ch 1 (does not count as st here and throughout sc rows). Sc in each st across. Turn. (63 sc)
This two-row strip forms the neckline base and will be picked up for the ribbed collar at the end.
Checkpoint: Your neckline strip should measure approximately 13 inches / 33 cm wide and just under 0.5 inch / 1.3 cm tall.
Section 2: Yoke Setup Row
The yoke is worked flat in rows from the neckline down. The 63 sts are divided as follows with markers placed to delineate sections:
Place a stitch marker at stitch 11, stitch 20, stitch 43, and stitch 52 to identify the four raglan lines.
Row 3 (RS) – Raglan Increase Row: Ch 3 (counts as first dc here and throughout dc rows), turn.
Work as follows: dc in each st to 1 st before first marker, (dc, ch 1, dc) in next st (raglan increase made), dc in each st to 1 st before next marker, (dc, ch 1, dc) in next st, dc in each st to 1 st before next marker, (dc, ch 1, dc) in next st, dc in each st to 1 st before next marker, (dc, ch 1, dc) in next st, dc to end. Turn.
Stitch count: 63 + 8 raglan dc + 4 ch-1 sps = 71 sts (count each ch-1 sp as 1 st for working purposes). (71 sts)
Row 4 (WS): Ch 3, turn. Dc in each st and ch-1 sp across. Turn. (71 dc)
Row 5 (RS) – Raglan Increase Row: Ch 3, turn. Rep the raglan increase row, working (dc, ch 1, dc) at each of the 4 marked positions. (79 sts)
Row 6 (WS): Ch 3, turn. Dc in each st and ch-1 sp across. Turn. (79 dc)
Row 7 (RS) – Raglan Increase Row: Rep raglan increase row. (87 sts)
Row 8 (WS): Ch 3, turn. Dc in each st and ch-1 sp across. Turn. (87 dc)
Row 9 (RS) – Raglan Increase Row: Rep raglan increase row. (95 sts)
Row 10 (WS): Ch 3, turn. Dc in each st and ch-1 sp across. Turn. (95 dc)
After Row 10, the yoke sections are as follows:
Section 3: Lace Fan Yoke Rows
The lace fan pattern is introduced in this section. Each lace fan unit consumes 6 base stitches and is anchored by 1 sc, spanning 7 sts total. Fans are worked across the back and front sections only. The sleeve sections receive plain dc to keep sleeve circumference manageable.
Row 11 (RS) – Fan Setup: Ch 3, turn.
Right front (15 sts): dc in each of next 15 sts.
At raglan: dc in ch-1 sp.
Right sleeve (17 sts): dc in each of next 17 sts.
At raglan: dc in ch-1 sp.
Back (31 sts): Work fan row across back as follows: dc in first st, [sk 2 sts, 7 dc in next st, sk 2 sts, sc in next st] rep 4 times, dc in last 3 sts.
Note on back fan setup: 31 sts in back. Work 1 dc, then 4 fan units of 7 sts each = 28 sts, then 2 dc at end = 31 sts total. Check: 1 + 28 + 2 = 31. Correct.
At raglan: dc in ch-1 sp.
Left sleeve (17 sts): dc in each of next 17 sts.
At raglan: dc in ch-1 sp.
Left front (15 sts): dc in each of next 15 sts. Turn. (95 sts worked, fan structure established in back section)
Row 12 (WS): Ch 1, turn. Sc in each st across, working sc into each dc of fans and 1 sc into each sc between fans. (95 sc)
Row 13 (RS) – Raglan Increase with Fan Continuation: Ch 3, turn.
Work raglan increases at all 4 points as before while maintaining fan placement in the back section (offset fans by 3 sts to create the staggered lace appearance). Right front, sleeve sections, and left front receive plain dc.
Back section now has 33 sts after increases: Work 1 dc, [sk 2, 7dc in next st, sk 2, sc in next st] 4 times (28 sts), dc in rem 4 sts = 1 + 28 + 4 = 33.
Total after Row 13: (103 sts)
Right front: 16 sts, Right sleeve: 18 sts, Back: 33 sts, Left sleeve: 18 sts, Left front: 16 sts.
Row 14 (WS): Ch 1, turn. Sc across. (103 sc)
Row 15 (RS) – Raglan Increase with Fans: Rep increases. Fans shift again in back (now 35 sts in back): 1 dc, [sk 2, 7dc in next st, sk 2, sc in next st] 4 times (28 sts), dc in rem 6 sts = 35.
Total: (111 sts)
Right front: 17, Right sleeve: 19, Back: 35, Left sleeve: 19, Left front: 17, plus 4 raglan sps.
Row 16 (WS): Ch 1, turn. Sc across. (111 sc)
Row 17 (RS): No increase row. Work even in fans across back (35 sts), plain dc across fronts and sleeves. (111 sts)
Row 18 (WS): Ch 1, turn. Sc across. (111 sc)
Checkpoint: After Row 18, the yoke should measure approximately 4 inches / 10 cm from the neckline foundation. The fan motifs are visible radiating across the yoke.
Section 4: Body and Sleeve Separation
Row 19 (RS) – Separation Row: Ch 3, turn.
Work 17 dc across right front.
Ch 4 (underarm chain bridge for right side).
Skip across right sleeve 19 sts (place these on a holder or leave with markers).
Work 35 dc across back.
Ch 4 (underarm chain bridge for left side).
Skip across left sleeve 19 sts (hold for later).
Work 17 dc across left front.
Working stitch count for body: 17 (right front) + 4 ch + 35 (back) + 4 ch + 17 (left front) = 77 working positions. (77 sts)
Row 20 (WS): Ch 3, turn. Dc in each st and each ch across, and increase 1 st in 3 evenly spaced positions (approx every 25 sts). (80 dc)
This adjustment creates a clean multiple of 6 for the shell pattern.
Section 5: Body Shell Pattern
The shell pattern creates the scalloped diamond texture visible in the lower portion of the cardigan.
Row 21 (RS) – Shell Row 1: Ch 3 (counts as dc), turn.
Dc in first st (half-shell at edge), [sk 2 sts, V-st in next st, sk 2 sts, shell (5dc) in next st] rep 13 times, end sk 2 sts, V-st in next st, sk 2 sts, 2 dc in last st (half-shell at edge). Turn. (108 sts)
Row 22 (WS): Ch 3, turn. Dc in first st, [sc in center dc of shell, shell into ch-2 sp of V-st] rep across, end sc in center dc of last shell, 2 dc in top of t-ch. Turn. (83 sts)
Row 23 (RS): Ch 3, turn. Dc in first st, [sk sc, shell into ch-2 sp of previous V-st that is now at center, V-st in sc between shells] rep across, 2 dc at end. This re-establishes shell on top of V-st and V-st on top of shell, creating the staggered diamond texture. Turn. (108 sts)
Row 24 (WS): Ch 3, turn. Dc in first st, [sc in center dc of shell, shell into ch-2 sp of V-st] rep across, 2 dc in end. Turn. (83 sts)
Continue alternating Rows 23 and 24 (shell pattern rows) until body measures approximately 5 inches / 12.7 cm from underarm separation, ending with a WS row.
Final body row count guidance: approximately 8 to 10 pattern rows (4 to 5 full shell repeats).
Checkpoint: After the body section, the piece should measure approximately 9 inches / 23 cm from neckline foundation to the end of the last shell row.
Section 6: Hem Ribbing
Transition Row: Ch 1, turn. Sc evenly across the bottom edge of the body, working 1 sc per dc and 1 sc per row end as needed, until you have 74 sc across. (74 sc)
Row 1 (ribbing): Ch 1, turn. Sc in BLO of each st across. Turn. (74 sc)
Rep this row 5 more times for a total of 6 ribbing rows.
After 6 rows, the ribbing should measure approximately 0.75 inch / 2 cm.
Fasten off and weave in end. Finish bottom edge with a picot edging: attach yarn at corner, [sc in next st, picot, sk 1 st] across. Fasten off.
Section 7: Sleeves (Make 2)
Return to the 19 held sleeve stitches on one side. With RS facing, attach yarn at underarm center of the ch-4 bridge.
Round 1 (joining): Ch 3 (counts as dc), work 1 dc into each of the 4 ch of the underarm bridge, then work 1 dc into each of the 19 held sleeve sts, sl st to top of starting ch-3 to join. (23 dc)
Place marker at beginning of round and move up each round.
Rounds 2 to 4: Dc in each st around. (23 dc per round)
Round 5 – adjustment: Sc around, decreasing 1 st to make 22 sts for the sleeve shell pattern. (22 sc)
Sleeve Shell Pattern (4-st repeat):
[sk 1, shell in next st, sk 1, sc in next st] rep 5 times, then dc in last 2 sts to close. Join with sl st. (22 base sts consumed, 30 working sts produced)
Continue sleeve shell pattern for 6 rounds, alternating shell and V-st rows as in body, adjusting to the round format by joining each round.
After sleeve shell section, sleeve should measure approximately 5.5 inches / 14 cm from underarm.
Sleeve Cuff Ribbing:
Transition round: Sc evenly around, working down to 18 sc. (18 sc)
Ribbing Row 1: Ch 10 (for sideways ribbing strip). Sc in 2nd ch from hook and in each ch across. (9 sc)
Sl st to first sleeve edge sc to anchor. Turn.
Ribbing Row 2: Sc in BLO of each of the 9 sc. Turn.
Sl st to next sleeve edge sc. Turn.
Continue until cuff strip spans all the way around the sleeve (18 anchor points). Join the two ends of the ribbing strip together with sl st or mattress stitch. Fasten off.
Cuff should measure approximately 1.25 inches / 3.2 cm tall.
Finish cuff edge with picot edging matching hem.
Checkpoint: Completed sleeve should measure approximately 7 inches / 18 cm from underarm to cuff edge.
Section 8: Button Bands
Right Front Band (buttonholes):
With RS facing, attach yarn at the bottom right front corner.
Row 1: Ch 1. Work 54 sc evenly up the right front edge (approximately 1 sc per row). Turn. (54 sc)
Row 2: Ch 1, sc in BLO of each st across. Turn. (54 sc)
Row 3 (buttonhole row): Ch 1, turn. Sc in first 3, [sc in 7 sts, ch 2, sk 2] 5 times, sc in last 4 sts. Turn. (52 sts + 5 ch-2 holes = 54 working positions)
Row 4: Ch 1, turn. Sc in each st and 2 sc into each ch-2 sp across. (54 sc)
Row 5: Ch 1, sc in BLO across. Fasten off. (54 sc)
Left Front Band (plain):
With RS facing, attach yarn at top left front corner.
Row 1: Ch 1. Work 54 sc evenly down the left front edge. Turn. (54 sc)
Rows 2 to 5: Ch 1, sc in BLO across. Turn. (54 sc each row)
Fasten off after Row 5.
Section 9: Collar Edging
With RS facing, attach yarn at top of right button band.
Round 1: Work sc evenly across the top of the button band edge, across the original neckline foundation (picking up in the unused loops of the foundation chain), and down the top of the left button band. Work a total of approximately 70 sc around the neckline. Join with sl st. Do not turn. (70 sc)
Round 2: Ch 1, [sc in next st, picot] rep around. Join. Fasten off.
The collar edging is intentionally minimal to keep the neckline from being overly stiff on a baby.
Section 10: Finishing
Weave in all ends securely, pulling tails through at least 3 to 4 sts in different directions before trimming.
Seam the underarm gaps (where the sleeve joined the body ch bridge) with a yarn needle and a few whipstitches if any holes are visible.
Sew buttons to the left front band directly opposite each buttonhole. Use matching thread or a length of yarn doubled. Pass through the shank of each button and through all layers of the band, anchoring with several passes. Tie off securely on the WS.
Blocking Instructions
Wet blocking is strongly recommended. Soak the finished cardigan in cool water with a small amount of wool wash or gentle soap for 20 minutes. Do not wring. Press gently in a towel to remove excess moisture.
Lay flat on a blocking mat and pin to finished measurements: chest 20 inches / 51 cm, length 11 inches / 28 cm, sleeve length 7 inches / 18 cm.
Open the lace fans gently with fingers and pin each fan point. Allow to dry completely before removing pins (12 to 24 hours depending on yarn fiber).
Cotton will benefit most from firm pinning. Acrylic can be steam blocked by holding a steam iron 1 to 2 inches above the surface without touching the fabric.
Size Customization Tips
To size down to 6 to 12 months: Begin with a foundation chain of 57 (56 working sc). Distribute as right front 9, sleeve 7, back 21, sleeve 7, left front 9 = 53 sts. Work 3 raglan increase rows instead of 4 before introducing fans. Separate at a total body count of approximately 65 sts. Finished chest will be approximately 17 inches / 43 cm.
To size up to 2T to 3T: Begin with a foundation chain of 71 (70 sc). Distribute as right front 13, sleeve 11, back 27, sleeve 11, left front 13. Work 5 raglan increase rows. Add 2 additional body shell rows. Finished chest will be approximately 23 inches / 58 cm.
To lengthen the body: Add pairs of shell rows (2 rows per repeat) before the hem ribbing. Each full repeat adds approximately 0.75 inch / 2 cm of length.
To lengthen the sleeves: Add shell rows before the cuff. Each full repeat adds approximately 0.5 inch / 1.3 cm.
Care Instructions
Hand wash in cool water or machine wash on gentle cycle in a mesh laundry bag. Use mild detergent without bleach. Lay flat to dry. Do not tumble dry, iron directly, or dry clean. If yarn is 100% acrylic, low-heat tumble dry is acceptable per yarn label guidance. Store folded, not on a hanger, to prevent stretching.
Thank you so much for choosing this pattern for your next project. I truly hope you love making this cardigan as much as I loved designing it. The lace fans really do look more complicated than they are, and that moment when you separate the body from the sleeves and see the whole shape come together is genuinely satisfying. If you make one, I would absolutely love to see it. Tag me on Instagram or share a photo in our Facebook group. Seeing your finished projects is honestly the best part of sharing patterns.
If this lavender lace baby cardigan crochet pattern caught your eye, go ahead and pin it to your Pinterest boards so you can find it when you are ready to start. And if you do make one, please leave a comment below. I read every single one, and hearing about your color choices and who you are making it for always makes my day.