
Go ahead and dig through that stash of yours. You know the one. That collection of DK weight yarn in bright, cheerful colors that you have been saving for something special. This watermelon baby set is exactly what those skeins have been waiting for.
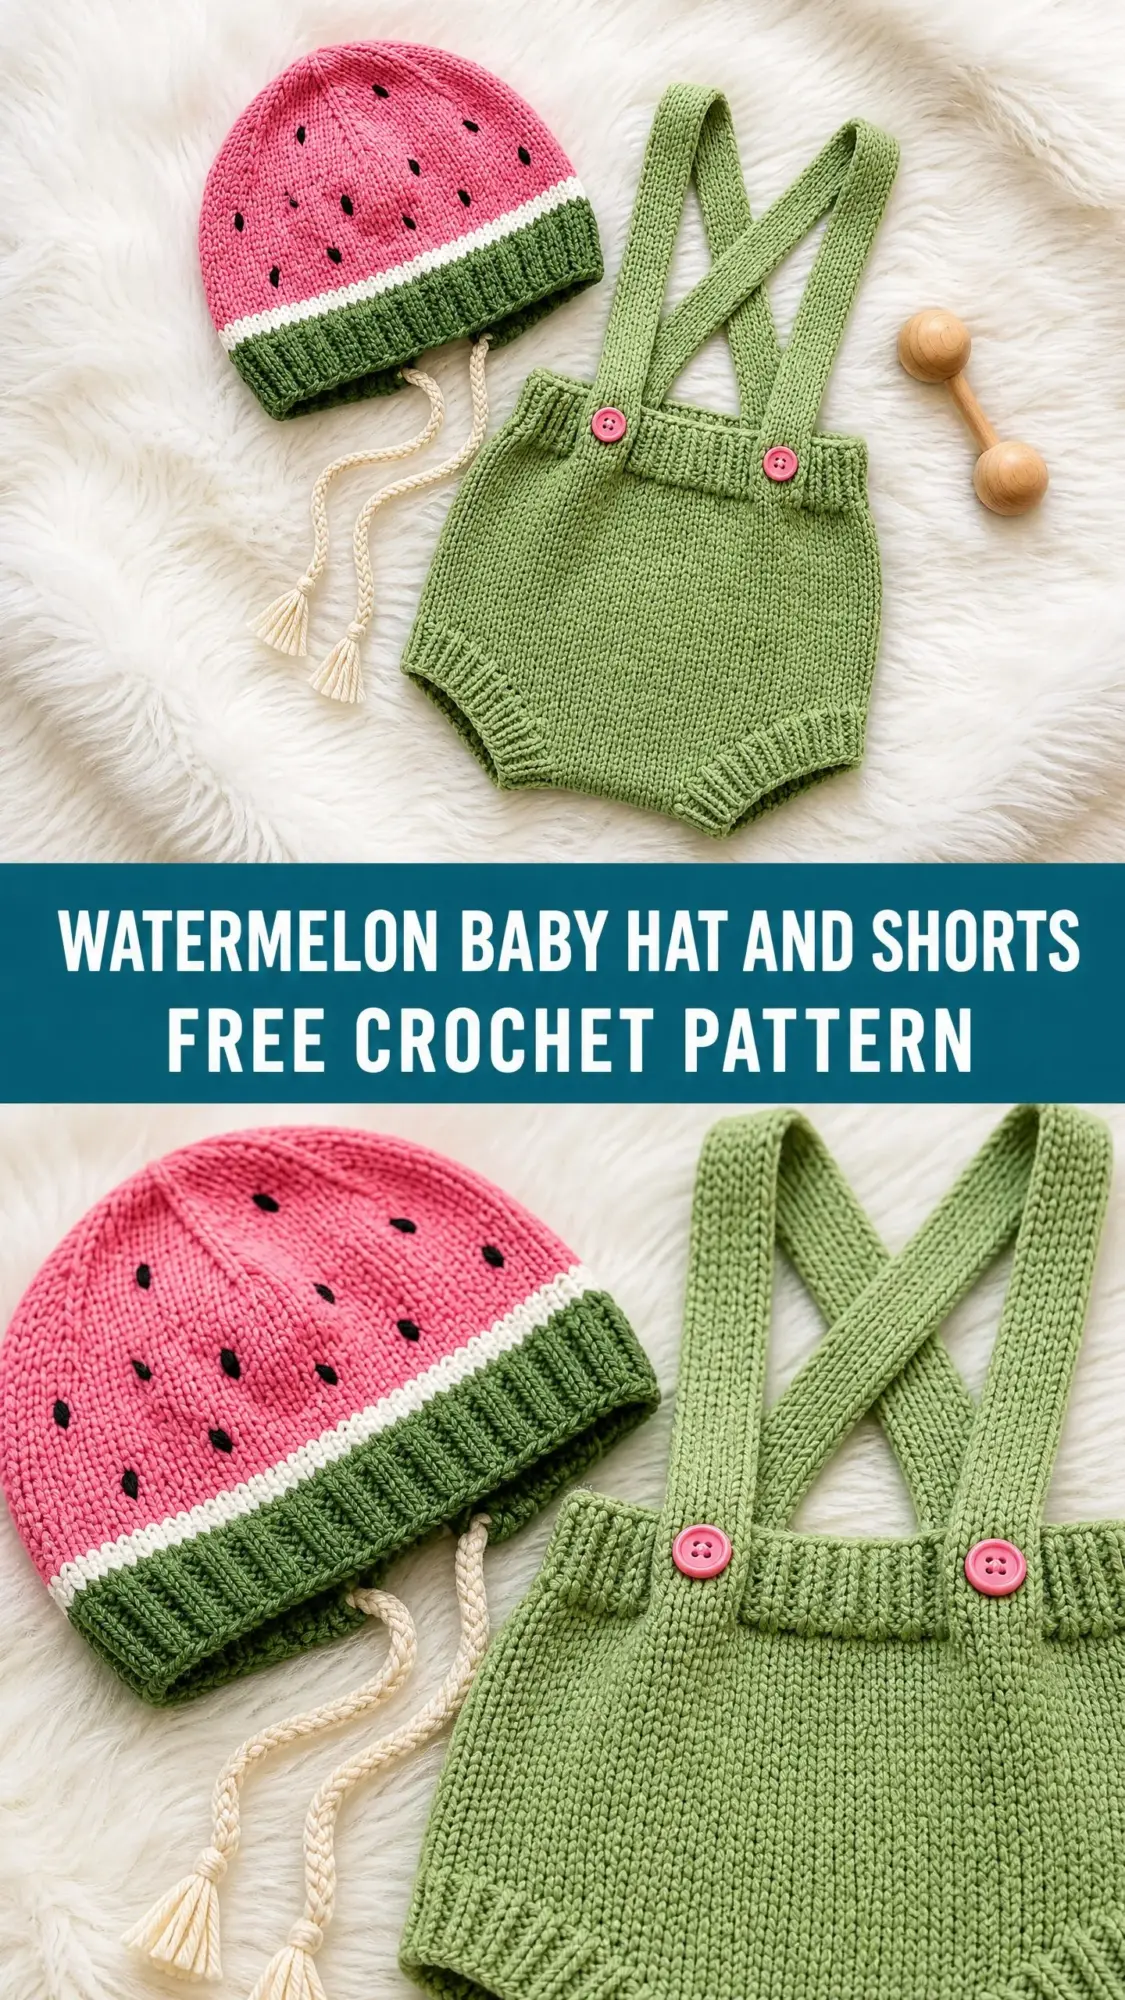
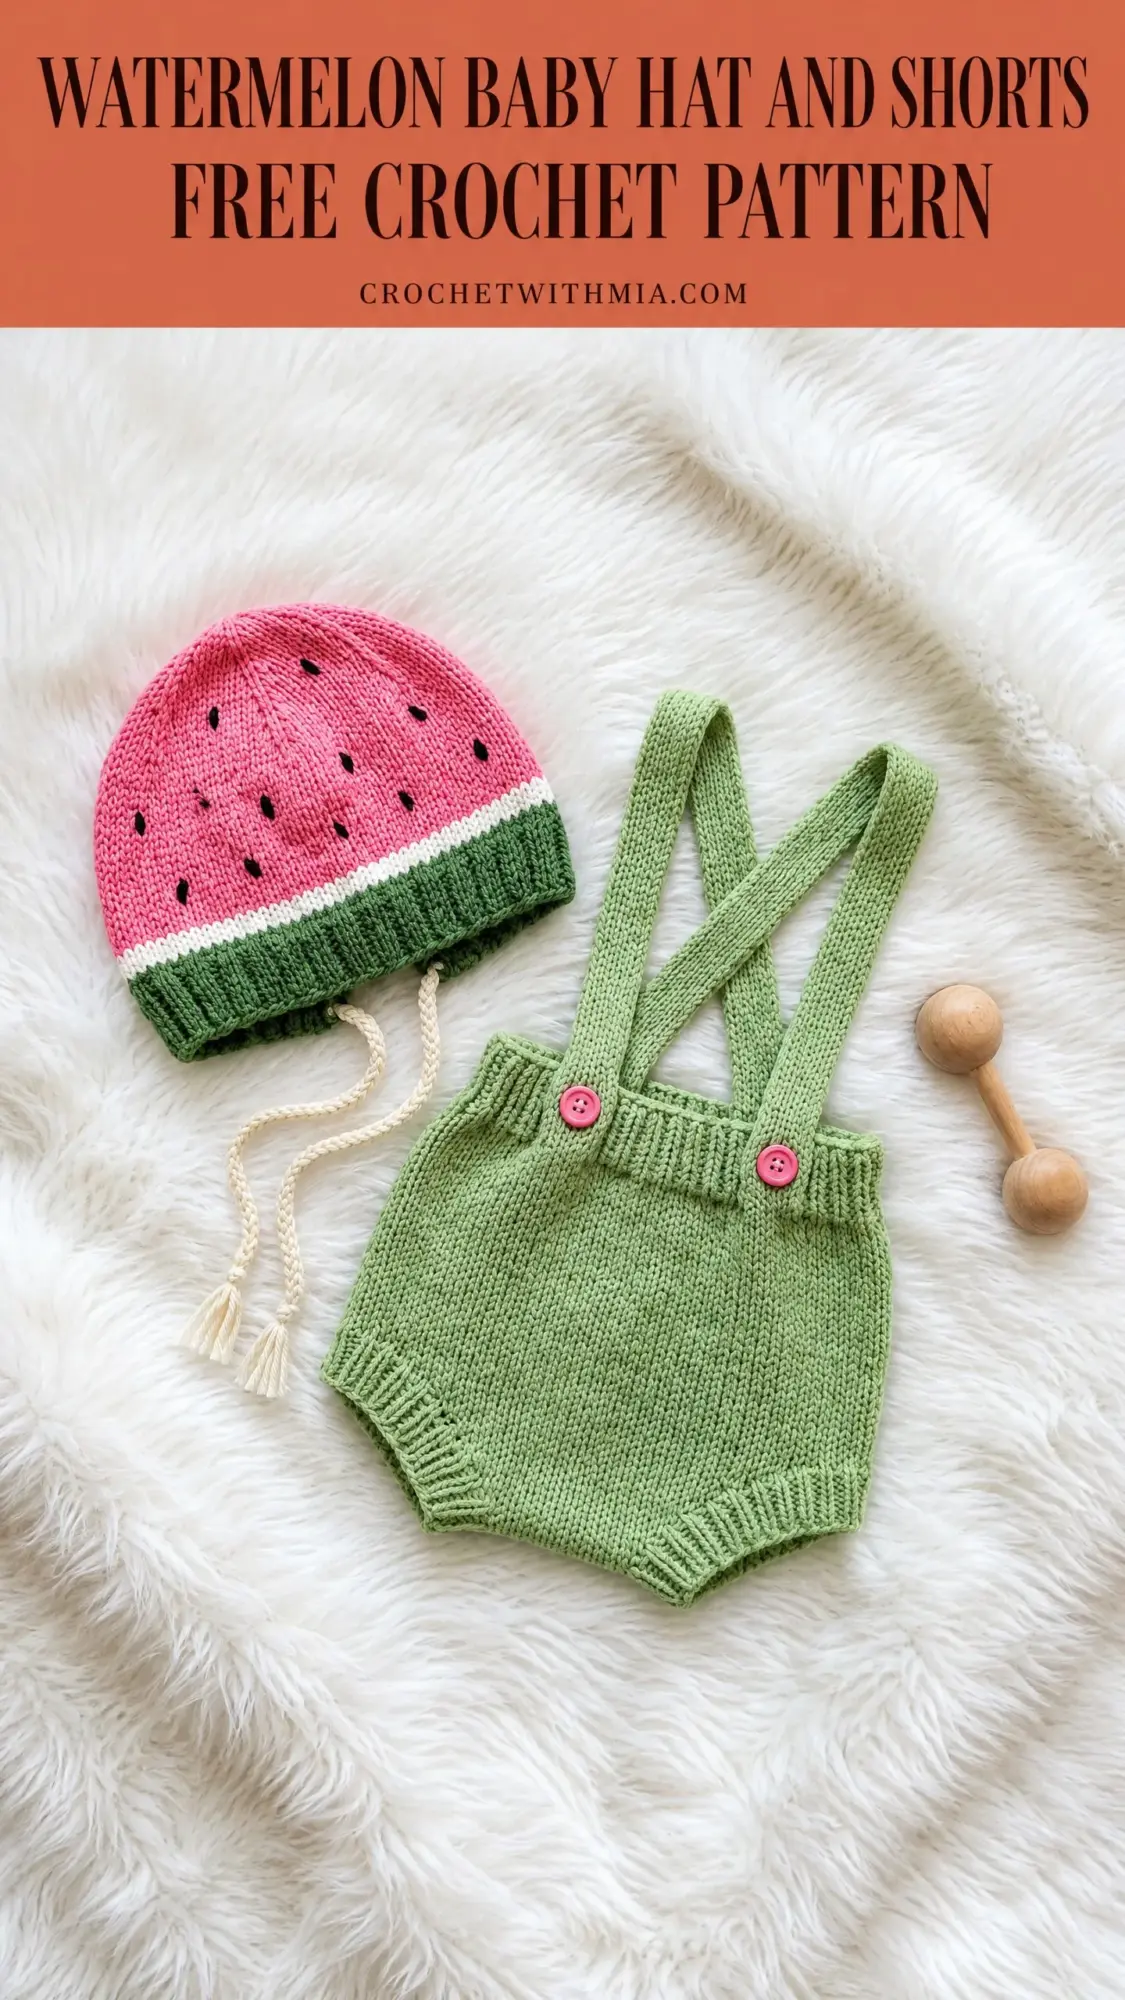
This coordinating hat and suspender shorts combo works up in single crochet throughout, which gives you that dense, almost knit-like fabric perfect for baby photos. The construction is straightforward but interesting. The hat builds from the crown down in a continuous spiral while the bloomers are worked in the round from the waist, then split and seamed at the crotch.
Fair warning though. This one sits solidly at intermediate level. You will need to be comfortable juggling multiple yarn colors, working increases and decreases for shaping, and doing some basic seaming and embroidery at the end. If that sounds like your wheelhouse, let’s get started.
Why This Watermelon Baby Set Works So Well
The genius of this design is how the colors layer to create that unmistakable watermelon slice look. Pink for the flesh, a thin white stripe for the inner rind, and green for the outer rind. Add some embroidered black seeds scattered across the pink section, and you have an instantly recognizable summer outfit.
The suspender shorts coordinate perfectly with the hat. They are worked entirely in green with pink button accents at the front strap attachments. Those buttons are decorative only, which means no fiddly buttonholes to worry about. The straps themselves are simple flat strips of single crochet that get sewn firmly in place.
This set sizes from newborn through 12 months, so you can make it for a baby shower gift, a first birthday photo session, or just because tiny watermelon outfits are objectively adorable.
Materials You Will Need
Gathering your supplies before you start will make the whole process smoother. Here is everything this pattern requires:
Yarn (DK weight):
Hook: US size G-6 / 4.0 mm
Notions:
Yarn suggestions: Paintbox Yarns Simply DK works beautifully for this project with excellent stitch definition. Lion Brand Pound of Love is a budget-friendly alternative. For a natural fiber option, Drops Safran in cotton gives lovely results and breathes well in warm weather.
Gauge Information
18 single crochet stitches by 20 rows equals 4 inches, worked in the round.
I cannot stress this enough. Gauge matters here. A hat that is even half an inch too small will not fit over baby’s head, and one that is too large will slide right off. Work a swatch before you begin and adjust your hook size if needed.
Finished Sizes
Newborn (0 to 3 months):
Hat circumference: 13 inches, Hat height: 5.5 inches
Shorts waist: 14 inches unstretched, Shorts length: 7 inches
3 to 6 months:
Hat circumference: 14 inches, Hat height: 6 inches
Shorts waist: 15 inches unstretched, Shorts length: 7.5 inches
6 to 12 months:
Hat circumference: 15 inches, Hat height: 6.5 inches
Shorts waist: 16 inches unstretched, Shorts length: 8 inches
Instructions are written for newborn size. Changes for larger sizes appear in parentheses: Newborn (3 to 6 months, 6 to 12 months).
Abbreviations and Stitch Definitions
Before we dive into the pattern, let me walk you through every stitch and abbreviation you will encounter.
ch means chain. This is your foundation stitch where you yarn over and pull through the loop on your hook.
sl st means slip stitch. Insert hook, yarn over, pull through both the stitch and the loop on your hook in one motion.
sc means single crochet. Insert hook in stitch, yarn over and pull up a loop (two loops on hook), yarn over and pull through both loops.
sc2tog means single crochet two together, which is a decrease. Insert hook in next stitch, pull up a loop, insert hook in following stitch, pull up a loop (three loops on hook), yarn over and draw through all three loops.
inc means increase. Work 2 single crochet stitches into the same stitch.
MR means magic ring (also called magic circle). This creates an adjustable starting ring that you can pull closed tightly.
BLO means back loop only. Instead of inserting your hook under both loops at the top of the stitch, you work into just the back loop. This creates a ridge on the fabric.
pm means place marker. sm means slip marker.
How to Make a Magic Ring
Make a loop with your yarn, leaving a 6-inch tail. Insert your hook through the loop. Yarn over with the working yarn and pull through to form a loop on your hook. Chain the number of stitches specified. Work the required stitches into the center of the ring. Pull the tail end firmly to close the ring tight.
Hat Pattern Instructions
Section 1: Crown (Color A, Pink)
Rnd 1: Using Color A, make MR. Work 6 sc into ring. Pull ring closed. (6 sc)
Rnd 2: Inc in each st around. (12 sc)
Rnd 3: (Sc in next st, inc in next st) 6 times. (18 sc)
Rnd 4: (Sc in next 2 sts, inc in next st) 6 times. (24 sc)
Rnd 5: (Sc in next 3 sts, inc in next st) 6 times. (30 sc)
Rnd 6: (Sc in next 4 sts, inc in next st) 6 times. (36 sc)
Rnd 7: (Sc in next 5 sts, inc in next st) 6 times. (42 sc)
Rnd 8: (Sc in next 6 sts, inc in next st) 6 times. (48 sc)
For newborn, skip to Section 2.
For 3 to 6 months:
Rnd 9: (Sc in next 7 sts, inc in next st) 6 times. (54 sc)
For 6 to 12 months:
Rnd 9: (Sc in next 7 sts, inc in next st) 6 times. (54 sc)
Rnd 10: (Sc in next 8 sts, inc in next st) 6 times. (60 sc)
Checkpoint: Your flat circle should measure approximately 4.25 inches across for newborn, 4.75 inches for 3 to 6 months, or 5.25 inches for 6 to 12 months.
Section 2: Body of Hat (Color A, Pink)
Continue with Color A. Work even rounds of sc with no increases or decreases.
Newborn: Work even for 10 rounds. (48 sc)
3 to 6 months: Work even for 11 rounds. (54 sc)
6 to 12 months: Work even for 12 rounds. (60 sc)
Section 3: White Rind Stripe (Color B, White)
Change to Color B at the end of the last pink round. To make a clean color change, work the last stitch of the old color until 2 loops remain on your hook, then pull through with the new color.
Work 2 rounds of sc even in Color B. Stitch count does not change.
Cut Color B, leaving a 6-inch tail.
Section 4: Green Rind Base (Color C, Green)
Join Color C.
Rnd 1: Sc in each st around. (48 sc) / (54 sc) / (60 sc)
Rnd 2: Sc in each st around. (48 sc) / (54 sc) / (60 sc)
Rnd 3: Sc in each st around. (48 sc) / (54 sc) / (60 sc)
Section 5: Green Rib Brim (Color C, Green)
The brim is worked in BLO to create a neat fold line.
Rnd 1 (BLO): Sc in BLO of each st around. (48 sc) / (54 sc) / (60 sc)
Rnd 2: Sc in each st around (both loops). (48 sc) / (54 sc) / (60 sc)
Rnd 3: Sc in each st around. (48 sc) / (54 sc) / (60 sc)
Sl st in next st to join. Fasten off, leaving a 6-inch tail.
Hat Finishing
Weave in all ends before starting the embroidery.
Seed embroidery: Using Color D and a tapestry needle, embroider 8 to 10 seeds scattered across the pink section. Each seed is approximately 3/8 inch long, slightly oval, and angled at a gentle diagonal. Space seeds randomly but evenly. Avoid the very top center and the bottom 2 rows of pink near the white stripe. Work each seed with 2 to 3 passes of the yarn to build thickness.
Chin ties: Cut 12 strands of cream yarn, each 14 inches long. Divide into two groups of 6 strands. For each group, fold all 6 strands in half. At the lower edge of the hat at one side, pull the folded loop through the edge stitch from outside to inside using your crochet hook. Pass the loose ends through the loop and pull to secure (a larks-head knot). Braid for approximately 3.5 inches. Tie an overhand knot at the end. Trim to form a small tassel.
Suspender Shorts Pattern Instructions
Section 1: Waistband (Color C, Green)
Foundation chain: Ch 64 (68, 72). Being careful not to twist, sl st in first ch to form a ring.
Rnd 1: Ch 1, sc in BLO of each ch around. Sl st to first sc to join. (64 sc) / (68 sc) / (72 sc)
Rnd 2: Ch 1, sc in each st around. Sl st to join. (64 sc) / (68 sc) / (72 sc)
Rnd 3: Ch 1, sc in each st around. Sl st to join. (64 sc) / (68 sc) / (72 sc)
Rnd 4: Ch 1, sc in each st around. Sl st to join. (64 sc) / (68 sc) / (72 sc)
Section 2: Bloomer Body (Color C, Green)
Continue working in the round without joining. Place marker in first stitch of each round.
Rnds 1 through 4: Sc in each st around. (64 sc) / (68 sc) / (72 sc)
Rnd 5 (increase round):
Newborn: (Sc in next 7 sts, inc in next st) 8 times. (72 sc)
3 to 6 months: (Sc in next 16 sts, inc in next st) 4 times. (72 sc)
6 to 12 months: (Sc in next 8 sts, inc in next st) 8 times. (80 sc)
Rnds 6 through 12: Sc in each st around. (72 sc) / (72 sc) / (80 sc)
Section 3: Crotch Shaping and Leg Openings
Mark the round by placing a marker at stitch 1 and at stitch 37 for newborn and 3 to 6 months. For 6 to 12 months, place markers at stitch 1 and stitch 41.
Front Panel:
Row 1 (RS): Starting at st 1, sc in next 36 sts (40 sts for 6 to 12 months). Ch 1, turn. (36 sc) / (36 sc) / (40 sc)
Row 2: Sc2tog at start of row, sc to last 2 sts, sc2tog. Ch 1, turn. (34 sc) / (34 sc) / (38 sc)
Row 3: Sc2tog at start of row, sc to last 2 sts, sc2tog. Ch 1, turn. (32 sc) / (32 sc) / (36 sc)
Row 4: Sc in each st across. Ch 1, turn. (32 sc) / (32 sc) / (36 sc)
Work 2 more rows even. Fasten off.
Back Panel:
Rejoin Color C at stitch 37 (or stitch 41 for 6 to 12 months).
Row 1 (RS): Sc in next 36 sts (40 sts for 6 to 12 months). Ch 1, turn. (36 sc) / (36 sc) / (40 sc)
Row 2: Sc2tog at start, sc to last 2 sts, sc2tog. Ch 1, turn. (34 sc) / (34 sc) / (38 sc)
Row 3: Sc2tog at start, sc to last 2 sts, sc2tog. Ch 1, turn. (32 sc) / (32 sc) / (36 sc)
Row 4: Sc in each st across. Ch 1, turn. (32 sc) / (32 sc) / (36 sc)
Work 2 more rows even. Fasten off.
Section 4: Seaming the Crotch
Fold front and back panels together with wrong sides facing. Using Color C and a tapestry needle, whipstitch the panels together along the row edges at the inner crotch for approximately 1.5 inches for newborn, 1.75 inches for 3 to 6 months, or 2 inches for 6 to 12 months.
Section 5: Leg Opening Edging (Color C, Green)
Join Color C at inner crotch seam of one leg opening.
Rnd 1: Work sc evenly around the leg opening. Aim for approximately 32 to 36 sts. Sl st to join.
Rnd 2: Ch 1, sc in BLO of each st around. Sl st to join.
Fasten off. Repeat for second leg opening.
Section 6: Suspender Straps (Make 2, Color C, Green)
Foundation: Ch 6.
Row 1: Sc in 2nd ch from hook, sc in each ch across. Ch 1, turn. (5 sc)
Rows 2 through 38 (42, 46): Sc in each st across. Ch 1, turn. (5 sc)
Final row: Sc in each st across. Fasten off, leaving a 10-inch tail.
Shorts Finishing and Strap Attachment
Place the shorts flat with right side facing. Position each strap approximately 2 inches in from the side edge on the front. The straps should overlap the waistband by about 3/4 inch.
Sew a pink button through both the strap and waistband at each front attachment point. Add a second decorative button above or below the first for that layered look.
On the back, whipstitch each strap end securely to both the inside and outside of the waistband. The straps can cross slightly at center back or sit parallel about 2 inches apart.
Care Instructions
Hand wash both pieces in cool water with mild soap. Lay flat to dry, shaping to the finished measurements. If you used acrylic yarn, you can machine wash on gentle in a mesh bag and tumble dry on low.
Time to Completion
Expect the hat to take 3 to 4 hours, the shorts 5 to 7 hours, and finishing about 1 to 2 hours. Total project time runs between 9 and 13 hours depending on your pace.
Thank you so much for choosing this pattern for your next project. I truly hope you enjoy making this sweet little watermelon set as much as I enjoyed designing it. If you make one, I would absolutely love to see it. Tag me on Instagram or share a photo in our Facebook group.
If this pattern made you smile, go ahead and save it to your Pinterest boards so you can find it easily when you are ready to cast on. And please drop a comment below if you make this set. Seeing your finished projects is honestly the best part of sharing patterns.