
THIS IS THE ONE. The sweater that makes people stop and ask, "Wait, you MADE that?" I am SO excited to share this pattern with you because it is genuinely one of the most stunning wearable art pieces I have ever created.
Yes, it is an advanced project. Yes, it takes time. But here is the thing: every single stitch is something you already know how to do. Single crochet, double crochet, chains, working in the round. That is it. The magic comes from how these simple stitches combine into something absolutely breathtaking.
If you have been crocheting for a while and you are ready to challenge yourself with something truly special, this is your project. Expect to spend around 60 to 90 hours from start to finish, but trust me, you will love every minute of watching this peacock come to life.
Why This Sweater Is Worth Every Hour
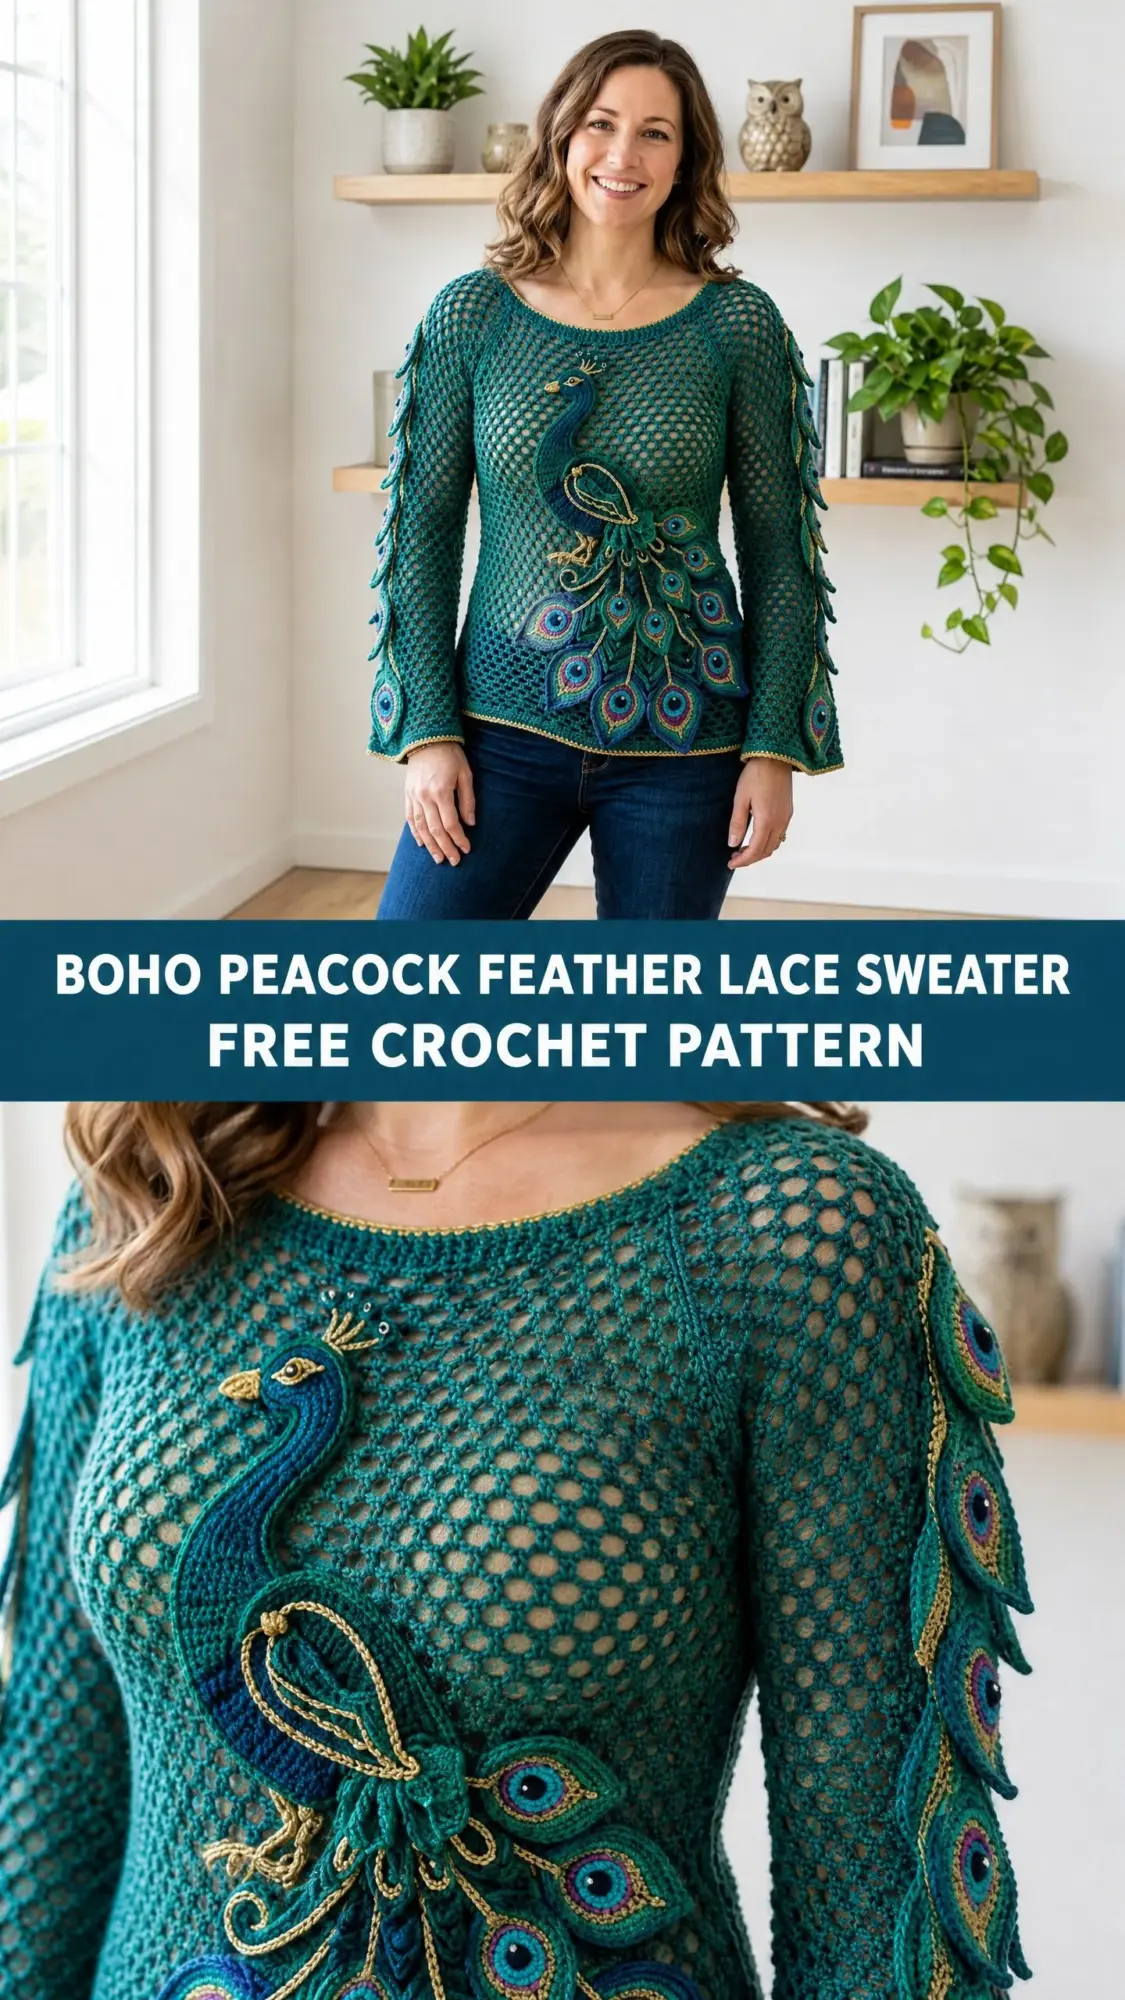
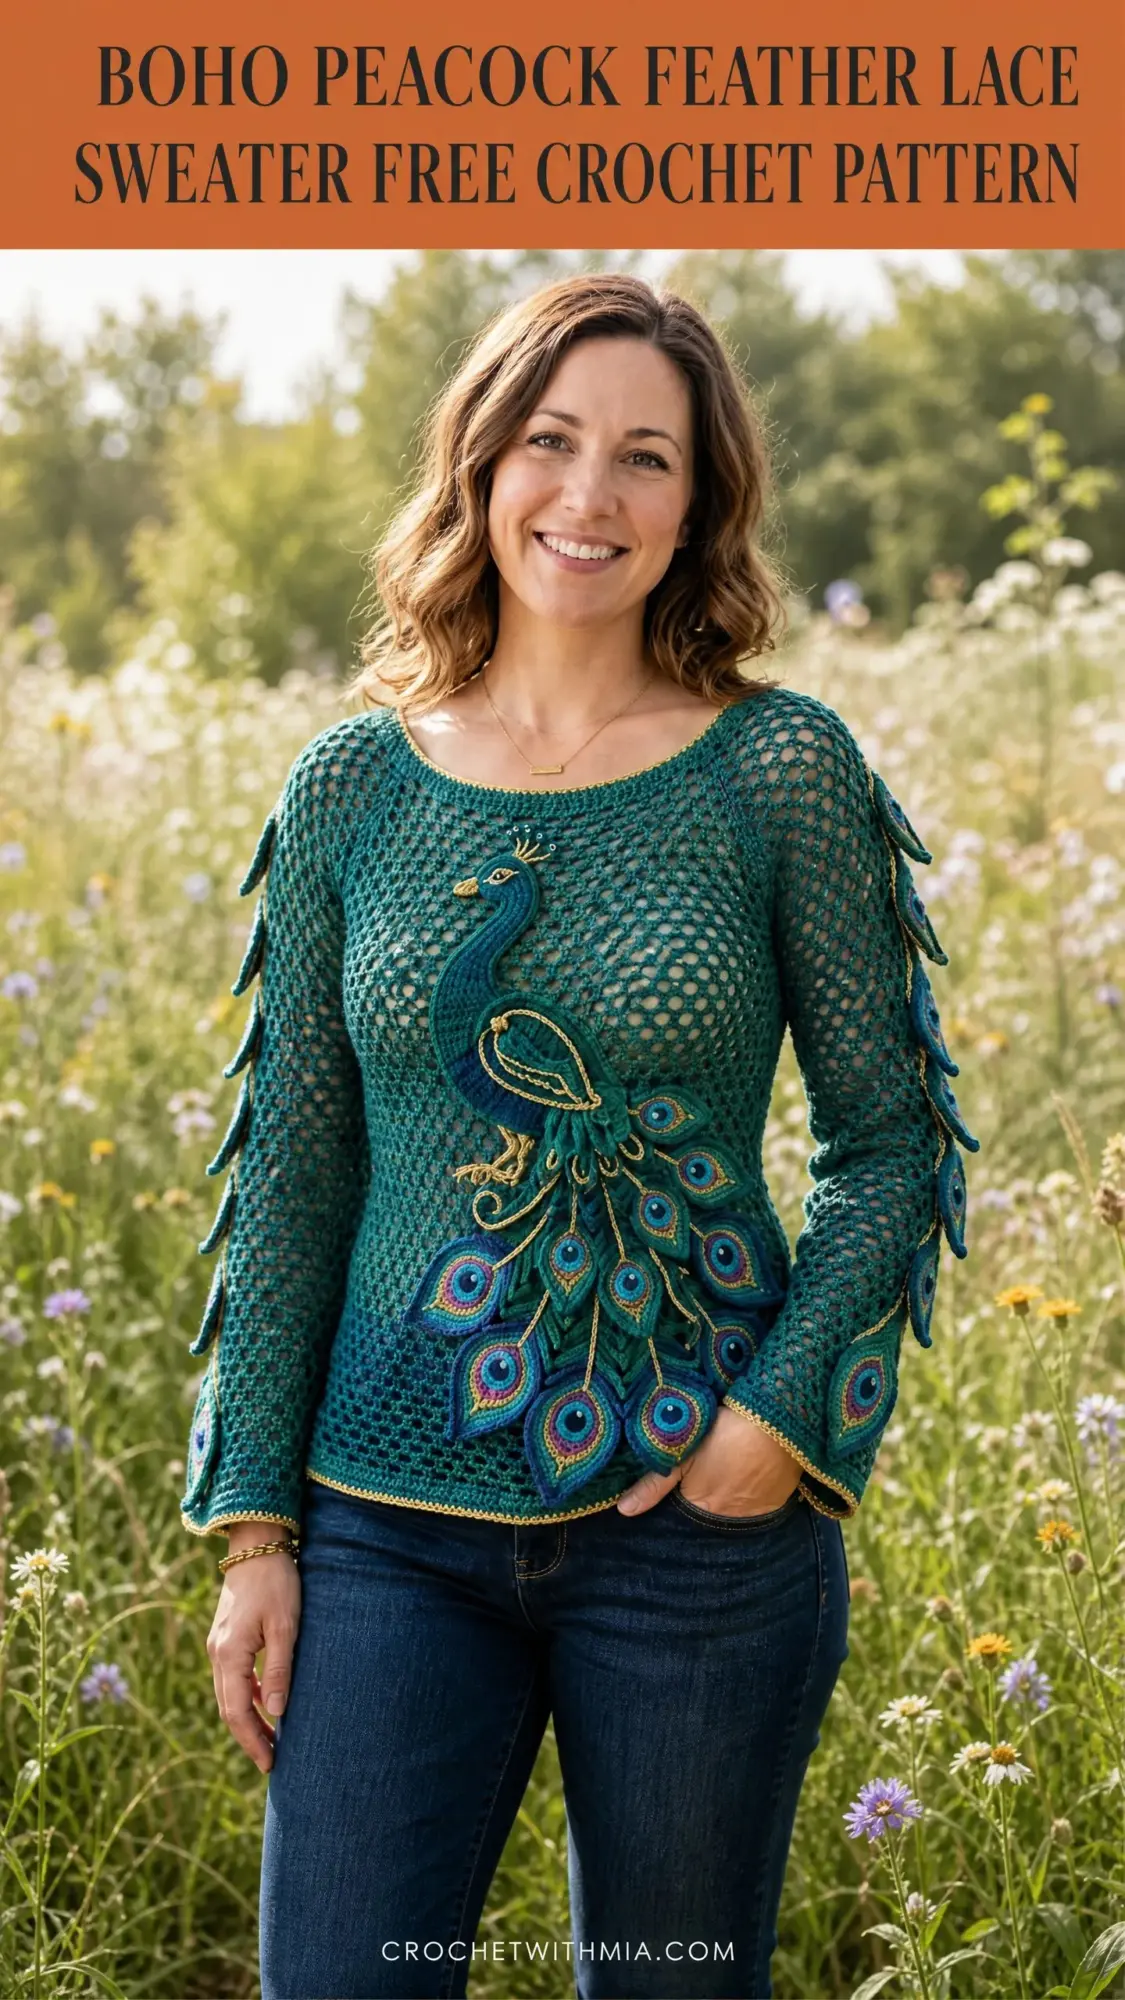
The Boho Peacock Feather Lace Sweater combines an airy hexagon mesh body with a dimensional peacock applique that cascades across the front. The sleeves feature those gorgeous leaf-shaped fringe elements that add movement and drama to every gesture you make.
What makes this pattern special is the construction method. You work the sweater body in flat pieces using an open mesh stitch, then create the peacock and all its feathers separately. Everything gets assembled at the end like a beautiful puzzle.
The peacock itself sits on the lower left of the front panel, with its magnificent tail feathers fanning out toward the side seam. Gold accents along the neckline, cuffs, and hem tie everything together with subtle shimmer.
Skill Level and Time Investment
This pattern is rated advanced, but do not let that intimidate you if you have intermediate experience. You need to be comfortable with:
The total time breaks down roughly like this: 20 to 30 hours for the mesh body and sleeves, 15 to 20 hours for the peacock body applique, and 25 to 40 hours for all the feather tail units and sleeve fringe elements.
Finished Measurements
This pattern includes full grading from XS through 2XL. All measurements refer to the finished garment with approximately 1 to 2 inches of positive ease.
XS: Bust 32 inches, length 22 inches, sleeve 24 inches
S: Bust 34 inches, length 22.5 inches, sleeve 24 inches
M: Bust 36 inches, length 23 inches, sleeve 24.5 inches
L: Bust 38 inches, length 23.5 inches, sleeve 25 inches
XL: Bust 40 inches, length 24 inches, sleeve 25 inches
2XL: Bust 44 inches, length 24.5 inches, sleeve 25.5 inches
Instructions throughout are written for size Medium with other size adjustments noted in parentheses in the order XS, S, M, L, XL, 2XL.
Materials You Will Need
Yarn
Main Color (MC): Deep Teal, approximately 900 (900, 1000, 1050, 1100, 1200) yards of DK weight yarn
Contrast Color A (CCA): Gold, approximately 80 yards
Contrast Color B (CCB): Navy Blue, approximately 60 yards
Contrast Color C (CCC): Royal Blue, approximately 60 yards
Contrast Color D (CCD): Teal (lighter than MC, for feather midtones), approximately 50 yards
Contrast Color E (CCE): Purple, approximately 40 yards
Contrast Color F (CCF): Magenta or Hot Pink, approximately 30 yards
Contrast Color G (CCG): Grass Green, approximately 30 yards
Recommended Yarn Options
Paintbox Yarns Simply DK works beautifully for this project. It is 100% acrylic with excellent stitch definition and takes blocking well. Budget-friendly and widely available online.
Cascade 220 Superwash Sport is a step up in luxury with gorgeous drape. The superwash treatment makes it safe for delicate machine washing, which helps with a garment that has this many yarn ends.
Hobbii Rainbow Cotton 8/4 provides excellent drape and structure for the open mesh, keeping the garment from stretching over time.
Choose a smooth DK or light worsted yarn with clear stitch definition and minimal halo. Fuzzy or bouclé yarns will obscure the mesh structure and applique detail.
Hooks
Notions
Gauge
With G-6 / 4.0 mm hook and MC, in Hexagon Mesh Pattern:
One mesh repeat (6 chains plus 1 single crochet) measures 1.25 inches wide. Six rows of mesh measure 3 inches tall.
Do not skip gauging this project. The open mesh will grow significantly with blocking and with the weight of the applique embellishments. Work a swatch of at least 5 full repeats wide by 8 rows tall, block it flat, and measure before cutting yarn.
Abbreviations
beg: beginning
ch: chain (yarn over, pull through loop on hook)
ch-sp: chain space (the gap created by a chain in the previous row)
dc: double crochet (yarn over, insert hook, pull up loop, yarn over, pull through 2 loops, yarn over, pull through remaining 2 loops)
hdc: half double crochet (yarn over, insert hook, pull up loop, yarn over, pull through all 3 loops)
MC: main color
CC: contrast color
pm: place marker
rep: repeat
rnd: round
RS: right side
sc: single crochet (insert hook, pull up loop, yarn over, pull through both loops)
sc2tog: single crochet decrease (insert hook in first stitch, pull up loop, insert hook in second stitch, pull up loop, yarn over, pull through all 3 loops)
sc3tog: single crochet 3 together (same concept, working into 3 stitches instead of 2)
sk: skip
sl st: slip stitch (insert hook, pull loop through stitch and loop on hook)
sp: space
st(s): stitch(es)
t-ch: turning chain
WS: wrong side
yo: yarn over
Special Stitches and Techniques
Hexagon Mesh Pattern
This creates the beautiful open lace texture of the sweater body. It is worked flat over a multiple of 6 chains plus 4.
Foundation Chain: Work a multiple of 6 chains plus 4.
Row 1 (RS): Sc in 2nd ch from hook, ch 5, sk 5 ch, sc in next ch, rep from to across, ch 1, turn.
Row 2: Ch 5, sc in center of next ch-5 sp, rep from to across, ending with sc in last sc, ch 1, turn.
Repeat Row 2 for pattern. Each ch-5 arch creates one hexagon mesh cell. The sc anchors sit in the center of the arch below.
Peacock Eye Motif
This creates the stunning eye spots on each feather. Worked in the round.
Rnd 1: With CCB (navy), make a magic ring, ch 1, work 6 sc into ring, sl st to first sc to join. (6 sc)
Rnd 2: Ch 1, work 2 sc in each sc around, sl st to join. (12 sc)
Rnd 3: Join CCC (royal blue), ch 1, sc in next st, 2 sc in next st, rep 6 times, sl st to join. (18 sc)
Rnd 4: Join CCE (purple), ch 1, sc in next 2 sts, 2 sc in next st, rep 6 times, sl st to join. (24 sc)
Rnd 5: Join CCF (magenta), ch 1, sc in next 3 sts, 2 sc in next st, rep 6 times, sl st to join. (30 sc)
Fasten off, leaving a long tail for attaching to feather unit.
Peacock Feather Unit
This creates the individual tail feathers. The feather unit is worked from the eye outward into an elongated teardrop shape with a central rib.
Step 1: Complete one Peacock Eye Motif through Rnd 5. Do not fasten off.
Step 2: With CCD (lighter teal), ch 1, sc evenly around the eye motif picking up the back loop only of each st, creating a smooth ridge at the edge. Work 30 sc total around. Sl st to join. (30 sc)
Step 3: With MC (deep teal), work an elongated point by working back and forth in short rows. Find the top center of the eye motif (this will become the bottom of the feather tip). Join MC at this point.
Row 1: Ch 1, sc in next 5 sts, ch 1, turn. (5 sc)
Row 2: Sc2tog, sc in next 1 st, sc2tog, ch 1, turn. (3 sc)
Row 3: Sc in next 3 sts, ch 1, turn. (3 sc)
Row 4: Sc3tog. (1 sc)
Fasten off.
Step 4: With CCA (gold), surface slip stitch a central stem line from the tip of the feather point up through the center of the eye motif. The stem should be approximately 1.5 inches long on small feathers and up to 2.5 inches on large feathers.
Large Peacock Feather Units
For the lower front tail feathers, work the Peacock Eye Motif through Rnd 6 before beginning the elongated point.
Rnd 6: Join CCG (grass green), ch 1, sc in next 4 sts, 2 sc in next st, rep 6 times, sl st to join. (36 sc)
Then proceed with Steps 2 through 4 using the 36-stitch base.
Sleeve Leaf Fringe Element
With MC and E-4 / 3.5 mm hook, ch 14.
Row 1: Starting in 2nd ch from hook, sc in next 2 ch, hdc in next 3 ch, dc in next 3 ch, hdc in next 3 ch, sc in last 2 ch. Do not turn. Work along the opposite side of the foundation chain: sc in next 2 ch, hdc in next 3 ch, dc in next 3 ch, hdc in next 3 ch, sc in last 2 ch. Sl st to first sc to close. (26 sts total around)
Fasten off with a long tail for attaching. Make 24 total (12 per sleeve).
Peacock Body Applique
Body Section
With CCD (lighter teal), ch 20.
Row 1 (RS): Sc in 2nd ch from hook, sc across. Ch 1, turn. (19 sc)
Row 2: 2 sc in first st, sc to last st, 2 sc in last st. Ch 1, turn. (21 sc)
Row 3: 2 sc in first st, sc to last st, 2 sc in last st. Ch 1, turn. (23 sc)
Rows 4-5: Sc across. Ch 1, turn. (23 sc)
Row 6: Sc2tog, sc to last 2 sts, sc2tog. Ch 1, turn. (21 sc)
Row 7: Sc2tog, sc to last 2 sts, sc2tog. Ch 1, turn. (19 sc)
Row 8: Sc across. Ch 1, turn. (19 sc)
Row 9: Sc2tog, sc to last 2 sts, sc2tog. Ch 1, turn. (17 sc)
Row 10: Sc2tog, sc to last 2 sts, sc2tog. Ch 1, turn. (15 sc)
Row 11: Sc2tog, sc to last 2 sts, sc2tog. Ch 1, turn. (13 sc)
Row 12: Sc2tog, sc across to last 2 sts, sc2tog. (11 sc)
Fasten off. This is the main body oval.
Neck and Head Section
With CCB (navy), ch 9.
Row 1: Sc in 2nd ch from hook, sc across. Ch 1, turn. (8 sc)
Row 2: 2 sc in first st, sc to last st, 2 sc in last st. Ch 1, turn. (10 sc)
Rows 3-4: Sc across. Ch 1, turn. (10 sc)
Row 5: Sc2tog, sc across to last 2 sts, sc2tog. Ch 1, turn. (8 sc)
Row 6: Sc2tog, sc to last 2 sts, sc2tog. Ch 1, turn. (6 sc)
Row 7: Sc across. (6 sc)
Fasten off.
Head Circle
With CCB, make a magic ring, ch 1, work 6 sc into ring, sl st to join. (6 sc)
Rnd 2: Ch 1, 2 sc in each st, sl st to join. (12 sc)
Rnd 3: Ch 1, sc in next st, 2 sc in next st, rep 6 times, sl st to join. (18 sc)
Fasten off.
Crest Feathers
Make 5. With CCA (gold), ch 8. Starting in 2nd ch from hook, sl st, sc, hdc, dc, hdc, sc, sl st. Fasten off.
Wing
With CCC (royal blue), ch 15.
Row 1: Sc in 2nd ch from hook, sc in next 5 ch, hdc in next 4 ch, dc in next 3 ch, 3 dc in last ch. Working back along the opposite side of the foundation chain: dc in next 3, hdc in next 4, sc in next 5, sc in last. Ch 1, turn. (30 sts total)
Row 2 (RS): Sl st across first 3 sts, sc in next 4, hdc in next 4, dc in next 4, hdc in next 4, sc in next 4, sl st in last 3. (30 sts)
Fasten off.
Sweater Construction
Back Panel
With MC and G-6 hook, ch 88 (82, 88, 94, 100, 112).
Foundation Row: Sc in 2nd ch from hook, ch 5, sk 5 ch, sc in next ch, rep across. Ch 1, turn.
For size M: 14 mesh repeats across.
Work in Hexagon Mesh Pattern (Row 2 repeated) for 30 rows total.
Checkpoint: After Row 30, the back panel should measure approximately 15 inches wide and 15 inches tall (size M) before blocking.
Armhole Shaping:
Row 31: Sl st across first 1.5 mesh repeats (approximately 8 stitches), ch 1, then continue in mesh pattern across until 1.5 repeats remain at the end of the row, leave those unworked. Ch 1, turn.
For size M, you now have 11 mesh repeats across.
Continue in mesh pattern without shaping for 18 rows.
Shoulder and Neckline Shaping:
Work across first 3.5 mesh repeats, ch 1, turn. Work 2 rows even over this shoulder section. Fasten off.
Rejoin yarn at center and skip center 4 mesh repeats for back neck. Join yarn at right shoulder marker and work 3.5 mesh repeats for 2 rows. Fasten off.
Front Panel
With MC and G-6 hook, ch 88 (82, 88, 94, 100, 112).
Work exactly as back panel through Row 30 (same stitch count and row count).
Work armhole shaping identically to back panel.
Continue in mesh pattern for 12 rows after armhole shaping.
Front Neckline Shaping:
Row 43: Work across first 3.5 mesh repeats, ch 1, turn. Leave remaining stitches unworked. (3.5 mesh repeats, left shoulder)
Rows 44-48: Dec 0.5 repeats at neck edge every other row until 3 mesh repeats remain. Work even to match back shoulder length. Fasten off.
Rejoin yarn 4 mesh repeats from right edge for right front shoulder. Work symmetrically to left shoulder. Fasten off.
Sleeves (Make 2)
With MC and G-6 hook, ch 46 (46, 46, 52, 52, 58).
Foundation Row: Sc in 2nd ch from hook, ch 5, sk 5 ch, sc in next ch, rep across. Ch 1, turn.
For size M: 7 mesh repeats.
Rows 2-5: Work even in mesh pattern. (7 mesh repeats)
Sleeve Increase Row: At the beginning of this row, after turning, ch 8 (this adds one full mesh repeat to the left edge), sc in 2nd ch from hook, ch 5, sk 5, sc, then continue in pattern across. At the end of the row, work sc into the last sc as normal, then ch 5, sc into the base of that last sc post to add one repeat to the right edge. Ch 1, turn. (9 mesh repeats)
Work 4 rows even. (9 mesh repeats)
Repeat the increase row again. (11 mesh repeats)
Work 4 rows even. (11 mesh repeats)
Work 1 final increase row. (13 mesh repeats)
Work even until sleeve measures 18 inches from cuff foundation (approximately 36 rows).
Sleeve Cap Shaping:
Row 37: Sl st across first 1.5 mesh repeats, continue in pattern until 1.5 repeats remain, leave those unworked. Ch 1, turn. (10 mesh repeats)
Row 38: Sl st across 0.5 repeats, continue across until 0.5 repeats remain, leave those unworked. Ch 1, turn. (9 mesh repeats)
Rows 39-42: Dec 1 mesh repeat total at each end across these 4 rows. (7 mesh repeats after Row 42)
Rows 43-45: Continue decreasing 0.5 repeats at each end every row. (5.5 mesh repeats after Row 45)
Fasten off.
Cuff Bell Edge
After working the Foundation Row of each sleeve, join CCA, ch 1, sc evenly across the foundation chain edge, placing 1 sc in each chain space and 1 sc in each sc anchor point for a total of approximately 43 sc across size M. Then work a picot along this edge: sl st in next 3 sc, ch 3, sl st in same sc as last sl st, rep across. Fasten off CCA.
Assembly and Finishing
Seaming
Block all four pieces before seaming. See blocking notes below.
With MC threaded on a tapestry needle, use mattress stitch to join the shoulder seams first, matching the mesh repeats carefully.
Set in the sleeves: fold each sleeve in half lengthwise to find the center top of the sleeve cap, pin this center point to the shoulder seam, then pin the sleeve cap to the armhole opening evenly on both sides. Mattress stitch the sleeve cap into the armhole.
Seam the side seams and sleeve underarm seams in one continuous seam from the hem to the cuff on each side.
Neckline Border
With CCA and E-4 hook, join yarn at the right shoulder seam.
Round 1: Ch 1, sc evenly around the entire neckline opening. For size M, work approximately 72 sc. Sl st to first sc to join. (72 sc)
Round 2: Ch 1, sc in next 4 sc, sc2tog, rep 12 times around, sl st to join. (60 sc)
Fasten off.
Hem and Sleeve Cuff Border
With CCA and E-4 hook, join at side seam at hem.
Work 1 round of sc evenly around hem: approximately 168 sc for size M. Sl st to join. Fasten off.
For cuffs, work 1 round of sc around each cuff opening: approximately 42 sc per cuff for size M. Sl st to join. Fasten off.
Applique Construction and Attachment
Feather Count
Large Peacock Feather Units: 5 units (approximately 4 inches from tip to stem top)
Medium Peacock Feather Units: 9 units (approximately 3 inches)
Small Peacock Feather Units: 8 units (approximately 2 inches)
Sleeve Leaf Fringe Elements: 24 total (12 per sleeve)
Peacock Body Assembly
Attach the neck section to the upper narrow end of the body oval using a tapestry needle and matching yarn, whip stitching through the edge stitches. Attach the head circle to the top of the neck section. Attach the wing flat over the right side of the body. Attach the five crest feathers standing at slight angles from the top of the head. Work gold surface embroidery lines around the wing edge and along the neck.
Placement Guide
Position the assembled peacock body on the front panel with the feet approximately 4 inches above the hem, centered slightly left of center. Arrange the large tail feathers fanning from the lower right side of the peacock body, spreading diagonally toward the lower right and side seam. The tail fans in an arc approximately 13 inches wide and 14 inches tall. Fill in with medium and small feather units between the large ones.
Stitch all applique pieces down with matching yarn using small invisible whip stitches.
Sleeve Fringe Attachment
Place the first leaf fringe element 4 inches above the cuff border, centered on the outer edge of the sleeve. Attach subsequent leaf elements every 2 rows (approximately 1 inch apart) up the outer sleeve edge, stopping 4 inches below the shoulder seam.
Blocking and Care
Wet blocking is strongly recommended. Submerge the assembled sweater in cool water with gentle soap. Press out excess water without wringing. Lay flat on blocking mats and pin to finished measurements. Allow to dry fully, at least 24 hours.
Care: Hand wash in cool water with gentle detergent. Lay flat to dry. Do not tumble dry. Store folded flat rather than hanging.
Pattern Notes and Tips
The mesh will open significantly during blocking, so do not panic if your pieces look small before wet blocking. Trust the gauge swatch you made at the beginning.
When attaching the peacock applique, pin everything in place first and step back to check the arrangement before you start stitching. Take photos from different angles. This helps you catch any asymmetry before it is permanent.
For the gold surface embroidery, work slowly and keep your stitches even. This detail is what takes the peacock from "nice" to "stunning."
I know this project is a big commitment, but the result is a genuine showstopper. You will wear this sweater for years and collect compliments every single time.
I hope this crochet pattern brings you as much joy to make as it did for me to design. If you create your own Boho Peacock Feather Lace Sweater, please save this pattern to your Pinterest boards so you can find it easily when you are ready to start. And I would absolutely love to see your finished piece. Drop a comment below or tag me on social media. Happy hooking!