
I’ve been looking for the perfect transitional layer for ages. Something that drapes beautifully, works up in a reasonable timeframe, and makes me look like I have my life together. This Ocean Blue Coastal Poncho is my new favourite find.
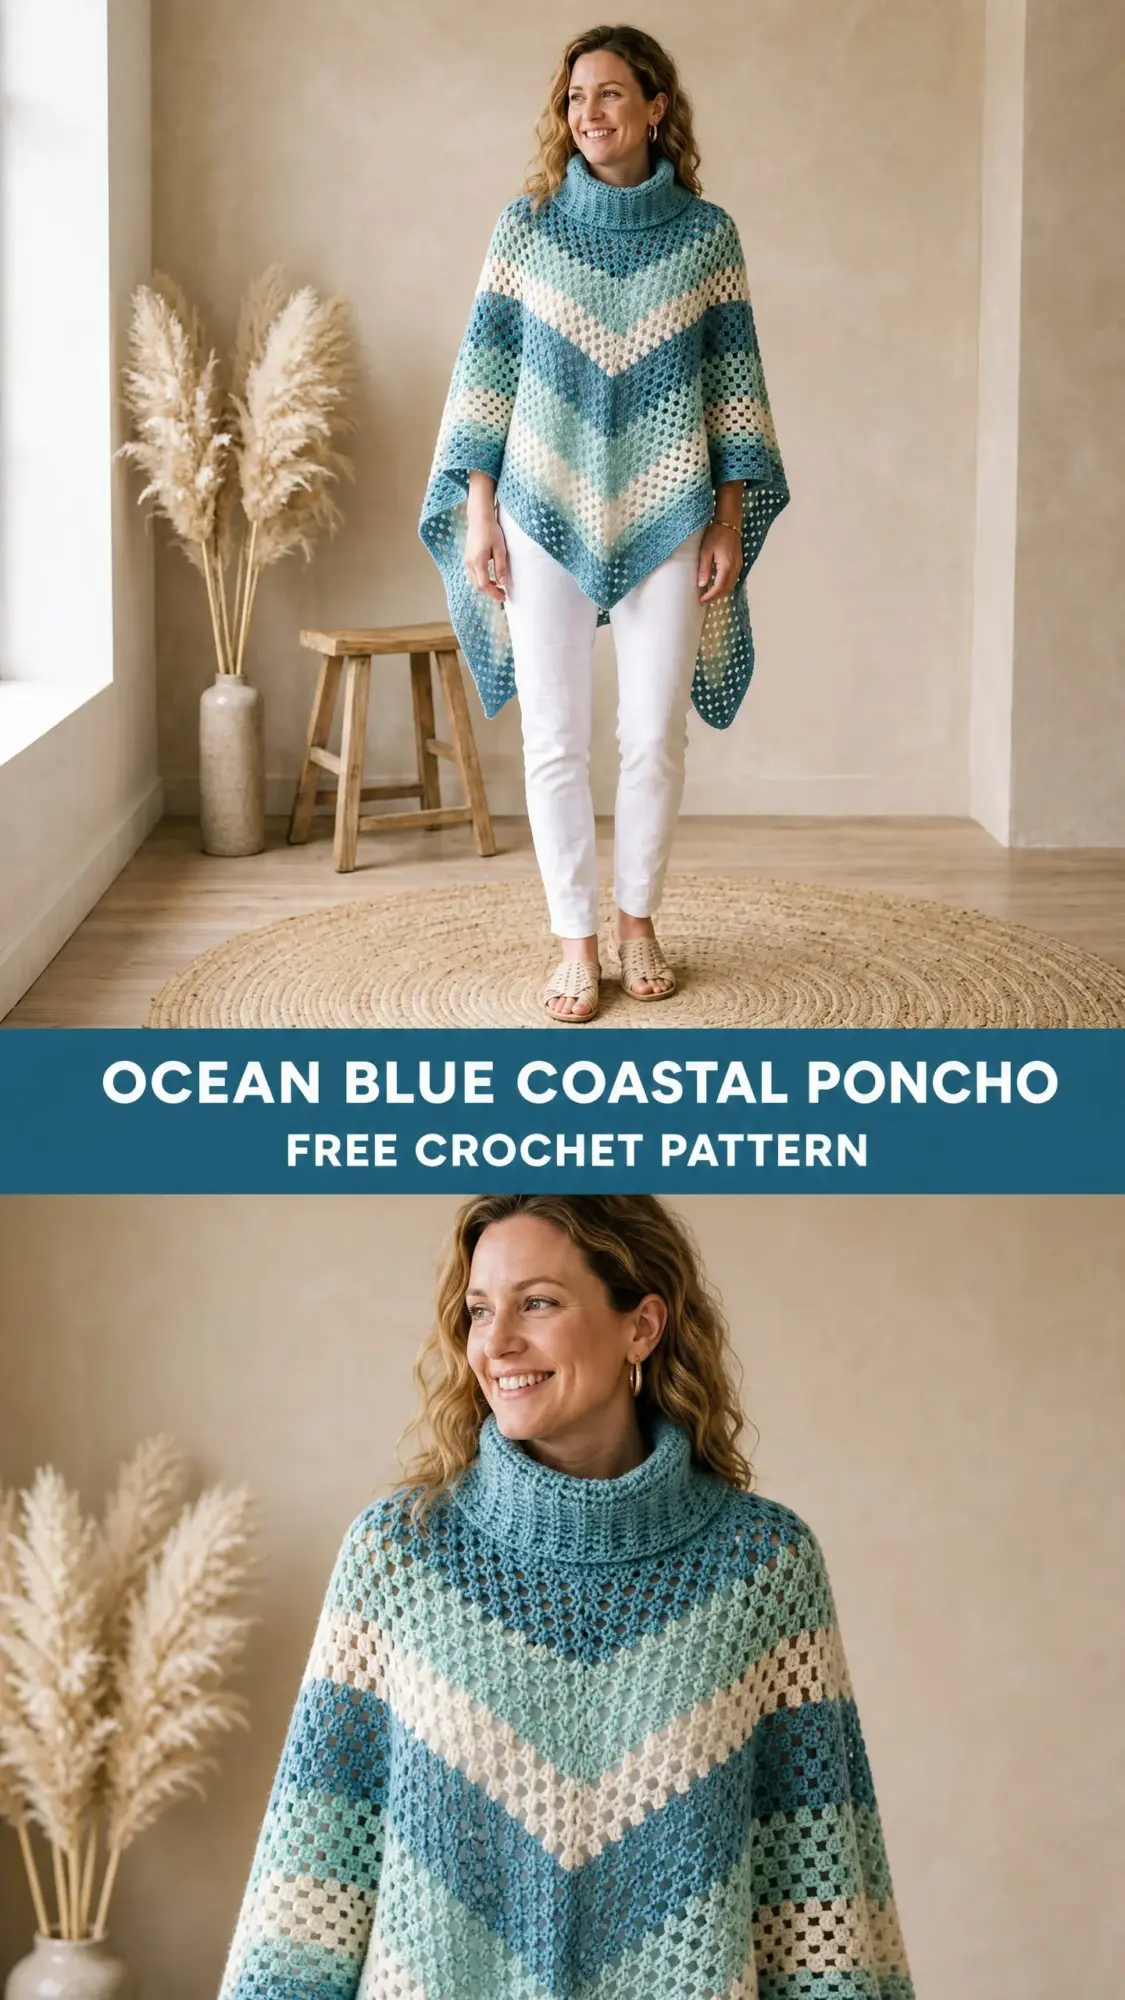
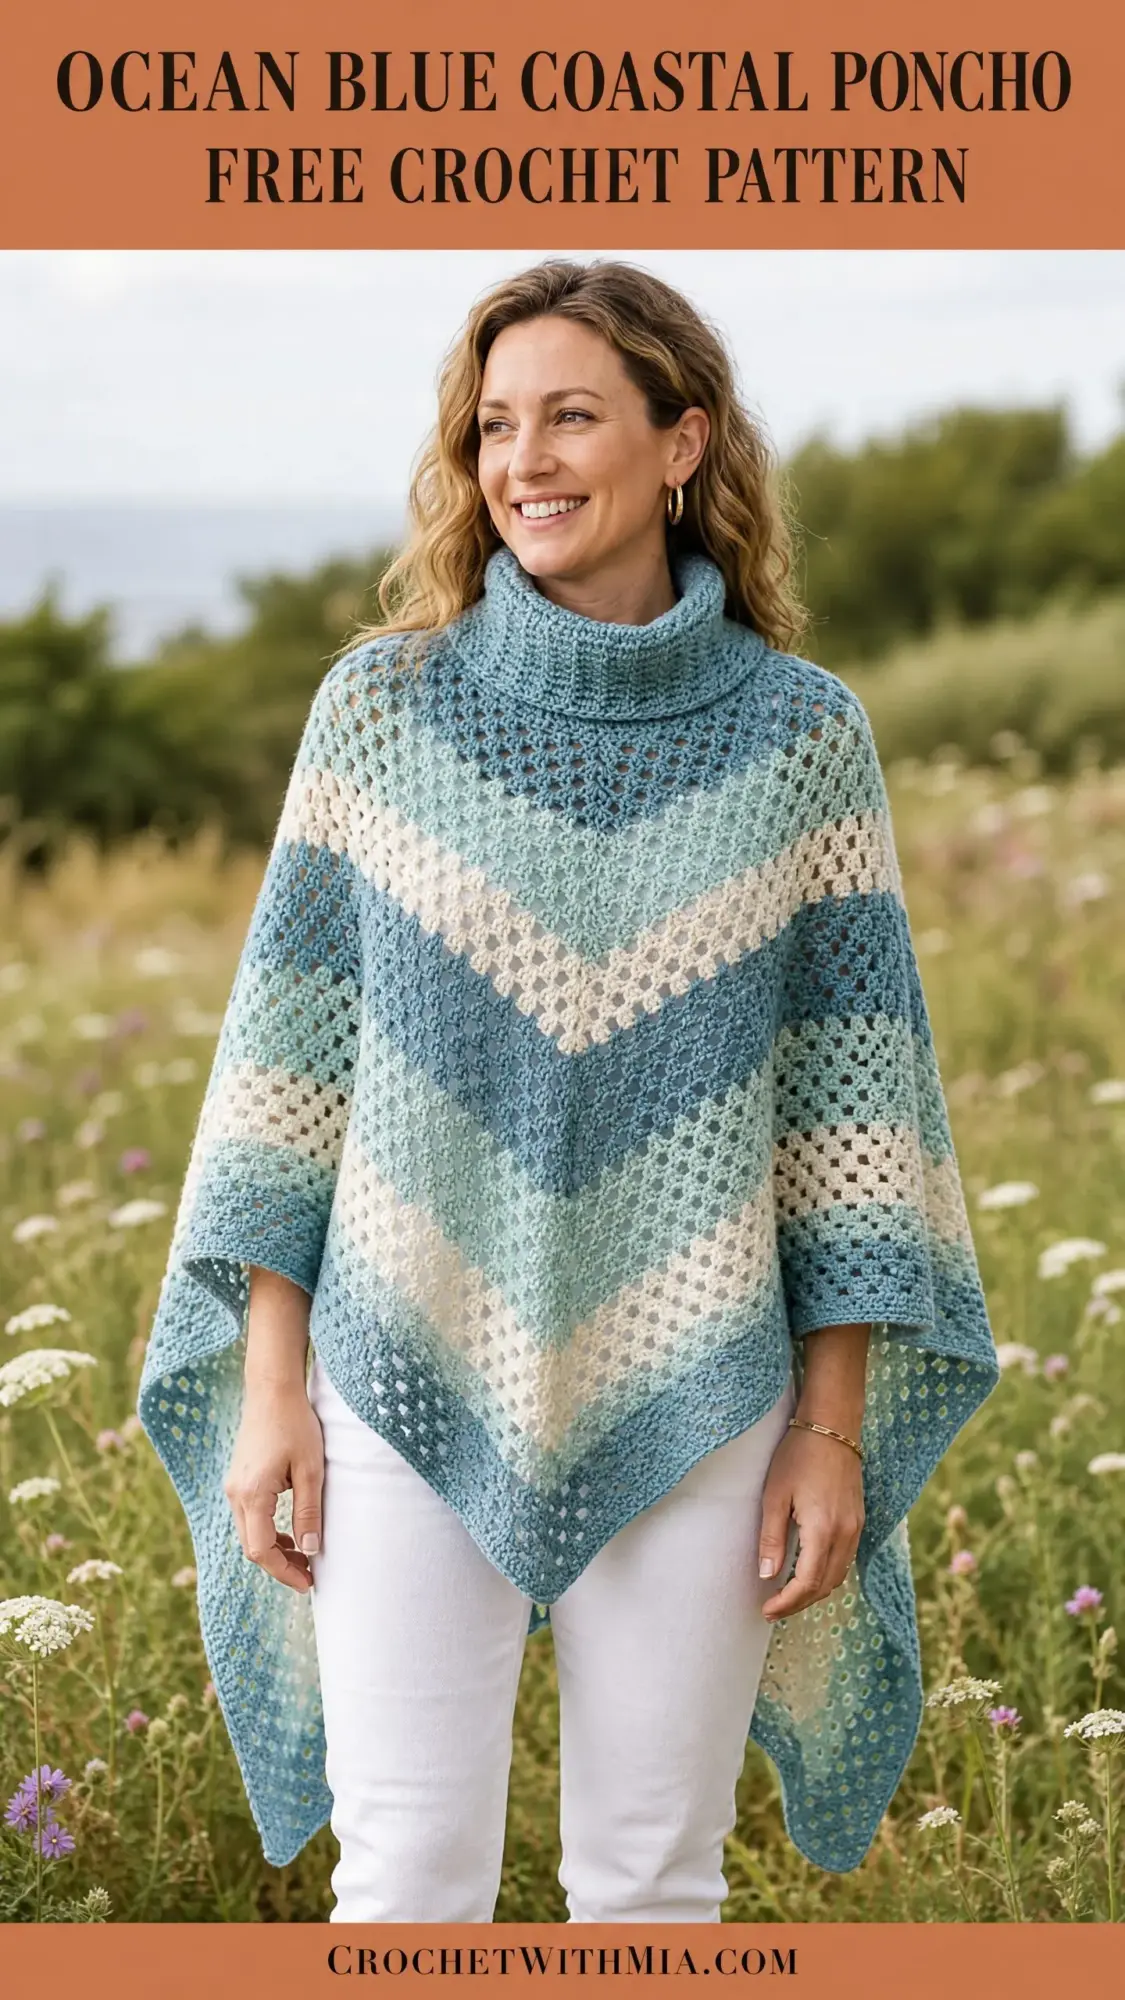
The color palette alone sold me. Deep ocean teal fading through aqua and sage to creamy ivory, then back again. It captures that layered look of coastal water in the most wearable way possible. And here’s what I love most: the dramatic chevron effect comes entirely from clever color placement and smart seaming, not from any tricky stitch manipulation.
If you’ve got some gorgeous medium weight yarn in your stash that’s been waiting for the right project, this is it. The construction is simpler than it looks. Two flat rectangles, one easy mesh stitch, and a cozy turtleneck collar to finish it off. Let me walk you through everything you need to know.
Why This Crochet Pattern Works So Well
The Ocean Blue Coastal Poncho uses a relaxed, oversized silhouette that flatters just about everyone. Each panel measures 26 inches wide by 26 inches tall before seaming. When you join them at the shoulders and along one side, you get that signature V-shaped front drop and those beautiful points at the hem.
The secret to this design is the grid mesh stitch. It’s essentially single crochet stitches separated by chain-1 spaces, creating an airy, open texture throughout. The fabric has wonderful drape without being too heavy. Perfect for three-season wear.
What really makes this poncho special is how the chevron illusion forms. You’re not increasing or decreasing anywhere in the body panels. The stripes run horizontally across each rectangle. When you seam the panels together at perpendicular angles, horizontal stripes on one panel meet vertical stripes on the other. The intersection creates that gorgeous V-pattern automatically. Clever, right?
Skill Level and Time Commitment
I’d call this an intermediate level project. The stitch itself is absolutely beginner-friendly. But you’ll need confidence with reading color-change sequences, joining yarn cleanly, seaming two panels accurately, and picking up stitches for a worked-in-the-round collar.
No advanced shaping required. The main challenge is maintaining consistent tension across many rows so your chevron stripes line up beautifully.
Plan for approximately 18 to 26 hours of work, including finishing. That’s spread across comfortable crafting sessions, not marathon crochet days. If you’re someone who likes to weave in ends as you go rather than carrying yarn up the sides, add a bit more time for all those color changes.
Materials You’ll Need
Yarn: Medium weight (category 4) in three colors
A note about Color C: The original design uses a self-striping or hand-dyed ombre yarn that moves through light aqua, sage green, and medium teal. This produces that soft blended look between the bold ivory chevron stripes. A solid medium teal works perfectly well too, giving you a cleaner, more graphic result.
Hook: US Size K-10.5 / 6.5 mm
Additional supplies:
Yarn Suggestions
Lion Brand Pound of Love works beautifully here. One skein of deep teal for Color A, one skein of off-white for Color B. For Color C, Lion Brand Mandala or Mandala Ombre in a coastal colorway gives you those gorgeous blended aqua-sage tones.
Caron Simply Soft is another excellent choice. Grab 2 skeins of deep teal for Color A, 1 skein of off-white for Color B, and 2 skeins of mid-aqua or ombre for Color C.
Paintbox Yarns Simply DK held double creates beautiful stitch definition with a slightly lighter drape. Just double your yardage calculations when substituting.
Any smooth medium weight yarn will work. Avoid very fuzzy or textured yarns because the mesh grid stitch loses its lovely open character when the stitches blur together.
Gauge Information
With US Size K-10.5 / 6.5 mm hook and medium weight yarn:
14 mesh stitches wide by 14 rows tall = 4 inches / 10 cm square in the Grid Mesh Stitch pattern.
To check your gauge, chain 32. Work Row 1: single crochet (sc) in 2nd chain from hook, then work (chain 1, skip 1 chain, sc in next chain) across, turn. Repeat Row 1 for 14 rows total. Block lightly and measure the center 4 inches, avoiding the edge stitches where tension tends to vary.
Gauge matters here. If your swatch is too big, go down a hook size. Too small, go up. Getting the right gauge ensures your finished poncho measures correctly and the panels match up when you seam them.
Abbreviations and Stitch Definitions
Let me walk you through every abbreviation before we start. I’ll define each one with a plain-English explanation so you know exactly what to do.
Special Stitches Explained
Grid Mesh Stitch (Worked Flat)
This creates a regular open grid of single crochets separated by chain-1 spaces. Every stitch and every chain space counts as one unit across the row.
Foundation row: Chain an even number.
Row 1 (RS): Sc in 2nd ch from hook, (ch 1, skip 1 ch, sc in next ch) across, turn.
Row 2 (WS): Ch 1, sc in first sc, (ch 1, skip ch-1 sp, sc in next sc) across, turn.
Repeat Row 2 for pattern. Each sc sits directly above the sc of the previous row. Each ch-1 sp sits directly above the ch-1 sp of the previous row. It’s wonderfully rhythmic once you get going.
Hdc Ribbing (For the Collar)
Round 1: Ch 2 (does not count as a stitch), hdc in each st around, sl st to first hdc to join.
Round 2: Ch 2, hdc-tbl in each hdc around, sl st to first hdc to join.
Repeat Round 2 for the ribbing texture. Working through the back loop only creates those raised vertical ribs that give the collar its stretchy, snuggly feel.
Color Changes
To switch colors cleanly, work the last sc of the row until 2 loops remain on your hook. Drop the current color to the wrong side without cutting. Pull the new color through both loops to complete the sc. Turn and continue with the new color.
Carry unused yarn loosely up the side edge when colors alternate every 1 to 3 rows. Cut and rejoin when the gap between uses is 4 or more rows.
Ocean Blue Coastal Poncho Pattern Instructions
Panel (Make 2)
Foundation Chain:
With Color A, chain 182.
Row 1 (RS): Sc in 2nd ch from hook, (ch 1, skip 1 ch, sc in next ch) across to end, turn.
(91 sc, 90 ch-1 sp = 181 working units across)
Here’s how to count: The foundation chain of 182 gives you 181 working stitches in Row 1 because the 2nd chain from hook becomes your first sc. You’ll have 91 sc with 90 ch-1 spaces between them. This count stays constant for all 90 rows.
Row 2 (WS): Ch 1, sc in first sc, (ch 1, skip ch-1 sp, sc in next sc) across, turn. (91 sc, 90 ch-1 sp)
Rows 3 through 90: Repeat Row 2, following the stripe color sequence below.
The turning chain is ch 1 and does not count as a stitch. The first sc of every row goes into the first sc of the previous row.
Stripe Color Sequence
This is where the magic happens. Follow this exactly for both panels so your chevrons match perfectly when you join them.
If you’re using a self-striping ombre for Color C, just work those sections continuously from the same skein. Let the color shift naturally. The slight variation between panels adds to the handcrafted charm.
After completing all 90 rows, fasten off and weave in ends. Make the second panel identically.
Checkpoint: Each finished panel should measure 26 inches / 66 cm wide and 26 inches / 66 cm tall after light blocking. If yours doesn’t match, check your gauge before moving on.
Assembly Instructions
This is where your two rectangles become a poncho. Take your time here.
Lay both panels flat with right sides facing up. Orient them so the stripe direction runs horizontally on both. Think of each panel as having four edges: Top, Bottom, Left, and Right.
Shoulder Seam
Rotate Panel 2 so that its Right edge aligns with the Top edge of Panel 1. Place both panels with right sides together. The Top edge of Panel 1 (26 inches wide) meets the Right edge of Panel 2 (26 inches tall).
Before seaming, mark the center 8 inches / 20 cm of the joining edge on both panels with stitch markers. This center section stays OPEN as your neck opening.
Using a yarn needle and Color A (or a crochet hook with slip stitch seaming), join the two panels along 9 inches / 23 cm on the left portion. Leave the center 8 inches open. Then join the remaining 9 inches / 23 cm on the right portion.
The math: 9 + 8 + 9 = 26 inches total edge length.
Side Seam
With panels now connected at the shoulder, fold the assembly so the raw Left edge of Panel 1 aligns with the raw Left edge of Panel 2, right sides together. This creates your side seam.
Before seaming, mark the arm opening. Measure down 14 inches / 35.5 cm from the shoulder seam along this edge. Leave this top 14 inches OPEN as the arm opening. Seam the remaining 12 inches / 30.5 cm closed.
Fasten off, weave in ends, and turn right side out.
Checkpoint: The poncho should now sit on your shoulders with the open neck in the center, the chevron V visible at front and back, and clear arm openings on each side. The front panel should hang approximately 22 inches from shoulder to point.
Turtleneck Collar
The collar is worked in the round using half double crochet ribbing.
Setup: Work a foundation round of sc evenly around the neck opening. Insert your hook into the edge stitches and chain spaces along all four edges of the opening. Aim for exactly 80 sc evenly distributed to give you a number divisible by 2 for ribbing. Adjust up or down by a stitch or two as needed. Join with sl st to first sc. (80 sc)
Round 1: Ch 2 (does not count as a stitch), hdc in each sc around, sl st to first hdc to join. (80 hdc)
Round 2: Ch 2, hdc-tbl in each hdc around, sl st to first hdc to join. (80 hdc)
Rounds 3 through 25: Repeat Round 2. (80 hdc each round)
After 25 rounds of ribbing, the collar measures approximately 10 inches / 25.5 cm tall. Fasten off, leaving a 12-inch tail for weaving. Fold the collar in half to the outside for a turtleneck look, or wear it standing upright.
Checkpoint: The collar should sit comfortably without pulling or gaping. If it feels tight, rip back and add 4 to 6 more pickup stitches. If it gaps, reduce by 4 to 6 stitches.
Outer Border
With the right side of the assembled poncho facing and Color A, attach yarn at one of the lower side points.
Work 1 round of sl st evenly along all outer edges, inserting your hook into each stitch or chain space along straight edges. Work 2 sl sts into each corner point to let the fabric turn without puckering.
At the arm openings, you can leave them unbordered for a clean, relaxed look.
Join with sl st to first sl st. Fasten off and weave in all remaining ends.
Size Customization Tips
To make the poncho wider: Add stitches to the foundation chain in multiples of 2. Each additional 2 chains adds approximately 0.57 inches. For 4 extra inches per panel, chain 196 instead of 182.
To make the poncho longer: Add rows to each panel. Each row adds approximately 0.29 inches. For 4 extra inches, add 14 rows. Extend the stripe sequence by repeating middle Color A or Color C bands.
For a smaller bust: Reduce each panel to 22 inches wide by chaining 154.
For a larger bust: Increase each panel to 30 inches wide by chaining 210. Consider widening the neck opening to 9 inches if needed.
Blocking and Finishing
Wet blocking gives the best results. Soak the finished poncho in cool water with a bit of wool wash for 20 minutes. Gently press out water without wringing. Lay flat on blocking mats, stretch to correct dimensions, and pin those points firmly. Allow 12 to 24 hours to dry completely.
Steam blocking works well for acrylic yarns. Hold your iron 1 inch above the fabric and apply steam gently. Never press directly onto crochet fabric.
After blocking, the mesh grid opens up beautifully and your chevron lines look crisp and defined.
Care Instructions
Machine wash on a gentle cycle in cool water if your yarn label permits. Lay flat to dry. Never tumble dry or hang dry, as hanging causes uneven stretching. Store folded rather than on a hanger.
I really hope you love making this Ocean Blue Coastal Poncho as much as I loved writing up this crochet tutorial. The finished piece is so satisfying to wear, with that beautiful drape and those gorgeous coastal colors.
If this pattern speaks to you, go ahead and save it to your Pinterest boards so you can find it when you’re ready to start. And please, leave a comment below if you make one. I’d absolutely love to see your color choices and finished ponchos!