
I don’t know about you, but I have a serious weakness for bag charms. They’re the perfect way to add personality to a plain tote or make your keys easy to spot at the bottom of your purse. This sweet little floral charm combines delicate cherry blossom style flowers with a tiny branch and leaves, creating a dainty accessory that looks far more complicated than it actually is.
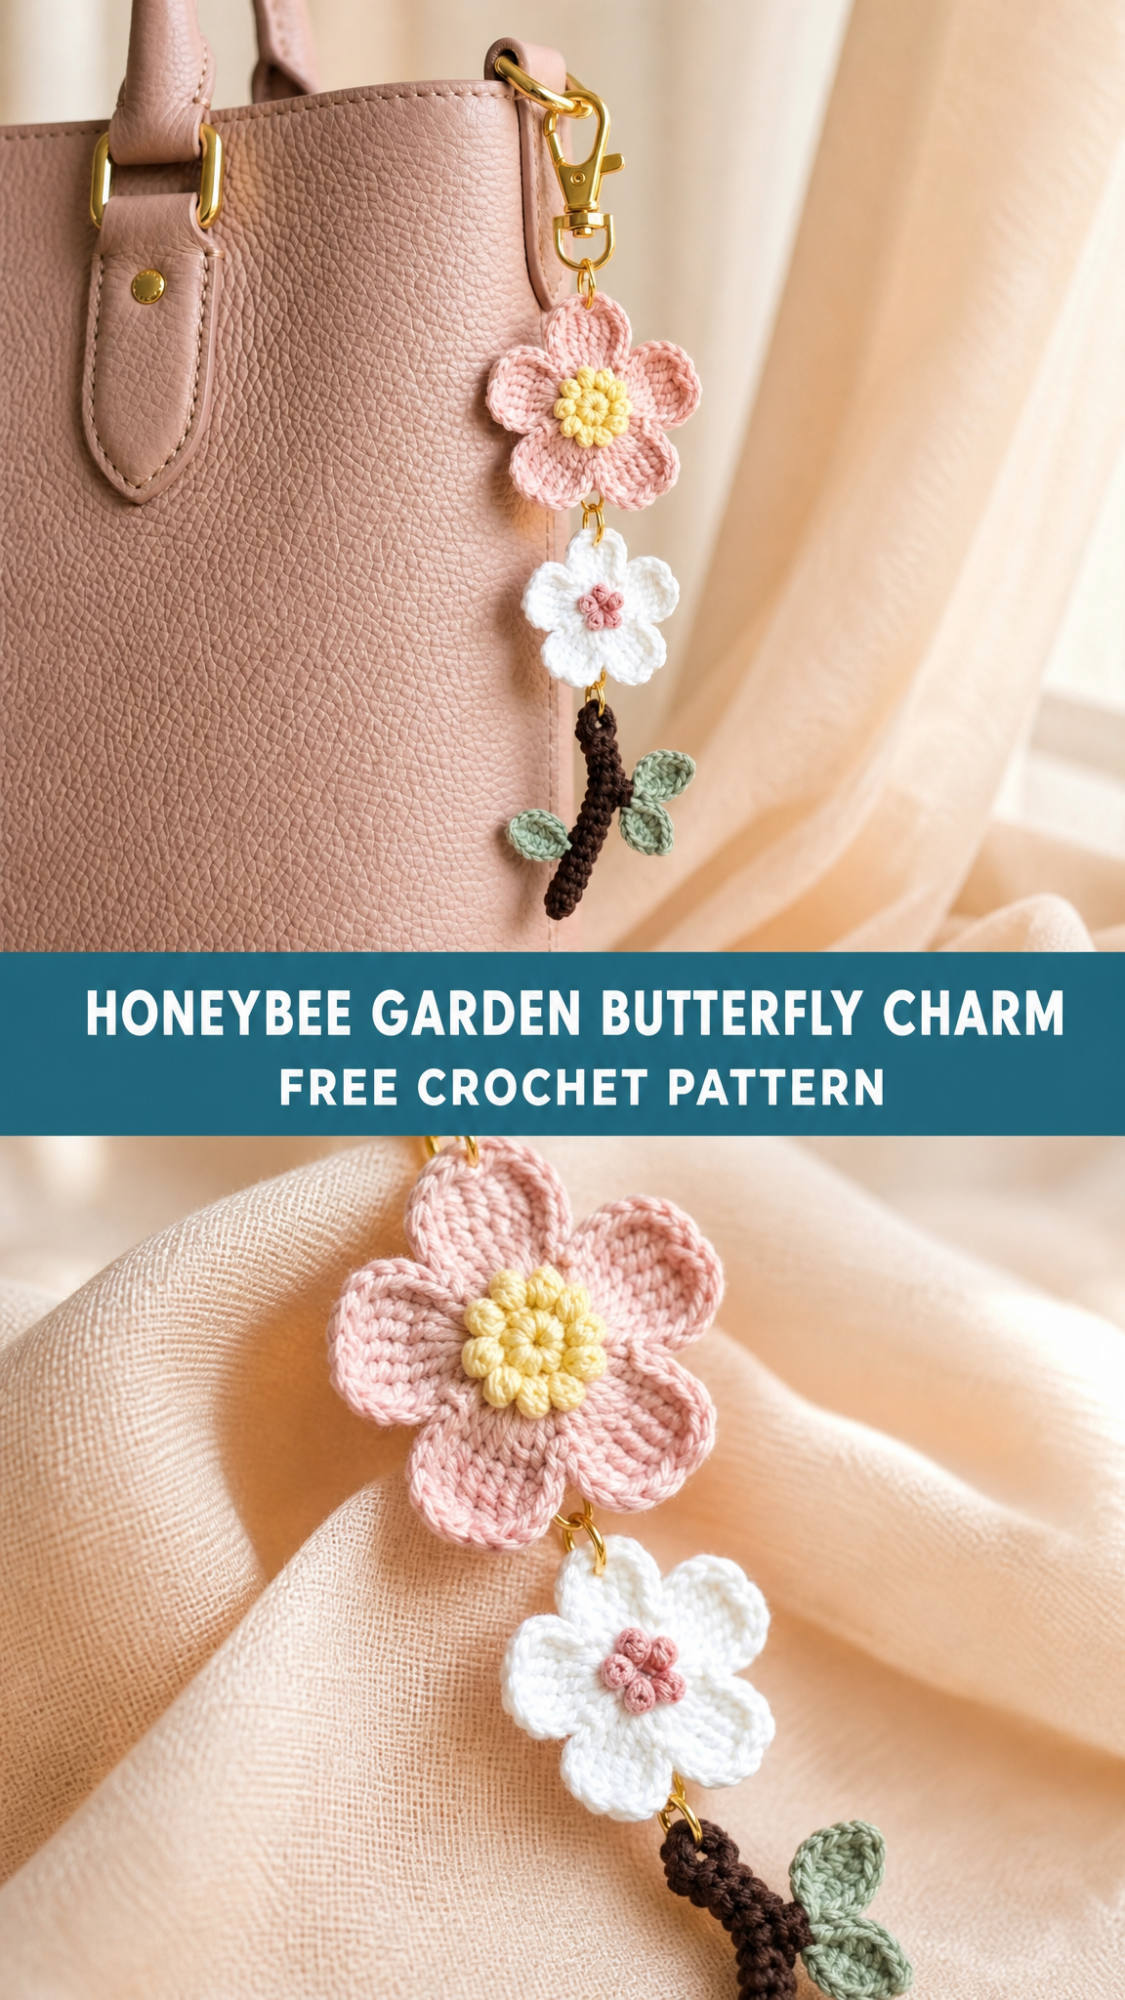
This crochet flower keychain pattern works up in about an hour once you get the hang of the petal construction. The layered design features a larger pink five petal flower on top, a smaller white flower beneath it, and a charming crocheted branch with miniature leaves at the bottom. All the pieces connect with small jump rings to create that lovely cascading effect.
Why You’ll Love This Crochet Flower Charm Pattern
This project hits all the right notes for crafters who want something beautiful without a massive time commitment. The finished charm measures approximately 5 inches from the swivel clasp to the bottom of the branch, making it substantial enough to show off but not so large that it overwhelms your bag.
The stitch work is genuinely beginner friendly. If you can single crochet and double crochet, you can absolutely make this. The flowers use a simple petal technique worked in rounds, and the textured center is created with a bobble stitch that I’ll walk you through step by step.
Each component is small, which means you can easily tuck this project into your purse and work on it during lunch breaks or while watching TV. The individual pieces also make great scrap yarn projects since you only need small amounts of each color.
Materials Needed for Your Crochet Keychain
Yarn:
Cotton or cotton blend yarn works beautifully for this project. The close up image shows a slightly textured yarn with good stitch definition, which is exactly what you want for small detailed work like this.
Tools:
Abbreviations and Stitch Definitions
Let me break down every stitch you’ll encounter in this pattern so there’s no guesswork involved.
Ch = Chain. Wrap yarn over hook, pull through loop on hook. This creates the foundation for most crochet projects.
Sl st = Slip stitch. Insert hook into stitch, yarn over, pull through both the stitch and the loop on your hook in one motion. Used to join rounds and create nearly invisible connections.
Sc = Single crochet. Insert hook into stitch, yarn over and pull up a loop (two loops on hook), yarn over and pull through both loops.
Hdc = Half double crochet. Yarn over, insert hook into stitch, yarn over and pull up a loop (three loops on hook), yarn over and pull through all three loops at once.
Dc = Double crochet. Yarn over, insert hook into stitch, yarn over and pull up a loop (three loops on hook), yarn over and pull through two loops, yarn over and pull through remaining two loops.
Bobble = A cluster stitch that creates a puffy raised texture. For this pattern, work 5 half finished double crochets into the same stitch, then yarn over and pull through all loops at once. I’ll give you detailed instructions when we get there.
Magic ring = An adjustable starting loop that pulls completely closed. If you’re not comfortable with magic rings, you can chain 4 and slip stitch to form a ring instead.
Large Pink Flower Pattern (Make 1)
This flower forms the top of your charm and features five rounded petals with a puffy bobble center. The close up detail shot shows how the petals curve slightly and the bobble center creates that textured, dimensional look.
Flower Center (Yellow)
Round 1: Using pale yellow yarn, create a magic ring. Ch 1 (does not count as a stitch throughout), work 6 sc into the ring. Pull the ring closed. Sl st to first sc to join. (6 sts)
Round 2: Ch 1, work 1 bobble in each stitch around. To make each bobble: yarn over, insert hook into stitch, yarn over and pull up a loop, yarn over and pull through 2 loops. Repeat this sequence 4 more times in the same stitch (6 loops on hook), then yarn over and pull through all 6 loops. Ch 1 to secure the bobble. Repeat in each stitch around, working a total of 6 bobbles. Sl st to first bobble to join. (6 bobbles)
Fasten off and leave a 6 inch tail for sewing.
Flower Petals (Pink)
Round 1: Using light pink yarn, create a magic ring. Ch 1, work 5 sc into the ring. Pull the ring closed. Sl st to first sc to join. (5 sts)
Round 2: Ch 1, work 2 sc in each stitch around. Sl st to first sc to join. (10 sts)
Round 3 (Petal Round): This is where the petals form. In the first stitch, work: sl st, ch 2, 2 dc, ch 2, sl st. This creates one complete petal. Skip the next stitch. Repeat this petal sequence in every other stitch around, creating 5 petals total. Sl st to first sl st to join.
Note: If your petals are curling or cupping, try using a slightly larger hook. The petals should lay relatively flat with just a gentle curve.
Fasten off and weave in the end.
Assembly
Place the yellow bobble center on top of the pink flower, aligning it in the middle. Using the yarn tail from the center piece, sew the center to the flower with small stitches around the edge. Weave in all ends securely.
Small White Flower Pattern (Make 1)
This smaller flower sits below the pink flower and uses the same construction method, just scaled down slightly.
Flower Center (Yellow or Pink)
Round 1: Using your chosen center color, create a magic ring. Ch 1, work 5 sc into the ring. Pull the ring closed. Sl st to first sc to join. (5 sts)
Round 2: Ch 1, work 1 bobble in each stitch around using the same bobble technique from the large flower. Sl st to first bobble to join. (5 bobbles)
Fasten off and leave a tail for sewing.
Flower Petals (White)
Round 1: Using white yarn, create a magic ring. Ch 1, work 5 sc into the ring. Pull the ring closed. Sl st to first sc to join. (5 sts)
Round 2: In the first stitch, work: sl st, ch 2, 1 dc, ch 2, sl st. This creates one petal. Work this petal sequence in each stitch around. Sl st to first sl st to join. (5 petals)
Fasten off and weave in the end.
Assembly
Sew the center to the flower as you did with the large flower.
Branch and Leaves Pattern
The branch adds such a lovely organic element to this charm. It’s essentially a crocheted cord with tiny leaves attached.
Branch (Brown)
Row 1: Using dark brown yarn, ch 15. Starting in the second chain from the hook, sl st in each chain across. (14 sl sts)
Fasten off, leaving a 4 inch tail. The branch should be firm but slightly flexible.
Leaves (Sage Green)
Make 2 leaves.
Ch 6. Starting in the second chain from the hook: sl st, sc, hdc, sc, sl st. This creates one pointed leaf shape.
Fasten off, leaving a tail for attaching to the branch.
Tip: For slightly larger leaves, chain 7 and work: sl st, sc, hdc, dc, hdc, sl st.
Attaching the Leaves
Using your tapestry needle, sew one leaf to each side of the branch, positioning them about one third of the way up from the bottom. The leaves should angle outward slightly, as shown in the photos.
Finishing and Assembly
Now comes the fun part where everything comes together.
Step 1: Lay out your pieces to plan placement. You should have one large pink flower, one small white flower, one branch with leaves, and your hardware.
Step 2: Using a jump ring, attach the swivel clasp to the top of the large pink flower. To do this, use your pliers to gently twist the jump ring open (don’t pull it apart). Thread it through a stitch at the top of the flower and through the loop on the clasp. Twist the ring closed.
Step 3: Using another jump ring, connect the bottom of the large pink flower to the top of the small white flower.
Step 4: Using the final jump ring, connect the bottom of the small white flower to the top of the branch.
Alternative attachment method: If you don’t have jump rings, you can use yarn to create small loops connecting each piece. Simply chain 5 or 6 stitches, form a loop, and sew the ends securely to each component.
Customization Ideas for Your Flower Charm
This basic pattern opens up so many possibilities for personalization.
Color variations: Try a classic white and yellow daisy combination, or go bold with coral and turquoise. Variegated yarn creates an interesting ombre effect in the petals.
Add more flowers: Create a longer cascade by adding a third or fourth flower in graduating sizes.
Beaded centers: Replace the bobble center with a small button or bead for a different look.
Single flower option: Make just one flower with the branch for a simpler charm that works up even faster.
Seasonal versions: Use orange and burgundy for fall, red and green for the holidays, or pastels for spring.
Tips for Crochet Beginners
If this is one of your first small crochet projects, here are some things that will help you succeed.
Tension matters more than usual when working on tiny pieces. Try to keep your stitches consistent but not too tight. If you’re struggling to get your hook into the stitches, your tension is probably too tight.
The magic ring can be tricky for beginners. There’s no shame in using the chain 4, slip stitch to join method instead. Your finished piece will look nearly identical.
Blocking isn’t essential for a project like this, but if your petals are curling oddly, you can lightly steam them or dampen them and pin them flat to dry.
Count your stitches at the end of each round, especially on the petal rounds. Getting the right number ensures your petals are evenly spaced.
Final Thoughts on This Crochet Flower Keychain Pattern
This crochet flower charm pattern combines simple techniques with beautiful results. The layered design, the puffy bobble centers, and that sweet little branch with leaves all come together to create something that looks like it came from a boutique. Once you make one, you’ll probably want to make several in different colors for gifts.
The construction is forgiving enough that imperfections add charm rather than ruin the piece. Your handmade touch is what makes it special.
I hope you enjoy making this project as much as I enjoyed designing it. If you create your own version, I would absolutely love to see it. Tag me on Instagram or share your photos in my Facebook group. Seeing your makes truly brightens my day.
If this pattern caught your eye, go ahead and pin it to your crochet board on Pinterest so you can find it when you’re ready to start. And please drop a comment below if you give it a try. I love hearing which color combinations you choose.