
I don’t know about you, but I absolutely love a cozy layering piece that doesn’t require sleeves getting in the way of everything I’m trying to do. This caramel autumn bow crochet vest gives you all the warmth and texture of a chunky sweater with none of the bulk. Plus, those adorable acorn bow embellishments? Perfect for fall without being over the top pumpkin spice everything.
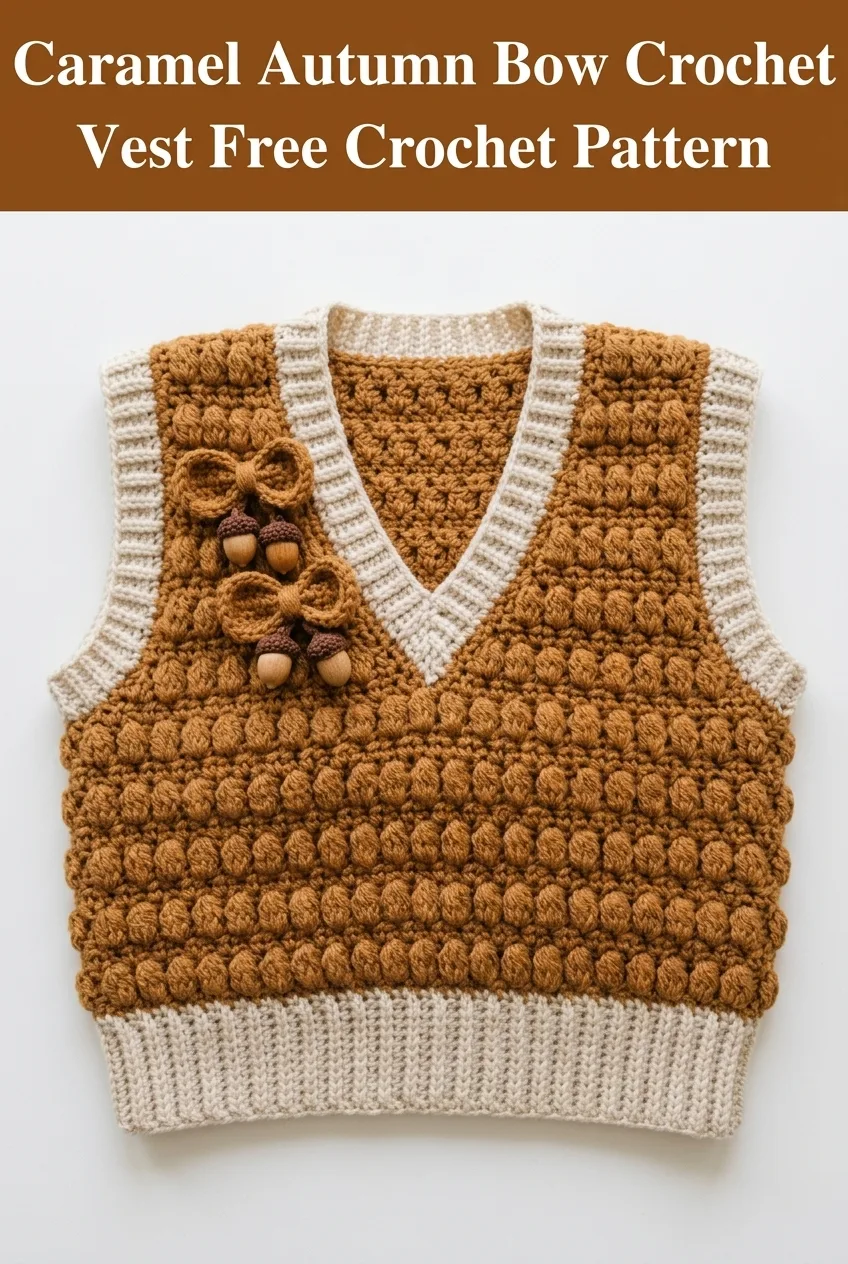
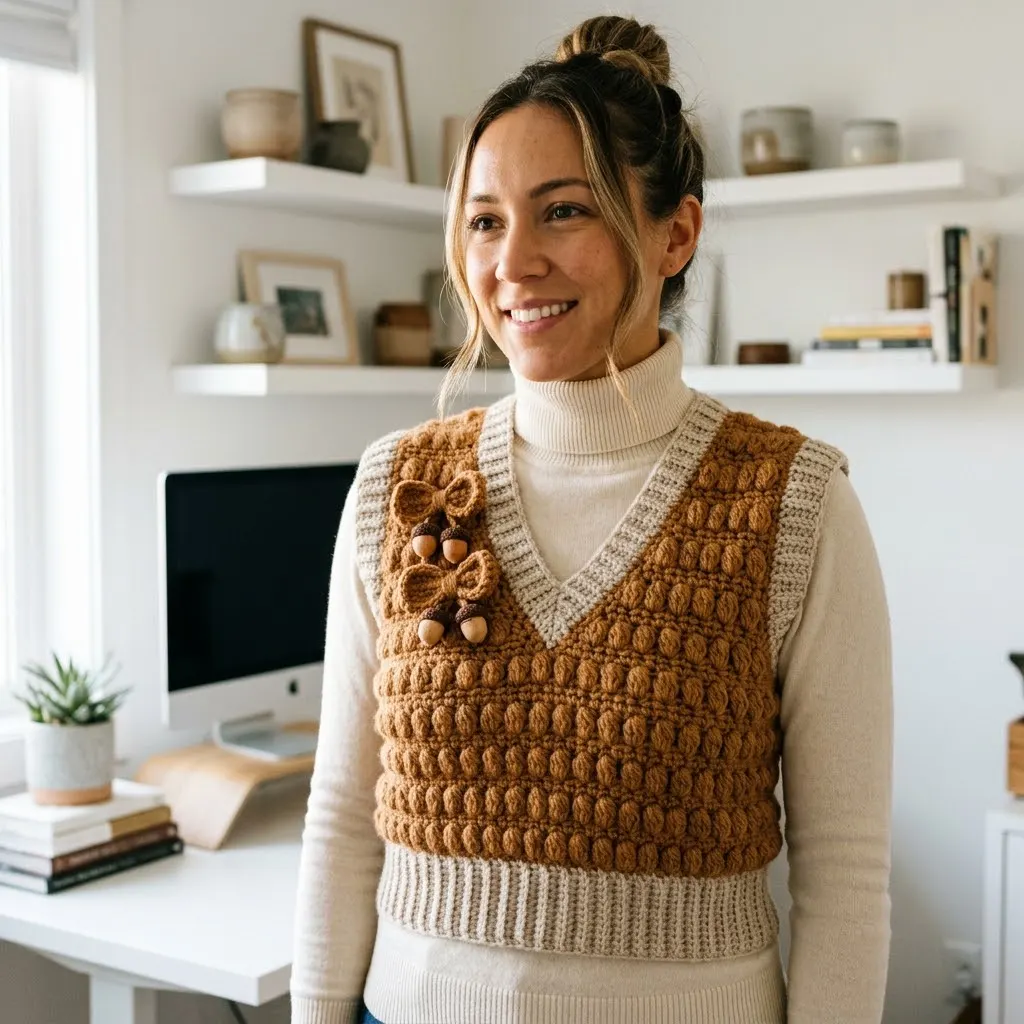
This crochet vest pattern combines a gorgeous bobble stitch texture with ribbed edging for a modern, slightly vintage look that pairs beautifully with turtlenecks, button-downs, or even just a simple tee. The two-tone color scheme keeps things sophisticated while those sweet little acorn bows add just the right amount of whimsy.
Why You’ll Love This Crochet Vest Pattern
Let me tell you what makes this project so satisfying to create. The bobble stitch creates incredible texture that looks far more complicated than it actually is. Once you get into the rhythm, you’ll find yourself flying through rows. The contrast ribbing at the neckline, armholes, and hem gives the vest a polished, store-bought finish that people won’t believe you made yourself.
This crochet tutorial walks you through every single step, from the foundation chain to attaching those charming acorn bow embellishments. Whether you’ve never worked a bobble stitch before or you’re a seasoned pro looking for your next fall project, this pattern has you covered.
Skill Level
Intermediate
Don’t let that word scare you off if you’re a confident beginner. If you can work a single crochet and you’re willing to learn something new, you can absolutely make this vest. The bobble stitch sounds fancy, but it’s really just a cluster of stitches worked into the same space. I’ll walk you through it completely.
Finished Measurements
Bust: Approximately 36 inches (fits sizes Small to Medium)
Length: Approximately 20 inches from shoulder to hem
Armhole depth: Approximately 9 inches
Materials Needed
Yarn:
I recommend a soft acrylic or acrylic blend for this project. Something with good stitch definition will really show off those beautiful bobbles. Look for yarn labeled "premium acrylic" or consider a wool blend if you want extra warmth.
Hook:
Notions:
Gauge
16 stitches and 12 rows = 4 inches in bobble stitch pattern
Please, please check your gauge. I know it’s tempting to skip this step, but with a garment like a vest, gauge really matters. If your gauge is off, your vest could end up fitting like a crop top or a tent. Neither is ideal unless that’s what you’re going for.
Work a 5-inch square in the bobble stitch pattern, then measure the center 4 inches. Adjust your hook size up if your swatch is too small, or down if it’s too large.
Abbreviations and Stitch Definitions
Let me break down every stitch you’ll need for this project:
ch = chain: Wrap yarn over hook, pull through loop on hook. This creates your foundation.
sc = single crochet: Insert hook into stitch, yarn over, pull up a loop (2 loops on hook), yarn over, pull through both loops.
dc = double crochet: Yarn over, insert hook into stitch, yarn over, pull up a loop (3 loops on hook), yarn over, pull through 2 loops, yarn over, pull through remaining 2 loops.
hdc = half double crochet: Yarn over, insert hook into stitch, yarn over, pull up a loop (3 loops on hook), yarn over, pull through all 3 loops at once.
bob = bobble stitch: Work 5 double crochet stitches into the same stitch, but stop each dc before the final "yarn over, pull through 2 loops." You’ll have 6 loops on your hook. Yarn over and pull through all 6 loops at once. This creates a beautiful raised bump on your fabric.
sl st = slip stitch: Insert hook into stitch, yarn over, pull through stitch and loop on hook in one motion.
BLO = back loop only: Work into only the back loop of the stitch (the loop furthest from you).
sk = skip: Pass over the indicated stitch without working into it.
st(s) = stitch(es)
rep = repeat
Step by Step Crochet Pattern Instructions
Back Panel
The back panel is worked from the bottom up in rows.
Foundation Row: With Color A and larger hook, ch 73.
Row 1 (RS): Sc in 2nd ch from hook and in each ch across. Turn. (72 sts)
Row 2: Ch 1, sc in first st, *bob in next st, sc in next st; rep from * across. Turn. (72 sts, 35 bobbles)
Row 3: Ch 1, sc in each st across. Turn. (72 sts)
Row 4: Ch 1, sc in first 2 sts, *bob in next st, sc in next st; rep from * to last 2 sts, sc in last 2 sts. Turn. (72 sts, 34 bobbles)
Row 5: Ch 1, sc in each st across. Turn. (72 sts)
Rows 6-45: Repeat Rows 2-5 ten more times. You should have a piece measuring approximately 15 inches from the beginning.
Back Panel Armhole Shaping
Row 46: Sl st in first 6 sts, ch 1, sc in same st as last sl st, work in established bobble pattern across to last 5 sts, leave remaining sts unworked. Turn. (62 sts)
Row 47: Ch 1, sc2tog over first 2 sts, sc in each st to last 2 sts, sc2tog. Turn. (60 sts)
Rows 48-51: Continue in bobble pattern, decreasing 1 st at each end every other row. (56 sts after Row 51)
Rows 52-65: Continue even in bobble pattern without decreases. (56 sts)
Fasten off and weave in ends.
Front Panel (Make 2)
Each front panel is worked separately, then joined.
Foundation Row: With Color A and larger hook, ch 37.
Row 1 (RS): Sc in 2nd ch from hook and in each ch across. Turn. (36 sts)
Rows 2-45: Work in bobble stitch pattern as established for back panel.
Front Panel Armhole and Neckline Shaping
Row 46 (Right Front): Sl st in first 6 sts, ch 1, sc in same st, work in pattern across. Turn. (31 sts)
Row 47: Ch 1, work in pattern to last 2 sts, sc2tog. Turn. (30 sts)
Continue decreasing at armhole edge every other row for 4 rows total while simultaneously decreasing at neck edge.
Neck Shaping: Beginning at Row 50, decrease 1 st at neck edge every row for 8 rows. (18 sts remain)
Work even until front measures same length as back to shoulder.
For Left Front, reverse all shaping.
Ribbed Hem Band
With Color B and smaller hook:
Row 1: Ch 11. Sc in 2nd ch from hook and in each ch across. Turn. (10 sts)
Row 2: Ch 1, sc in BLO of each st across. Turn. (10 sts)
Rows 3-144: Rep Row 2.
The ribbing should stretch to fit around the entire bottom edge of the vest. Adjust length as needed.
V-Neck Ribbing
With Color B and smaller hook:
Row 1: Ch 9. Sc in 2nd ch from hook and in each ch across. Turn. (8 sts)
Row 2: Ch 1, sc in BLO of each st across. Turn. (8 sts)
Continue until ribbing measures the length of the V-neck opening from shoulder to center front point. Make two pieces.
Armhole Ribbing (Make 2)
With Color B and smaller hook:
Row 1: Ch 7. Sc in 2nd ch from hook and in each ch across. Turn. (6 sts)
Row 2: Ch 1, sc in BLO of each st across. Turn. (6 sts)
Continue until ribbing fits around armhole opening.
Assembly Instructions
Now comes the fun part where everything comes together.
1. Block all pieces. Lay flat, spray with water, and pin to measurements. Let dry completely. Trust me, blocking makes a huge difference in how professional your finished vest looks.
2. Seam shoulders. With tapestry needle and Color A, whip stitch or mattress stitch front panels to back panel at shoulders.
3. Seam sides. Join side seams from hem to underarm.
4. Attach hem ribbing. Pin ribbing to bottom edge, stretching slightly to fit. Whip stitch in place.
5. Attach V-neck ribbing. Starting at center front point, attach ribbing up one side of the V, around the back neck, and down the other side.
6. Attach armhole ribbing. Join into a ring, then whip stitch around each armhole opening.
Acorn Bow Embellishments
These sweet little decorations are what make this vest truly special for fall.
Bow (Make 3)
With Color A:
Row 1: Ch 21. Dc in 4th ch from hook and in each ch across. Turn. (18 dc)
Rows 2-3: Ch 3 (counts as dc), dc in each st across. Turn.
Fasten off, leaving a long tail. Fold the rectangle in half lengthwise, then pinch the center and wrap yarn around several times to create the bow shape. Secure with a few stitches.
Acorn Cap
With Color A:
Rnd 1: Magic ring, 6 sc in ring. (6 sts)
Rnd 2: 2 sc in each st around. (12 sts)
Rnd 3: *Sc in next st, 2 sc in next st; rep from * around. (18 sts)
Rnd 4: Sc in BLO around. (18 sts)
Fasten off. Insert wooden bead and stitch closed.
Attach acorn to center of each bow. Position three bows along the right front neckline, spaced evenly. Sew securely in place.
Helpful Tips for Success
Bobble tension: Keep your bobbles loose and relaxed. If they feel tight and small, loosen up a bit. The bobbles should pop nicely on the right side of your work.
Counting stitches: After every bobble row, count your stitches. It’s easy to accidentally skip a stitch or add one where there shouldn’t be one. Ask me how I know.
Blocking matters: I mentioned this before, but I’ll say it again. Blocking transforms this vest from "I made this at home" to "where did you buy that?"
Customize the fit: Add or subtract chains in multiples of 2 to adjust the width. Add or subtract bobble pattern repeats to adjust the length.
Care Instructions
Hand wash in cool water with mild detergent. Lay flat to dry on a clean towel. Never hang a crocheted garment while wet, as it will stretch out of shape. Store folded, not on a hanger.

Share Your Makes
I cannot wait to see your finished caramel autumn bow crochet vest. Seriously, seeing your creations makes my whole day brighter. This beginner friendly project (okay, beginner adjacent) works up beautifully in so many color combinations. Imagine it in forest green and cream, or deep burgundy with oatmeal. The possibilities are endless.
This step by step crochet pattern gives you everything you need to create a stunning layering piece perfect for crisp fall days, apple picking adventures, and cozy weekends with hot cider. The bobble texture photographs beautifully, so get ready for all the compliments.
Whether you’re making this crochet vest pattern for yourself or as a handmade gift, you’re creating something truly special. Handmade garments carry a warmth and intention that simply can’t be replicated by anything store bought.
Thank you so much for choosing this pattern for your next project. Your time and creativity mean the world to me, and I’m genuinely honored to be part of your crochet journey. If you make this vest, I would absolutely love to see it. Tag me on Instagram or share a photo in my Facebook group. Your makes inspire me and help other crocheters see what’s possible.
Go ahead and save this pattern to your favorite Pinterest board so you can find it whenever you’re ready to start. And if you do make it, drop a comment below. I read every single one, and I love hearing about your projects, your yarn choices, and how the pattern worked for you. Happy crocheting, friend.