
Hooded capes look intimidating. I get it. All those stripes, the pointed hood, the graceful drape. You might be thinking this belongs in the "someday when I’m a better crocheter" pile. But here’s the truth: if you can single crochet and double crochet, you can absolutely make this cape. That’s it. Those two stitches carry the entire project.
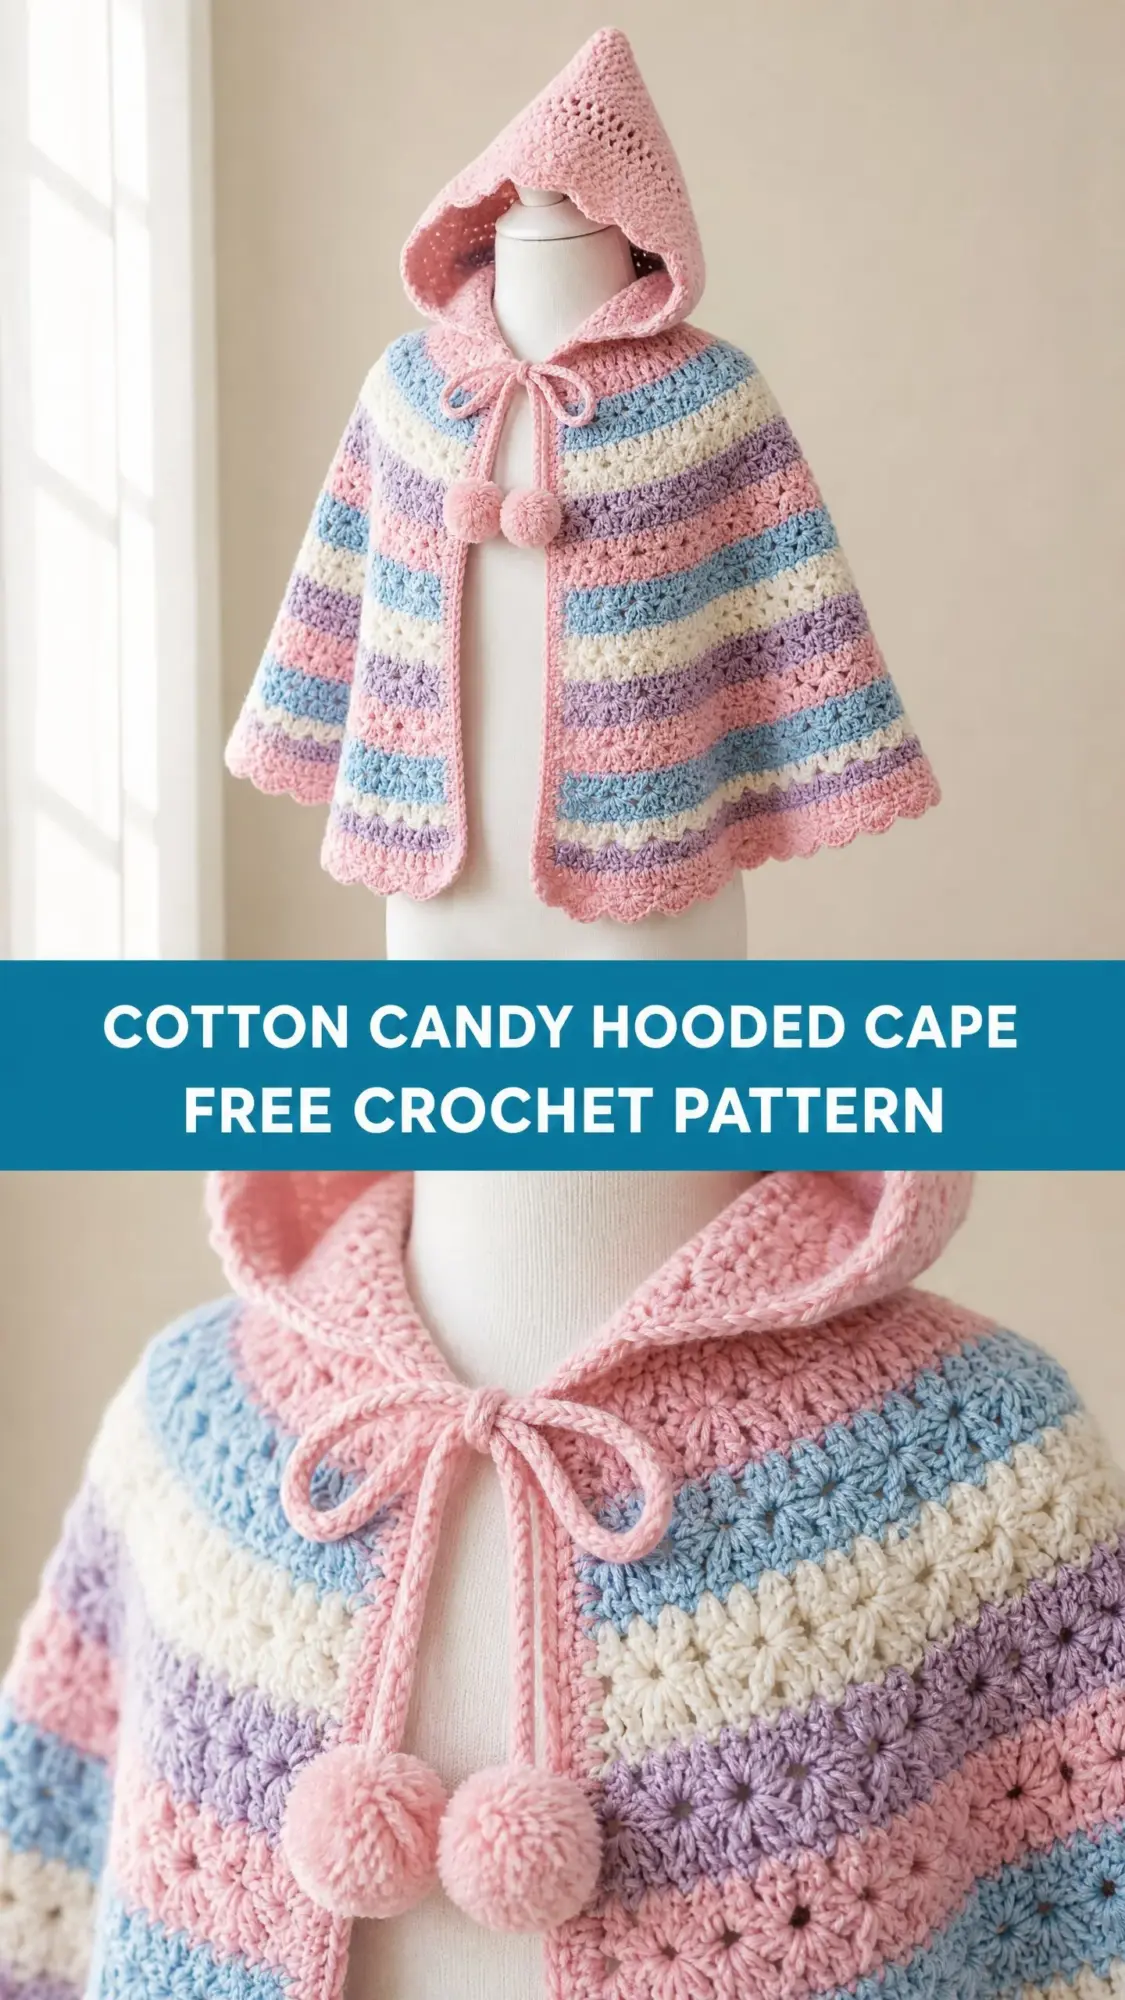
The construction is more straightforward than it appears. You work the body from the top down in rows, increasing gradually to create that beautiful A-line shape. The hood is just a rectangle with some decreases at the top to form the point. Then you sew them together. No complicated shaping, no confusing assembly. Just steady, rhythmic stitching with color changes to keep things interesting.
Whether you’re an intermediate crocheter looking for your next satisfying project or a confident beginner ready to level up, this pattern meets you where you are. I’ve included checkpoints throughout so you can verify your progress, and the stripe sequence is simple enough that you’ll memorize it after the first repeat. Let’s break this down together.
About This Crochet Pattern
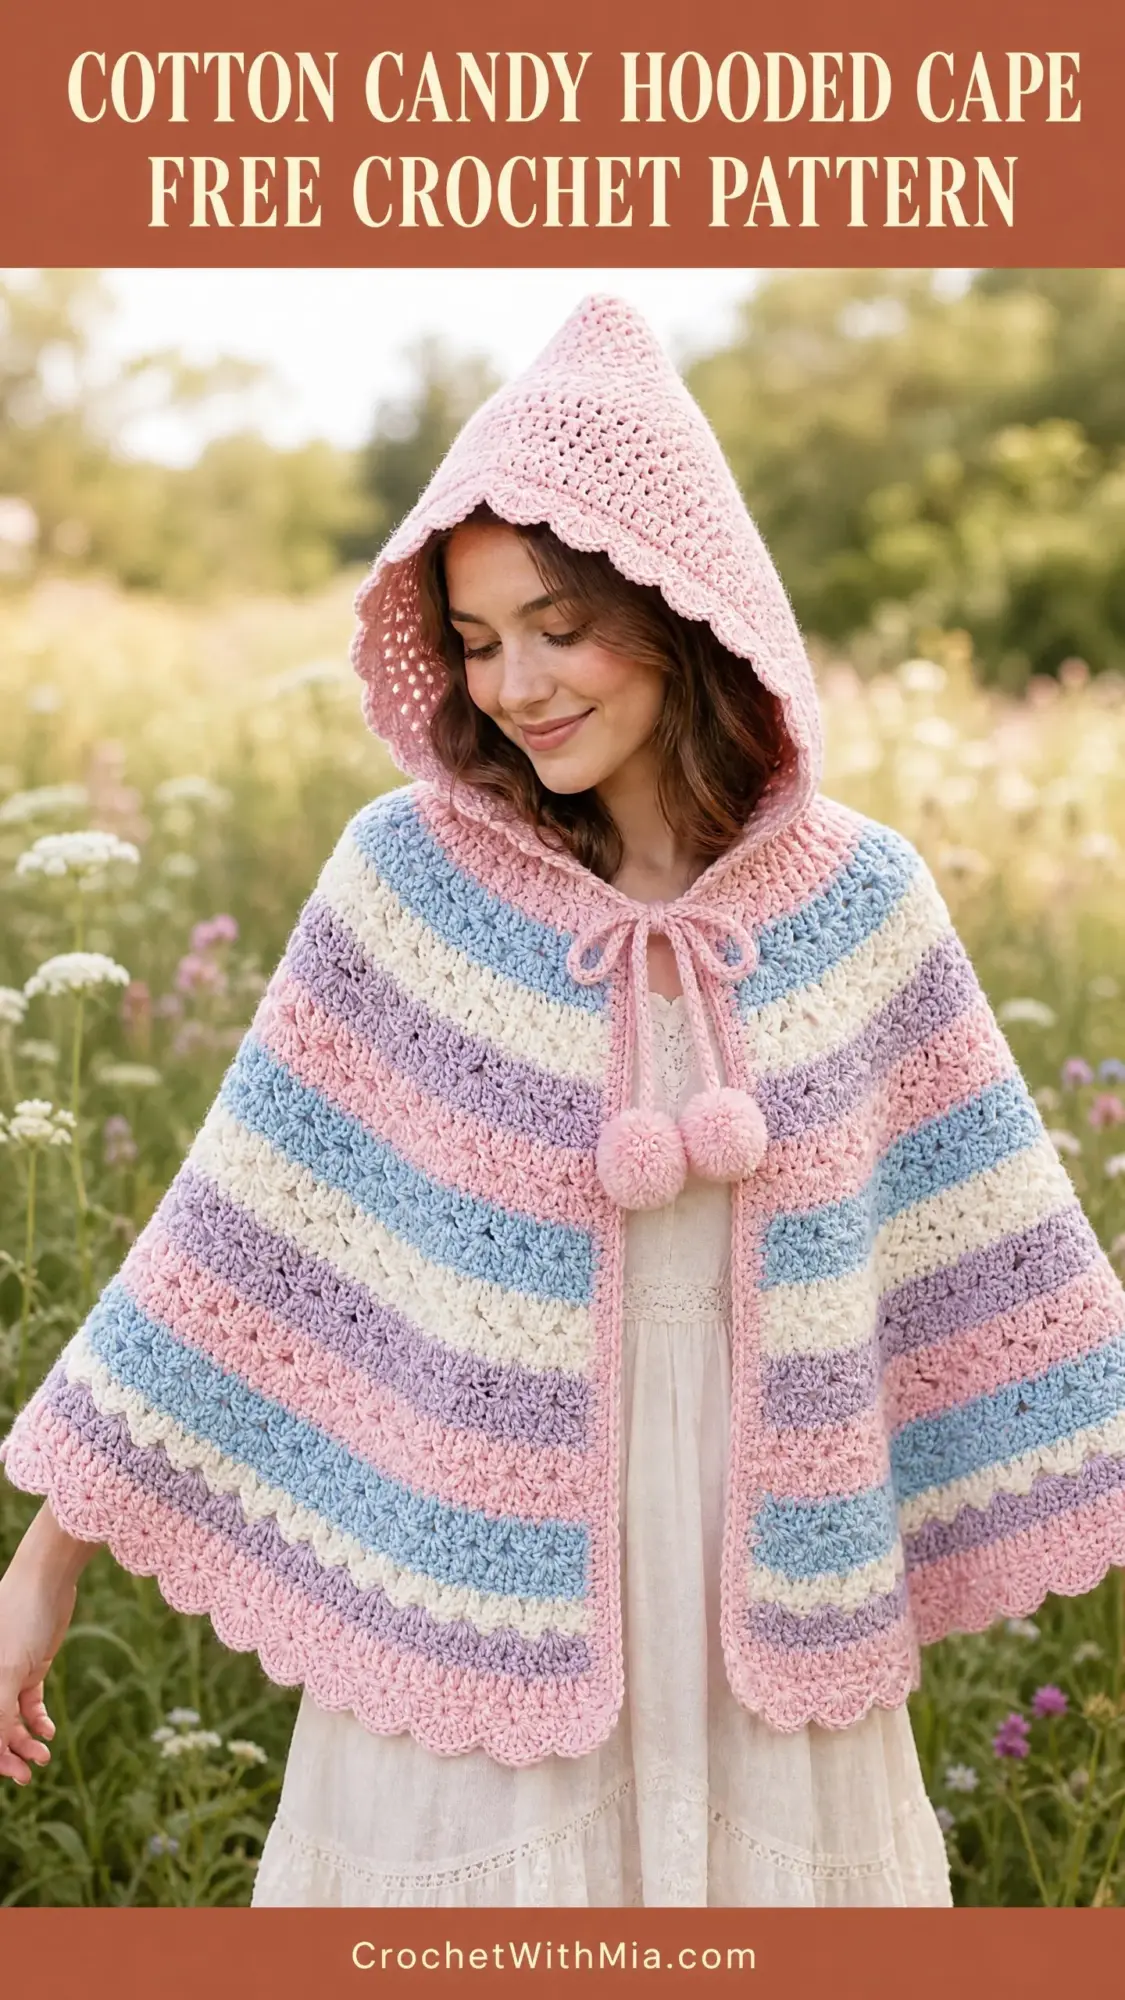
This whimsical hooded cape makes a perfect layering piece for children ages 4 to 6. The finished cape measures approximately 14 inches from neckline to hem, with a generous 34-inch width at the bottom that allows for easy movement and a dramatic silhouette. The pointed hood adds a fairytale touch that kids absolutely love.
The body features a shell stitch pattern that creates those gorgeous scalloped stripes you see in the photos. Don’t let the texture fool you. Shells are simply five double crochet stitches worked into the same stitch. That’s all. The dimensional fabric practically creates itself once you get into the rhythm.
Skill level: Intermediate. You’ll need comfort with basic stitches, color changes, and following a multi-section pattern. If you’ve completed a few projects and feel ready for something with more steps, you’re ready for this.
Time estimate: Plan for 18 to 25 hours depending on your working speed and how often you need to reference the instructions.
Materials You’ll Need
Gathering your supplies before you start makes the whole process smoother. Here’s everything you’ll need:
Yarn: DK weight (CYCA 3), approximately 800 yards total
Hook: US size G-6 / 4.00 mm
Notions:
Yarn suggestions: Lion Brand Comfy Cotton Blend works beautifully for this project. It’s machine washable and has excellent stitch definition. Paintbox Yarns Simply DK is a budget-friendly alternative with a full color range. Any smooth DK weight yarn in the 200 to 230 yards per 100g range will substitute well. Avoid heavily textured yarns that would obscure the shell stitch detail.
Gauge
20 stitches x 22 rows = 4 inches in single crochet, blocked
Gauge matters here because it affects the finished size. Make a 6-inch swatch, wash and block it, then measure. Adjust your hook size up if your swatch is too small, or down if it’s too large.
Abbreviations
Let me define every abbreviation you’ll encounter. I’ll explain each one in plain terms:
Special Stitches
Shell Stitch: Work 5 double crochet stitches all into the same stitch. This creates a fan shape that forms the primary texture of the cape body. When you see "shell in next st," you’ll work all 5 dc into that single stitch.
Scallop Edging: Skip 2 stitches, work 5 dc in next stitch (shell), skip 2 stitches, sc in next stitch. Repeat across.
Pompom: Wind yarn around a 1.25 inch cardboard rectangle approximately 60 times. Slide off, tie tightly around the center with a 12-inch strand. Cut all loops and trim into a round shape.
Pattern Notes Before You Begin
Read these carefully. They’ll save you confusion later:
1. The cape body is worked in rows from the top down. You turn at the end of each row.
2. Turning chains: In single crochet rows, ch 1 at the beginning does not count as a stitch. In shell pattern rows, ch 3 at the beginning counts as the first dc.
3. Color changes: Change to the new color on the final yarn over of the last stitch of the current row, before you complete that stitch. Cut and rejoin colors for the cleanest finish.
4. The front opening runs straight up the center throughout. The cape is never sewn shut along the body.
5. The hood is worked separately and sewn on at the end.
6. Stripe sequence for the body: 2 rows Color A, 2 rows Color B, 2 rows Color C, 2 rows Color D. Repeat this sequence.
Section 1: Cape Body Instructions
The cape body begins at the neckline and works downward to the hem.
Foundation and Setup Rows
Foundation Chain: Using Color A, ch 73.
Row 1 (RS): Ch 1, sc in 2nd ch from hook and in each ch across. Turn. (72 sc)
Row 2 (WS): Ch 1, sc in first st, [sc in each of next 8 sts, 2 sc in next st] 8 times. Turn. (80 sc)
Row 3 (RS): Ch 1, sc in each st across. Turn. (80 sc)
Row 4 (WS): Ch 1, sc in first st, [sc in each of next 8 sts, 2 sc in next st] 8 times, sc in last 8 sts. Turn. (88 sc)
Place stitch markers at stitches 22, 44, 66, and 88 to mark quarter points.
Row 5 (RS): Ch 1, sc in each st across. Turn. (88 sc)
Row 6 (WS): Ch 1, sc in first st, [sc in each of next 10 sts, 2 sc in next st] 8 times. Turn. (96 sc)
Row 7 (RS): Ch 1, sc in each st across. Turn. (96 sc)
Row 8 (WS): Ch 1, sc in first st, [sc in each of next 11 sts, 2 sc in next st] 8 times. Turn. (104 sc)
Checkpoint 1: Your neckline edge should measure approximately 20 inches across. The piece should spread in a gentle arc.
Row 9 (RS): Ch 1, sc in each st across. Turn. (104 sc)
Row 10 (WS): Ch 1, sc in first st, [sc in each of next 12 sts, 2 sc in next st] 8 times. Turn. (112 sc)
Row 11 (RS): Ch 1, sc in each st across. Turn. (112 sc)
Row 12 (WS): Ch 1, sc in first st, [sc in each of next 13 sts, 2 sc in next st] 8 times. Turn. (120 sc)
Change to Color B on the last stitch of Row 12.
Shell Pattern Transition
Row 13 (Color B): Ch 3 (counts as dc), turn. [Sk 2 sts, shell in next st, sk 2 sts, sc in next st] 10 times across. Turn.
Row 14 (Color B): Ch 1, sc in each dc of each shell, sc in each sc between shells across. Turn. (120 sc)
Row 15 (Color C): Ch 3, turn. [Sk 2, shell in next st, sk 2, sc in next st] 10 times. Turn.
Row 16 (Color C): Ch 1, sc in each st across, working 2 sc into the center dc of every other shell (5 shells total) to increase. Turn. (130 sc)
Row 17 (Color D): Ch 1, sc in each st across, working 1 additional sc increase into 14 evenly spaced stitches. Place increases approximately every 9 stitches: [sc in 8 sts, 2 sc in next st] 14 times, sc in remaining 4 sts. Turn. (144 sc)
Checkpoint 2: You should have 144 stitches and the piece should measure approximately 5 to 6 inches from the neckline.
Row 18 (Color D): Ch 3, turn. [Sk 2, shell in next st, sk 2, sc in next st] 12 times. Turn.
Row 19 (Color A): Ch 1, sc in each st across. Turn. (144 sc)
Row 20 (Color A): Ch 1, sc in each st across, working 2 sc into every 12th stitch evenly. Turn. (156 sc)
Row 21 (Color B): Ch 3, turn. [Sk 2, shell in next st, sk 2, sc in next st] 13 times. Turn.
Row 22 (Color B): Ch 1, sc in each st across. Turn. (156 sc)
Row 23 (Color C): Ch 1, sc in each st across, working 2 sc into every 13th stitch. Turn. (168 sc)
Row 24 (Color C): Ch 3, turn. [Sk 2, shell in next st, sk 2, sc in next st] 14 times. Turn.
Row 25 (Color D): Ch 1, sc in each st across. Turn. (168 sc)
Row 26 (Color D): Ch 1, sc in each st across, working 2 sc into every 14th stitch. Turn. (180 sc)
Checkpoint 3: You should have 180 stitches and the piece should measure approximately 9 to 10 inches from the neckline.
Row 27 (Color A): Ch 3, turn. [Sk 2, shell in next st, sk 2, sc in next st] 15 times. Turn.
Row 28 (Color A): Ch 1, sc in each st across. Turn. (180 sc)
Row 29 (Color B): Ch 1, sc in each st across, working 2 sc into every 15th stitch. Turn. (192 sc)
Row 30 (Color B): Ch 3, turn. [Sk 2, shell in next st, sk 2, sc in next st] 16 times. Turn.
Row 31 (Color C): Ch 1, sc in each st across. Turn. (192 sc)
Row 32 (Color C): Ch 1, sc in each st across, working 2 sc into every 16th stitch. Turn. (204 sc)
Row 33 (Color D): Ch 3, turn. [Sk 2, shell in next st, sk 2, sc in next st] 17 times. Turn.
Row 34 (Color D): Ch 1, sc in each st across. Turn. (204 sc)
Checkpoint 4: The cape body should measure approximately 12 to 13 inches from the neckline.
Hem Scallop Edging
Row 35 (Color A): With RS facing and Color A, ch 1, sc in first st. [Sk 2 sts, 5 dc in next st, sk 2 sts, sc in next st] 34 times. Turn.
Fasten off Color A. Weave in end.
Section 2: Front Border
With RS facing, join Color A at bottom right front corner of the cape.
Work 1 sc evenly into each row end along the right front edge, working upward to the neckline corner. Ch 1, do not turn.
Continue along the neckline top edge: sc in each stitch across the neckline (72 sts) to the left front corner.
Continue down the left front edge: work 1 sc evenly into each row end to the bottom left corner.
Do not work across the hem edge. Sl st to first sc to join. Fasten off. Weave in ends.
Section 3: Hood Instructions
The hood is worked in rows of single crochet, then shaped at the top to form the pointed cone.
Hood Body
Foundation Chain: Using Color A, ch 47.
Row 1: Ch 1, sc in 2nd ch from hook and in each ch across. Turn. (46 sc)
Rows 2 through 40: Ch 1, sc in each st across. Turn. (46 sc each row)
After Row 40, you’ll have a rectangle measuring approximately 18 inches wide by 7 inches tall.
Hood Crown Shaping
Row 41: Ch 1, [sc2tog, sc in each of next 21 sts] 2 times. Turn. (44 sc)
Row 42: Ch 1, sc in each st across. Turn. (44 sc)
Row 43: Ch 1, [sc2tog, sc in each of next 20 sts] 2 times. Turn. (42 sc)
Row 44: Ch 1, sc in each st across. Turn. (42 sc)
Continue this pattern of decreasing on odd rows and working even on even rows:
Row 45: (40 sc) Row 46: (40 sc)
Row 47: (38 sc) Row 48: (38 sc)
Row 49: (36 sc) Row 50: (36 sc)
Row 51: (34 sc) Row 52: (34 sc)
Row 53: (32 sc) Row 54: (32 sc)
Row 55: (30 sc) Row 56: (30 sc)
Row 57: (28 sc) Row 58: (28 sc)
Row 59: (26 sc) Row 60: (26 sc)
Row 61: (24 sc) Row 62: (24 sc)
Row 63: (22 sc) Row 64: (22 sc)
Row 65: (20 sc) Row 66: (20 sc)
Row 67: (18 sc) Row 68: (18 sc)
Row 69: (16 sc) Row 70: (16 sc)
Row 71: (14 sc) Row 72: (14 sc)
Row 73: (12 sc) Row 74: (12 sc)
Row 75: (10 sc) Row 76: (10 sc)
Row 77: (8 sc) Row 78: (8 sc)
Row 79: (6 sc) Row 80: (6 sc)
Row 81: (4 sc) Row 82: (4 sc)
Row 83: Ch 1, [sc2tog] 2 times. Turn. (2 sc)
Row 84: Ch 1, sc2tog. Fasten off, leaving a 12-inch tail. (1 sc)
Hood Assembly
Fold the hood rectangle in half lengthwise with the right side facing out. The fold line runs from the crown tip down to the face opening.
Using your yarn needle and Color A, seam the top edge from the crown point down along the decrease rows using a whipstitch or mattress stitch.
Hood Face Edging: Join Color A with sl st to any stitch along the face opening edge. Ch 1, sc evenly around the entire face opening. Sl st to join. Fasten off.
Attaching the Hood
With right sides together, pin the bottom open edge of the assembled hood to the top neckline edge of the cape. The center back of the hood should align with the center back of the cape neckline. The front edges of the hood should end approximately 1 inch in from each front edge of the cape.
Using Color A and a yarn needle, whipstitch the hood to the neckline from one front side to the other, leaving the 1-inch sections at each front free.
Fasten off and weave in all ends securely.
Section 4: Twisted Cord Tie and Pompoms
Twisted Cord:
Cut 6 strands of Color A, each 60 inches long. Hold all strands together and fold in half so you have 12 strands each 30 inches long with a folded loop at one end.
Anchor the loop end to a doorknob. Twist the strands tightly clockwise until they begin to kink when tension releases slightly. Fold the twisted length in half, holding both ends together. Allow the two halves to twist around each other naturally. Knot both ends securely and trim to approximately 1 inch beyond the knot.
The finished cord should measure approximately 18 inches.
Thread the cord through the neckline area of the front border, centered at the front of the hood attachment point.
Pompoms: Make 2 pompoms in Color A following the instructions in Special Stitches. Attach one pompom to each end of the twisted cord by threading the tie tails through the cord end and knotting securely.
Section 5: Optional Front Edge Scallops
For a coordinated finish, you can add mini scallops along the front vertical edges.
Join Color A at the bottom of one front edge. Ch 1, sc in same st. [Sk 1 st, 3 dc in next st, sk 1 st, sc in next st] along the entire edge. Fasten off. Repeat on the second front edge.
Size Customization Tips
For ages 7 to 10: Work 4 additional increase rows before beginning the shell pattern transition, and continue the body for 4 to 6 additional rows. Finished length will be approximately 17 to 18 inches.
For toddler size (ages 2 to 3): Begin with a foundation chain of 61 stitches instead of 73, and increase by 6 stitches per increase row instead of 8. Work fewer total rows to reach a finished length of approximately 10 to 11 inches.
For the hood: Measure the child’s head circumference and adjust the foundation chain to equal head circumference plus 1 inch for ease.
Finishing and Blocking
Weave in all yarn ends using a yarn needle, weaving in different directions for at least 2 inches to prevent unraveling during washing. Block the finished cape by pinning it to shape and allowing it to dry completely. This relaxes the stitches and evens out the drape.
Thank you so much for choosing this pattern. I hope you enjoy every stitch of this project as much as I enjoyed designing it. When you finish your cape, I would love to see it! Share your photos on Instagram or Facebook and tag me so I can admire your beautiful work.
If this pattern caught your eye, go ahead and save it to your Pinterest boards so you can find it easily when you’re ready to start. And if you make this cape, please leave a comment below. I always love hearing how projects turn out and seeing what color combinations you choose!