
I’ve been sketching dragon designs in my notebook for months, and this little guy finally came to life exactly the way I imagined. I wanted to create something that looked impressive but wasn’t intimidating to make. Big sparkly eyes, adorable horns, a chubby belly, and that sweet little smile. I am SO thrilled with how this turned out, and I cannot wait for you to make one too.
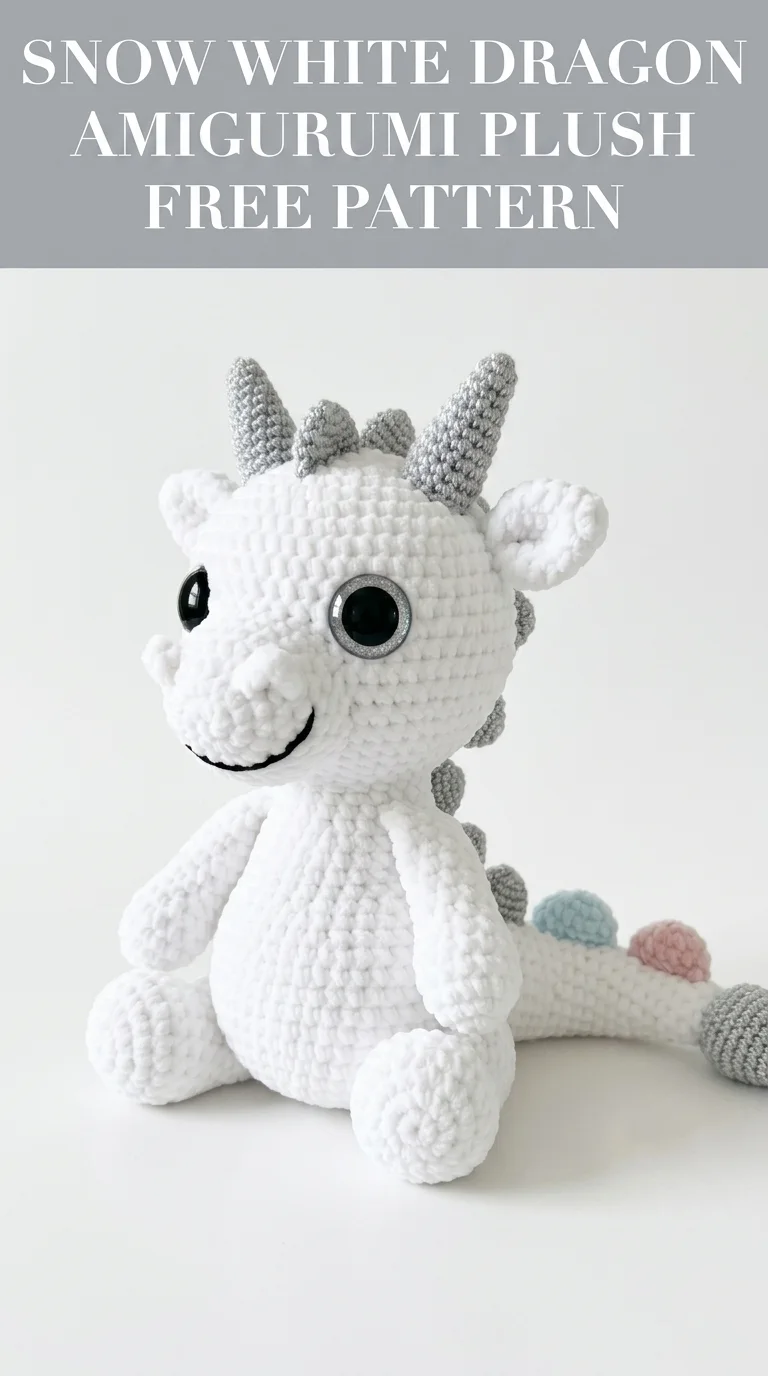
This Snow White Dragon Amigurumi Plush Crochet Pattern creates a huggable, squishy friend that stands about 10 inches tall when complete. The chunky yarn gives it that plush, cuddly look while working up faster than traditional amigurumi made with worsted weight. Whether you’re making this for a nursery, a gift, or just because dragons are awesome, you’re going to love the process.
Why You’ll Love This Dragon Crochet Pattern
Let me tell you what makes this project special. The construction uses basic amigurumi techniques, so if you’ve made a simple stuffed animal before, you can absolutely handle this. The body parts are all worked separately and sewn together at the end, which means you can take breaks and work on it in pieces.
The color palette keeps things simple. Soft white chenille yarn for the body creates that cloud-like, squishy texture. Gray accent yarn adds contrast for the spikes, horns, and tail tip. Then those sweet pastel bobbles on the tail add just a touch of whimsy without being overwhelming.
What skill level is this? I’d call it intermediate. You need to be comfortable working in continuous rounds, increasing and decreasing, and sewing pieces together neatly. If you’re a confident beginner ready to level up, this is a great project to try.
Materials Needed for Your Dragon Amigurumi
Gathering your supplies before you start makes everything smoother. Here’s what you’ll need:
Yarn:
Hook:
Notions:
A note about yarn choice: Chenille yarn creates that beautiful plush texture you see in the photo. Bernat Blanket or similar chunky chenille works perfectly. The gray sections use regular worsted weight for better stitch definition on the small details.
Abbreviations and Stitch Definitions
Before we dive into the step by step instructions, let’s go over every stitch you’ll use. I’ll define each one so there’s no confusion.
MR = Magic Ring. This is a adjustable loop that you work your first round into, then pull tight to close the hole.
ch = Chain. Wrap yarn over hook, pull through loop on hook. This creates a foundation stitch.
sc = Single Crochet. Insert hook into stitch, yarn over and pull up a loop (2 loops on hook), yarn over and pull through both loops.
inc = Increase. Work 2 single crochet stitches into the same stitch. This adds one stitch to your count.
dec = Invisible Decrease. Insert hook through front loops only of next 2 stitches, yarn over and pull through both front loops, yarn over and pull through both loops on hook. This removes one stitch while staying neat.
sl st = Slip Stitch. Insert hook, yarn over, pull through stitch and loop on hook in one motion.
FO = Fasten Off. Cut yarn and pull through final loop to secure.
Gauge and Finished Size
For amigurumi, gauge matters less than fabric density. Your stitches should be tight enough that stuffing doesn’t show through. If you can see gaps between stitches, go down a hook size.
Finished dimensions: Approximately 10 inches tall when seated, 8 inches wide including arms.
How to Crochet the Dragon Body
The body is worked from the bottom up in one continuous piece. Use white chenille yarn and your 5.0mm hook.
Round 1: MR, 6 sc into ring. (6 sts)
Round 2: Inc in each st around. (12 sts)
Round 3: *Sc 1, inc* repeat around. (18 sts)
Round 4: *Sc 2, inc* repeat around. (24 sts)
Round 5: *Sc 3, inc* repeat around. (30 sts)
Round 6: *Sc 4, inc* repeat around. (36 sts)
Round 7: *Sc 5, inc* repeat around. (42 sts)
Rounds 8-14: Sc in each st around. (42 sts) Work 7 rounds even.
Round 15: *Sc 5, dec* repeat around. (36 sts)
Round 16: Sc in each st around. (36 sts)
Round 17: *Sc 4, dec* repeat around. (30 sts)
Rounds 18-22: Sc in each st around. (30 sts) Work 5 rounds even.
Begin stuffing firmly at this point. Continue adding stuffing as you work.
Round 23: *Sc 3, dec* repeat around. (24 sts)
Round 24: Sc in each st around. (24 sts)
Round 25: *Sc 2, dec* repeat around. (18 sts)
Sl st to next st, FO, leave long tail for sewing to head.
How to Crochet the Dragon Head
The head is the star of this crochet tutorial. Work carefully and stuff firmly as you go.
Round 1: MR, 6 sc into ring. (6 sts)
Round 2: Inc in each st around. (12 sts)
Round 3: *Sc 1, inc* repeat around. (18 sts)
Round 4: *Sc 2, inc* repeat around. (24 sts)
Round 5: *Sc 3, inc* repeat around. (30 sts)
Round 6: *Sc 4, inc* repeat around. (36 sts)
Round 7: *Sc 5, inc* repeat around. (42 sts)
Rounds 8-15: Sc in each st around. (42 sts) Work 8 rounds even.
Round 16: *Sc 5, dec* repeat around. (36 sts)
Round 17: Sc in each st around. (36 sts)
Insert safety eyes between rounds 11 and 12, approximately 8 stitches apart. The glitter backing goes behind the eye before securing with the washer.
Round 18: *Sc 4, dec* repeat around. (30 sts)
Round 19: *Sc 3, dec* repeat around. (24 sts)
Stuff head very firmly.
Round 20: *Sc 2, dec* repeat around. (18 sts)
Round 21: *Sc 1, dec* repeat around. (12 sts)
Sl st to next st, FO, leave long tail for sewing.
Snout
The snout creates that adorable dragon face shape. Use white chenille yarn.
Round 1: MR, 6 sc into ring. (6 sts)
Round 2: Inc in each st around. (12 sts)
Round 3: *Sc 1, inc* repeat around. (18 sts)
Rounds 4-6: Sc in each st around. (18 sts)
Sl st, FO, leave tail for sewing. Stuff lightly before attaching.
Arms (Make 2)
These chubby little arms are quick to work up.
Round 1: MR, 6 sc into ring. (6 sts)
Round 2: Inc in each st around. (12 sts)
Round 3: *Sc 1, inc* repeat around. (18 sts)
Rounds 4-6: Sc in each st around. (18 sts)
Round 7: *Sc 1, dec* repeat around. (12 sts)
Rounds 8-12: Sc in each st around. (12 sts)
Sl st, FO, leave tail for sewing. Stuff paw firmly, upper arm lightly.
Legs (Make 2)
The legs are similar to the arms but slightly longer.
Round 1: MR, 6 sc into ring. (6 sts)
Round 2: Inc in each st around. (12 sts)
Round 3: *Sc 1, inc* repeat around. (18 sts)
Round 4: *Sc 2, inc* repeat around. (24 sts)
Rounds 5-8: Sc in each st around. (24 sts)
Round 9: *Sc 2, dec* repeat around. (18 sts)
Round 10: *Sc 1, dec* repeat around. (12 sts)
Rounds 11-14: Sc in each st around. (12 sts)
Sl st, FO, leave tail. Stuff foot firmly, leg portion lightly.
Ears (Make 2)
Small floppy ears add personality. Use white chenille yarn.
Round 1: MR, 4 sc into ring. (4 sts)
Round 2: Inc in each st around. (8 sts)
Round 3: *Sc 1, inc* repeat around. (12 sts)
Rounds 4-5: Sc in each st around. (12 sts)
Sl st, FO. Do not stuff. Pinch flat for sewing.
Horns (Make 2)
Switch to gray worsted weight yarn and 3.5mm hook for the horns.
Round 1: MR, 4 sc into ring. (4 sts)
Round 2: *Sc 1, inc* repeat around. (6 sts)
Round 3: *Sc 2, inc* repeat around. (8 sts)
Round 4: Sc in each st around. (8 sts)
Round 5: *Sc 3, inc* repeat around. (10 sts)
Rounds 6-7: Sc in each st around. (10 sts)
Sl st, FO. Stuff lightly with fiberfill.
Back Spikes (Make 5)
These triangular spikes run down the dragon’s back and tail. Use gray yarn and smaller hook.
Round 1: MR, 4 sc into ring. (4 sts)
Round 2: *Sc 1, inc* repeat around. (6 sts)
Round 3: *Sc 2, inc* repeat around. (8 sts)
Round 4: *Sc 3, inc* repeat around. (10 sts)
Sl st, FO. Do not stuff. Flatten slightly before sewing.
Tail
The tail uses white chenille, then transitions to gray at the tip.
With white yarn:
Round 1: MR, 6 sc into ring. (6 sts)
Rounds 2-4: Sc in each st around. (6 sts)
Round 5: *Sc 1, inc* repeat around. (9 sts)
Rounds 6-10: Sc in each st around. (9 sts)
Round 11: *Sc 2, inc* repeat around. (12 sts)
Rounds 12-16: Sc in each st around. (12 sts)
Switch to gray worsted weight for the tail tip.
Rounds 17-20: Sc in each st around. (12 sts)
Sl st, FO. Stuff tail lightly.
Tail Bobbles (Make 3)
These adorable little bobbles add charm. Make one in gray, one in light blue, one in pale pink.
Round 1: MR, 6 sc into ring. (6 sts)
Round 2: Inc in each st around. (12 sts)
Rounds 3-4: Sc in each st around. (12 sts)
Round 5: Dec around. (6 sts)
Stuff lightly, close hole, leave tail for sewing.
Assembly Instructions
Now for the fun part. Putting your dragon together brings it to life.
Step 1: Sew snout to front of head, centered below eyes. Position it so the dragon has a slightly upturned nose.
Step 2: Using black embroidery thread, stitch a curved smile below the snout. A simple curved line works beautifully.
Step 3: Attach ears to sides of head, angling them slightly outward and back.
Step 4: Sew horns to top of head, positioned behind the ears.
Step 5: Attach head to body, with the head tilted slightly to one side for personality.
Step 6: Sew arms to sides of body, just below where the head attaches.
Step 7: Attach legs to bottom front of body so the dragon sits upright.
Step 8: Sew tail to back of body at the bottom.
Step 9: Attach spikes down the center back, starting at the head and continuing onto the tail. Space them evenly.
Step 10: Sew bobbles to the tail, clustering them near the gray tip.
Tips for a Professional Finish
Stuffing matters. Firm stuffing in the head and paws helps your dragon hold its shape. Lighter stuffing in the arms and legs allows them to be poseable.
Weave in ends carefully. Chenille yarn can be tricky. Weave through several stitches and trim close.
Eye placement changes everything. Before securing the safety eyes permanently, try different positions. Moving them even one row can dramatically change the expression.
Take photos as you assemble. This helps you remember placement if you make another one later.
Customization Ideas
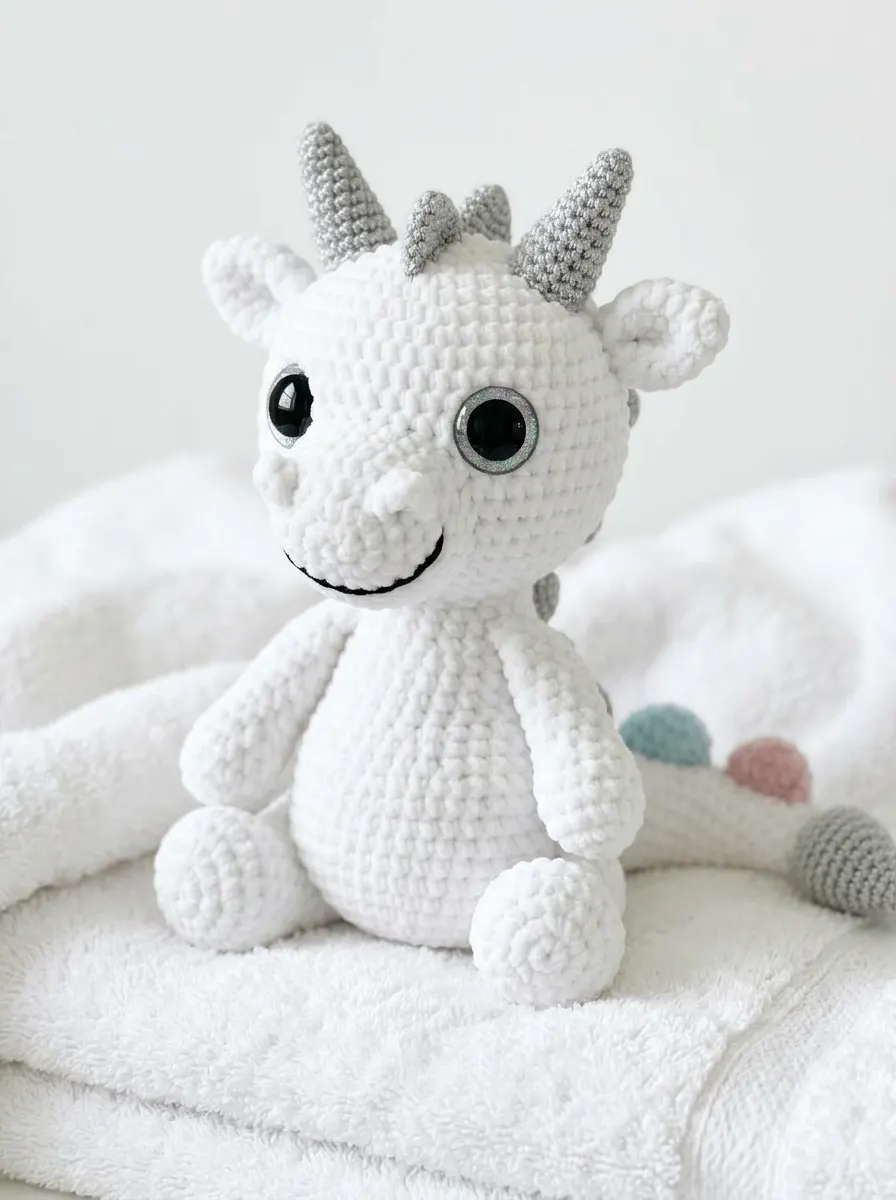
This beginner friendly pattern (once you’ve made one) becomes a canvas for creativity. Try different eye sizes for a cuter or more dramatic look. Use pastel colors for the whole dragon for a nursery theme. Add wire to the tail for poseability. Embroider nostrils on the snout. The possibilities are endless.
You could also make a whole family by adjusting hook size and yarn weight. Worsted weight yarn with a 4.0mm hook creates a mini version perfect for keychains or ornaments.
I really hope you enjoy making this sweet dragon as much as I enjoyed designing it. If you create one, please save this pattern to your Pinterest boards so you can find it again easily. And I would absolutely love to see your finished dragons, so drop a comment below or tag me on Instagram when yours is complete. Happy crocheting, friend!