
Looking for a bag that pulls its weight at the farmers market, beach trip, or daily errands? This tote delivers. It combines three classic crochet techniques in one project: a sturdy single crochet base, playful puff stitch stripes, and an elegant granny square panel that gives the bag its signature open-lattice charm.
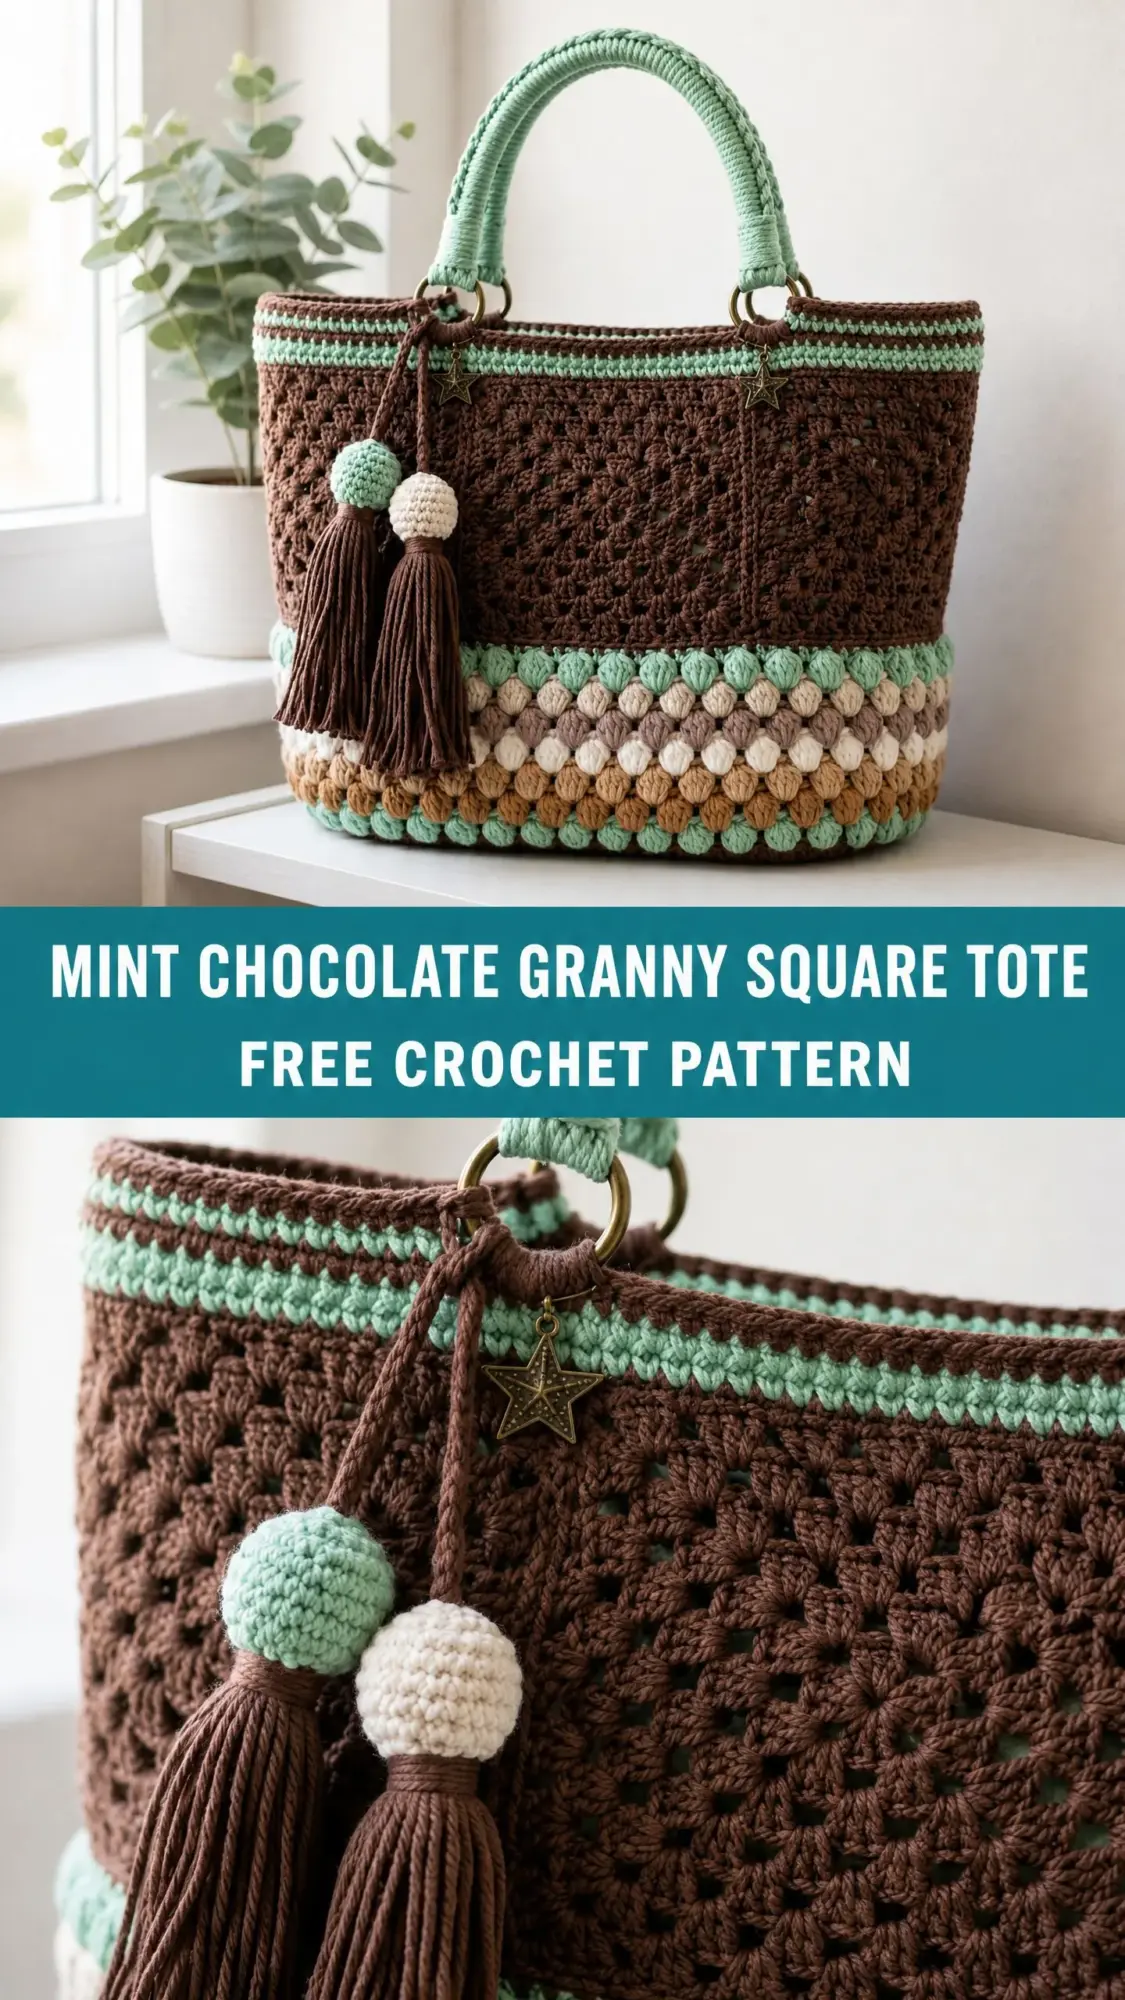
The color palette feels like a scoop of mint chocolate chip ice cream. You get warm caramel and cream tones at the bottom, graduating through soft taupe and fresh mint, then settling into rich chocolate brown for the main body. The mint green handles and top border tie everything together beautifully.
This pattern works up to approximately 14 inches wide by 11 inches tall, perfect for carrying a good amount without becoming overwhelming. It makes an excellent gift for the friend who appreciates handmade quality. The construction is straightforward once you understand each section, and I have broken everything down step by step so you can work through it with confidence.
Why You Will Love This Crochet Tote Pattern
This bag stands out because it teaches you multiple techniques in one satisfying project. You will practice working in the round, mastering puff stitches, joining granny squares seamlessly, and creating sturdy crocheted handles. By the time you finish, you will have leveled up your skills significantly.
The structured oval base gives the bag a professional look and prevents that saggy bottom that plagues many crocheted totes. The puff stitch border adds gorgeous texture without being difficult once you get the rhythm. And those classic granny squares joined in the round create the iconic lattice pattern that catches compliments everywhere you go.
The tassel charm with crocheted pom-pom beads adds a playful finishing touch. You can customize it to match your personal style or skip it entirely if you prefer a cleaner look.
Skill Level
Advanced Beginner to Intermediate. You should be comfortable with basic stitches, working in the round, and reading written patterns. If you have completed at least two granny square projects and one puff stitch project, you will find this manageable. Take your time with the joining methods and you will do great.
Time Estimate
Plan for approximately 18 to 24 hours total, spread across multiple sessions. The puff stitch border takes the longest due to all those color changes. The granny squares work up quickly once you get into a groove.
Finished Dimensions
Materials Needed
Yarn
You will need worsted weight yarn (category 4) in five colors:
| Color | Name | Yardage |
|---|---|---|
| Color A | Chocolate Brown | 400 yards / 366 meters |
| Color B | Mint Green | 200 yards / 183 meters |
| Color C | Cream / Off-White | 75 yards / 69 meters |
| Color D | Warm Taupe / Mauve | 75 yards / 69 meters |
| Color E | Caramel / Mustard Gold | 75 yards / 69 meters |
Total yardage: approximately 825 yards / 755 meters
Recommended Yarns
1. Lion Brand Pound of Love (100% acrylic) offers excellent stitch definition and machine washability
2. Paintbox Yarns Simply DK held doubled creates crisp, clear stitches
3. Drops Safran (100% cotton, held doubled) adds natural structure without stiffener
Choose yarn with good stitch definition. Avoid fuzzy or bouclé yarns since they will obscure the beautiful textures.
Hooks
Notions
Gauge
With US J / 6.0 mm hook and Color A:
Granny square panel gauge: One 4-round granny square = approximately 4.5 inches / 11.5 cm square when blocked
Puff stitch stripe gauge: 8 puff stitches = 4 inches / 10 cm; 5 rows = 2.5 inches / 6.5 cm
Gauge matters for achieving the correct size. Work a swatch and adjust your hook if needed.
Abbreviations Used
Special Stitches
Puff Stitch (ps)
This creates those beautiful bubble textures in the lower border.
1. Yarn over, insert hook into indicated stitch or space
2. Yarn over, pull up a loop to approximately 0.5 inch height (3 loops on hook)
3. Yarn over, insert hook into the same stitch again
4. Yarn over, pull up a loop to the same height (5 loops on hook)
5. Yarn over, insert hook into the same stitch a third time
6. Yarn over, pull up a loop to the same height (7 loops on hook)
7. Yarn over, draw through all 7 loops on hook
8. Chain 1 to close and secure the puff stitch
Important: When working into the top of a puff stitch, insert your hook under this closing chain.
Granny Square (4 rounds)
Round 1: Magic ring, ch 3 (counts as first dc), 2 dc into ring, [ch 2, 3 dc into ring] 3 times, ch 2, sl st to top of beginning ch-3 to join. Pull tail to close ring. (12 dc, 4 ch-2 corner spaces)
Round 2: Sl st to first ch-2 corner sp, ch 3 (counts as dc), [2 dc, ch 2, 3 dc] into same corner sp, ch 1, [3 dc, ch 2, 3 dc] into next ch-2 corner sp; repeat from 2 more times, ch 1, sl st to top of beg ch-3 to join. (24 dc, 4 ch-2 corner sps, 4 ch-1 side sps)
Round 3: Sl st to first ch-2 corner sp, ch 3, [2 dc, ch 2, 3 dc] into same corner sp, ch 1, 3 dc into next ch-1 side sp, ch 1, [3 dc, ch 2, 3 dc] into next ch-2 corner sp; repeat from 2 more times, ch 1, 3 dc into last ch-1 side sp, ch 1, sl st to top of beg ch-3. (36 dc, 4 ch-2 corner sps, 8 ch-1 side sps)
Round 4: Sl st to first ch-2 corner sp, ch 3, [2 dc, ch 2, 3 dc] into same corner sp, [ch 1, 3 dc into next ch-1 sp] across to next corner sp, ch 1, [3 dc, ch 2, 3 dc] into corner sp; repeat from 2 more times, [ch 1, 3 dc into next ch-1 sp] across, ch 1, sl st to top of beg ch-3. (48 dc, 4 ch-2 corner sps, 12 ch-1 side sps)
Fasten off and leave a 12-inch tail for joining.
Join-As-You-Go Method (JAYG)
When joining the final round of a new square to an adjacent finished square:
This creates a flat, nearly invisible join.
Pattern Instructions
Section 1: Oval Base
The base establishes the bag’s structure. Work with Color A and US J / 6.0 mm hook.
Round 1: Ch 30. Starting in 2nd ch from hook, work 28 sc across to last chain. Work 3 sc into the last chain (corner turn). Working along opposite side of foundation chain, work 27 sc back across. Work 3 sc into first chain. Sl st to first sc to join. (61 sc)
Round 2: Ch 1. Sc in each of first 28 sc. [2 sc in next sc, sc in next sc, 2 sc in next sc]. Sc in each of next 27 sc. [2 sc in next sc, sc in next sc, 2 sc in next sc]. Sl st to join. (65 sc)
Round 3: Ch 1. Sc in each of first 28 sc. [2 sc in next sc, sc in each of next 3 sc, 2 sc in next sc]. Sc in each of next 27 sc. [2 sc in next sc, sc in each of next 3 sc, 2 sc in next sc]. Sl st to join. (69 sc)
Round 4: Ch 1. Sc in each of first 28 sc. [2 sc in next sc, sc in each of next 5 sc, 2 sc in next sc]. Sc in each of next 27 sc. [2 sc in next sc, sc in each of next 5 sc, 2 sc in next sc]. Sl st to join. (73 sc)
Round 5: Ch 1. Sc in each of first 28 sc. [2 sc in next sc, sc in each of next 7 sc, 2 sc in next sc]. Sc in each of next 27 sc. [2 sc in next sc, sc in each of next 7 sc, 2 sc in next sc]. Sl st to join. (77 sc)
Round 6: Ch 1. Sc in each of first 28 sc. [2 sc in next sc, sc in each of next 9 sc, 2 sc in next sc]. Sc in each of next 27 sc. [2 sc in next sc, sc in each of next 9 sc, 2 sc in next sc]. Sl st to join. (81 sc)
Checkpoint: Your oval base should measure approximately 14 inches long by 5 inches wide. It should lie flat without cupping or ruffling.
Section 2: Side Wall in Single Crochet
Now you build straight walls without increasing.
Round 7: Ch 1. Working through back loop only (BLO), sc in each sc around. Sl st to join. (81 sc)
Rounds 8-9: Ch 1. Sc in each sc around (through both loops). Sl st to join. (81 sc)
Working Round 7 in BLO creates a subtle ridge that defines where the base meets the sides.
Section 3: Puff Stitch Decorative Border
This gorgeous section uses five colors in sequence from bottom to top: caramel, cream, taupe, cream, mint.
Round 10 (Color E, Caramel): Join Color E. Ch 2. [Ps in next sc, ch 1, sk next sc] around. Sl st to top of first ps. (40 ps, 40 ch-1 sps)
Round 11 (Color C, Cream): Join Color C. Ch 2. [Ps into ch-1 sp between previous round puff sts, ch 1] around. Sl st to first ps. (40 ps, 40 ch-1 sps)
Round 12 (Color D, Taupe): Join Color D. Ch 2. [Ps into ch-1 sp, ch 1] around. Sl st to first ps. (40 ps, 40 ch-1 sps)
Round 13 (Color C, Cream): Join Color C. Ch 2. [Ps into ch-1 sp, ch 1] around. Sl st to first ps. (40 ps, 40 ch-1 sps)
Round 14 (Color B, Mint): Join Color B. Ch 2. [Ps into ch-1 sp, ch 1] around. Sl st to first ps. (40 ps, 40 ch-1 sps)
Note: Working puff stitches into the chain spaces (not into the puff tops) creates that beautiful staggered bubble pattern.
Section 4: Transition Round
Round 15 (Color A): Join Color A into any ch-1 sp. Ch 1. Work 1 sc into each ch-1 sp and 1 sc into the top of each ps around. Sl st to join. (80 sc)
Section 5: Granny Square Upper Body Panel
Make 16 granny squares following the Special Stitches instructions, using Color A for all rounds. Leave 12-inch tails for joining.
Joining the Panel:
1. Arrange squares in 2 rows of 8
2. Use JAYG method to join all 8 squares in the first row into a horizontal strip
3. Join the second row of 8 to the top of the first row
4. Join the short ends together to form a tube
Attaching Panel to Bag Body:
Hold the granny square tube against the outside of the bag body with right sides facing out. Work a joining round of slip stitches through both the bottom chain spaces of the panel and the sc stitches of Round 15, spacing evenly around the entire circumference.
Section 6: Top Border
Round 16 (Color B, Mint): Join Color B to any ch-2 corner sp of top edge. Ch 1. Work sc evenly around, placing 3 sc into each ch-2 corner sp and 1 sc into each ch-1 sp. Sl st to join. (80 sc)
Round 17 (Color B): Ch 1. Sc in each sc around. Sl st to join. (80 sc)
Round 18 (Color A): Join Color A. Ch 1. Sc in each sc around. Sl st to join. (80 sc)
Round 19 (Color A): Ch 1. Sc in each sc around. Sl st to join. (80 sc)
Round 20 (Color B): Join Color B. Ch 1. Sc in each sc around. Sl st to join. (80 sc)
Round 21 (Color B): Ch 1. Sl st in each sc around for a decorative edge. Sl st to join. (80 sl sts)
Fasten off and weave in ends.
Section 7: Handle Attachments and D-Rings
Locate the center of the front panel and center of the back panel. Mark positions 4 stitches to the left and 4 stitches to the right of center on each side.
Attachment Loop (make 4 total):
1. Join Color A at first marked stitch
2. Ch 8
3. Thread D-ring onto the chain loop
4. Sl st to the marked stitch 2 stitches away
5. Work 10 sc tightly over the ch-8 loop and around the D-ring bar
6. Sl st to join. Fasten off and weave in ends
Section 8: Handles (make 2)
With Color B and US I / 5.5 mm hook:
Round 1: Ch 5, sl st to form a ring. Ch 1, 5 sc into ring, sl st to join. (5 sc)
Round 2 onward: Ch 1, sc in each sc around, sl st to join. Repeat until tube measures 22 inches / 56 cm.
Finishing:
Insert both ends of handle through one front D-ring and one back D-ring. Fold each end over the D-ring bar by 1 inch. Stitch securely with yarn needle.
Section 9: Tassel Charm
Tassel: Cut 30 strands of Color A, each 8 inches long. Fold bundle in half, thread through a jump ring, pull tails through loop. Wrap Color A tightly around bundle 0.5 inch from top. Trim ends to 3 inches.
Crocheted Pom-Pom Beads (make 1 in Color B, 1 in Color C):
1. Magic ring, ch 1, 6 sc into ring, sl st to join (6 sc)
2. Ch 1, 2 sc into each sc around, sl st to join (12 sc)
3. Ch 1, [sc in next sc, 2 sc in next sc] 6 times, sl st to join (18 sc)
4. Ch 1, sc in each sc around, sl st to join. Repeat once more for height (18 sc)
5. Ch 1, [sc in next sc, sc2tog] 6 times, sl st to join (12 sc)
6. Stuff with yarn scraps until firm
7. Ch 1, [sc2tog] 6 times, sl st to join (6 sc)
8. Fasten off, thread tail through remaining stitches, pull to close
Thread beads onto tassel cord, attach star charms, and secure to a front D-ring.
Size Customization Tips
For a wider bag: Add stitches to the foundation chain in increments of 2. Each extra 2 chains adds approximately 0.75 inch to the length. Add 1 granny square per additional 4.5 inches of circumference.
For a taller bag: Add more granny square rows. One additional row adds approximately 4.5 inches of height.
For a deeper bag: Add more stitches to the short-end increases during base rounds.
Pattern Notes to Remember
Troubleshooting Common Issues
Base cupping upward? Your tension is too tight. Go up one hook size.
Base ruffling or waving? Your tension is too loose. Go down one hook size.
Puff stitches look uneven? Focus on pulling up loops to the same height each time. Practice makes perfect here.
Granny squares different sizes? Check your gauge and make sure you are blocking each square before joining.
Final Thoughts on This Crochet Tote Tutorial
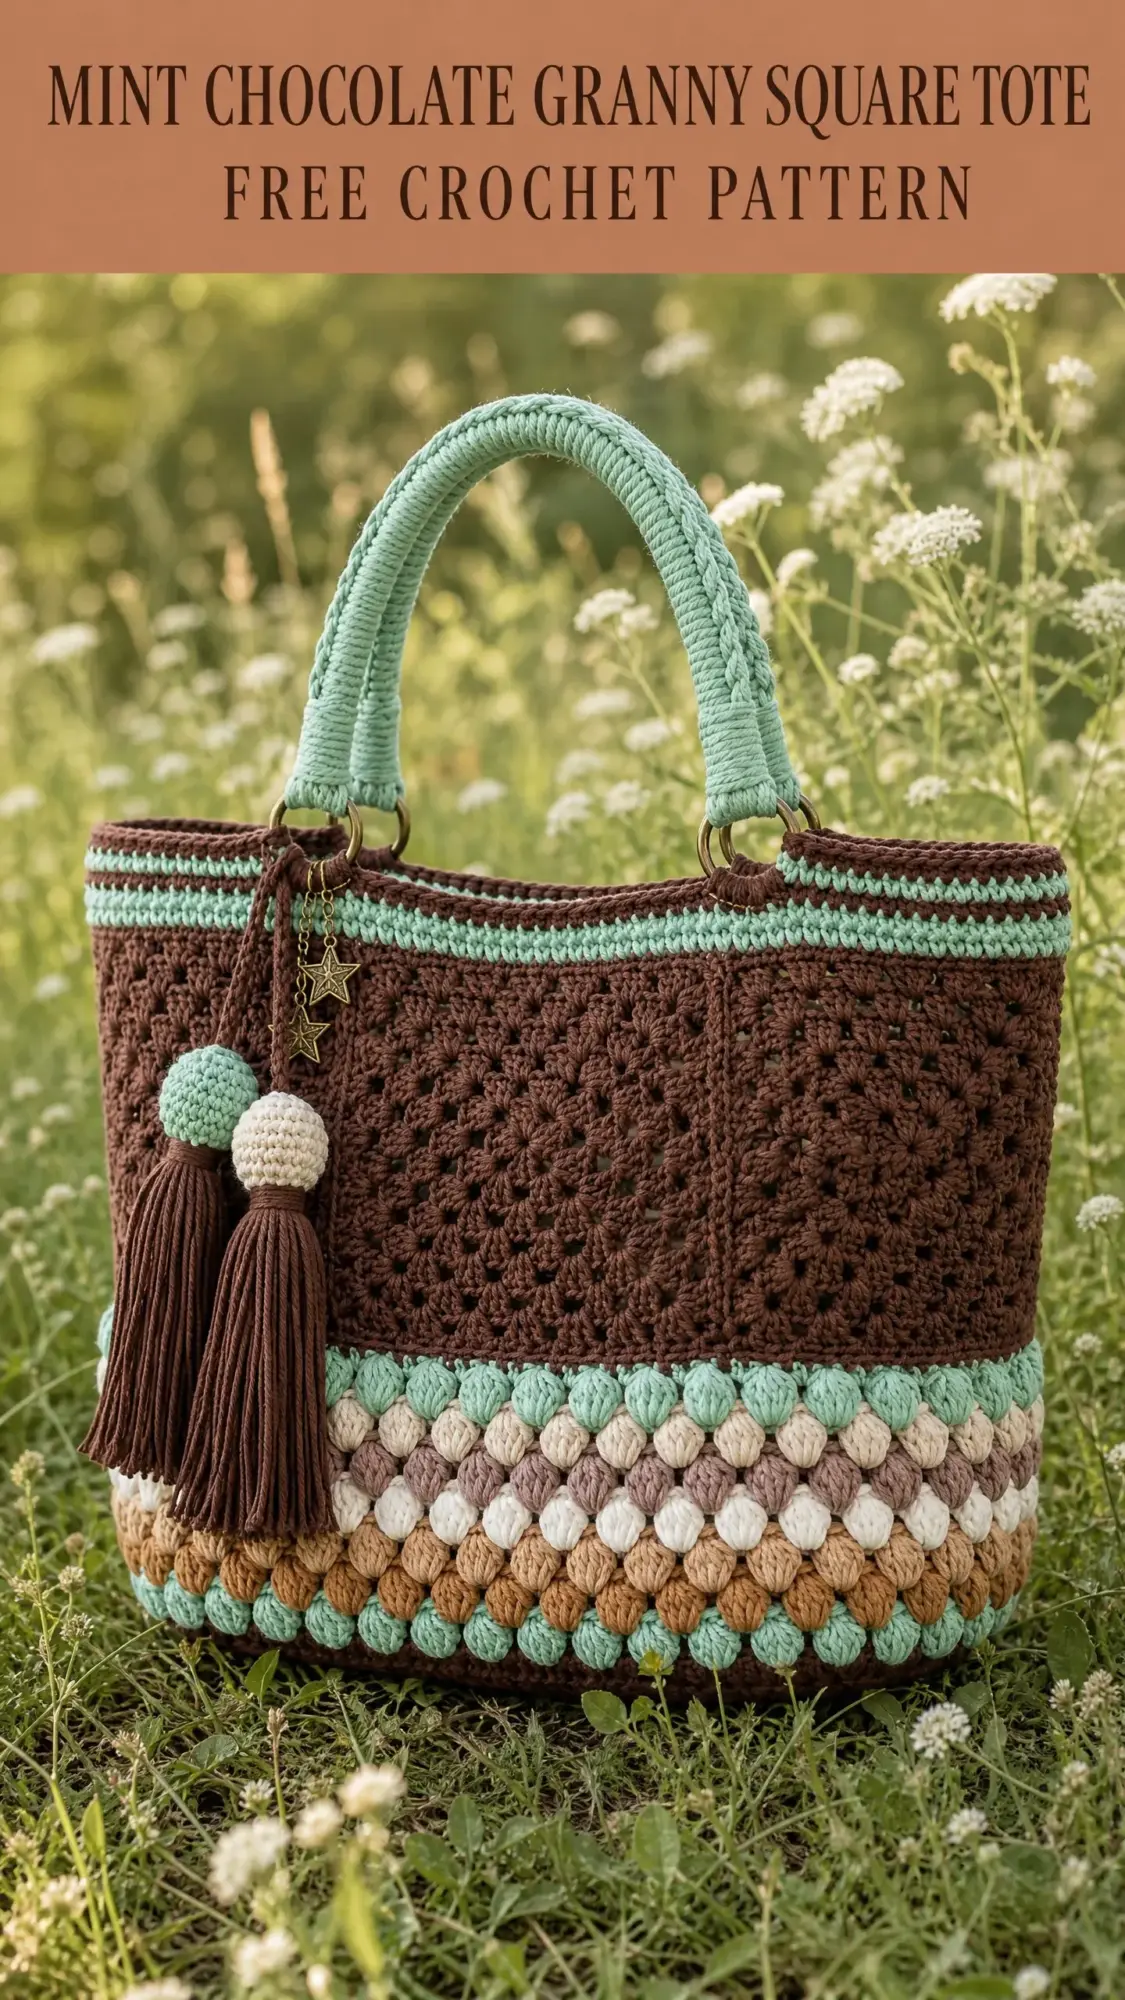
This mint chocolate granny square tote combines beauty and function in one impressive project. You get to practice multiple crochet techniques while creating something genuinely useful. The color combination feels fresh and modern, but you could easily swap in your own palette to match your style.
Take your time with each section. The puff stitch border requires patience with all those color changes, but the result is absolutely worth it. And those granny squares? Once you get into a rhythm, they practically fly off your hook.
I hope you love making this bag as much as I loved designing it. The compliments you will receive when you carry it around town are just a bonus.
If you enjoyed working on this pattern, save it to your Pinterest boards so you can find it again easily. And please leave a comment below if you make one. I would love to hear how yours turned out and see photos of your color combinations!