
I don’t know about you, but I have a thing for pretty journals. The kind you want to carry everywhere, fill with lists and dreams, and maybe show off a little at the coffee shop. The problem? Most store-bought covers feel generic, and the cute ones fall apart after a month.
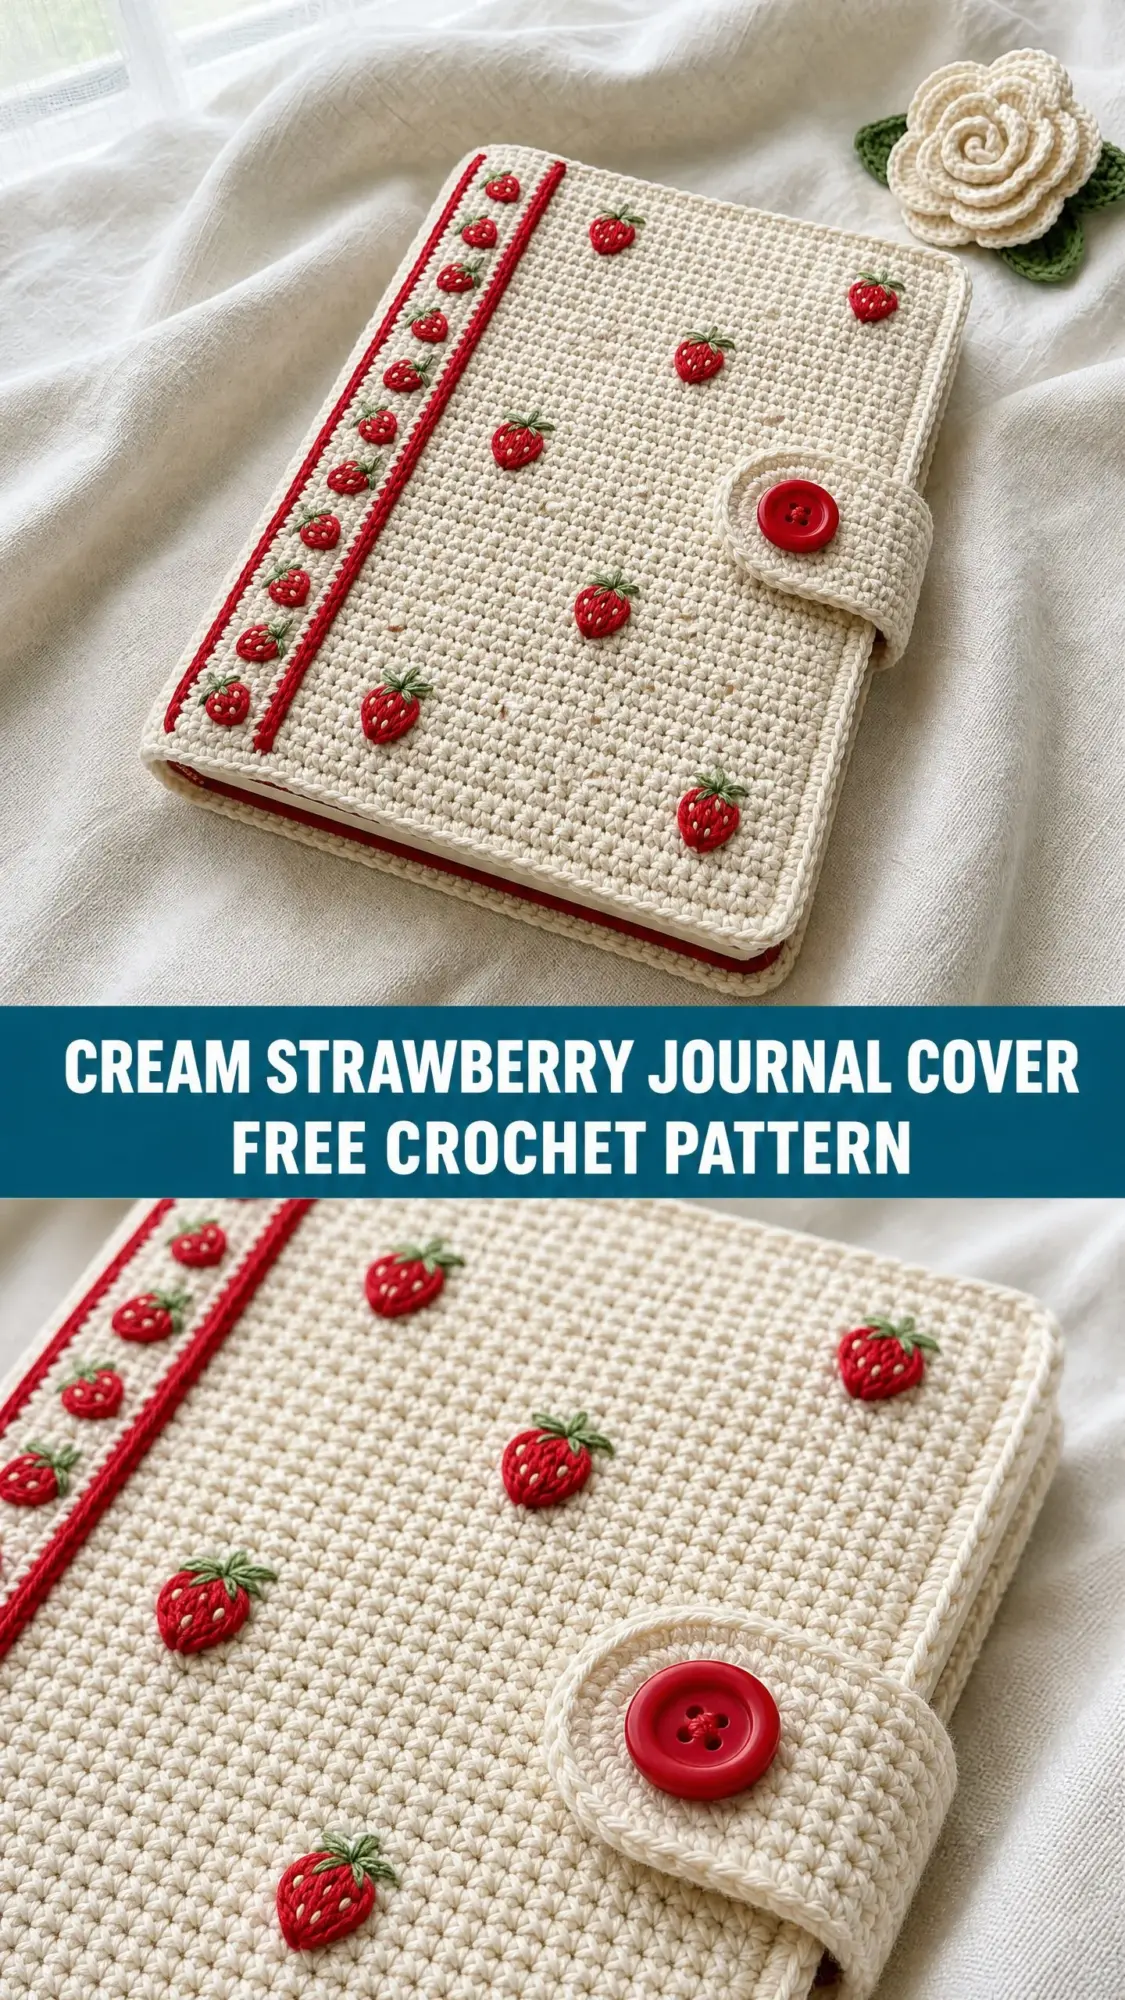
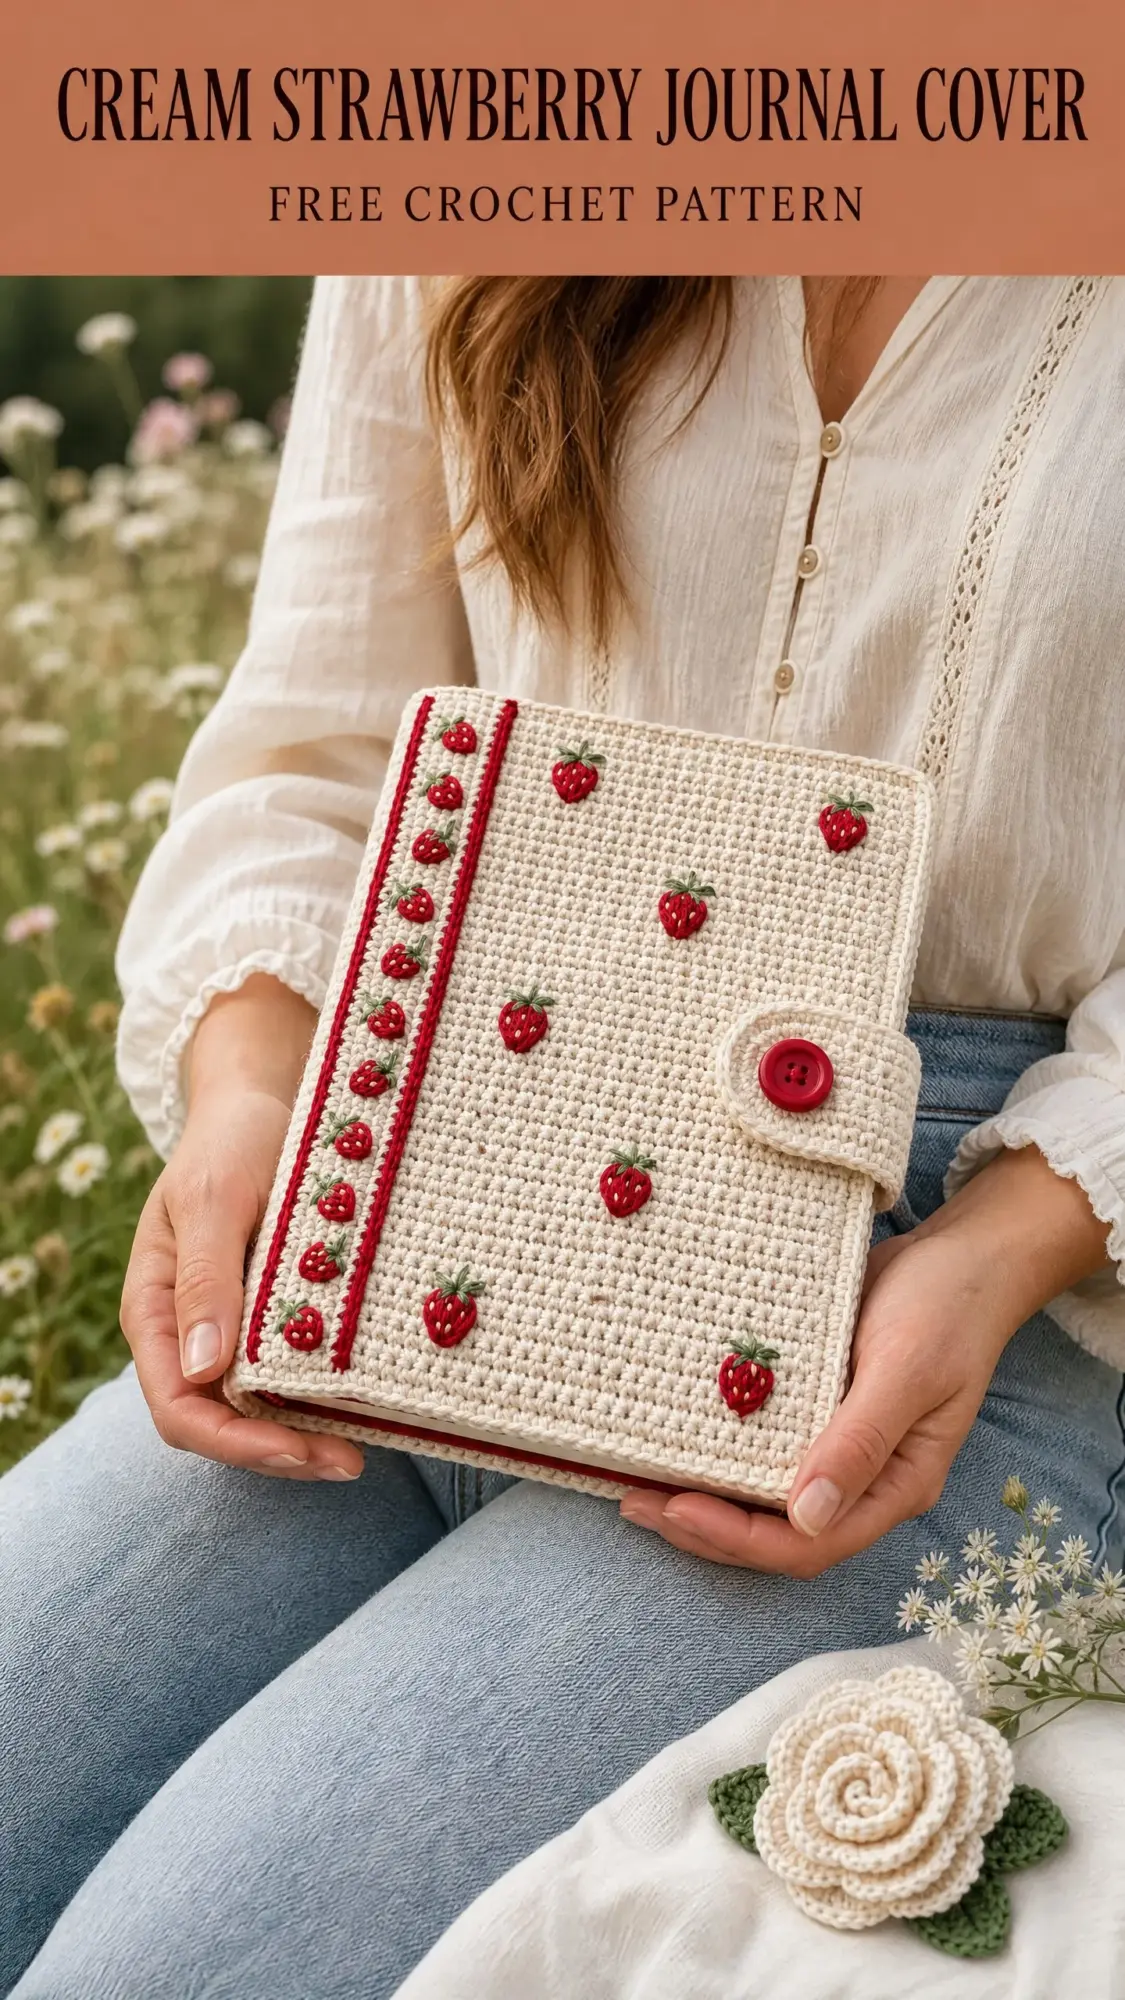
That’s exactly why I designed this strawberry journal cover. It wraps your favorite A5 notebook in a cozy crocheted hug, complete with embroidered strawberries scattered across cream-colored fabric. The dense single crochet creates a sturdy protective shell while those sweet little berries add personality without being over the top.
Whether you’re making this for yourself or gifting it to the journal lover in your life, this project hits that sweet spot between practical and absolutely adorable. Let’s get into it.
About This Crochet Journal Cover Pattern
This journal cover is worked as one continuous flat panel using single crochet (sc) to create a dense, fabric-like texture. The construction is straightforward: you crochet a large rectangle, fold it around your journal, and add inner pocket flaps to hold everything in place.
The real magic happens after the main piece is done. Those charming strawberries aren’t crocheted into the fabric. They’re embroidered on afterward using simple satin stitches. This means you have complete control over placement, and honestly, it’s way easier than colorwork.
The decorative red border lines along the spine? Also added after construction using surface slip stitches. This technique creates raised corded lines on top of your finished fabric without any complicated color changes during the main construction phase.
A button-and-loop closure keeps your journal securely wrapped when it’s tucked in your bag. And if you want to go the extra mile, there’s an optional crochet rose embellishment that makes the cutest removable accessory.
Skill Level
This pattern is rated intermediate, but don’t let that scare you off if you’re a confident beginner.
The stitch pattern itself is just single crochet. That’s it. Row after row of the most basic stitch in crochet. What bumps this into intermediate territory is the precision required to maintain consistent stitch counts over 50 rows, the embroidery work, and the assembly of the pocket flaps.
If you can crochet a dishcloth and you’re willing to try some simple embroidery, you can absolutely make this cover. I’ll walk you through everything.
Time Estimate
Plan for approximately 10 to 15 hours total to complete this project.
Here’s how that breaks down:
This isn’t a weekend afternoon project, but it’s not a month-long commitment either. Perfect for working on during evening TV time.
Finished Dimensions
The completed cover fits a standard A5 journal measuring approximately 5.8 inches by 8.3 inches (14.8 cm by 21 cm).
Before folding, your crocheted panel measures approximately 14 inches wide by 9 inches tall (35.5 cm by 23 cm). After assembly with the pocket flaps, the closed cover measures approximately 6.5 inches wide by 9 inches tall (16.5 cm by 23 cm).
I’ve included size customization tips at the end if your journal is a different size.
Materials Needed
Yarn
Yarn Suggestions
Lion Brand Pound of Love in Antique White and Scarlet works beautifully for this project. The stitch definition is excellent and it holds structure well.
Paintbox Yarns Simply DK held double creates a worsted-equivalent weight with exceptional color consistency.
Drops Paris or Drops Safran are cotton-based options that give the cover a firm, slightly stiff drape. Cotton holds embroidery cleanly and doesn’t pill, making it ideal for this type of project.
Substitution Note: Use any worsted weight yarn that achieves the stated gauge. The finished fabric should be firm, not stretchy, so the cover holds its shape. Avoid yarns with high elastane content.
Hook
US size G-6 / 4.0 mm crochet hook
Notions
Gauge
20 single crochet stitches and 22 rows = 4 inches (10 cm) worked in single crochet with a US G-6 / 4.0 mm hook.
Gauge matters here. An incorrect gauge means your cover won’t fit your journal. Work a swatch at least 5 inches square, wash and block it the way you plan to treat the finished piece, then measure. Adjust your hook size up or down as needed.
Abbreviations
Special Techniques
Surface Slip Stitch Line
This creates the raised red vertical lines on your finished cover. With a separate strand of CA and your crochet hook, insert the hook from the RS through a stitch gap in the finished fabric. Draw up a loop of CA. Insert the hook into the next stitch gap directly above, draw the working yarn through the fabric and through the loop on your hook. Continue upward in a straight vertical line. Fasten off and weave ends to WS.
Strawberry Embroidery Motif
Each strawberry measures approximately 0.5 inch tall by 0.4 inch wide. The body is worked in CA using satin stitch filling. Work satin stitches across a heart shape, angling slightly to follow the rounded form. Add 3 to 4 small straight stitch seeds in CC scattered across the red body. Work the leaves and stem in CB using 3 to 4 straight stitches radiating from the top of the berry.
Don’t worry if you’ve never done embroidery on crochet fabric before. The stitches sit nicely between the single crochet posts, and you can always practice on your gauge swatch first.
Step by Step Instructions
Section 1: Main Panel
The main panel covers all three sections at once: back panel, spine, and front panel. No seams across the main fabric.
At gauge, your stitch breakdown is:
With MC and US G-6 / 4.0 mm hook, ch 71.
Row 1 (RS): Sc in second ch from hook and in each ch across. (70 sc)
Row 2: Ch 1, turn. Sc in each st across. (70 sc)
Rows 3 through 37: Ch 1, turn. Sc in each st across. (70 sc per row)
Checkpoint: After Row 37, your panel should measure approximately 6.5 to 7 inches tall and 14 inches wide. The fabric should be firm and even.
Rows 38 through 50: Ch 1, turn. Sc in each st across. (70 sc per row)
After Row 50, the main panel is complete.
Fasten off MC. Weave in ends.
Final Checkpoint: Your completed main panel should measure approximately 14 inches wide and 9 inches tall. It should be a true rectangle with square corners.
Section 2: Fold Lines at Spine
The spine fold lines sit at stitch columns 32 and 38, counting from the right edge when RS faces you. After blocking, lightly crease these fold lines by folding the panel gently over a ruler or the journal spine. This helps the cover wrap cleanly.
Section 3: Inner Pocket Flaps
These create the sleeves that hold your journal covers in place. Make 2.
Each pocket flap measures 2.5 inches tall by 6.5 inches wide after folding.
Pocket Flap (make 2):
With MC, ch 33.
Row 1: Sc in second ch from hook and in each ch across. (32 sc)
Rows 2 through 28: Ch 1, turn. Sc in each st across. (32 sc per row)
Fasten off after Row 28, leaving a tail of approximately 18 inches for seaming.
The completed pocket flap measures approximately 6.5 inches wide and 5 inches tall before folding.
Fold each pocket flap in half lengthwise (bringing the foundation chain edge up to meet the last row edge). The folded piece is now approximately 2.5 inches tall with a clean folded edge at the top.
Attaching Pocket Flaps:
Align one folded pocket flap against the WS of the back panel section. The folded top edge should sit approximately 0.5 inch below the top raw edge of the main panel. Pin in place.
Using MC and a tapestry needle, whip stitch along the left side edge, right side edge, and bottom raw edge of the pocket flap to the main panel WS. Leave the top folded edge open to form the pocket opening.
Repeat for the second pocket flap on the front panel section.
Test Fit: Fold the main panel around your journal. The journal covers should slide into each pocket flap smoothly.
Section 4: Button Tab Closure
With MC, ch 16.
Row 1: Sc in second ch from hook and in each ch across. (15 sc)
Row 2: Ch 1, turn. Sc across. (15 sc)
Row 3: Ch 1, turn. Sc in first 6 sts, ch 3, sk 3 sts, sc in last 6 sts. (12 sc, 1 ch-3 sp)
Row 4: Ch 1, turn. Sc in first 6 sts, 3 sc in ch-3 sp, sc in last 6 sts. (15 sc)
Row 5: Ch 1, turn. Sc across. (15 sc)
Fasten off leaving a 12 inch tail.
Border the tab: With CA, join at any corner. Work sc around entire perimeter, working 3 sc in each corner to keep it flat. Sl st to join. Fasten off CA.
Fold the tab in half lengthwise so it’s doubled for thickness. Whip stitch the long edges together using MC.
Attach the tab to the right edge of the front panel at vertical center (approximately 4.5 inches from the top edge). The tab extends outward so it can wrap around to the back panel.
Sew the button to the exterior of the back panel on the right edge at vertical center, approximately 0.5 inch from the right raw edge. Position it so the ch-3 loop reaches over it when closed.
Section 5: Edge Finishing
With MC and RS facing, join yarn at any corner. Work one row of sc evenly around the entire outer perimeter, working 3 sc in each corner to keep corners square. Sl st to first sc to close the round. Fasten off MC.
You can optionally work a second round in CA for a red border edge. The sample shows a cream edge with red accent coming only from the surface stitched lines.
Section 6: Surface Stitch Red Border Lines
The spine column spans stitches 33 through 37. The red border lines sit at columns 33 and 35.
First red line: Using CA and your crochet hook, work a surface slip stitch line from the bottom edge to the top edge along stitch column 33.
Second red line: Work a second surface slip stitch line along stitch column 35.
Fasten off all CA ends and weave securely to WS.
Section 7: Strawberry Embroidery
Spine Column Strawberries: Work strawberries in a straight vertical line centered within the spine column at stitch column 35. Work one strawberry every 2 rows, beginning at Row 3 from the bottom and ending at Row 3 from the top. This yields approximately 22 strawberries along the spine column.
Front Panel Scattered Strawberries: Work 9 to 11 additional strawberries scattered across the front panel in loose random placement. Suggested positions measured from the bottom-left corner of the front panel:
Feel free to adjust. The placement should feel organic, not gridded.
Spine Column Side Strawberries: Work an additional 8 to 10 strawberries along the inner edge of the red border lines, alternating sides.
Section 8: Optional Rose Embellishment
Rose:
With CC, ch 31.
Row 1: Sc in second ch from hook and in each ch across. (30 sc)
Row 2: Ch 1, turn. Work 2 sc in each st across. (60 sc)
Row 3: Ch 1, turn. Work 1 sc in first st, then alternating: sl st in next st, sc in next st, across to end. (60 sts)
Fasten off leaving a long tail. Roll the strip into a spiral with RS facing outward. Use the tail to stitch the base together as you roll.
Leaf:
With CB, ch 9. Sc in second ch from hook, hdc in next ch, dc in next 2 ch, hdc in next ch, sc in next ch, sl st in last ch. Ch 1, rotate to work along the opposite side. Sl st in first ch, sc in next, hdc in next, dc in next 2, hdc in next, sc in last. Sl st to beginning to close. Fasten off.
Attach the leaf to the rose base. This piece can be pinned to the cover as a removable accessory.
Blocking and Finishing
Wet blocking is recommended, especially for cotton yarn. Soak the completed cover in cool water for 10 to 15 minutes. Gently press out excess water without wringing. Lay flat on a blocking mat and pin to dimensions. Allow to dry completely.
For acrylic yarn, steam blocking works well. Hold a steam iron 1 inch above the fabric without touching, steam gently, then pin to shape and let cool.
Weave all yarn tails at least 1 inch through the WS fabric in multiple directions. This cover will be handled frequently, so secure those ends well.
Size Customization Tips
To fit a different journal, measure your journal’s height, width, and spine depth.
New panel width = front cover width + spine depth + back cover width + 0.5 inch ease
New stitch count = total panel width multiplied by your stitch gauge per inch
New panel height = journal height + 0.5 inch total ease
Pocket flap width should match the front or back panel width minus 0.25 inch on each side.
Care Instructions
Hand wash in cool water with gentle soap. Do not wring or twist. Lay flat to dry. Remove your journal from the cover before washing. Do not iron directly on the embroidered strawberries.
I really hope you love making this strawberry journal cover as much as I enjoyed designing it. There’s something so satisfying about turning a simple notebook into something truly special.
If you make this pattern, I’d absolutely love to see your finished cover! Save this to your Pinterest boards so you can find it when you’re ready to start, and please drop a comment below sharing your version. Your photos seriously make my day.