
Multi-section garment construction can feel intimidating, but I promise this dress is more manageable than it looks. Yes, you will work a bodice, a lace skirt, and some adorable appliques. But each piece breaks down into straightforward steps, and nothing here is beyond your reach if you have made a few projects already.
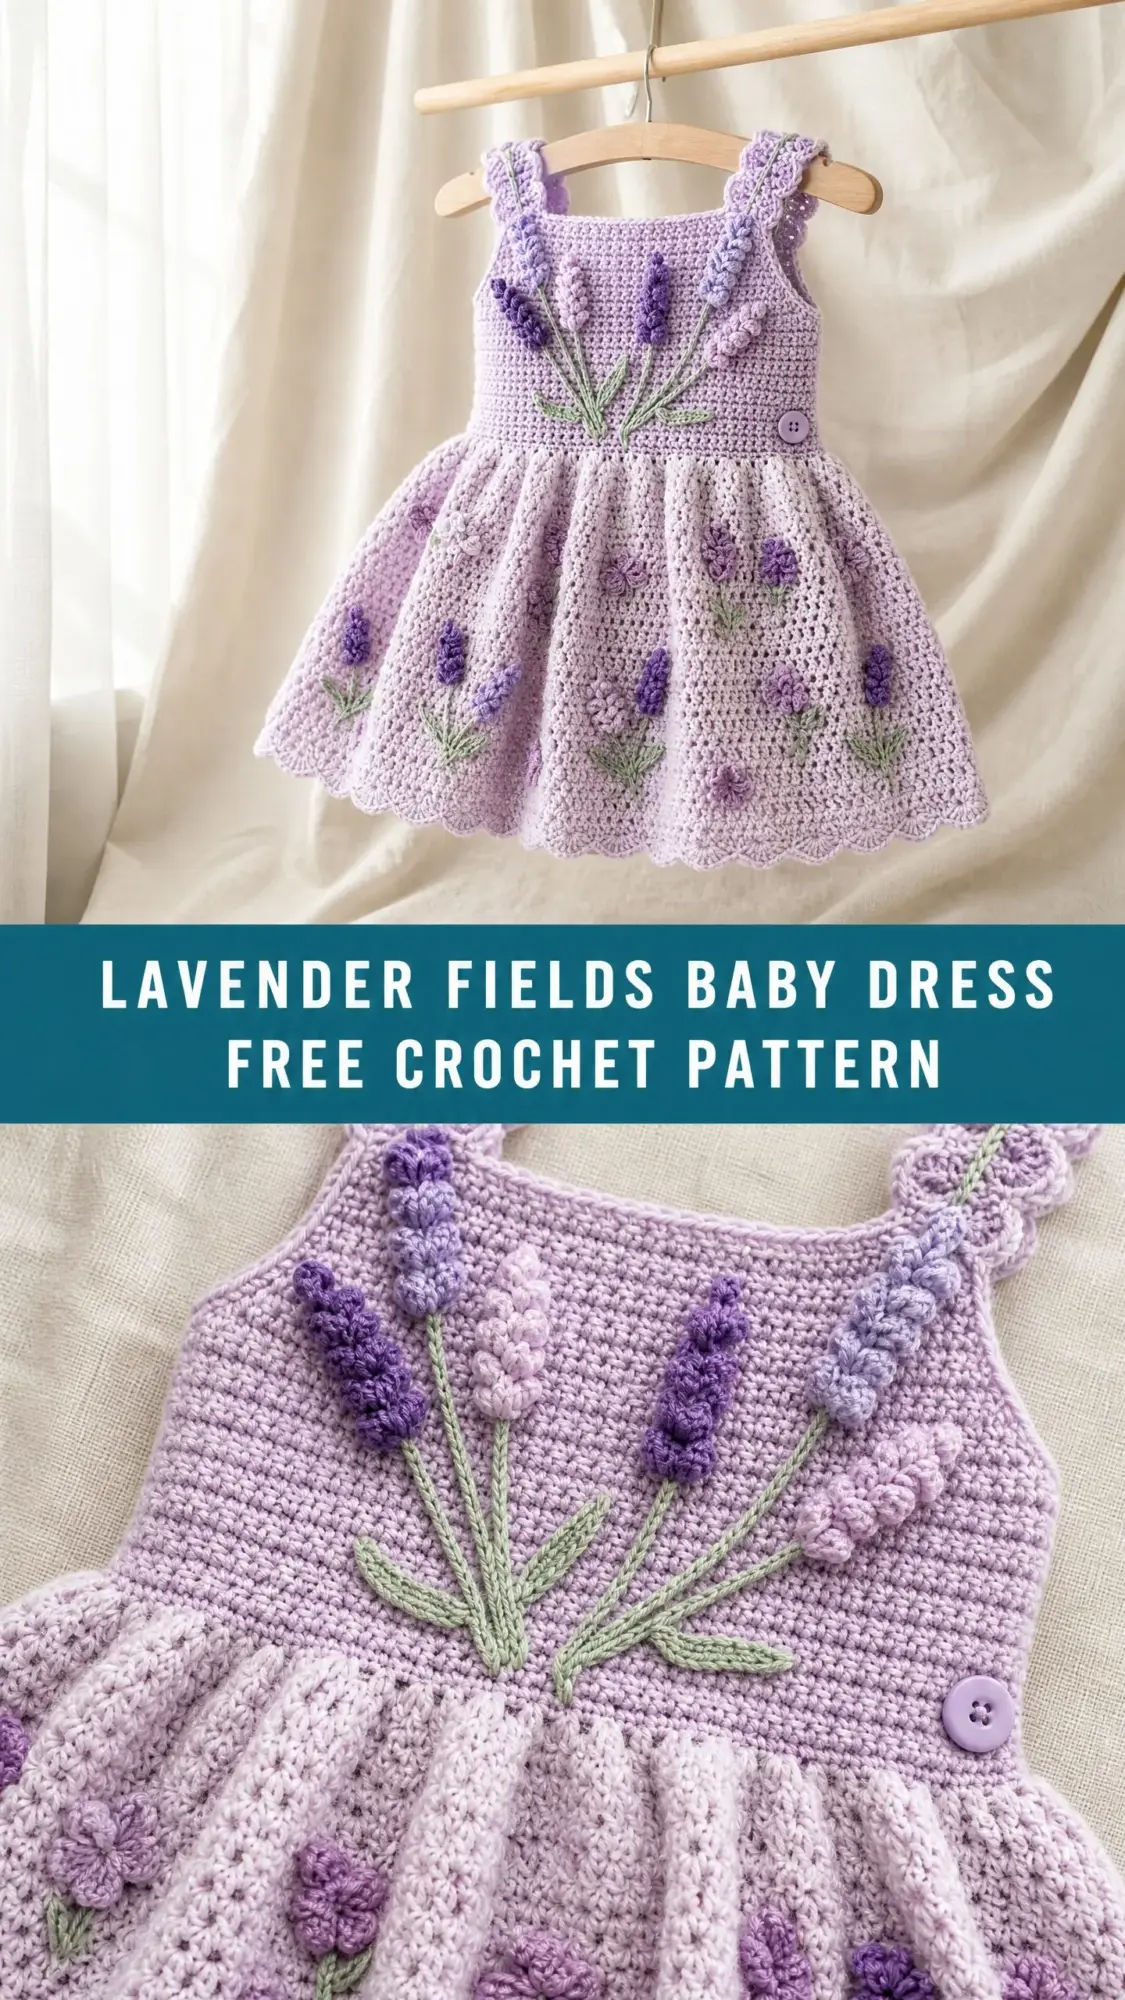
I designed this pattern with clear checkpoints so you can measure your progress and catch any issues early. The bodice is just single crochet worked flat. The skirt uses a classic shell lace that practically works itself once you get the rhythm. And those gorgeous lavender spikes? They are simply bobbles on a chain.
Whether you are an intermediate crocheter ready to tackle your first garment or an experienced maker looking for a beautiful baby gift, this Lavender Fields Baby Dress crochet pattern will walk you through every stitch. Let me show you exactly how it all comes together.
About This Baby Dress Crochet Pattern
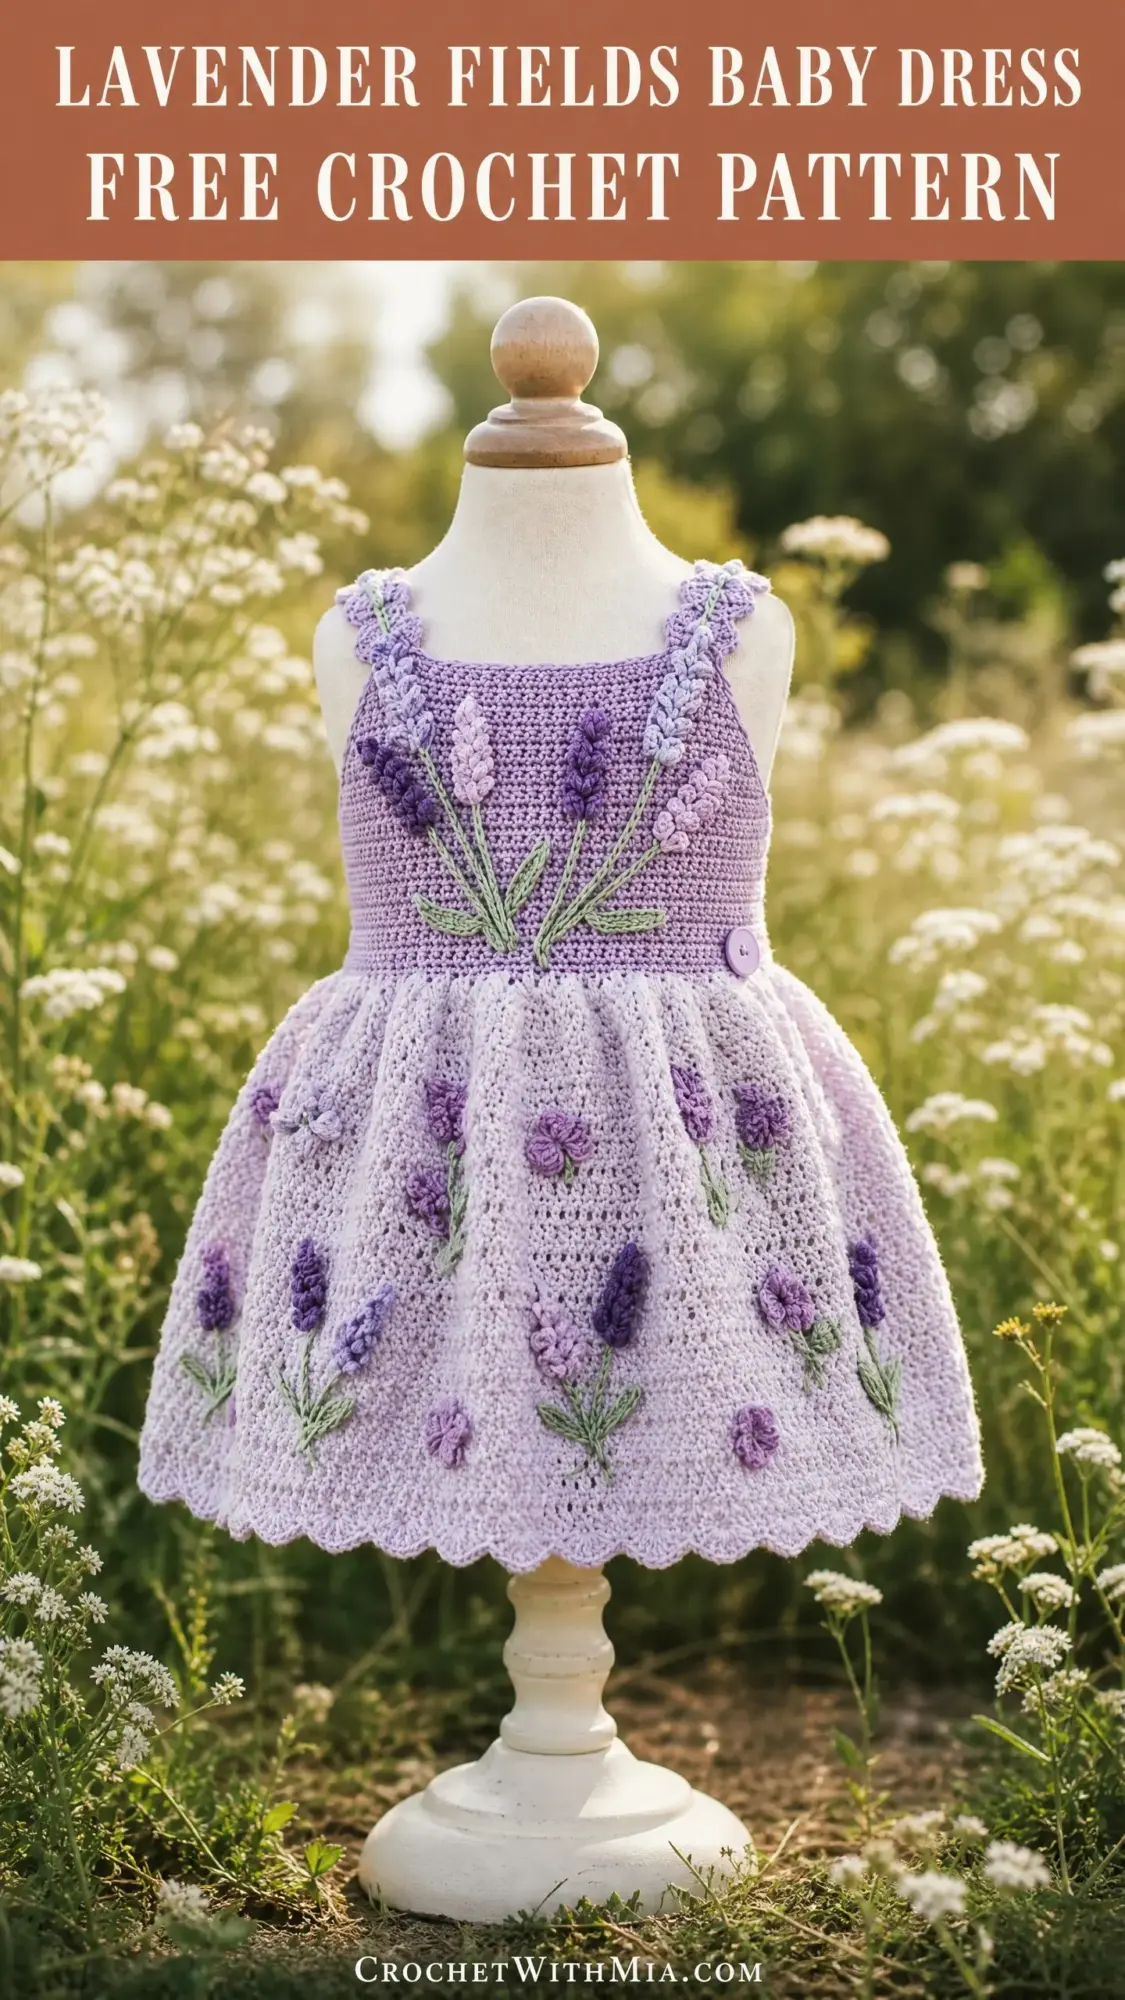
This heirloom-quality sleeveless dress features a fitted square-neck bodice, a full gathered skirt with open shell lace, and three-dimensional lavender spike appliques with embroidered stems. The soft purple color palette creates a garden-fresh look perfect for spring photos, special occasions, or everyday sweetness.
The construction moves from the top down. You will work the bodice front flat in single crochet, then work the back as two separate panels for a button closure. After joining the sides, the skirt flows from the waist in the round using a pretty shell stitch pattern. The lavender flower details are crocheted separately and sewn on after blocking.
Skill Level: Intermediate to Advanced
This pattern requires comfort with flat and in-the-round construction, reading a multi-part garment, working three-dimensional bobble clusters, surface embroidery, and applying separate crocheted appliques. If you are new to garment making, consider practicing with a simpler baby top first.
Time Estimate: Approximately 15 to 22 hours for the main construction, plus 3 to 5 hours for applique work and finishing.
Finished Measurements
This pattern is written for size 12 months.
Materials Needed
Yarn
You will need DK weight yarn (CYCA weight 3) in four colors:
Recommended Yarn Options
Paintbox Yarns Simply DK (100% acrylic, 276 yards / 252 m per 100 g skein) offers machine washability and excellent stitch definition for showing the lace pattern clearly.
Lion Brand Pound of Love (100% acrylic, 1020 yards / 932 m per 16 oz skein) is extremely soft against baby skin and provides ample yardage if you purchase coordinating colors.
Cascade Yarns 220 Superwash (100% superwash wool, 220 yards / 200 m per 100 g skein) produces the most heirloom appearance with superior stitch definition and beautiful drape after blocking.
Avoid highly textured, fuzzy, or bouclé yarns as the lace pattern and applique details will be obscured. Always verify your yarn is machine washable for a baby garment.
Hooks
Notions
Gauge
Getting gauge right is critical for achieving the correct chest measurement and dress length. Please work swatches before beginning.
With MC and smaller hook (E-4 / 3.5 mm), in single crochet worked flat:
21 stitches = 4 in / 10 cm
24 rows = 4 in / 10 cm
With CC1 and larger hook (F-5 / 3.75 mm), in shell lace pattern worked in the round:
One full 6-stitch shell repeat = 1.25 in / 3.2 cm wide
4 rounds of shell pattern = 1.5 in / 3.8 cm tall
Work a 5 in / 13 cm swatch in each stitch pattern before beginning.
Abbreviations
Special Stitches
Scallop Edging Stitch
This decorative edging appears on the hem, straps, and neckline.
1. Slip stitch into the first stitch to anchor.
2. Chain 3.
3. Work 2 dc into the same stitch as the slip stitch.
4. Skip 2 stitches.
5. Slip stitch into the next stitch.
6. Repeat steps 2 through 5 across the edge.
Each scallop uses 3 stitches, so your stitch count must be divisible by 3 for even scallops.
Lavender Spike Cluster (lv-sp)
This creates the raised lavender flower spikes used in the bodice motif and skirt appliques.
1. Join CC2 (deep purple) to the working stitch.
2. Chain 1.
3. Yarn over, insert hook into same stitch, pull up a loop, yarn over, pull through 2 loops (you have a half-closed double crochet on your hook).
4. Repeat step 3 two more times in the same stitch (3 half-closed dc on hook, 4 loops total).
5. Yarn over and pull through all 4 loops to close the bobble.
6. Chain 1 to lock the bobble.
This forms one spike cluster. You will work clusters in groups of 5 to 7 to form each lavender stem.
Shell Stitch
Work 5 dc into a single stitch or chain space as directed. All shell stitches in the skirt use 5 dc unless otherwise noted.
Small Flower Applique
1. With CC2, make a magic ring.
2. Chain 3, work 1 dc into the ring, chain 3, slip stitch into ring. (First petal complete.)
3. Repeat step 2 four more times for a total of 5 petals.
4. Pull ring closed and fasten off, leaving a 6 in / 15 cm tail for sewing.
5. With CC3, embroider a small French knot at the center.
Important Pattern Notes
Before you begin, please read through these construction notes:
1. The bodice front and bodice back are worked separately, flat, from the top down. The sides are then joined with a whipstitch seam.
2. The skirt is worked in the round from the joined waist edge.
3. Turning chains do not count as stitches throughout the bodice. Begin every row with ch 1, turn, then work your first sc into the first stitch.
4. The lavender motif on the bodice front is worked as surface embroidery and applied spike clusters after the bodice is complete. Do not try to incorporate it during construction.
5. Always count your stitches at the end of each row and round. Place a stitch marker at the beginning of each round in the skirt.
6. Block the finished dress before attaching appliques. Wet blocking is strongly recommended.
7. All stitch counts appear in parentheses at the end of each row or round.
Step by Step Instructions
Bodice Front
The bodice front is worked flat from the top edge (neckline) down to the waist.
Foundation: With MC and smaller hook, chain 49.
Row 1 (RS): Sc in second ch from hook and in each ch across. Ch 1, turn. (48 sc)
Row 2 (WS): Sc in each st across. Ch 1, turn. (48 sc)
Row 3 (RS): Sc in each st across. Ch 1, turn. (48 sc)
Rows 4 through 6: Repeat Row 2. (48 sc at end of each row)
Strap Shaping
The top 10 stitches on each edge form the shoulder straps. The center 28 stitches form the chest panel. Beginning on Row 7, work only the left strap.
Left Strap (from RS perspective):
Row 7 (RS): Sc in first 10 sts. Ch 1, turn. Leave remaining 38 sts unworked. (10 sc)
Rows 8 through 22: Sc in each st across. Ch 1, turn. (10 sc per row)
After Row 22, the left strap measures approximately 2.5 in / 6.4 cm from Row 7. Fasten off MC. Set aside.
Right Strap:
With RS facing, skip the center 28 sts of Row 6 and join MC in the 39th stitch.
Row 7 (RS): Sc in this st and in each of the last 10 sts. Ch 1, turn. (10 sc)
Rows 8 through 22: Sc in each st across. Ch 1, turn. (10 sc per row)
After Row 22, do not fasten off. Set aside.
Joining Straps to Form Yoke
Joining Row (Row 23, RS): With RS facing and working yarn still attached to right strap, sc across the 10 sts of the right strap, ch 28 (these chains bridge the neckline gap), then sc across the 10 sts of the left strap. Ch 1, turn. (48 sts: 10 sc + 28 ch + 10 sc)
Row 24 (WS): Sc in each of the 10 right strap sts, sc in each of the 28 chain sts, sc in each of the 10 left strap sts. Ch 1, turn. (48 sc)
Rows 25 through 36: Sc in each st across. Ch 1, turn. (48 sc per row)
After Row 36, do not fasten off. Secure the working loop on a stitch marker.
Checkpoint: Your bodice front should measure approximately 6 in / 15 cm tall and 9 in / 23 cm wide.
Bodice Back
The back is worked similarly but split at center back for the button closure.
Left Back Panel:
Foundation: With MC and smaller hook, chain 25.
Row 1 (RS): Sc in second ch from hook and in each ch across. Ch 1, turn. (24 sc)
Rows 2 through 6: Sc in each st across. Ch 1, turn. (24 sc per row)
Left Back Strap:
Row 7 (RS): Sc in first 10 sts. Ch 1, turn. (10 sc)
Rows 8 through 22: Sc in each st across. Ch 1, turn. (10 sc per row)
Fasten off MC. Set aside.
Right Back Panel:
Foundation: With MC and smaller hook, chain 25.
Row 1 (RS): Sc in second ch from hook and in each ch across. Ch 1, turn. (24 sc)
Rows 2 through 6: Sc in each st across. Ch 1, turn. (24 sc per row)
Right Back Strap:
Row 7 (RS): Skip center 14 sts of Row 6, join yarn in 15th st from center back edge. Sc across last 10 sts. Ch 1, turn. (10 sc)
Rows 8 through 22: Sc in each st across. Ch 1, turn. (10 sc per row)
Do not fasten off.
Joining Back Straps:
Joining Row (Row 23): Sc across 10 sts of right back strap, ch 4, sc across 10 sts of left back strap. Ch 1, turn. (24 sts)
Row 24: Sc in each of the 10 right strap sts, sc in each of the 4 chain sts, sc in each of the 10 left strap sts. Ch 1, turn. (24 sc)
Rows 25 through 36: Sc in each st across. Ch 1, turn. (24 sc per row)
Do not fasten off.
Side Joining
Lay bodice front RS up. Place left back panel against left side of front and right back panel against right side of front with WS together.
Using MC and yarn needle, whipstitch side seams from underarm to waist edge. Leave straps free. The armhole forms naturally.
Waist Joining Round
Attach MC to the right side seam at the waist with a slip stitch.
Round 1 (RS): Sc evenly around the entire waist opening, working across the front waist edge (48 sts), across the left back panel waist edge (24 sts), and across the right back panel waist edge (24 sts). Join with sl st to first sc. (96 sc)
Checkpoint: The waist round should measure approximately 18 in / 46 cm in circumference.
Skirt
Switch to CC1 and the larger hook (F-5 / 3.75 mm).
Skirt Setup Round (RS): Join CC1 to any stitch of the waist joining round with a slip stitch. Ch 1, sc in same st. (Sk 2 sts, work 5 dc in next st, sk 2 sts, sc in next st) 16 times. Join with sl st to first sc. (16 shells, 16 sc)
Skirt Round 2: Ch 3 (counts as dc), work 2 more dc in same sc. Ch 1. (Sc in center dc of next shell, ch 1, work shell of 5 dc in next sc, ch 1) 15 times. Sc in center dc of last shell. Ch 1. Work 2 dc in same sc as beg ch-3. Join with sl st to top of beg ch-3. (16 shells, 16 sc)
Skirt Round 3: Ch 1, sc in same st. (Ch 2, work shell of 5 dc in next sc, ch 2, sc in center dc of next shell) 16 times, ending last rep with sl st to beg sc. (16 shells, 16 sc, 32 ch-2 sps)
Skirt Round 4: Ch 3, work 2 dc in same sc. Ch 2. (Sc in center dc of next shell, ch 2, shell in next sc, ch 2) 15 times. Sc in center of last shell, ch 2. Work 2 dc in beg sc. Join. (16 shells, 16 sc, 32 ch-2 sps)
Skirt Round 5: Ch 1, sc in same st. (Ch 2, shell in next sc, ch 2, sc in center of next shell) 16 times. Join. (16 shells, 16 sc)
Skirt Round 6 (Increase Round): Ch 1, sc in same st. (Ch 2, work 7 dc in next sc, ch 2, sc in center of next shell) 16 times. Join. (16 large shells of 7 dc, 16 sc)
Skirt Round 7: Ch 3, work 3 dc in same sc. Ch 2. (Sc in center dc of 7-dc shell, ch 2, 7 dc in next sc, ch 2) 15 times. Sc in center of last shell, ch 2. Work 3 dc in beg sc. Join. (16 shells of 7 dc, 16 sc)
Skirt Rounds 8 through 14: Continue in established shell pattern, alternating shell placement and sc-between-shells rounds.
After Round 14, your skirt measures approximately 5.25 in / 13.3 cm from the waist.
Hem Adjustment Round (Round 15): Ch 1, sc in each dc and in each sc around, working 1 sc in each ch-sp as well. Join. (144 sc)
Hem Scallop Edging (Round 16): Sl st into first sc. (Ch 3, work 2 dc in same st, sk 2 sc, sl st in next sc) 48 times. Join to beg sl st. Fasten off CC1. (48 scallops)
Checkpoint: Total dress length from shoulder to hem should measure approximately 12.5 in / 32 cm.
Strap Edging and Neckline Finishing
With MC and smaller hook, join yarn at the top outer corner of the left front strap with RS facing.
Strap Edging Round 1: Work sc edging around the entire strap perimeter. Along the long side edges, work 1 sc per row end. Along the top, work 1 sc per stitch. Work 3 sc in each corner. Join. Adjust count if needed so it is divisible by 3. Fasten off.
Strap Edging Round 2 (Scallop): Rejoin MC. Work scallop edging around entire strap perimeter. Fasten off.
Repeat for all four straps.
Front Neckline Edging:
Join MC at right corner of front neckline with RS facing.
Row 1: Sc evenly across the neckline bridge (approximately 30 sc). Ch 1, turn.
Row 2: Sc in each st. Fasten off.
Work back neckline identically with 24 sc across.
Armhole Edging
With MC and smaller hook, join at underarm side seam. Work 1 round of sc evenly around each armhole opening, approximately 32 sc. Join, fasten off.
Button Band and Loops
Button Band (Right Back Panel):
Join MC at the top right corner of the right back panel.
Row 1: Work sc evenly down the entire right center back edge, approximately 36 sc. Ch 1, turn.
Row 2: Sc in each st across. Fasten off. (36 sc)
Buttonhole Band (Left Back Panel):
Join MC at bottom left corner of left back panel.
Row 1: Work sc evenly up the left center back edge, approximately 36 sc. Ch 1, turn.
Row 2 (Buttonhole Row): Sc in first 4 sts. (Ch 3, sk 2 sts, sc in next 10 sts) 3 times, ending with sc in last 4 sts after final ch-3 loop. Fasten off.
Sew 3 buttons to the right back button band, aligning them with the 3 button loops.
Lavender Bodice Motif
Make 3 lavender spikes using CC2:
Spike 1 (Center, longest): Make a slip knot. Ch 10. Working back along the chain, work 1 lv-sp bobble into the 3rd ch from hook, then 1 lv-sp into each of the next 4 ch (5 bobbles total). Fasten off, leaving a 6 in tail.
Spike 2 (Left side): Ch 8. Work 4 lv-sp bobbles back along chain starting from 3rd ch. Fasten off.
Spike 3 (Right side): Ch 8. Work 4 lv-sp bobbles back along chain starting from 3rd ch. Fasten off.
Stem Embroidery: Using CC3 and yarn needle, embroider 3 stem lines on the blocked bodice front, starting from the center waist area and fanning out toward where each spike will be placed. Use chain stitch or stem stitch, approximately 2 to 3 in long.
Pin the longest spike to the top of the center stem line. Pin the two shorter spikes at slight angles on either side. Sew each spike securely.
Skirt Flower Appliques
Make 8 Small Flower Appliques as described in Special Stitches.
Scatter the flowers across the skirt in a natural, asymmetric arrangement, spacing them approximately 2 to 3 in apart. Position them within the lace openings for a dimensional effect. Pin in place on the blocked skirt, then sew down securely.
Make 2 additional smaller lavender spikes (following Spike 2 instructions) and add one to the right front skirt area and one to the left back skirt area.
Finishing
Weave in all ends securely using a yarn needle. Take extra care to weave in applique tails in at least two directions to prevent them from working loose through washing.
Wet block the completed dress before attaching appliques: Submerge in cool water, gently squeeze out excess water without wringing, reshape on a flat surface, pin hem and straps to measurements, and allow to dry completely flat (approximately 24 hours). The lace skirt will open up dramatically after blocking.
After blocking and drying, attach all appliques and embroider stems. Sew buttons onto the right back button band at evenly spaced intervals, approximately 1.5 in apart.
Care Instructions
For acrylic yarns, follow steam blocking guidelines or wet block. For wool yarns, wet block only and do not felt by agitating.
Ongoing care: Hand wash in cool water or machine wash on gentle cycle in a mesh laundry bag. Use mild detergent. Lay flat to dry. Do not tumble dry or hang to dry. Do not iron directly on bobble or applique areas.
Size Customization
To size down to 6 months (chest 17 in / 43 cm): Reduce foundation chain to 43 for the bodice front (42 sc). Reduce each back panel foundation to 22 (21 sc per panel). Reduce total waist round to 84 sc (14 shell repeats). Reduce strap rows to 18 rows instead of 22. Finished length will be approximately 11 in / 28 cm.
To size up to 18 months (chest 19 in / 48 cm): Increase foundation chain to 55 for the bodice front (54 sc). Increase each back panel to 28 (27 sc per panel). Total waist round becomes 108 sc (18 repeats). Add 2 extra rows to straps. Add 2 additional shell rounds to skirt. Finished length will be approximately 13.5 in / 34 cm.
Always ensure the waist stitch count is divisible by 6 before beginning the skirt.
Thank you so much for choosing to make this Lavender Fields Baby Dress! I hope the step by step crochet tutorial helped you feel confident tackling each section. This dress makes such a thoughtful handmade gift, and I would absolutely love to see your finished project. Tag me on Instagram or share in my Facebook group so I can cheer you on!
If you loved this pattern, go ahead and save it to your Pinterest boards so you can find it easily when you are ready to start. And please drop a comment below if you make one. I read every single comment, and hearing about your projects truly makes my day!