
Last summer I found myself sitting on my friend’s porch at midnight, staring up at a sky so full of stars it made my heart ache. She was going through a tough time, and I wanted to make her something that would remind her that even in darkness, there’s always something beautiful to find. That’s when the idea for this anklet came to me.
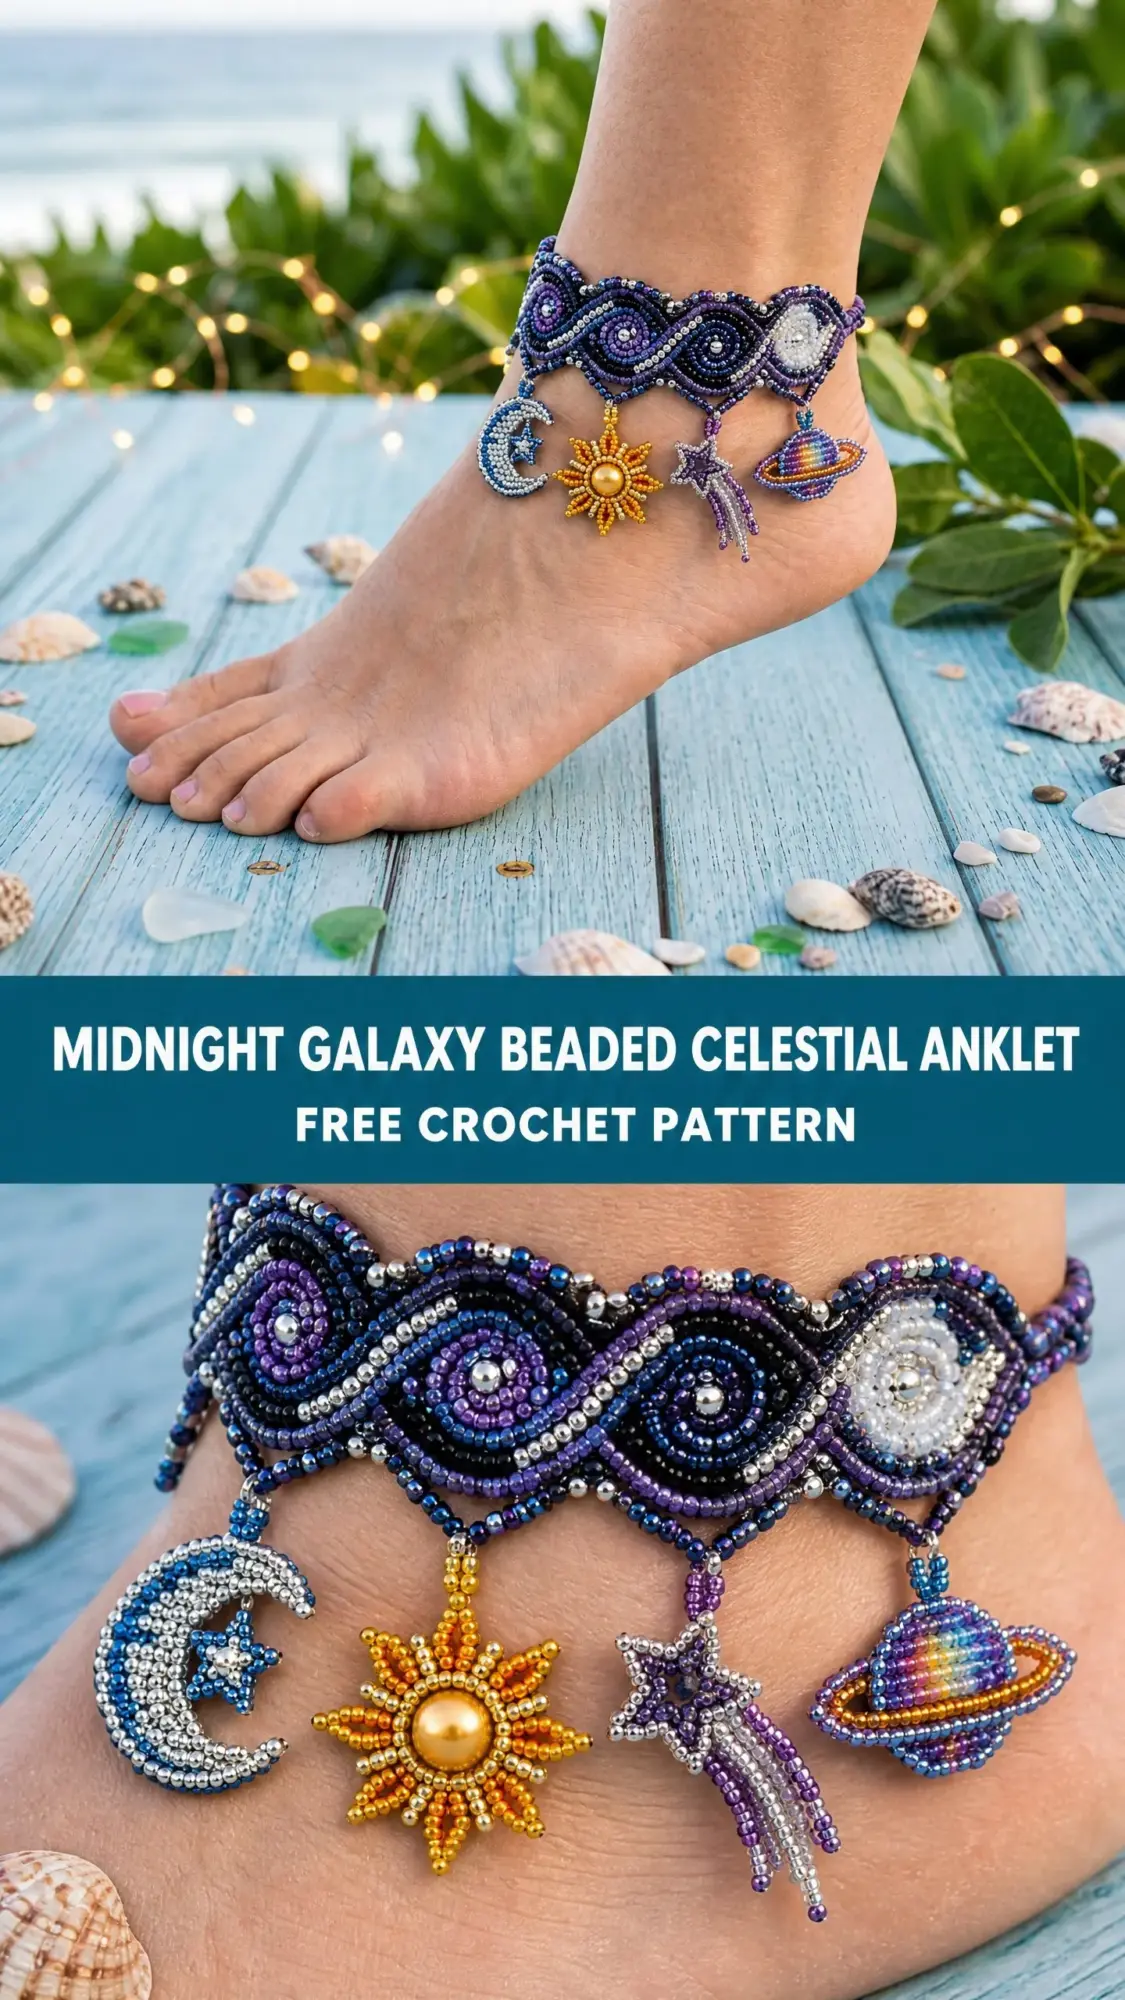
I spent the next few weeks sketching designs, testing bead combinations, and reworking the wave pattern until it looked exactly like the swirling galaxies I’d seen that night. The crescent moon, the sun, the shooting star, the little Saturn with its tilted ring. Each charm felt like a tiny piece of hope she could carry with her.
Now I’m finally sharing this pattern with you. This celestial anklet is not a quick weekend project. It’s an advanced labor of love that requires patience, precision, and comfort with bead crochet techniques. But if you’re ready for the challenge, the finished piece is absolutely stunning. Let’s dive in.
What Makes This Beaded Celestial Anklet Special
This fully beaded anklet features an undulating wave band worked in the bead-as-you-go technique, topped with swirling galaxy spiral motifs. Four dangling charms complete the celestial theme: a crescent moon, a radiant sun, a shooting star with trailing tails, and a ringed planet Saturn.
The construction involves five separate components that come together at the end. You’ll work the main band flat in rows with beads pre-strung onto thread and pushed into place with each stitch. The wave silhouette along the upper edge comes from a scalloped edging round worked after the band is complete. Those mesmerizing galaxy swirl motifs? They’re produced by alternating bead colors in a spiral arrangement within each wave cell.
Skill Level: Advanced. You’ll need comfort with bead crochet including pre-stringing and placing beads into stitches. You’ll also be working very tightly at a small gauge with thread-weight yarn, working in the round on small pieces, joining separate motifs, and managing multi-color bead sequences.
Time Estimate: Plan for 10 to 16 hours total. The main band takes approximately 3 to 4 hours once beads are strung. Each charm takes 30 to 90 minutes depending on complexity. Bead pre-stringing and finishing together add another 2 to 3 hours.
Finished Measurements
The completed anklet measures approximately 9 inches (23 cm) long including ties, with a wearable circumference of approximately 7 to 8 inches (18 to 20 cm) adjustable via the tie ends. The band itself, excluding ties, measures approximately 6.5 inches (16.5 cm) long and 1.25 inches (3.2 cm) tall at its highest wave point. Each charm measures approximately 0.75 to 1 inch (2 to 2.5 cm) at its longest point.
Materials Needed
Thread and Cord
You’ll need Size 10 crochet cotton thread, also called bedspread weight, in the following colors and amounts:
Yarn Suggestions: Lizbeth Size 10 Crochet Cotton by Handy Hands works beautifully with its smooth finish that allows beads to slide easily. Aunt Lydia’s Classic Crochet Thread Size 10 is widely available and affordable with consistent twist. DMC Cebelia Size 10 Crochet Cotton has a slight sheen that enhances the galaxy colorway.
Avoid fuzzy or loosely spun threads. They make bead pushing difficult and obscure stitch definition.
Beads
You’ll need size 11/0 Japanese seed beads. I recommend Miyuki or Toho brand for consistency.
Hook
Additional Supplies
Gauge
In bead single crochet (bsc) worked flat using size 7 (1.65 mm) steel hook and size 10 crochet cotton thread with size 11/0 seed beads:
10 stitches = 1 inch (2.5 cm)
12 rows = 1 inch (2.5 cm)
Work a 20-stitch by 24-row swatch in bead single crochet. Your swatch should measure 2 inches wide by 2 inches tall (5 cm by 5 cm) after light blocking. Gauge is critical for achieving the correct band width and charm sizing.
Abbreviations (US Terms)
Before we begin, let me walk you through every abbreviation you’ll encounter. I’ll define each one in plain English.
Special Stitches Explained
Bead Single Crochet (bsc)
This is the foundation technique for the entire anklet. Here’s how it works step by step:
1. Before beginning the row, slide one pre-strung bead up close to the hook, positioning it snugly against the last stitch.
2. Insert hook into the indicated stitch.
3. Yarn over and draw up a loop. You now have 2 loops on hook with the bead sitting on the side of the stitch facing away from you. This is on the wrong side of the work, which becomes the visible face of the beaded surface.
4. Yarn over and draw through both loops.
5. The bead is locked in place. One bsc made.
Important note: For this anklet, the bead-dense face is the right side. Work with wrong side facing you during flat rows so beads appear on the right side.
Bead Slip Stitch (bsl st)
1. Slide one pre-strung bead up close to the hook.
2. Insert hook into the indicated stitch.
3. Yarn over and draw through stitch and loop on hook in one motion while bead slides to the back of the work.
4. One bsl st made.
Spiral Galaxy Fill Stitch
This creates the swirling galaxy effect in each wave cell. It’s not a distinct crochet stitch but a bead color-sequencing method. As you work bsc across a wave cell, follow this color order from left to right:
Pre-string the beads in reverse order, core first then outward, so they emerge in the correct spiral order as you work.
Magic Ring (MR)
1. Wrap thread around two fingers to form a loop.
2. Insert hook through the loop, yarn over, draw up a loop.
3. Chain 1. This does not count as a stitch unless specified.
4. Work the specified number of stitches into the ring.
5. Pull the tail end to close the ring.
Pattern Notes Before You Begin
Please read through these notes before starting. They’ll save you confusion later.
1. All bead crochet is worked with beads pre-strung on the thread before beginning each section. Pre-string beads in the exact reverse sequence you will work them. The last bead needed goes on first.
2. The main band is worked flat in rows, back and forth. Turn after each row with chain 1. The turning chain does NOT count as a stitch throughout this pattern.
3. The two short ends are joined with slip stitches at the end, or left as open ends finished with tie cords depending on your preferred closure. Instructions for both are provided.
4. All charm pieces are worked in continuous rounds unless otherwise noted. Do not join rounds unless specified. Use a stitch marker to track the beginning of each round.
5. Bead color sequences for the wave cells follow the Spiral Galaxy Fill Stitch method. Pre-string each row’s beads before starting that row.
6. When changing thread colors, drop the old color, pick up the new color, and draw through the last two loops of the last stitch. Weave in ends as you go.
7. The Saturn charm ring is worked as a separate oval and attached around the planet body after both pieces are complete.
8. Thread conditioner or beeswax is strongly recommended for all working threads to prevent tangling and fraying when sliding beads.
Construction Order
Here’s how we’ll build this anklet:
1. Pre-string beads onto thread in color sequence
2. Work the main band flat in rows using bead single crochet
3. Work the scalloped upper-edge wave round
4. Work the lower-edge finishing round
5. Make each of the four charms separately
6. Attach charms via bead chains to the lower edge
7. Finish the ties at each end
Crochet Pattern Instructions
Main Band
Pre-stringing guide: The main band is 65 stitches wide and 15 rows tall. Total beads per row: 65. Pre-string each row separately in the Spiral Galaxy Fill Stitch sequence for rows 1 through 15.
Rows 1, 3, 5, 7, 9, 11, 13, and 15 are right side facing rows. You work with wrong side facing you so beads show on right side. Rows 2, 4, 6, 8, 10, 12, and 14 are wrong side facing rows. You work with right side facing you and beads appear on wrong side, which is the interior of the band and will not be visible when worn.
For simplicity, only right side rows carry the full spiral galaxy bead sequence. Wrong side rows use a single background bead color, deep navy blue throughout.
Foundation chain:
Using color A (deep navy blue) and size 7 hook, ch 67. This creates 65 working stitches plus 2 turning chains for setup. The foundation chain is not a beaded row.
Row 1 (RS setup, WS facing you for bead placement):
Ch 1, turn. Work 1 bsc in the 2nd ch from hook and in each ch across using the pre-strung galaxy bead sequence for Row 1. (65 bsc)
Row 2 (WS row, RS facing you):
Ch 1, turn. Work 1 bsc in each st across using deep navy blue beads only. (65 bsc)
Row 3 (RS row, WS facing you):
Ch 1, turn. Work 1 bsc in each st across using pre-strung galaxy bead sequence for Row 3. (65 bsc)
Row 4 (WS row):
Ch 1, turn. Work 1 bsc in each st across using deep navy blue beads only. (65 bsc)
Row 5 (RS row):
Ch 1, turn. Work 1 bsc in each st across using pre-strung galaxy bead sequence for Row 5. (65 bsc)
Row 6 (WS row):
Ch 1, turn. Work 1 bsc in each st across using royal purple beads only. (65 bsc)
Row 7 (RS row):
Ch 1, turn. Work 1 bsc in each st across using pre-strung galaxy bead sequence for Row 7. (65 bsc)
Row 8 (WS row):
Ch 1, turn. Work 1 bsc in each st across using royal purple beads only. (65 bsc)
Row 9 (RS row):
Ch 1, turn. Work 1 bsc in each st across using pre-strung galaxy bead sequence for Row 9. (65 bsc)
Row 10 (WS row):
Ch 1, turn. Work 1 bsc in each st across using silver-lined crystal beads only. (65 bsc)
Row 11 (RS row):
Ch 1, turn. Work 1 bsc in each st across using pre-strung galaxy bead sequence for Row 11. (65 bsc)
Row 12 (WS row):
Ch 1, turn. Work 1 bsc in each st across using silver-lined crystal beads only. (65 bsc)
Row 13 (RS row):
Ch 1, turn. Work 1 bsc in each st across using pre-strung galaxy bead sequence for Row 13. (65 bsc)
Row 14 (WS row):
Ch 1, turn. Work 1 bsc in each st across using deep navy blue beads only. (65 bsc)
Row 15 (RS row):
Ch 1, turn. Work 1 bsc in each st across using pre-strung galaxy bead sequence for Row 15. (65 bsc)
Do not fasten off. Proceed to the Upper Wave Edging.
Checkpoint: After Row 15, the main band should measure approximately 6.5 inches (16.5 cm) wide and 1.25 inches (3.2 cm) tall, not including the foundation chain edge.
Upper Wave Edging (Scalloped Edge)
This round creates the undulating upper silhouette visible in the finished anklet. It is worked along the top edge from the right side.
Pre-string for edging: Using color B (royal purple), pre-string the following bead sequence for the scallop pattern. For each wave repeat of 13 stitches, string 2 silver, 3 purple, 5 navy, 3 purple, 2 silver beads. That’s 15 beads per repeat times 5 repeats equals 75 beads. The extra beads accommodate the chain stitches in the scallop peaks.
Turn work so right side is facing you. Join color B at the right end of Row 15.
Edging setup: Ch 1 (does not count as a stitch).
Wave repeat instructions:
The 65 stitches of the top edge divide into 5 wave cells of 13 stitches each.
For each wave cell, work as follows:
Sl st in next st (valley), bsl st in next st, sc in next st, hdc in next st, dc in next st, ch 3 (peak chain), dc in same st as last dc, hdc in next st, sc in next st, bsl st in next st, sl st in next st, sl st in next st. (13 stitches worked per cell with 1 peak)
Repeat wave cell sequence across all 5 cells. (5 complete wave scallops across the top edge)
Fasten off color B. Weave in end.
Checkpoint: After the Upper Wave Edging, the top of the band should have 5 clearly defined wave peaks. Each peak rises approximately 0.4 inches (1 cm) above the band body.
Lower Edge Finishing
This creates a neat base for attaching the pendant charms.
Join color B at the bottom-left corner of the band at the foundation chain edge, right side facing you.
Rnd 1 (lower edge):
Ch 1. Work 1 bsc in each foundation chain stitch across using silver-lined crystal beads. (65 bsc)
At the end of the row, do not turn. Work 3 sc in the corner stitch, then work 15 sc evenly up the short left end of the band. Work 3 sc in the corner stitch at the top left. Sl st to the first bsc of the lower edge to join. Fasten off. (Approximately 89 sts total in this combined finishing round, but only the 65-st lower edge is beaded.)
Mark the following stitch positions along the lower edge with stitch markers for charm attachment points:
Crescent Moon Charm
Using color C (silver/metallic white) and size 7 hook, pre-string 120 silver-lined crystal beads and 80 white opaque beads onto the thread before beginning.
MR, ch 1.
Rnd 1: Work 6 bsc into MR, pull ring closed. (6 bsc)
Rnd 2: Work 2 bsc in each st around using silver beads. (12 bsc)
Rnd 3: (1 bsc, 2 bsc in next st) 6 times using silver beads. (18 bsc)
Rnd 4: (2 bsc, 2 bsc in next st) 6 times using silver beads. (24 bsc)
Rnd 5: (3 bsc, 2 bsc in next st) 6 times using silver beads. (30 bsc)
Rnd 6: Work 1 bsc in each st around using silver and white beads alternating (1 silver, 1 white) to create the marbled moon face. (30 bsc)
Now shape the crescent by working partial rows:
Row 7: Ch 1, turn. Sk first 8 sts. Work 1 bsc in each of next 14 sts only using white beads. Leave rem 8 sts unworked. (14 bsc)
Row 8: Ch 1, turn. Sc2tog, work 1 bsc in each of next 10 sts, sc2tog. (12 bsc)
Row 9: Ch 1, turn. Sc2tog, work 1 bsc in each of next 8 sts, sc2tog. (10 bsc)
Row 10: Ch 1, turn. Sc2tog, work 1 bsc in each of next 6 sts, sc2tog. (8 bsc)
Row 11: Ch 1, turn. (Sc2tog) 4 times. (4 bsc)
Row 12: Ch 1, turn. (Sc2tog) twice. (2 bsc)
Row 13: Ch 1, turn. Sc2tog. (1 st)
Fasten off, leaving a 6-inch (15 cm) tail.
Moon star embellishment: Using color A (navy blue), join to any stitch near the center of the crescent open field. Work a 5-pointed star in surface slip stitch by drawing up loops in a star shape across 5 stitches. Fasten off. Weave in ends.
Checkpoint: The crescent moon charm should measure approximately 0.9 inches (2.3 cm) tall by 0.75 inches (2 cm) wide.
Sun Charm
Using color D (bright gold/amber) and size 7 hook, pre-string 100 gold beads and 80 bright orange beads.
MR, ch 1.
Rnd 1: Work 6 sc into MR, pull ring closed. (6 sc) No beads in this round. This will be covered by the 6mm gold pearl bead at center.
Rnd 2: Work 2 bsc in each st around using gold beads. (12 bsc)
Rnd 3: (1 bsc in next st, 2 bsc in next st) 6 times using gold beads. (18 bsc)
Rnd 4 (ray round): (1 bsc in each of next 2 sts, ch 4, sl st in 2nd ch from hook, sl st in next 2 ch, sl st back into same st to form ray spike) 9 times, using orange beads for the bsc and gold beads pre-strung onto the chain stitches of each ray. (9 rays made, 18 bsc base sts used, returning to 18 base sts after each ray)
Rnd 5: Work 1 bsc in each of the 18 base sts around using gold beads, working behind the rays. (18 bsc)
Rnd 6: (Sc2tog) 9 times, do not use beads in this round. (9 sts)
Thread the 6mm gold pearl bead onto the working thread and slip it through the center of the disc. Pull tight to seat the pearl at the center front. Fasten off. Thread tail through all 9 remaining sts, pull tight to close the back. Weave in ends.
Checkpoint: The sun charm should measure approximately 0.85 inches (2.2 cm) across at its widest point including rays.
Shooting Star Charm
Using color B (royal purple) and size 7 hook, pre-string 60 purple beads, 60 silver-lined crystal beads, and 30 rainbow mix beads.
Star body:
MR, ch 1.
Rnd 1: Work 5 bsc into MR, pull ring closed. (5 bsc)
Rnd 2: Work 2 bsc in each st around using purple beads. (10 bsc)
Rnd 3: (1 bsc, 2 bsc in next st) 5 times using purple and silver alternating. (15 bsc)
Rnd 4: Work 1 bsc in each st around using silver beads. (15 bsc)
Rnd 5: (Sc2tog, 1 bsc in next st) 5 times using silver beads. (10 bsc)
Rnd 6: (Sc2tog) 5 times. (5 sts)
Fasten off, leaving a long tail. Thread tail through all 5 sts to close.
Tail trails (3 separate bead chains):
For each trail, join color B at a stitch near the base-right side of the star.
Trail 1 (longest): Ch 1. Work 14 bsl sts in a line using rainbow mix beads. Fasten off.
Trail 2 (medium): Join at adjacent stitch. Work 10 bsl sts using rainbow mix and purple beads alternating. Fasten off.
Trail 3 (shortest): Join at next adjacent stitch. Work 7 bsl sts using purple beads. Fasten off.
Checkpoint: The shooting star charm (body plus longest trail) should measure approximately 1.25 inches (3.2 cm) total.
Saturn Charm
Planet body:
Using color A (deep navy blue) and size 7 hook, pre-string 80 navy beads, 50 purple beads, and 50 gold beads.
MR, ch 1.
Rnd 1: Work 6 bsc into MR using navy beads, pull ring closed. (6 bsc)
Rnd 2: Work 2 bsc in each st around using navy beads. (12 bsc)
Rnd 3: (1 bsc, 2 bsc in next st) 6 times using navy and purple alternating. (18 bsc)
Rnd 4: (2 bsc, 2 bsc in next st) 6 times using purple beads. (24 bsc)
Rnd 5: Work 1 bsc in each st around using purple and gold beads alternating. (24 bsc)
Rnd 6: (2 bsc, sc2tog) 6 times using gold beads. (18 bsc)
Rnd 7: (1 bsc, sc2tog) 6 times using navy beads. (12 bsc)
Rnd 8: (Sc2tog) 6 times using navy beads. (6 sts)
Stuff lightly with a small piece of scrap thread to give slight dimension. Fasten off. Thread tail through all 6 sts to close.
Saturn ring:
Using color E (rainbow variegated) and size 7 hook, pre-string 120 rainbow mix beads.
Ch 29. Sl st in the first ch to form a ring. (29 ch ring)
Rnd 1: Ch 1. Work 1 bsc in each ch around. Sl st to first bsc to join. (29 bsc)
Rnd 2: Ch 1. Work 1 bsc in each st around using rainbow beads. Sl st to join. (29 bsc)
Fasten off, leaving a long tail.
Thread the planet body through the ring so the ring sits at an angle across the equator of the planet, tilted approximately 30 degrees. Use the tail to tack the ring to the planet body at two points, top and bottom of the planet, to hold the angled position. Weave in ends.
Checkpoint: The Saturn charm should measure approximately 1 inch (2.5 cm) wide at the widest point of the ring.
Attachment Bead Chains
Each charm is connected to the lower edge of the band via a short bead chain of approximately 8 to 10 stitches.
For each charm:
1. Join color B at the marked lower-edge attachment stitch.
2. Work a chain of 9 bsl sts using purple and silver beads alternating, creating a dangling connector chain approximately 0.75 inches (2 cm) long.
3. At the end of the chain, use the tail to sew through the top stitch of the corresponding charm twice.
4. Knot securely. Weave in all ends. Apply a small drop of clear nail polish to the knot if desired.
Attachment order from left to right:
Tie Closure
Leave thread tails of at least 8 inches (20 cm) at each short end of the band when fastening off.
At each end, gather the thread tails and any extra lengths of color B added to bulk up the tie. Using the 4 to 6 thread strands at each end, work a simple 3-strand braid or flat macrame knot sequence for approximately 2.5 inches (6.4 cm). Tie an overhand knot at the end of each braid.
Thread the 8mm purple bead onto one of the ties to serve as a toggle. To fasten, wrap the toggle tie around the ankle and loop the plain tie through the bead to close.
Alternatively, the two short ends of the band may be slip-stitched together with color A to create a permanent loop, omitting the tie closure.
Size Customization Tips
To lengthen or shorten the band, add or remove stitches from the foundation chain in multiples of 13, which is the wave repeat width. Each repeat of 13 stitches adds approximately 1.3 inches (3.3 cm) to the band length. For an average ankle of 8 to 9 inches (20 to 23 cm) circumference, the 65-stitch, 5-repeat band with a finished length of approximately 6.5 inches (16.5 cm) plus the ties will fit comfortably.
To widen the band, add rows in pairs. One right side row, one wrong side row. Each pair adds approximately 0.17 inches (0.4 cm) to the band height.
Note that adding more wave repeats will require additional charm pieces to maintain the balanced aesthetic.
Finishing and Blocking
1. Weave in all remaining ends securely using a tapestry needle, running each end through at least 1 inch (2.5 cm) of stitches in two directions.
2. To block: Dampen the finished anklet gently with cool water. Pin flat on a foam blocking mat with the right side facing up, stretching the band lightly to the stated dimensions. Allow to dry completely before removing pins. Do not iron.
3. Apply a thin coat of clear nail polish or jewelry sealant to any knots that secure charm attachment points for added durability.
4. The pendant charms may be stiffened lightly with diluted craft stiffener spray if desired.
Care Instructions
Hand wash only in cool water with a small amount of gentle soap. Do not wring. Lay flat to dry. Do not machine wash or dry. Avoid prolonged exposure to chlorinated water or saltwater as this may discolor seed beads over time. Store flat or loosely coiled in a dry place away from direct sunlight.
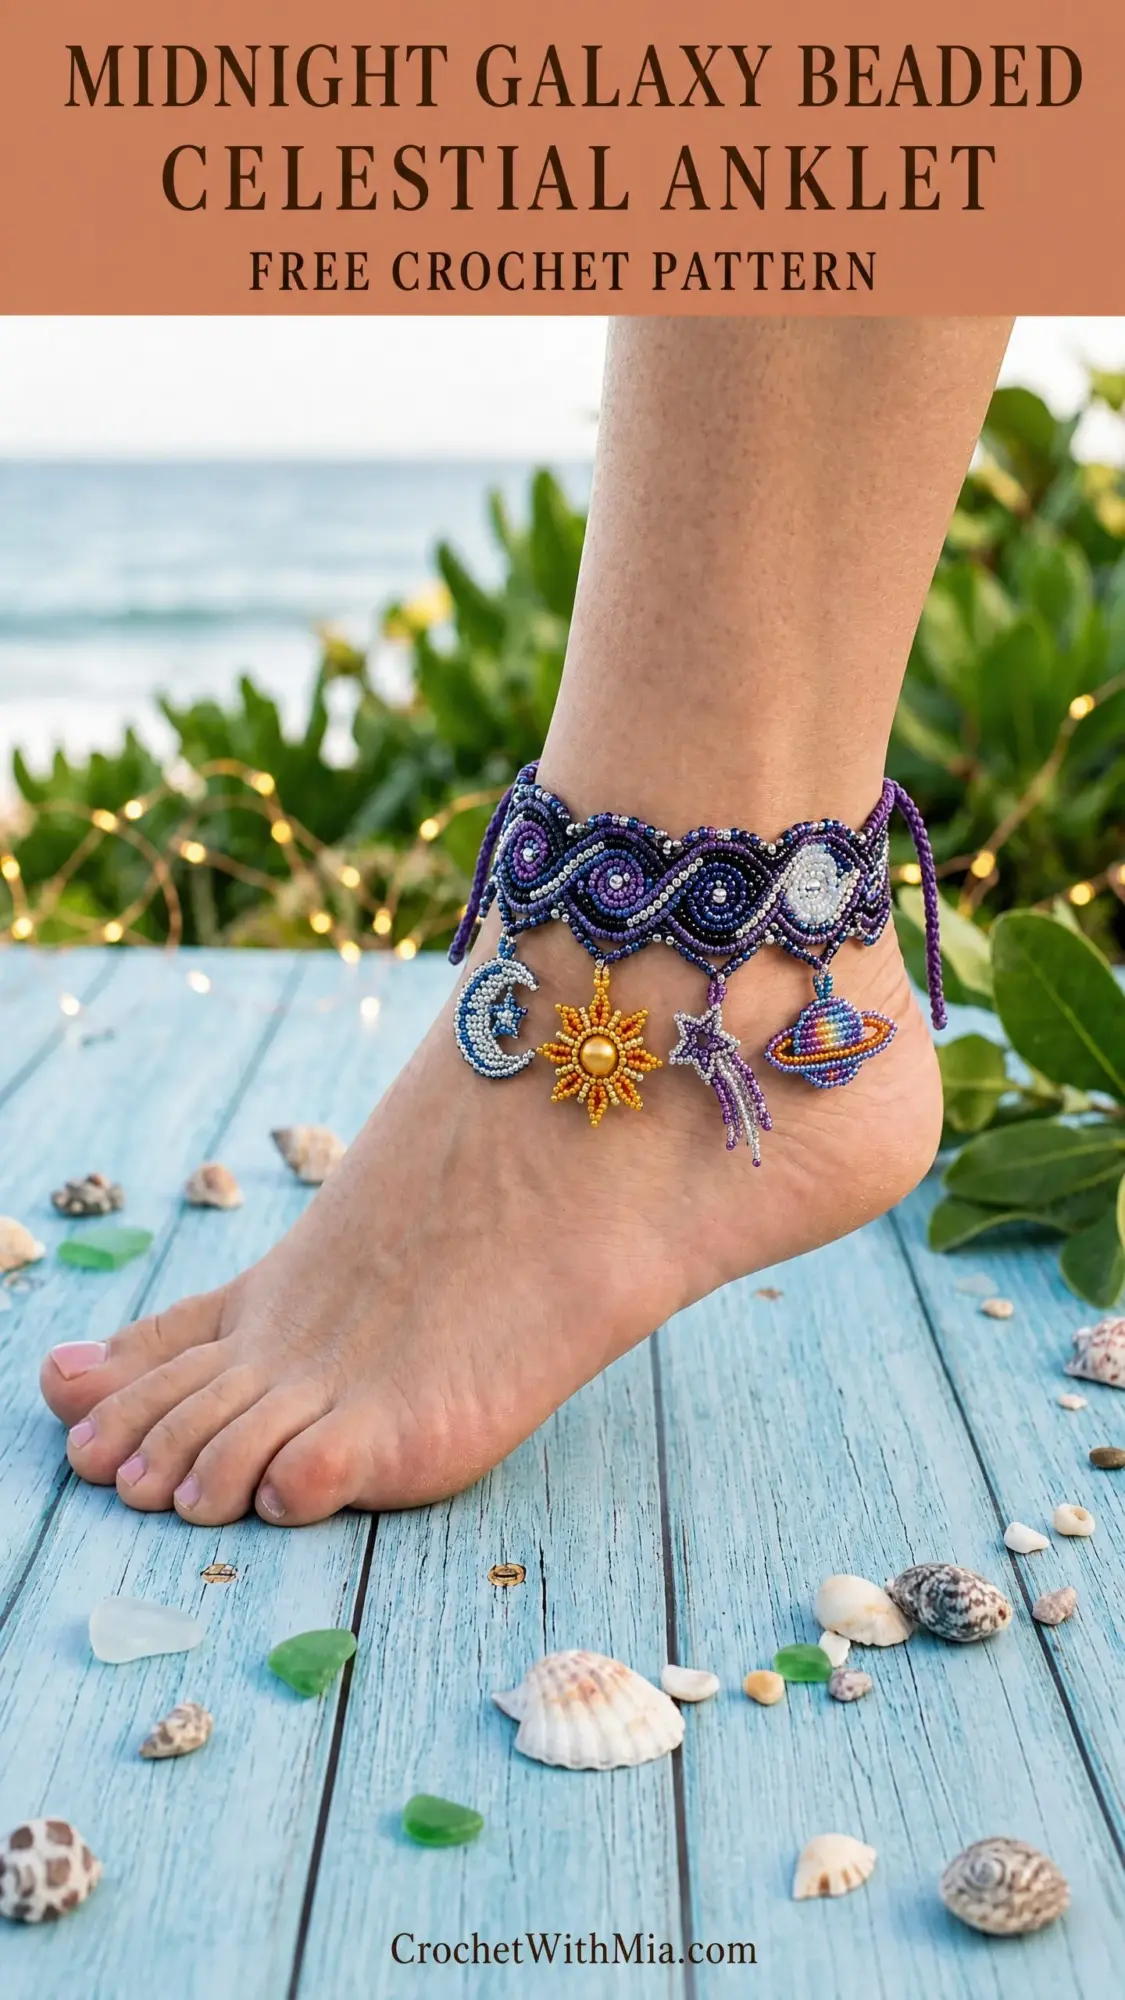
Final Thoughts on This Celestial Crochet Pattern
I hope this beaded celestial anklet brings as much joy to make as it did for me to design. It’s definitely a project that requires patience and focus, but there’s something deeply satisfying about watching those tiny galaxies form under your hook. Take your time with the bead pre-stringing, trust the process, and don’t be afraid to take breaks.
Thank you so much for choosing this pattern. I genuinely appreciate you trusting me with your crafting time. If you make this anklet, I would absolutely love to see it! Tag me on Instagram or share your finished piece on Facebook. Seeing your creations truly makes my day.
If this pattern made you want to grab your hook and start crafting, consider pinning it to your Pinterest boards so you can find it again when you’re ready. And please drop a comment below if you give it a try. I’d love to hear how it turned out for you!